


TIMS Card Guide: Cost, How to Get It & Where to Apply (2026)
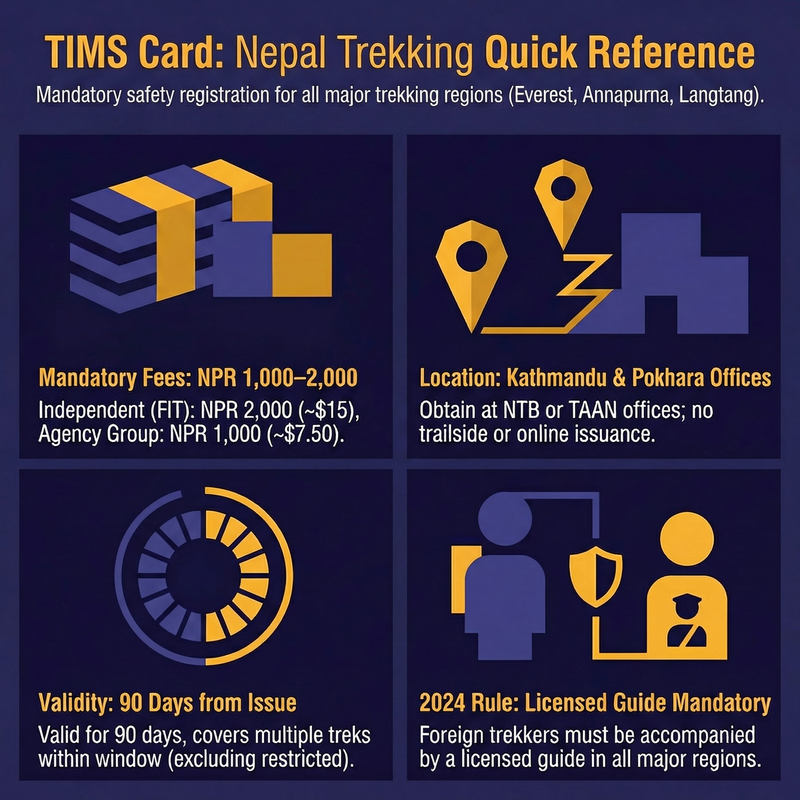
This TIMS card guide covers everything you need to trek legally in Nepal in 2026: a TIMS card costs NPR 1,000 (group, through an agency) or NPR 2,000 (independent/FIT) for foreign trekkers, is issued same-day at Nepal Tourism Board or TAAN offices in Kathmandu and Pokhara, and is valid for 90 days. You apply in person — there is no official online application.
NPR 1,000 (~$7.50)
NPR 2,000 (~$15)
NPR 300 (group) / NPR 600 (FIT)
NTB Bhrikutimandap & TAAN, Kathmandu; TAAN Lakeside, Pokhara
Same-day, 30 min–2 hrs
90 days from issue date
None — apply in person in Nepal
Green (FIT) / Blue (Group)
If you're planning to trek in Nepal, you've probably heard about the TIMS card. It's one of those bureaucratic requirements that seems confusing at first but is actually straightforward once you understand the system. This guide walks you through everything from what the TIMS card is to where to get it, how much it costs, and the documents you need.
Whether you're heading to Everest Base Camp, trekking the Annapurna Circuit, or exploring the Langtang Valley, understanding the TIMS card requirements will save you time and prevent any unwelcome surprises when you arrive in Nepal. For the wider picture, see our overview of Nepal trekking permits explained.
What is TIMS Card?
TIMS stands for Trekkers' Information Management System. It's a computerized database system introduced by the Nepal Tourism Board (NTB) and the Trekking Agencies' Association of Nepal (TAAN) in 2008 to maintain records of trekkers entering Nepal's trekking regions.
The TIMS card serves several important purposes:
Safety and Security: The primary purpose is trekker safety. When you register for TIMS, your personal information, emergency contacts, itinerary, and insurance details are recorded in a central database. This information is crucial if you go missing, need rescue, or face an emergency on the trail.
Statistical Records: TIMS helps the Nepal government track trekking tourism statistics, including the number of trekkers visiting different regions, peak seasons, and demographic information. This data helps in planning infrastructure and managing trekking routes.
Environmental Management: By tracking trekker numbers, authorities can better manage the environmental impact on popular trails and implement sustainable tourism practices.
Emergency Response: In case of natural disasters, political unrest, or other emergencies, authorities can quickly identify which trekkers are in affected areas and coordinate rescue or evacuation efforts.
The TIMS card is a physical card (similar to a credit card) with your photo, personal details, trekking route, and emergency contact information. You'll need to present this card at various TIMS checkpoints along your trekking route, where officials will record your passage.
Not a Substitute for Conservation Permits
The TIMS card is NOT a substitute for national park entry permits or conservation area permits. In most popular trekking regions, you'll need both TIMS and the relevant conservation permit.
Do You Need a TIMS Card?
Whether you need a TIMS card depends on where you're trekking and how you're trekking. Here's what you need to know:
Treks That Require TIMS
You need a TIMS card for most major trekking routes in Nepal, including:
- Everest Region: Everest Base Camp, Gokyo Lakes, Three Passes, Everest View treks
- Annapurna Region: Annapurna Circuit, Annapurna Base Camp, Poon Hill, Mardi Himal
- Langtang Region: Langtang Valley, Gosaikunda, Helambu, Tamang Heritage Trail
- Manaslu Region: Manaslu Circuit, Tsum Valley
- Makalu Region: Makalu Base Camp trek
- Kanchenjunga Region: Kanchenjunga Base Camp circuits
- Dhaulagiri Region: Dhaulagiri Circuit and base camp treks
Exemptions and Special Cases
You do NOT need a TIMS card in the following situations:
Restricted Area Permits (RAP): If you're trekking in restricted areas like Upper Mustang, Upper Dolpo, Manaslu's restricted zone, or Tsum Valley, you'll get a Special Trekking Permit instead. However, note that for Manaslu Circuit, you need BOTH the Restricted Area Permit AND TIMS, as parts of the trek are outside the restricted zone.
Day Hikes Near Cities: Short day hikes around Kathmandu Valley or Pokhara that don't enter conservation areas typically don't require TIMS.
Certain Remote Treks: Some very remote or newly opened trekking routes may not have TIMS checkpoints yet, though this is becoming increasingly rare.
Pro Tip
Even if a trek doesn't officially require TIMS, many trekking agencies and insurance companies recommend getting it anyway for the safety benefits and emergency contact database.
2026 Guide Rule Update
Since 2023-2024, the Nepal government has implemented mandatory guide rules for certain trekking regions. As an independent (FIT) trekker, you're now required to hire a licensed guide for most popular treks. This rule change has implications for your TIMS application:
- With Agency/Guide: You'll get a Group Trekker TIMS (blue card) at a lower cost (NPR 1,000 for foreigners)
- Independent (FIT): You'll get an Individual Trekker TIMS (green card) at a higher cost (NPR 2,000 for foreigners), but you still need to hire a licensed guide for most regions
The guide requirement is enforced at TIMS checkpoints, so even if you obtain a TIMS card, you may be turned back on the trail if you don't have a guide where required.
TIMS Card Cost in 2026
The cost of your TIMS card depends on how you're trekking and your nationality. Here's the complete breakdown:
TIMS Cost Table
| Category | Cost (NPR) | Cost (USD approx.) | Card Color |
|---|---|---|---|
| Individual Trekker (FIT) - Foreign | NPR 2,000 | $15 | Green |
| Group Trekker - Foreign | NPR 1,000 | $7.50 | Blue |
| FIT - SAARC Nations | NPR 600 | $4.50 | Green |
| Group Trekker - SAARC | NPR 300 | $2.25 | Blue |
Who Pays What?
Individual Trekkers (FIT): If you're organizing your trek independently without going through a registered trekking agency, you're classified as a FIT and pay the higher rate of NPR 2,000 (NPR 600 for SAARC nationals).
Group Trekkers: If you book your trek through a registered trekking agency in Nepal, you're classified as a group trekker and pay the lower rate of NPR 1,000 (NPR 300 for SAARC nationals). This applies even if you're the only person in your group.
SAARC Nations: Citizens of SAARC countries (India, Bangladesh, Pakistan, Sri Lanka, Bhutan, Maldives, and Afghanistan) receive discounted rates.
Agency Booking Required for Lower Rate
To get the Group Trekker rate, you must book through a registered Nepal trekking agency BEFORE arriving. The agency will provide a letter confirming your booking, which you'll need when applying for TIMS.
Additional Costs to Consider
The TIMS card cost is just one part of your permit expenses. For most treks, you'll also need:
- Conservation Area Permits: NPR 3,000 for ACAP (Annapurna), NPR 3,000 for MCAP (Manaslu)
- National Park Entry Fees: NPR 3,000 for Sagarmatha (Everest), NPR 3,000 for Langtang
- Restricted Area Permits: $500-700 for Upper Mustang, $500-700 for Upper Dolpo (per 10 days)
Most popular treks require TIMS plus one conservation/park permit, so budget accordingly.
Green TIMS vs Blue TIMS: What's the Difference?
You might have heard trekkers talking about "green cards" and "blue cards." These refer to the two types of TIMS cards, which are color-coded based on how you're trekking.
Green TIMS Card (FIT)
Who Gets It: Individual Trekkers (FIT) who organize their trek independently without a registered agency.
Cost: NPR 2,000 for foreign nationals, NPR 600 for SAARC nationals.
Benefits:
- Complete independence in planning your trek
- Flexibility to change routes and schedules
- Direct interaction with teahouse owners and local communities
Requirements:
- Must arrange your own accommodation, transport, and logistics
- Need to provide detailed itinerary
- Must hire a licensed guide (as per 2026 rules) in most regions
Application: Can be obtained directly at NTB or TAAN offices without an agency letter.
Blue TIMS Card (Group Trekkers)
Who Gets It: Trekkers who book through a registered trekking agency in Nepal.
Cost: NPR 1,000 for foreign nationals, NPR 300 for SAARC nationals.
Benefits:
- Lower cost
- Agency handles all permit paperwork
- Includes guide and porter arrangements
- Emergency support through the agency
- Often includes meals and accommodation
Requirements:
- Must book with a registered Nepal trekking agency
- Need agency confirmation letter
- Agency typically applies on your behalf
Application: Usually handled by your trekking agency, but you can also apply yourself with an agency letter.
Which Should You Choose?
The choice between green and blue TIMS comes down to your trekking style and budget:
Choose Green TIMS (FIT) if:
- You want complete independence and flexibility
- You're comfortable navigating yourself (with a hired guide)
- You prefer the adventure of self-organized trekking
- You're on an extended trip and want to stay flexible
Choose Blue TIMS (Group) if:
- You want logistical support and convenience
- You're short on time and want everything organized
- You prefer having meals and accommodation pre-arranged
- You want the lower permit cost
- You're less experienced with independent trekking
Pro Tip
With the mandatory guide rules now in effect, the main difference between FIT and group trekking has diminished. Even FITs need guides, so booking through an agency for the blue card might make more sense for many trekkers.
Where to Get Your TIMS Card
You can obtain your TIMS card at several official locations in Nepal. Here's where to go and what to expect (see also our full Nepal permit offices directory with addresses and hours):
Kathmandu Offices
Nepal Tourism Board (NTB) Office - Bhrikutimandap
- Address: Tourist Service Center, Bhrikutimandap, Kathmandu (near Tundikhel)
- Office Hours: Sunday to Friday, 10:00 AM to 5:00 PM (closed Saturdays and public holidays)
- Processing Time: 30 minutes to 2 hours (same day)
- Who Can Apply: Both FIT and Group trekkers
- Payment: Cash (NPR) or credit card accepted
- Contact: +977-1-4256909
This is the main official office run by the Nepal Tourism Board. It's often less crowded than the TAAN office and processes TIMS cards for both independent and agency-organized trekkers.
TAAN Office - Maligaon
- Address: Trekking Agencies' Association of Nepal, Maligaon, Kathmandu (near Kathmandu Guest House area in Thamel)
- Office Hours: Sunday to Friday, 10:00 AM to 5:00 PM (closed Saturdays and public holidays)
- Processing Time: 30 minutes to 1 hour (same day)
- Who Can Apply: Both FIT and Group trekkers
- Payment: Cash (NPR) only
- Contact: +977-1-4440920
The TAAN office is more centrally located in the tourist area of Thamel, making it convenient if you're staying in that area. It's often the go-to choice for trekking agencies.
Pokhara Office
TAAN Office - Pokhara
- Address: Trekking Agencies' Association of Nepal, Pokhara Office, Lakeside, Pokhara
- Office Hours: Sunday to Friday, 10:00 AM to 5:00 PM (closed Saturdays and public holidays)
- Processing Time: 30 minutes to 1 hour (same day)
- Who Can Apply: Both FIT and Group trekkers
- Payment: Cash (NPR) only
- Contact: +977-61-465576
If you're heading to Annapurna region treks, you can get your TIMS card in Pokhara. This is convenient if you're already there for acclimatization or if you didn't have time in Kathmandu.
Online Application
As of 2026, there is NO official online application system for TIMS cards for individual trekkers. You must apply in person at one of the official offices listed above.
Some trekking agencies may offer to obtain TIMS on your behalf before you arrive in Nepal, but you'll still need to provide all required documents and be present for verification when you arrive. The physical card can only be issued when you're physically in Nepal.
Beware of Fake Online Services
Several websites claim to offer online TIMS applications or advance bookings. These are not official and may be scams. Always apply through official NTB or TAAN offices in Nepal.
Getting TIMS Through Your Agency
If you've booked your trek with a registered agency, they will typically handle the TIMS application for you as part of their service. Here's how it works:
- You provide your documents to the agency (usually via email before arrival or in person when you arrive)
- The agency prepares the application and gets an appointment
- You must be present at the office for photo and verification
- The agency collects the card and delivers it to you
Most agencies include TIMS application assistance in their package, but confirm this when booking. Even if the agency applies for you, you still need to pay the TIMS fee (usually included in your package cost).
Required Documents for TIMS Application
Getting your documents right the first time will save you frustration and extra trips to the office. Here's exactly what you need:
Complete Document Checklist
1. Passport
- Original passport (must be valid for at least 6 months)
- 2 photocopies of the passport photo page
- 2 photocopies of your Nepal visa page
2. Passport Photographs
- 2 recent passport-size color photographs (3.5cm x 4.5cm)
- Photos should be taken against a white background
- Should be recent (within the last 6 months)
3. Detailed Trekking Itinerary
- Written day-by-day itinerary of your trek
- Include starting point, route, places you'll overnight, and ending point
- Estimated dates for each section
- Can be handwritten or typed
4. Agency Letter (For Group Trekkers Only)
- Official letter from registered Nepal trekking agency
- Must be on agency letterhead
- Should include your name, trek details, and confirmation of booking
- Agency license number should be visible
5. Travel Insurance Details
- Copy of your travel insurance policy
- Must show coverage for emergency evacuation and medical treatment
- Insurance must cover trekking up to your planned altitude
- Policy number and emergency contact must be clearly visible
6. Emergency Contact Information
- Full name of emergency contact person (usually family member)
- Phone number with country code
- Email address
- Relationship to you
Pro Tip
Make extra copies of everything. Passport photocopies are used for multiple permits, and having extras will save you from hunting for photocopy shops (though they're abundant in tourist areas).
Document Preparation Tips
Before You Leave Home:
- Scan all documents and email them to yourself for backup
- Get your passport photographs taken professionally
- Verify your travel insurance covers trekking at high altitude
- Write down emergency contact details
In Kathmandu/Pokhara:
- Photocopy shops are everywhere in Thamel and Lakeside
- Passport photo shops can provide TIMS-appropriate photos in minutes
- Most hotels can help you print documents if needed
Common Document Issues:
- Photos too old or wrong size
- Insurance doesn't explicitly cover trekking/mountaineering
- Agency letter missing or not on official letterhead
- Passport expiring within 6 months
- Unclear or incomplete itinerary
Special Cases
If You're Changing Your Itinerary: If you need to change your trek route after getting TIMS, you technically should update it at a TIMS office. In practice, minor route changes are usually not an issue at checkpoints.
If Your Passport is Being Processed: If your passport is at the immigration office for visa extension, you can request a temporary release to apply for TIMS, or some offices may accept a copy with a letter explaining the situation.
For Children: Children need their own TIMS card with their own passport and photos. The cost is the same as for adults.
TIMS Application Process: Step-by-Step Guide
Now that you know where to go and what to bring, here's exactly how the application process works:
Step 1: Gather Your Documents
Collect all required documents as per the checklist above. Double-check that your passport photocopies are clear and your photos meet the requirements.
Time Required: 30 minutes to 1 hour (if you need photocopies or photos made)
Step 2: Visit the Office
Go to either the NTB office in Bhrikutimandap or TAAN office in Maligaon (Kathmandu) or TAAN office in Pokhara. Arrive early in the day (by 11 AM) to avoid afternoon rushes and ensure same-day processing.
Best Time: Weekday mornings, 10:00-11:00 AM Avoid: Afternoons after 3 PM, as processing might carry over to the next day
Step 3: Fill Out the Application Form
At the office, you'll be given a TIMS application form. The form asks for:
- Personal details (name, nationality, passport number)
- Trekking details (route, duration, start/end dates)
- Emergency contact information
- Insurance details
- Agency details (if applicable)
Time Required: 10-15 minutes
Pro Tip
Fill out the form clearly and accurately. Any mistakes will require a new form. Bring a pen, as sometimes offices run out. Use CAPITAL LETTERS for clarity.
Step 4: Submit Documents and Form
Hand in your completed form along with all required documents to the counter. The officer will:
- Verify your documents
- Check that your itinerary is reasonable and safe
- Confirm your insurance coverage
- Enter your information into the TIMS database
If anything is missing or incorrect, they'll let you know immediately.
Time Required: 5-10 minutes
Step 5: Pay the Fee
After document verification, you'll be directed to the payment counter. Pay the applicable TIMS fee:
- NPR 2,000 for FIT (foreign nationals)
- NPR 1,000 for Group trekkers (foreign nationals)
- NPR 600 for FIT (SAARC nationals)
- NPR 300 for Group trekkers (SAARC nationals)
Keep your receipt. You'll need it to collect your card.
Payment Methods: Cash (NPR) is accepted everywhere. NTB Bhrikutimandap office also accepts credit cards.
Time Required: 5 minutes
Step 6: Photo Session
You'll be called to have your photo taken for the TIMS card. This is done on-site with a digital camera (you don't use your submitted photos for the card itself, but they're kept for records).
Stand against the backdrop and look at the camera. The photo is printed directly onto your TIMS card.
Time Required: 2 minutes
Step 7: Collect Your TIMS Card
Wait for your card to be prepared and printed. During peak season, this might take up to 2 hours. During quieter times, you might get it in 30 minutes.
Your name will be called when your card is ready. Check that all details are correct:
- Your name (spelled correctly)
- Passport number
- Trek route
- Dates
- Photo is clear
If there are any errors, report them immediately for correction.
Time Required: 30 minutes to 2 hours (waiting time)
Step 8: Verify and Store Safely
Once you receive your card, verify all details one more time. Take a photo of the card with your phone as a backup. Store the physical card in a safe, waterproof location (ideally with your passport).
Total Time: 1-3 hours from start to finish
Application Flow Diagram
Arrive at Office → Get Application Form → Fill Form (15 min)
                                              ↓
                    Collect TIMS Card ← Pay Fee ← Submit Documents
                         (30-120 min)        ↓
                                        Take Photo
                                        (2 min)
If You're Applying Through an Agency
If your trekking agency is handling the application:
- Provide documents to your agency (usually 2-3 days before trek start)
- Agency schedules appointment and fills out forms
- You must still go to the office in person for photo and verification
- Agency collects the card and delivers to you
- TIMS fee is usually included in your package price
Even with agency assistance, expect to spend at least 1-2 hours at the office.
Processing Time and When to Apply
Understanding processing times helps you plan when to apply for your TIMS card.
Standard Processing Time
During Off-Season (June-August, December-January): 30 minutes to 1 hour
During Peak Season (September-November, March-May): 1 to 2 hours, sometimes up to 3 hours if very crowded
Same-Day Service: TIMS cards are issued same-day if you apply before 3:00 PM. Applications after 3:00 PM might be processed the next working day.
When to Apply
Ideal Timing: Apply 2-4 days before your trek starts. This gives you buffer time in case there are issues with documents or if you need to make corrections.
Minimum Timing: You can apply as little as 1 day before your trek, but this is risky if you encounter any problems.
Maximum Advance: You can apply up to 2 weeks before your trek start date. The card is valid for 90 days from issue date.
For Popular Treks: If you're trekking during peak season (October, November, March, April), apply as early as possible to avoid pre-trek stress.
Office Holiday Schedule
TIMS offices are closed on:
- Saturdays (Nepal's weekend)
- Major public holidays (Dashain, Tihar, etc.)
- Occasional strikes or bandhs (general strikes)
Plan around these closures, especially if you're on a tight schedule.
Don't Wait Until the Last Day
Never wait until the day before your trek to apply for TIMS. Unexpected closures, document issues, or processing delays could derail your entire trek. Apply at least 2 days before departure.
Expedited Processing
There is no official expedited or express processing for TIMS cards. All applications are processed in the order received. However:
- Arriving early in the morning often means shorter wait times
- Going through an agency might streamline the process slightly
- Being fully prepared with all correct documents speeds things up
What If You're Starting Your Trek from Pokhara?
If your trek starts from Pokhara (like Annapurna Circuit or ABC), you can get your TIMS card in Pokhara at the TAAN office there. Don't assume you'll have time on the day you arrive in Pokhara—apply at least a day before your trek starts.
Many trekkers get their TIMS in Kathmandu before flying to Pokhara to avoid any last-minute issues.
TIMS Checkpoints on the Trail
Once you have your TIMS card, you'll need to present it at official checkpoints along your trekking route. Here's what to expect:
What is a TIMS Checkpoint?
A TIMS checkpoint is an official registration post where trekkers must record their passage. These are usually small offices or booths staffed by TAAN representatives or local officials.
At each checkpoint:
- You show your TIMS card and national park/conservation permit
- Officials record your passage in their register (sometimes manually, sometimes digitally)
- They verify your card details match your passport
- The process takes 2-5 minutes per person
Major TIMS Checkpoint Locations
Everest Region:
- Lukla airport area
- Monjo (Sagarmatha National Park checkpoint)
- Namche Bazaar
- Pangboche
Annapurna Region:
- Bhulbhule (for Annapurna Circuit)
- Besisahar
- Ghandruk (for ABC and Poon Hill)
- Birethanti (for multiple routes)
- Nayapul
Langtang Region:
- Dhunche
- Syabrubesi
- Langtang village area
Manaslu Region:
- Jagat
- Deng
- Samagaon
What Happens at a Checkpoint
- Approach: You'll see a sign for "TIMS Checkpoint" or "Tourist Checkpoint"
- Queue: During peak season, there might be a short line of trekkers
- Present Documents: Show your TIMS card and permit to the official
- Verification: They check your photo, name, and itinerary
- Registration: Your details are recorded in their system
- Return: You get your card back and continue trekking
What Officials Check
- Your TIMS card is genuine (not fake or expired)
- Your photo matches your appearance
- Your stated route matches where you're actually trekking
- You have the required guide (if mandatory for that region)
- Your permits are valid and match your TIMS registration
What If You Don't Have TIMS?
If you reach a checkpoint without a valid TIMS card:
- You'll be asked to return to the nearest office to get one
- In some cases, you might be fined
- You could be prevented from continuing your trek
- Your guide or agency could face penalties
There's no option to get TIMS on the trail—you must get it before starting your trek.
Always Carry Your TIMS Card
Keep your TIMS card with you at all times during your trek, along with your passport and permits. Store them in a waterproof bag. Checkpoints can appear at various points on the trail.
Checkpoint Etiquette
- Have your documents ready when approaching a checkpoint
- Be patient during peak season when lines form
- Be respectful to checkpoint staff—they're ensuring trekker safety
- Don't argue about the necessity of TIMS or checkpoints
- If there's an issue with your card, address it calmly
Why Checkpoints Matter
TIMS checkpoints aren't just bureaucracy—they serve important functions:
- Safety: They track who's on the trail in case of emergencies
- Rescue: If you go missing, checkpoints show your last known location
- Statistics: They help manage trail congestion and infrastructure
- Revenue: They verify permit payment, funding trail maintenance
What If You Lose Your TIMS Card?
Losing your TIMS card on the trail is stressful but not uncommon. Here's what to do:
Immediate Steps
-
Check Thoroughly: First, search all your gear, pockets, and bags carefully. Check with your guide, porter, or trekking companions. TIMS cards are small and can slip into unexpected places.
-
Report to Your Guide: If you have a guide, inform them immediately. They can advise on the best course of action for your specific location.
-
Contact Your Agency: If you're with an agency, contact them (most have satellite phone access or can be reached from lodges with wifi). They may be able to help facilitate a replacement.
Getting a Replacement
If You're Close to a Major Town:
Option 1: Return to Kathmandu or Pokhara
- Go back to the original TIMS office where you got your card
- Bring your passport and any photos/copies of your original TIMS
- File a loss report and apply for a replacement
- Cost: Usually the same as original fee (NPR 1,000-2,000)
- Time: Same-day processing
Option 2: Local Police Post
- Report the loss at the nearest police post
- Get a written loss report (this is sometimes required for replacement)
- Keep this report with you for checkpoints
If You're Deep in the Trek:
- Some trekkers continue without TIMS, explaining the loss at checkpoints
- Results vary—some officials are understanding, others are strict
- Having a photo of your TIMS card on your phone can help verify you had one
- Your guide's testimony can also help
- You may face small fines at some checkpoints
Prevention Strategies
Before Losing It:
- Take a clear photo of your TIMS card (front and back) on your phone
- Make a photocopy and keep it separate from the original
- Store the original in a waterproof bag with your passport
- Use a neck wallet or document holder that stays on your person
- Never hand your original TIMS to anyone except officials at checkpoints
Storage Tips:
- Don't keep all documents together (split between day pack and main bag)
- Waterproof bags are essential (even in dry season)
- Some trekkers laminate their TIMS card for extra protection
- Keep it in an outside accessible pocket for quick access at checkpoints
Pro Tip
On day one of your trek, take a photo of your TIMS card and send it to your email or cloud storage. This digital backup can be a lifesaver if you lose the physical card.
Can You Continue Your Trek Without TIMS?
Technically, no. However, the reality depends on:
- How strict the checkpoints are (varies by region and season)
- Whether you have proof you had TIMS (photo, copy, witness testimony)
- Your guide's credibility and ability to vouch for you
- How far into the trek you are
Some trekkers have completed treks after losing TIMS by:
- Showing photos of the card at checkpoints
- Having their guide vouch for them
- Carrying police loss reports
- Paying small fines at checkpoints
But this is risky and not recommended. If possible, return to get a replacement, especially if you're early in your trek.
Official Replacement Process
The official process for TIMS replacement:
- Return to the TIMS office (NTB Bhrikutimandap or TAAN Maligaon in Kathmandu, or TAAN Pokhara)
- Bring your passport and any documentation of the original TIMS
- File a lost card report
- Fill out a new application form
- Pay the replacement fee (typically same as original)
- Get new photo taken
- Receive replacement card (same-day)
Insurance Coverage
Most travel insurance policies do NOT cover the cost of replacing lost permits or TIMS cards. Check your policy, but don't count on reimbursement.
TIMS vs National Park Permits: Understanding the Difference
One of the most common confusions for trekkers is understanding the difference between TIMS and National Park/Conservation Area permits. Here's the complete breakdown:
TIMS Card
Purpose: Trekker registration and safety database
Issued By: Nepal Tourism Board (NTB) and Trekking Agencies' Association of Nepal (TAAN)
What It Covers: Your registration as a trekker, emergency contact database, itinerary tracking
Where It's Required: Most trekking routes in Nepal
Cost: NPR 1,000-2,000 (depending on FIT or group)
Validity: 90 days from issue date
National Park / Conservation Area Permits
Purpose: Entry fee for protected areas (funds conservation and park management)
Issued By: Department of National Parks and Wildlife Conservation
What It Covers: Permission to enter and trek within specific protected areas
Where It's Required: Only within designated national parks and conservation areas
Cost: NPR 3,000 for most parks (Sagarmatha, Langtang, Annapurna, Manaslu)
Validity: Duration of your trek in that area
Key Differences
| Aspect | TIMS | Park Permit |
|---|---|---|
| Purpose | Trekker tracking/safety | Area entry fee |
| Coverage | Your person | Specific geographic area |
| Issuing Body | NTB/TAAN | National Parks Dept |
| Required For | Most treks | Only protected areas |
| Database | Yes (trekker info) | No (just revenue) |
Do You Need Both?
For most popular treks, YES, you need both:
Everest Base Camp: TIMS + Sagarmatha National Park Permit
Annapurna Circuit/ABC: TIMS + Annapurna Conservation Area Permit (ACAP)
Langtang Valley: TIMS + Langtang National Park Permit
Manaslu Circuit: TIMS + Manaslu Conservation Area Permit (MCAP) + Restricted Area Permit (RAP)
Poon Hill: TIMS + Annapurna Conservation Area Permit (ACAP)
Where to Get Park Permits
National Park Permits:
- Nepal Tourism Board Office, Bhrikutimandap, Kathmandu
- Park entrance gates (for some parks)
- Through your trekking agency
Conservation Area Permits (ACAP, MCAP, etc.):
- Nepal Tourism Board Office, Bhrikutimandap, Kathmandu
- Conservation Area Checkpoints at entry points
- TAAN Office (sometimes)
- Through your trekking agency
Application Together
Many trekkers apply for TIMS and park permits at the same time, often on the same day. The NTB office in Bhrikutimandap can issue both, which saves you time and multiple trips.
Documents Needed:
- Same as TIMS (passport, photos, insurance)
- Additional photocopies for each permit
- Cash for each permit fee
Pro Tip
Apply for all your permits on the same day at the NTB Bhrikutimandap office. It's a one-stop shop and saves you running around to different offices.
Which Permit Do You Show First?
At checkpoints:
- National Park/Conservation Area checkpoints check your park permit first
- TIMS checkpoints check your TIMS card
- Most checkpoints want to see both
Generally, present your park permit at park boundaries and your TIMS card at TIMS checkpoints. Some checkpoints will check both documents together.
What Happens If You Only Have One?
If You Have TIMS But No Park Permit:
- You'll be stopped at the park boundary
- You'll need to return to get the park permit or pay on-site (if available)
- In some cases, you can get it at the park gate, but not always
If You Have Park Permit But No TIMS:
- You might get through the park gate (they only check park permits)
- But you'll be stopped at TIMS checkpoints within the park
- You'll be required to return to get TIMS
Bottom line: Get both before starting your trek.
Treks That Require TIMS Card
Here's a comprehensive list of major trekking routes that require a TIMS card:
Everest Region Treks
All of these require TIMS + Sagarmatha National Park Permit:
- Everest Base Camp Trek (12-14 days)
- Gokyo Lakes Trek (12-15 days)
- Everest Three Passes Trek (18-21 days)
- Everest Base Camp and Gokyo Lakes Combined (15-18 days)
- Everest View Trek (5-7 days)
- Phaplu to Everest Base Camp (16-18 days)
- Jiri to Everest Base Camp (20-22 days)
Starting Points: Lukla (most common), Jiri, Phaplu, Salleri
Checkpoint Locations: Monjo (park entry), Namche Bazaar, Pangboche
Annapurna Region Treks
All of these require TIMS + Annapurna Conservation Area Permit (ACAP):
- Annapurna Circuit (15-20 days)
- Annapurna Base Camp (7-12 days)
- Poon Hill Trek (4-5 days)
- Mardi Himal Trek (5-7 days)
- Khopra Danda Trek (6-8 days)
- Ghorepani Poon Hill with ABC (10-12 days)
- Annapurna Panorama Trek (7-10 days)
- Nar Phu Valley (with restricted permit) (12-15 days)
- Tilicho Lake Trek (15-18 days)
Starting Points: Nayapul, Phedi, Besisahar, Koto
Checkpoint Locations: Birethanti, Ghandruk, Bhulbhule, Besisahar, Dharapani
Langtang Region Treks
All of these require TIMS + Langtang National Park Permit:
- Langtang Valley Trek (7-10 days)
- Langtang Gosaikunda Trek (10-14 days)
- Helambu Trek (6-8 days)
- Tamang Heritage Trail (7-10 days)
- Langtang, Gosaikunda, and Helambu Circuit (14-18 days)
Starting Points: Syabrubesi, Sundarijal, Dhunche
Checkpoint Locations: Dhunche, Syabrubesi, Langtang village area
Manaslu Region Treks
All of these require TIMS + Manaslu Conservation Area Permit (MCAP) + Restricted Area Permit (RAP):
- Manaslu Circuit Trek (14-18 days)
- Tsum Valley Trek (14-18 days)
- Manaslu Circuit with Tsum Valley (20-25 days)
Starting Point: Soti Khola, Arughat
Checkpoint Locations: Jagat, Deng, Samagaon
Special Note: Manaslu treks require THREE permits total, and you must trek with a registered agency (independent trekking is not allowed).
Makalu Region Treks
Require TIMS + Makalu Barun National Park Permit:
- Makalu Base Camp Trek (18-24 days)
- Makalu and Kanchenjunga Combined (30+ days)
Starting Point: Tumlingtar
Checkpoint Locations: Seduwa, Tashigaon
Kanchenjunga Region Treks
Require TIMS + Kanchenjunga Conservation Area Permit:
- Kanchenjunga Base Camp Trek (20-25 days)
- Kanchenjunga Circuit (24-28 days)
Starting Point: Taplejung, Suketar
Checkpoint Locations: Taplejung, Hellok, Ghunsa
Other Trekking Routes Requiring TIMS
- Dhaulagiri Circuit: TIMS + Special Permit
- Upper Dolpo: Special Restricted Area Permit (no TIMS needed)
- Upper Mustang: Special Restricted Area Permit (no TIMS needed)
- Rara Lake: TIMS + Rara National Park Permit
- Khopra Ridge: TIMS + ACAP
- Pikey Peak: TIMS only (no park permit needed)
Trek-Specific Requirements
Always verify the exact permit requirements for your specific trek with your agency or the Nepal Tourism Board, as requirements can change and some treks have unique permit combinations.
Restricted Area Permits: When TIMS Isn't Enough
Some trekking regions in Nepal require special Restricted Area Permits (RAP) instead of or in addition to TIMS. These are more expensive, have stricter requirements, and must be obtained through a registered agency.
What Are Restricted Areas?
Restricted areas are remote or culturally sensitive regions where the Nepal government limits tourism to protect local culture, environment, and security. These areas have limited infrastructure and require special permissions. For a full breakdown, see our restricted area permits overview and the Manaslu restricted area permit guide.
Major Restricted Area Treks
Upper Mustang
- Permit Cost: USD 500 for the first 10 days, then $50 per additional day
- No TIMS required (RAP replaces it)
- Must go with a registered agency and guide
- Minimum 2 trekkers required
Upper Dolpo
- Permit Cost: USD 500 for the first 10 days, then $50 per additional day
- No TIMS required
- Must go with a registered agency and guide
- One of the most remote treks in Nepal
Manaslu Circuit (Restricted Section)
- Permit Cost: $70-100 depending on season (Sep-Nov: $100, Dec-Aug: $75)
- Also needs TIMS + MCAP (three permits total)
- Must go with registered agency and guide
- Minimum 2 trekkers required
Tsum Valley
- Permit Cost: $40-50 depending on season
- Also needs TIMS + MCAP
- Must go with registered agency
Nar Phu Valley
- Permit Cost: $90-100 depending on season
- Also needs TIMS + ACAP
- Must go with registered agency
TIMS vs RAP: Key Differences
| Aspect | TIMS | Restricted Area Permit |
|---|---|---|
| Cost | NPR 1,000-2,000 | $40-700 USD |
| Application | Can apply yourself | Must go through agency |
| Trekking Style | FIT or group | Agency/group only |
| Validity | 90 days | Trek duration specific |
| Purpose | Safety tracking | Area access control |
When You Need Both TIMS and RAP
Some treks cross both regular and restricted areas, requiring both permits:
- Manaslu Circuit: TIMS + MCAP + RAP (all three required)
- Tsum Valley: TIMS + MCAP + Tsum RAP
- Nar Phu Valley: TIMS + ACAP + Nar Phu RAP
Getting Restricted Area Permits
You cannot get RAPs yourself. You must:
- Book with a registered Nepal trekking agency
- Provide documents to the agency
- Agency applies on your behalf to Department of Immigration
- Processing takes 5-10 working days (apply well in advance)
- Agency collects permits and gives to you before trek
Documents Required for RAP
- Passport copy
- Nepal visa copy
- Passport-size photos
- Travel insurance
- Detailed itinerary
- Agency booking confirmation
Your agency handles the application process, but you must provide all documents and pay permit fees (usually included in package price).
Pro Tip
If you're planning a restricted area trek, book at least 3-4 weeks before your trek start date to allow time for permit processing. Peak season can have delays.
The 2026 Mandatory Guide Rule and TIMS
In 2023, the Nepal government announced and began enforcing a mandatory guide rule for solo trekkers in most trekking regions. This rule significantly impacts how you obtain and use your TIMS card.
What is the Mandatory Guide Rule?
The rule requires all trekkers (including Individual Trekkers/FIT) to hire a licensed guide when trekking in Nepal's major trekking regions. Fully solo trekking is no longer officially permitted in most areas.
Why Was This Rule Introduced?
Safety Concerns: Several incidents of solo trekkers going missing or facing emergencies led to costly rescue operations.
Economic Support: Aims to provide employment to Nepal's licensed guide community.
Trekker Safety: Ensures trekkers have someone with local knowledge, language skills, and emergency training.
Monitoring: Makes it easier to track and assist trekkers on the trails.
Where is the Guide Mandatory?
The guide requirement applies to most major trekking areas:
- Everest region (including EBC)
- Annapurna region (including ABC, Circuit, Poon Hill)
- Langtang region
- Manaslu region (already had guide requirement)
- Most other popular trekking routes
Exemptions and Clarifications
Day Hikes: Short day hikes near cities typically don't require a guide.
Porters Only: You cannot substitute a porter for a guide—the person must be a licensed trekking guide.
Group Trekkers: If you're already with an agency, this doesn't change anything (you already have a guide).
How This Affects Your TIMS Application
For Individual Trekkers (FIT):
Previously: You could get green TIMS and trek completely independently
Now: You get green TIMS but must also:
- Hire a licensed guide
- Guide information may be recorded with your TIMS
- Guide license may be checked at checkpoints
Cost Impact:
- Green TIMS: NPR 2,000
- Plus guide cost: $25-$35 per day
- Total added cost: $300-500+ depending on trek length
Alternative Approach: Many former independent trekkers now book through budget agencies to:
- Get blue TIMS (cheaper at NPR 1,000)
- Get guide arranged through agency
- Sometimes get better rates on guide + accommodation packages
Guide Requirements
Your guide must be:
- Licensed by Nepal Tourism Board or TAAN
- Trained in first aid and altitude sickness
- Able to communicate in English (or your language)
- Carrying valid guide credentials
Enforcement on the Trail
Enforcement varies by region and season:
Strict Enforcement Areas:
- Everest region checkpoints
- Annapurna region checkpoints
- Popular trail entry points
What Happens Without a Licensed Guide:
- You may be stopped at TIMS checkpoints
- You could be turned back to starting point
- Your TIMS may be confiscated
- You might face fines
- In some cases, you'll be required to hire a guide on the spot
Finding a Licensed Guide
Through an Agency: The easiest option. The agency provides a vetted, licensed guide.
Independently in Kathmandu/Pokhara:
- Visit TAAN office and ask for guide recommendations
- Hire through reputable trekking shops in Thamel or Lakeside
- Verify the guide's license credentials (see our full guide to hiring guides and porters in Nepal)
Online Platforms:
- Some websites connect trekkers with licensed guides
- Always verify credentials and check reviews
Cost: Licensed guides charge approximately:
- $25-$35 per day (standard treks)
- Higher for technical or restricted area treks
- You also cover their food and accommodation
Verify Guide Credentials
Always ask to see your guide's license certificate before hiring. Fake guides exist, and using an unlicensed guide puts you at risk and violates the rules.
The Future of Solo Trekking in Nepal
The guide rule remains controversial among experienced trekkers who prefer independent hiking. However, as of 2026, the rule is being enforced, especially in major trekking areas.
Current Reality:
- Most trekkers now accept the guide requirement
- Many find value in having a guide (local knowledge, safety, cultural insights)
- Budget-conscious trekkers often team up to share guide costs
- Some very remote or less-popular trails have minimal enforcement
Predictions:
- Enforcement is likely to continue and possibly increase
- Digital systems may integrate guide info with TIMS database
- Costs may rise as demand for licensed guides increases
Making the Most of the Guide Requirement
If you're frustrated about the mandatory guide rule, consider these positives:
- Guides provide valuable cultural context and local knowledge
- They handle logistics, allowing you to focus on trekking
- Language barriers become minimal
- Emergency situations are handled more effectively
- You're supporting local employment and economy
- Many lasting friendships form between trekkers and guides
Agency vs Independent: TIMS Process Differences
How you obtain your TIMS card differs significantly depending on whether you're booking through an agency or going independently. Here's the complete comparison:
Through a Trekking Agency
How It Works:
- You book your trek with a registered Nepal trekking agency
- You provide your documents to the agency (usually via email before arrival)
- Agency prepares the TIMS application on your behalf
- You must be present at the office for photo and verification
- Agency collects the TIMS card and delivers it to you
- TIMS fee is included in your trek package price
Advantages:
- Less hassle—agency handles most paperwork
- Blue TIMS (cheaper at NPR 1,000 vs NPR 2,000)
- Agency knows the process and avoids common mistakes
- Agency can coordinate TIMS with other permits
- Guide and logistics included
- Emergency support from agency
Disadvantages:
- Must book trek package through agency (higher overall cost)
- Less flexibility in itinerary
- Must trek with assigned guide and group (if group trek)
- Package cost higher than independent (even with cheaper TIMS)
Best For:
- First-time trekkers in Nepal
- Those who want logistical support
- Trekkers on tight timelines
- Those trekking restricted areas (mandatory agency)
- People who prefer organized travel
Typical Package Costs (including TIMS):
- Everest Base Camp: $1,200-1,800 (12-14 days)
- Annapurna Base Camp: $800-1,200 (7-12 days)
- Annapurna Circuit: $1,000-1,500 (15-20 days)
- Langtang Valley: $600-900 (7-10 days)
Independent (Individual Trekker / FIT)
How It Works:
- You go to TIMS office yourself (NTB or TAAN)
- You fill out the application form
- You submit documents, pay fee, get photo taken
- You collect TIMS card after processing
- You hire a licensed guide separately
- You arrange your own accommodation and logistics
Advantages:
- Complete flexibility in route and schedule
- Choose your own accommodation (budget to luxury)
- Trek at your own pace
- Direct interaction with local communities
- Can change plans on the go
- Lower overall cost (if budget trekking)
Disadvantages:
- Green TIMS costs more (NPR 2,000 vs NPR 1,000)
- Must handle all paperwork yourself
- Must hire guide separately (added cost and coordination)
- No agency emergency support
- More time spent on logistics
- Language barriers when arranging a guide independently
Best For:
- Experienced trekkers
- Budget-conscious travelers
- Those wanting flexibility
- Trekkers on extended trips
- People who enjoy self-organization
Typical Costs (doing it independently):
- Green TIMS: NPR 2,000 ($15)
- Guide: $25-$40 /day × trek days
- Accommodation: $5-15/night
- Meals: $15-25/day
- Park permits: NPR 3,000 ($22)
- Transport: varies by route
Cost Comparison Example: Everest Base Camp (12 days)
Through Agency:
- Package: $1,400 (includes everything)
- TIMS (blue): included
- Guide: included
- Accommodation: included
- Meals: included
- Total: ~$1,400
Independent:
- TIMS (green): $15
- Guide: $30/day × 12 = $360
- Accommodation: $10/night × 11 = $110
- Meals: $20/day × 12 = $240
- Sagarmatha permit: $22
- Flights (Kathmandu-Lukla): $350
- Misc: $100
- Total: ~$1,197
Verdict: Independent is slightly cheaper but requires more effort. Agency is easier but less flexible.
Hybrid Approach
Some trekkers use a hybrid approach:
- Get green TIMS (independent)
- Hire a guide independently (not through agency package)
- Book own accommodation
- Have flexibility but meet guide requirements
This gives you flexibility while complying with guide rules, though you pay the higher FIT TIMS rate.
What Most Trekkers Choose
First-Timers: 70% go with agencies for peace of mind
Experienced Trekkers: 50/50 split between agency and independent (with hired guide)
Budget Backpackers: Increasingly going through budget agencies for lower blue TIMS and guide arrangement
Luxury Trekkers: Nearly all use agencies for full-service packages
Pro Tip
If you're on the fence, consider going through a budget agency for your first Nepal trek, then do subsequent treks independently once you understand the system.
Common TIMS Application Mistakes to Avoid
Learning from others' mistakes can save you time, money, and frustration. Here are the most common TIMS application errors:
1. Not Getting TIMS Before the Trek
Mistake: Assuming you can get TIMS on the trail or at the trailhead.
Reality: TIMS can only be obtained in Kathmandu or Pokhara at official offices. There are no TIMS offices at trailheads or on trekking routes.
Solution: Get TIMS at least 2 days before your trek departure.
2. Wrong Photo Size or Quality
Mistake: Bringing photos that are too old, wrong size (like driver's license photos), or poor quality.
Reality: TIMS offices are strict about photo requirements. Wrong photos = rejection = wasted trip.
Solution: Get passport-size photos (3.5cm × 4.5cm) taken professionally in Kathmandu or Pokhara. Photo shops know TIMS requirements.
3. Insufficient Passport Copies
Mistake: Bringing only one passport photocopy or none at all.
Reality: You need multiple copies for TIMS, park permits, and backup. One copy isn't enough.
Solution: Make at least 10 passport photocopies (photo page and visa page). They're cheap (NPR 5-10 each) and you'll use them.
4. Unclear or Unrealistic Itinerary
Mistake: Submitting a vague itinerary ("Everest region, 10 days") or an unrealistic one (EBC in 5 days).
Reality: TIMS offices want specific day-by-day itineraries with village names. Unrealistic itineraries raise safety concerns and may be rejected.
Solution: Write a detailed, realistic itinerary including village names and nightly stops. Use a guidebook or online resources to plan reasonable daily distances.
5. Insurance That Doesn't Cover Trekking
Mistake: Showing up with travel insurance that explicitly excludes trekking or high-altitude activities.
Reality: TIMS officials check that your insurance covers trekking and emergency evacuation at altitude.
Solution: Get travel insurance that explicitly covers trekking up to 6,000m (20,000 feet) and helicopter evacuation. See our guide to travel insurance for Nepal trekking for what to look for.
6. Applying Too Late
Mistake: Trying to get TIMS the day before your trek or on a Saturday.
Reality: Offices are closed Saturdays. Last-minute applications are stressful, and any issue means delaying your trek.
Solution: Apply 2-4 days before trek departure. Never wait until the last day.
7. Not Bringing Original Passport
Mistake: Bringing only a passport photocopy, assuming that's sufficient.
Reality: You must present your original passport for verification. Copies alone are not accepted.
Solution: Bring your original passport to the TIMS office. Keep it with you at all times in Nepal anyway.
8. Assuming Online Application Works
Mistake: Believing you can apply for TIMS online or that someone else can get it for you remotely.
Reality: There's no official online TIMS application. You must apply in person in Nepal.
Solution: Plan to visit a TIMS office in person once you're in Nepal.
9. Getting Only TIMS (Forgetting Park Permits)
Mistake: Getting TIMS and thinking you're done, forgetting you also need park/conservation permits.
Reality: Most treks need TIMS + park permit. TIMS alone isn't enough.
Solution: Check what permits your specific trek needs and get them all at once (ideally at NTB Bhrikutimandap office).
10. Wrong Card Type (FIT vs Group)
Mistake: Booking with an agency but applying for FIT TIMS, or vice versa.
Reality: Card type must match your trekking style. Mismatches cause issues at checkpoints.
Solution: If you've booked with an agency, get blue TIMS with agency letter. If independent, get green TIMS.
11. Not Keeping Emergency Contact Info Handy
Mistake: Not remembering your emergency contact's phone number or details when filling out the form.
Reality: You need to provide complete emergency contact information on the application.
Solution: Write down emergency contact details (name, phone with country code, email, relationship) before going to the office.
12. Ignoring the Guide Requirement
Mistake: Getting TIMS as FIT but not arranging a guide, forgetting that a licensed guide is mandatory in most regions (a rule introduced in April 2023).
Reality: Most trekking regions now require licensed guides. You'll be stopped at checkpoints without one.
Solution: Hire a licensed guide before starting your trek, or book through an agency.
13. Paying the Wrong Amount
Mistake: Not having correct cash amount or trying to pay in foreign currency.
Reality: Most offices accept only Nepali Rupees in cash. Wrong amount means finding an ATM or exchange.
Solution: Withdraw/exchange money beforehand. Bring exact amount or close to it (NPR 2,000 for FIT, NPR 1,000 for group).
14. Not Checking Card Details
Mistake: Getting TIMS card and putting it away without verifying the information.
Reality: Mistakes happen. Wrong name spelling or passport number can cause problems on the trail.
Solution: Check your card immediately when you receive it. Look for: correct name, passport number, trek route, dates.
15. Losing the Card Immediately
Mistake: Putting TIMS card in an unprotected pocket or loose in your bag.
Reality: TIMS cards are small and easy to lose. Losing it causes major headaches on the trek.
Solution: Get a waterproof document holder. Keep TIMS with passport in a secure, accessible location. Take a photo of it.
Learn From These Mistakes
Nearly all TIMS application issues are preventable with proper preparation. Spend an extra 30 minutes preparing documents correctly, and you'll save hours of frustration.
TIMS Validity Period and Extensions
Understanding how long your TIMS card is valid and whether you can extend it is important for planning longer or flexible treks.
Standard TIMS Validity
Duration: TIMS cards are valid for 90 days from the date of issue.
Not From Trek Start: The validity starts from the day the card is issued, not from when you start your trek. So if you get TIMS on January 1 but start trekking on January 15, your TIMS is valid until March 31 (90 days from January 1).
Covers Most Treks: 90 days is more than sufficient for any standard trek:
- Everest Base Camp: 12-14 days
- Annapurna Circuit: 15-20 days
- Even the longest treks: 20-30 days
Multiple Treks: You can use the same TIMS card for multiple treks within the 90-day period, as long as you're doing treks that require TIMS (not restricted areas).
Can You Extend TIMS?
No Official Extension: There is no official process to extend a TIMS card beyond 90 days.
What Happens If It Expires During Your Trek:
- If your 90-day validity expires while you're mid-trek, you technically need a new TIMS
- In practice, checkpoints may be understanding if you're close to finishing
- For very long treks (rare), plan to return to Kathmandu or Pokhara mid-trek to get a new TIMS
For Multi-Month Travelers
If you're in Nepal for several months and planning multiple treks:
Option 1: Get a new TIMS before each trek
- Allows you to update your itinerary each time
- Ensures fresh 90-day validity
- Costs NPR 1,000-2,000 each time
Option 2: Get one TIMS and do multiple treks within 90 days
- Cheaper (one fee covers multiple treks)
- Requires planning your treks within a 90-day window
- Original itinerary might not match actual treks (usually not a problem)
Option 3: Get a new TIMS every 3 months
- For long-term travelers doing many treks
- Keeps you compliant throughout your stay
Checking Your TIMS Validity
Your TIMS card shows the issue date. Calculate 90 days from that date to know your expiration.
Example:
- Issue Date: March 1, 2025
- Expiration: May 29, 2025 (90 days later)
Plan your treks to finish before this date.
What If You Finish Your Trek Early?
If your trek finishes well before your TIMS expires, the card remains valid for other treks within the 90-day period. You don't need a new TIMS for each trek—one can cover multiple.
Example:
- Get TIMS on March 1 (valid until May 29)
- Trek 1: Annapurna Base Camp, March 5-15 (10 days)
- Trek 2: Poon Hill, April 1-5 (5 days)
- Trek 3: Langtang Valley, May 1-10 (10 days)
All three treks are covered by the same TIMS (as long as you update checkpoints about your changing routes).
TIMS for Long-Term Residents
Long-term expats or volunteers in Nepal who trek occasionally:
- Get a new TIMS before each trek
- No special long-term TIMS exists
- Some use the same TIMS for multiple short treks within 90 days
Pro Tip
If you're planning multiple treks, get your TIMS as close to your first trek start date as possible to maximize the 90-day window for future treks.
Trek Delays and TIMS Validity
If your trek is delayed (weather, illness, permit issues):
- Your TIMS validity doesn't pause—it continues counting down
- If the delay causes your TIMS to expire, you need a new one
- Build buffer time into your 90-day window for unexpected delays
TIMS and Visa Validity
Your TIMS validity is separate from your Nepal visa validity:
- Tourist visa: 15, 30, or 90 days
- TIMS: Always 90 days from issue
Make sure both your visa AND TIMS are valid for your entire trek duration.
Emergency Contact Information and TIMS
One of the primary purposes of the TIMS system is maintaining emergency contact information for trekker safety. Here's what you need to know:
What Information is Recorded in TIMS?
When you register for TIMS, the following information is entered into the central database:
Personal Information:
- Full name (as on passport)
- Nationality
- Passport number
- Date of birth
- Photo
Trek Information:
- Intended route and itinerary
- Start and end dates
- Guide/agency details (if applicable)
- Group composition (if trekking with others)
Emergency Contacts:
- Emergency contact person name
- Relationship to you
- Phone number (with country code)
- Email address
- Home address
Insurance Details:
- Insurance company name
- Policy number
- Emergency assistance phone number
- Coverage limits and evacuation coverage
Why Emergency Info Matters
Search and Rescue: If you go missing or are overdue, your emergency contacts and last known checkpoint location help rescue teams.
Medical Emergencies: If you're incapacitated, medical staff can contact your emergency contact and insurance company.
Natural Disasters: During earthquakes, avalanches, or other disasters, authorities can identify which trekkers are in affected areas and notify their families.
Accidents: In case of serious injury or death, your emergency contacts can be notified quickly.
Checkpoint Tracking
As you pass through TIMS checkpoints on the trail:
- Your passage is recorded with date and time
- This creates a trail of your movement
- If you go missing, the last checkpoint shows where you were last seen
- Search efforts can be focused on the route between checkpoints
Choosing Your Emergency Contact
Best Practices:
- Choose someone in your home country who's easy to reach
- Make sure they know they're your emergency contact
- Provide them with your itinerary and expected check-in times
- Give them copies of your insurance and TIMS information
- Update them regularly during your trek (when you have wifi)
Who to Choose:
- Immediate family member (parent, spouse, sibling)
- Close friend who's reliable and reachable
- Someone in your home timezone who's likely to be available
Who NOT to Choose:
- Fellow trekker on the same trek (they'd be in the same emergency)
- Someone unreliable or hard to reach
- Someone who doesn't speak English (communication difficulties)
Updating Your Information
If your emergency contact information changes (phone number, contact person):
- You can update it at TAAN or NTB offices
- Bring your TIMS card and passport
- There's usually no fee for updates
- Critical if your original contact info is wrong or outdated
What Happens in an Emergency?
Minor Issues: Your guide or agency contacts local authorities or medical facilities.
Serious Emergency:
- Local authorities/rescue teams are notified
- They access TIMS database for your information
- Your emergency contact is notified by phone/email
- Your insurance company is contacted
- Rescue/evacuation is coordinated
- Your embassy may be notified for serious incidents
Search and Rescue:
- If you're overdue at a checkpoint, alarm is raised
- TIMS data shows your route and last known location
- Search teams focus on that area
- Helicopter rescue coordinated if needed
- Your emergency contact receives updates
Your Responsibilities
Before Trekking:
- Provide accurate, up-to-date emergency contact info
- Make sure your emergency contact knows your plans
- Leave copies of TIMS and insurance with your contact
- Verify your insurance has 24/7 emergency assistance line
During Trekking:
- Check in at all TIMS checkpoints (don't skip them)
- Update your emergency contact when possible (teahouse wifi)
- If you change route significantly, update at next checkpoint
- Carry TIMS card at all times
In an Emergency:
- Inform your guide immediately
- Contact your emergency contact if possible
- Don't hesitate to call for help (helicopter rescue)
- Your TIMS registration ensures help can find you
TIMS is Not a Satellite Tracker
TIMS tracks your planned route and checkpoint passages, but it's not GPS tracking. If you're off-route, rescue teams won't know exactly where you are. Always stick to main trails and check in at posts.
Insurance and TIMS
Your travel insurance information is recorded with TIMS for quick reference in emergencies.
What Insurers Need to Know:
- You have TIMS registration (shows you're a registered trekker)
- Your exact route and itinerary
- Your emergency contact information
What TIMS Helps Insurers Do:
- Quickly verify you're a legitimate claim (not fraud)
- Understand where and when the emergency occurred
- Coordinate with local rescue services
- Process evacuation approvals faster
Privacy Considerations
Is Your TIMS Data Private?: TIMS data is used only for trekking safety and emergency purposes. It's not public information and is not shared with unauthorized parties.
Who Can Access It?:
- TAAN and NTB officials
- Nepal police and rescue services
- Your registered trekking agency (if applicable)
- Medical facilities in emergencies
Data Retention: TIMS records are kept for several years for statistical purposes and in case of follow-up on incidents.
Frequently Asked Questions About TIMS
Here are answers to the most common questions trekkers have about TIMS cards:
Skip the Permit Paperwork
Book your Nepal trek with a verified local agency and your TIMS card, park permits, and licensed guide are all arranged for you — so you can focus on the trail, not the queue at the NTB office.
Final Thoughts on Getting Your TIMS Card
The TIMS card might seem like just another bureaucratic hoop to jump through, but it serves vital safety and tracking functions that have saved lives. Understanding how to get your TIMS card efficiently will save you time and stress when you arrive in Nepal.
Key Takeaways:
- Get TIMS early: Apply 2-4 days before your trek starts, not the last minute
- Bring correct documents: Passport, photos, insurance, itinerary—all in order
- Choose right type: Green (FIT) if independent, Blue (Group) if with agency
- Budget correctly: NPR 1,000-2,000 plus any park permits you need
- Hire a guide: Mandatory for most regions as of 2026
- Keep it safe: Store in waterproof holder, take a photo backup
- Check at posts: Present TIMS at all checkpoints along your route
The TIMS process is straightforward once you understand it. Thousands of trekkers successfully obtain their TIMS cards every month. With proper preparation and the information in this guide, you'll have yours in hand and be ready for your Nepal trekking adventure.
Safe trekking!
- Nepal Trekking Permits Explained — All Permits Overview
- Nepal Permit Offices Directory — Addresses & Hours
- Restricted Area Permits Overview
- Annapurna Conservation Area Permit (ACAP)
- Sagarmatha (Everest) National Park Permit
- Hiring Guides & Porters in Nepal
- Travel Insurance for Nepal Trekking
- Best Time to Trek Nepal — Seasonal Guide
Have questions about TIMS or Nepal trekking permits? Check out our guides on Nepal trekking permits explained, the Nepal permit offices directory, and hiring guides and porters in Nepal. When you're ready, you can book your trek with a verified local agency.