


Waterproofing and organization inside your duffel
4-6 bags of varying sizes
Roll-top closure with welded seams
150-400g for complete set
Heavy-duty trash bags and zip-lock bags
Sleeping bag, down jacket, electronics
$5-60 for a complete stuff sack system
Basic options available; quality brands limited
Dry Bags and Stuff Sacks for Nepal Trekking
Dry bags and stuff sacks are the lightweight inner bags that keep your gear dry and organized inside your duffel on a Nepal trek. For most Himalayan treks, carry four to six bags (150-400g total): a 15-20L compression dry bag for your sleeping bag, a 3-5L roll-top dry bag for electronics, stuff sacks for clothing, and zip-lock bags for documents. A complete system costs $15-100.
Your gear in Nepal faces water from multiple directions. Rain falls on porters carrying your duffel bag. Duffel bags rest on wet tea house porches. River spray catches the trail at canyon crossings. Condensation forms inside bags during temperature swings between warm valleys and freezing passes. Spilled water bottles and leaky thermoses soak through from inside. Without internal waterproofing and organization, your sleeping bag arrives damp, your electronics die, your documents become pulp, and your dry clothes become your wet clothes.
Dry bags and stuff sacks solve these problems at almost negligible weight. A complete system of four to six bags weighing 150-400g total keeps every item in your duffel organized by category, protected from water regardless of external conditions, compressed to save space, and instantly findable when you arrive at a tea house after a long day and want your warm fleece without unpacking your entire bag.
This guide covers every type of dry bag and stuff sack useful for Nepal trekking, specific size recommendations for each gear category, a color-coded packing system that makes organization effortless, waterproofing strategy (because no single layer is enough), and budget alternatives that work nearly as well as premium options.
Why You Need Internal Waterproofing (Even with a Water-Resistant Duffel)
The number one gear protection mistake trekkers make is trusting their duffel bag's exterior water resistance as the sole barrier against moisture. Even premium TPU-coated duffels have vulnerabilities:
Zipper Seepage
No duffel zipper is fully waterproof unless it uses a specialized dry suit-style zipper, which almost no trekking duffel does. Standard water-resistant zippers resist splash and brief rain but allow water penetration during sustained downpours. The zipper area is typically the first failure point in duffel water resistance.
Wear-Point Leaks
After a few treks, the fabric at high-wear points -- bottom corners that drag on the ground, areas where shoulder straps attach, spots where the porter's carrying straps compress the fabric -- develops micro-abrasions that compromise water resistance. The duffel may look fine externally but has lost its ability to shed water in these areas.
Condensation
When your duffel moves between warm environments (portered through sunny valleys) and cold environments (set down on a frozen tea house porch at 4,800m), condensation forms inside the bag. This internal moisture is invisible, insidious, and can dampen gear even on completely dry days. A sleeping bag that absorbs condensation moisture loses loft and warmth.
Spills and Internal Moisture
Water bottles leak. Hydration bladders develop pinhole punctures. Wet socks or damp towels packed inside the duffel transfer moisture to adjacent items. Internal waterproofing via dry bags contains these moisture sources, preventing a single leak from affecting everything in the duffel.
A Wet Down Sleeping Bag Is a Cold Night
Down insulation loses approximately 90% of its insulating value when wet. If your sleeping bag absorbs moisture from any source -- rain through the duffel, condensation, a leaking water bottle -- you face a cold night with no solution until the bag dries, which can take one to two full days. At altitude, where a warm sleeping bag is the difference between comfort and hypothermia, protecting your sleeping bag inside a waterproof dry bag is not optional. It is the single most important use of a dry bag on your entire trek.
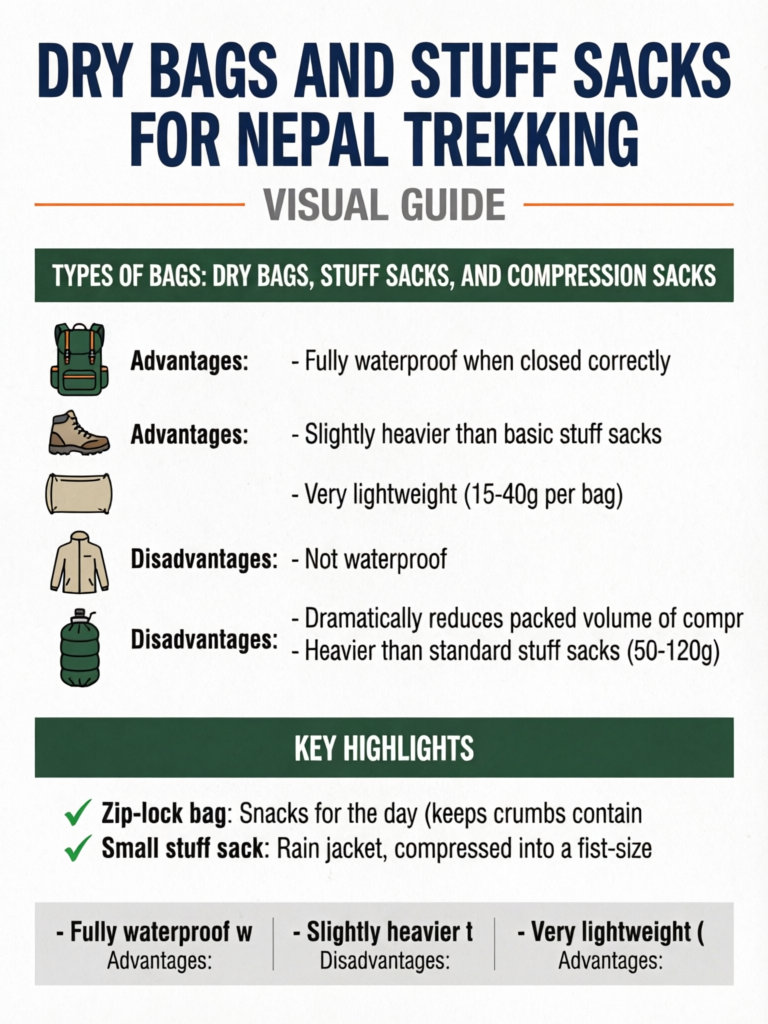
Types of Bags: Dry Bags, Stuff Sacks, and Compression Sacks
Roll-Top Dry Bags
Roll-top dry bags are the gold standard for waterproof gear protection. They feature a wide opening, waterproof fabric (typically silnylon or TPU-coated nylon), welded or tape-sealed seams, and a closure system where you fold the top over three or more times and clip it shut with a buckle. When properly closed, a roll-top dry bag is fully waterproof -- capable of brief submersion without leaking.
Advantages:
- Fully waterproof when closed correctly
- Wide opening for easy packing and access
- Available in sizes from 1L to 40L
- Lightweight (30-80g per bag depending on size)
- Durable and reusable for years
- Can be squeezed to expel air before closing, compressing contents
Disadvantages:
- Slightly heavier than basic stuff sacks
- More expensive than simple stuff sacks
- Must be rolled and clipped properly to achieve waterproofing
- Cannot see contents without opening
- Overkill for items that do not need waterproofing
Best for: Sleeping bag, down jacket, electronics, documents, spare clothing you need to keep absolutely dry.
Standard Stuff Sacks
Simple drawstring-closure bags made from lightweight nylon or polyester. They provide organization and mild water resistance (the fabric is typically DWR-coated) but are not waterproof. Water will seep through the fabric and the drawstring opening during sustained exposure.
Advantages:
- Very lightweight (15-40g per bag)
- Inexpensive ($3-15 per bag)
- Available in many sizes and colors for color-coded organization
- Drawstring closure is faster than roll-top
- Good compression of soft items (clothing, base layers)
Disadvantages:
- Not waterproof
- Limited water resistance in sustained rain
- Drawstring can work loose if not double-knotted
- Less durable than roll-top dry bags
Best for: Clothing organization, items that can tolerate some moisture exposure, general gear organization within the duffel.
Compression Stuff Sacks
Stuff sacks with additional compression straps that compress contents to a smaller volume. Essential for bulky insulation items (sleeping bags, down jackets) that need to be packed as small as possible.
Advantages:
- Dramatically reduces packed volume of compressible items
- Straps allow progressive compression
- Frees space in the duffel for other items
- Some models combine compression with waterproofing
Disadvantages:
- Heavier than standard stuff sacks (50-120g)
- Compression straps can stress delicate fabrics
- Over-compression damages down insulation over time
- More complex to pack and unpack
Best for: Sleeping bags and down jackets that need maximum volume reduction for duffel packing.
Pro Tip
Do not store your down sleeping bag in a compression sack long-term. Prolonged compression damages down clusters and reduces loft (insulating ability) over time. Use the compression sack only for active trekking days when the sleeping bag needs to fit inside your duffel. At each tea house, unpack the sleeping bag from its compression sack and either lay it flat on the bed or hang it to recover loft overnight. At home, store down items in large, breathable cotton storage sacks.
Zip-Lock Bags (Heavy Duty)
The humblest and cheapest waterproof container, yet possibly the most useful on any Nepal trek. Heavy-duty zip-lock bags (freezer-grade, not sandwich-grade) provide reliable waterproofing for small items at almost zero weight and cost.
Advantages:
- Nearly weightless (5-10g each)
- Transparent (see contents without opening)
- Fully waterproof when sealed
- Costs essentially nothing
- Replaceable if damaged
- Available in every size from passport-size to gallon-size
Disadvantages:
- Not durable (punctures easily, zipper wears out with repeated use)
- Environmental concern (single-use plastic)
- Cannot handle heavy or sharp items
- Looks less organized than proper stuff sacks
Best for: Documents (passport copies, permits, insurance papers), phone/camera accessories, medications, snacks, small electronics, cash, toiletry items that might leak.
The Color-Coded Packing System
The most efficient way to organize your duffel bag is a color-coded system where each stuff sack or dry bag color represents a gear category. When you arrive at a tea house, you pull out the specific colored bag you need without rummaging through everything else.
Recommended Color System
| Color | Contents | Bag Type | Recommended Size |
|---|---|---|---|
| Blue | Sleeping bag and liner | Compression dry bag | 15-20L |
| Red | Clothing (daily rotation) | Stuff sack | 10-15L |
| Yellow | Electronics and chargers | Roll-top dry bag | 3-5L |
| Green | Toiletries and first aid | Stuff sack with zip top | 3-5L |
| Orange | Down jacket and insulation layers | Compression stuff sack or dry bag | 8-12L |
| Clear (zip-lock) | Documents, permits, cash, medications | Heavy-duty zip-lock bags | Various |
| Black | Dirty laundry | Lightweight stuff sack | 8-12L |
How the System Works in Practice
Morning departure: You pack each color-coded bag with its designated items and place them in the duffel in the correct layer order (see the duffel packing guide for layering details). The blue sleeping bag goes to the bottom, clothing and down jacket in the middle, electronics and toiletries on top.
Arriving at tea house: You open your duffel and pull out the blue bag (sleeping bag) to set up your bed. Pull out the green bag (toiletries) for washing up. Pull out the yellow bag (electronics) to charge devices. Everything else stays packed in its bag inside the duffel.
Morning packing: Reverse the process. Each item returns to its color bag, bags return to the duffel in layer order. Total packing time: five to ten minutes.
Labeling Your Bags
If you cannot find bags in distinct colors, use colored tape, permanent marker labels, or small identification tags to mark each bag's contents. The goal is instant identification so you never waste time opening bags to find what is inside. Some trekkers use numbered bags (Bag 1 through Bag 7) with a laminated reference card listing each bag's contents. Whatever system you use, the key is consistency across every day of the trek.
Size Guide: What Size Bag for Each Item
Choosing the right bag size for each gear category prevents wasted space (bags too large) and frustrating overpacking (bags too small).
Sleeping Bag: 15-20L Compression Dry Bag
A standard three-season trekking sleeping bag compresses to approximately 8-12L in a compression sack. A 15-20L dry bag provides enough room for the sleeping bag plus a sleeping bag liner without overly tight compression. If your sleeping bag has its own compression sack, you can place the entire compressed bag inside a 15L dry bag for waterproofing.
Down Jacket and Insulation: 8-12L Compression Sack
A quality down jacket compresses to 3-5L. Combined with a fleece mid-layer (3-5L compressed), an 8-12L compression sack holds both items efficiently. Some trekkers pack their down jacket in the same compression bag as their sleeping bag to save one bag -- this works but makes it harder to access the jacket at rest stops without unpacking the sleeping bag.
Clothing: 10-15L Stuff Sack
A standard clothing rotation for Nepal trekking (three to four base layers, two to three pairs of underwear, three to four pairs of socks, one to two mid-layers) fits comfortably in a 10-15L stuff sack. If you carry more than this, you are likely overpacking -- see our packing list for the recommended clothing quantities.
Electronics: 3-5L Roll-Top Dry Bag
Your electronics bag should contain: power bank, charging cables, adaptor plug, spare batteries, e-reader, and any camera accessories. This typically fits in a 3-5L dry bag. The roll-top closure provides reliable waterproofing for these moisture-sensitive items. Consider adding a small sheet of closed-cell foam inside the bag for impact protection.
Toiletries and First Aid: 3-5L Zip-Top Bag
Toiletries (travel-size bottles of sunscreen, hand sanitizer, lip balm, toothbrush, toothpaste, wet wipes) and a basic first aid kit (blister treatment, pain medication, altitude sickness medication, anti-diarrheal, bandages) fit in a 3-5L bag. A zip-top or drawstring bag with some internal organization (small pockets or compartments) keeps items findable.
Documents: Large Zip-Lock Bag
Passport copies, insurance documents, emergency contact information, trekking permits (once obtained), and a small amount of backup cash fit in a single gallon-size zip-lock bag. Keep originals in your daypack, copies in the duffel as backup.
Dirty Laundry: 8-12L Lightweight Stuff Sack
As the trek progresses, dirty clothes accumulate. A dedicated dirty laundry bag prevents worn items from mixing with clean clothing and contains odors (to the extent any bag can contain trekking-level odors). A lightweight stuff sack with a drawstring is sufficient -- this bag does not need waterproofing since its contents are already somewhat damp from wear.
Waterproofing Strategy: The Three-Layer Approach
No single waterproofing method is foolproof. The most reliable approach uses three layers of water protection:
Layer 1: Internal Dry Bags (Critical Items)
Your sleeping bag, down jacket, electronics, and documents each live in their own waterproof dry bag or zip-lock. This is the last line of defense and the most important. Even if your duffel is fully submerged in a river crossing mishap, items in properly sealed dry bags survive.
Layer 2: Duffel Liner (Trash Bag Method)
Line the interior of your duffel with a large, heavy-duty trash bag (60-80L size) before packing your stuff sacks inside. This creates a waterproof shell inside the duffel that protects against zipper seepage and fabric wear-point leaks. The trash bag weighs under 30g and costs nearly nothing. Replace it if it punctures.
Layer 3: Duffel Exterior (Rain Cover or DWR)
Your duffel's external water resistance -- whether built-in DWR/TPU coating or a separate rain cover -- provides the outermost barrier. This layer handles the initial rain impact, deflecting most water before it reaches the duffel interior. Even the best external layer eventually fails in sustained rain, which is why layers one and two exist.
Pro Tip
The trash bag liner (layer 2) is the most underrated waterproofing tool in trekking. It costs nothing, weighs nothing, and provides a complete waterproof barrier inside any duffel regardless of the duffel's external quality. Even trekkers with premium TPU-coated duffels benefit from a trash bag liner because it protects against internal moisture sources (leaking bottles, damp items) that external waterproofing cannot address. Bring two or three spare trash bags folded flat in your duffel -- they weigh a few grams total and serve as emergency replacement liners, emergency rain ponchos, and trash bags.
Product Recommendations
Dry Bags
| Product | Size Range | Weight | Material | Closure | Price |
|---|---|---|---|---|---|
| Sea to Summit Ultra-Sil Dry Sack | 1-20L | 14-48g | 30D siliconized nylon | Roll-top with buckle | $15-28 |
| Osprey UltraLight Dry Sack | 3-20L | 18-50g | Siliconized nylon | Roll-top with buckle | $14-26 |
| Exped Fold Drybag | 1-40L | 12-65g | Nylon, PU-coated | Roll-top with buckle | $12-35 |
| Sea to Summit Lightweight Dry Bag | 1-35L | 20-70g | 70D nylon | Roll-top with buckle | $13-30 |
| Budget Kathmandu Dry Bag | 5-20L | 30-80g | PVC or coated nylon | Roll-top | $3-8 |
Stuff Sacks
| Product | Size Range | Weight | Material | Closure | Price |
|---|---|---|---|---|---|
| Sea to Summit Ultra-Sil Stuff Sack | 2-20L | 8-28g | 15D siliconized nylon | Drawstring | $10-18 |
| Granite Gear Air Bag | 3-16L | 10-26g | Siliconized Cordura | Drawstring | $8-16 |
| Osprey UltraLight Stuff Sack | 3-20L | 12-30g | Siliconized nylon | Drawstring | $10-18 |
| REI Co-op Stuff Sack | 3-20L | 15-35g | Nylon | Drawstring | $7-14 |
Compression Sacks
| Product | Size Range | Weight | Material | Compression | Price |
|---|---|---|---|---|---|
| Sea to Summit Ultra-Sil Compression Sack | 6-20L (compressed to 3-10L) | 55-80g | 30D siliconized nylon | 4-strap | $25-38 |
| Osprey StraightJacket Compression Sack | 6-32L | 80-140g | Nylon | 4-strap | $22-36 |
| Granite Gear eVent Compression Sack | 10-24L | 70-110g | eVent waterproof | 4-strap, waterproof | $30-45 |
| Sea to Summit eVent Compression Dry Sack | 6-20L | 80-130g | eVent waterproof | Roll-top + compression | $35-50 |
Best Complete Set for Nepal Trekking
For approximately $60-100, you can assemble a comprehensive stuff sack and dry bag system:
- 1x 15L compression dry bag (sleeping bag): Sea to Summit eVent Compression Dry Sack -- $40
- 1x 10L stuff sack (clothing): Sea to Summit Ultra-Sil Stuff Sack -- $14
- 1x 5L roll-top dry bag (electronics): Sea to Summit Ultra-Sil Dry Sack -- $18
- 1x 5L stuff sack (toiletries/first aid): Granite Gear Air Bag -- $10
- 1x 8L stuff sack (dirty laundry): REI Co-op Stuff Sack -- $8
- 3-4 gallon zip-lock bags (documents, misc): $2
- 2 heavy-duty trash bags (duffel liner): $1
Total weight: approximately 200-300g Total cost: approximately $90
Budget Alternative Set
For trekkers on a strict budget, an effective system costs under $15:
- Heavy-duty trash bags (various sizes) for sleeping bag and down jacket waterproofing: $2
- Gallon zip-lock bags for electronics and documents: $3
- Lightweight stuff sacks from Kathmandu (sold in Thamel for NPR 200-500 each, three to four bags): $5-8
- One compression strap (to compress sleeping bag inside trash bag): $3
- Extra trash bags for duffel liner and laundry: $1
Total weight: approximately 150-250g Total cost: approximately $12-15
This budget system provides adequate waterproofing and basic organization. It is less elegant and less durable than the premium system, but it works for a single trek.
Do Not Rely Solely on Zip-Lock Bags for Electronics
While zip-lock bags are excellent for documents and small items, they are too fragile for primary electronics protection. A phone or power bank in a zip-lock bag inside a packed duffel will eventually puncture the bag through pressure and movement. Use a proper roll-top dry bag for electronics, with a zip-lock as a secondary inner layer if desired. The combination of a dry bag exterior and a zip-lock interior provides double waterproofing with impact cushioning.
How to Use Dry Bags Correctly
A dry bag only works if you use it properly. Incorrect closure is the most common waterproofing failure.
Roll-Top Closure Technique
- Place items inside the bag, filling no more than 75% of the bag's volume (you need the top 25% for the roll)
- Squeeze out excess air by gently pressing the bag while holding the opening upward
- Fold the opening over itself, creating a clean fold approximately 3cm wide
- Continue folding the same direction for a minimum of three folds (four or five is better)
- Click the buckle to secure the rolled closure
- The rolled top should be smooth, flat, and wrinkle-free -- wrinkles in the roll create channels for water
Common Mistakes
- Overfilling: If the bag is stuffed to capacity, you cannot create the three-fold roll needed for waterproofing. Underfill slightly.
- Not expelling air: A bag full of trapped air is bulky, hard to pack, and the internal pressure can force the roll open under compression. Squeeze out air before rolling.
- Single fold: One fold is not waterproof. Three folds minimum.
- Rolling with wet hands: Moisture on the inside of the roll creates a capillary channel that wicks water inside. Dry your hands before closing dry bags.
- Using a torn bag: Even a small puncture defeats a dry bag's waterproofing. Inspect bags before each trek and replace any with holes, no matter how small.
Packing Organization Beyond Color Coding
The Accessibility Principle
Pack items in order of need. Things you need at every tea house stop go in the top of the duffel in easy-to-grab bags. Things you need once a week go at the bottom.
Every stop (top of duffel):
- Headlamp and batteries
- Warm hat and gloves (above 3,000m)
- Evening snacks
- Phone charger and power bank
- Book or e-reader
Every morning (middle of duffel):
- Daily clothing stuff sack
- Toiletries bag
- Sunscreen and lip balm
Rarely accessed (bottom of duffel):
- Sleeping bag (set up once each evening)
- Reserve clothing
- Spare batteries and emergency items
- Documents backup copies
The Daily Rotation System
For clothing, use a simple rotation within a single stuff sack rather than carrying separate bags for each day:
- Day 1: Wear Set A, Set B is clean in the bag
- Day 2: Wear Set B, Set A is dirty in the laundry bag
- Day 3: Wash Set A at tea house, wear Set B, Set A dries
- Day 4: Wear clean Set A, wash Set B
- Continue rotating
This requires only two complete sets of trekking clothing (excluding cold-weather layers), which is the standard recommendation for Nepal tea house treks. See our packing list for exact quantities.
Stuff Sacks in Your Daypack
Dry bags and stuff sacks are not just for your duffel. Your daypack benefits from the same organization:
Daypack Organization
- Small dry bag (1-2L): Phone, wallet, cash for the day
- Zip-lock bag: Snacks for the day (keeps crumbs contained)
- Small stuff sack: Rain jacket, compressed into a fist-size package
- Zip-lock bag: Trekking permits and day's documentation
- Small dry bag (1-2L): Camera, spare batteries
This keeps your daypack organized and ensures that if you are caught in rain, your critical items (phone, documents, camera) are protected even if the daypack's rain cover is imperfect.
Pro Tip
Carry one empty stuff sack or dry bag in your daypack as a versatile emergency container. It can hold wet items (if you need to cross a stream), serve as a camera rain cover, act as a small water-carrying bag in emergencies, or protect items you purchase at a shop along the trail. An empty 5L stuff sack weighs 10-15g and takes up almost no space when folded.
Sustainability Considerations
The most environmentally responsible approach to stuff sacks and dry bags:
Reuse Over Single-Use
Invest in quality dry bags and stuff sacks that last multiple treks rather than relying solely on single-use plastic bags. A Sea to Summit dry bag that lasts five years of trekking is more environmentally responsible than 50 zip-lock bags used and discarded over the same period.
Minimize Plastic
Use zip-lock bags strategically (for documents, medications, and items that genuinely need transparent, sealable containers) rather than as your primary organization system. Stuff sacks made from recycled materials are available from several brands and provide the same functionality with lower environmental impact.
Dispose Responsibly
Used zip-lock bags, torn trash bags, and worn-out stuff sacks should be carried out with you and disposed of in Kathmandu, not left at tea houses or on the trail. Nepal's waste management infrastructure in mountain areas is limited, and plastic waste left on trekking routes accumulates rapidly.
Frequently Asked Questions
What is the difference between a dry bag and a pack liner?
A pack liner is a single large waterproof bag (or heavy-duty trash bag) that lines the entire interior of your pack or duffel, creating one waterproof shell. A dry bag is a smaller bag for individual items. They are complementary, not competing: a pack liner gives blanket waterproofing with minimal fuss, while internal dry bags add organization and a second line of defense for critical items (sleeping bag, electronics). For Nepal, the strongest setup combines both -- a liner inside the duffel plus dedicated dry bags for your sleeping bag and electronics. See the three-layer approach above.
Do I really need dry bags if my duffel is porter-carried?
Yes -- arguably more so. A porter-carried duffel is exposed to rain, snow, and ground spray for six to eight hours every trekking day, often without a rain cover, and rests on wet tea house porches at altitude. You have no control over it during the day. Internal dry bags and a duffel liner are your only guarantee that your sleeping bag and electronics arrive dry, regardless of weather or how the load is handled.
How many dry bags do I need for Nepal trekking?
A minimum of two (one for sleeping bag, one for electronics) and ideally four to six covering all gear categories. The exact number depends on how much waterproofing you want versus how much organizational structure you prefer. Most trekkers settle on four to five bags plus a few zip-lock bags.
Can I just use heavy-duty trash bags instead of dry bags?
For waterproofing, yes -- a heavy-duty trash bag provides excellent waterproofing for a fraction of the cost. For organization, trash bags are inferior because they are opaque (you cannot see contents), they have no secure closure (you twist and tie the top, which can work open), and they puncture easily when packed with hard items. The best budget system combines trash bags for waterproofing with cheap stuff sacks for organization.
Are compression sacks bad for down sleeping bags?
Using a compression sack during active trekking (compressing the bag during the day, decompressing at night) does not cause meaningful damage over the course of a two to three week trek. Storing a down sleeping bag compressed for months at a time does cause permanent loft loss. Use the compression sack on the trail, then store the bag loosely at home.
What is the difference between a dry bag and a dry sack?
Terminology varies by brand, but generally a "dry bag" has a roll-top closure with a buckle and is fully waterproof, while a "dry sack" may refer to a stuff sack with water-resistant (not waterproof) fabric. Always check the closure type and waterproof rating rather than relying on the product name.
Should I use vacuum compression bags for trekking?
No. Vacuum bags (the type you use for home clothing storage) require a vacuum source to compress, which is not available on the trail. They also tend to re-inflate when punctured, which happens quickly in a packed duffel with hard items. Compression stuff sacks with straps are the trekking-appropriate alternative.
Can I wash stuff sacks during the trek?
Yes, stuff sacks can be rinsed in warm water at tea houses and hung to dry. They dry quickly (one to two hours in dry mountain air). Dry bags should be wiped clean rather than soaked, as prolonged water exposure to the interior coating can degrade waterproofing over time.
How do I repair a punctured dry bag?
Small punctures can be temporarily repaired with gear repair tape (Tenacious Tape or similar) applied to the interior of the bag. Clean and dry the area around the puncture, cut a patch of tape slightly larger than the hole, and press firmly. This repair lasts for the remainder of a trek but is not a permanent fix. Replace punctured dry bags before your next trek.
What size dry bag for a sleeping bag?
A 15-20L dry bag fits most trekking sleeping bags (whether already in a compression sack or loosely stuffed). If your sleeping bag is particularly bulky (winter-rated, large size), go with 20L. If it is compact (ultralight, three-season), 15L is sufficient. Test at home by stuffing your sleeping bag into the dry bag and confirming you have enough extra material at the top for a proper three-fold roll closure.
Do I need a dry bag for my daypack contents?
For critical items (phone, camera, documents), yes -- a small 1-2L dry bag inside your daypack provides essential rain protection. Daypack rain covers are imperfect (water enters through the back panel where it contacts your body, and covers can blow off in wind). A small dry bag inside the pack ensures your valuables stay dry regardless of rain cover performance.
Are silnylon or TPU-coated dry bags better?
Silnylon (siliconized nylon) is lighter and more packable. TPU-coated nylon is more durable and abrasion-resistant. For items inside a duffel (protected from external abrasion), silnylon is ideal because weight savings matter more than abrasion resistance. For items in a daypack where the dry bag contacts other hard items directly, TPU-coated bags last longer.
Can I buy stuff sacks in Kathmandu?
Basic stuff sacks and dry bags are available in Thamel gear shops for NPR 200-1,000 ($2-8). Quality varies significantly -- test the fabric, check the seam construction, and verify that roll-top closures actually seal properly. Premium brands (Sea to Summit, Osprey, Exped) are occasionally available in higher-end shops but at marked-up prices. For a guaranteed quality system, buy at home and bring with you.
How do I keep my stuff sacks organized in a shared duffel?
If you are sharing duffel space (rare but sometimes necessary), use distinctively colored or labeled bags so each person's gear is immediately identifiable. Alternatively, each person packs their gear in one large stuff sack, and these person-specific large bags go inside the shared duffel. This prevents gear mixing and simplifies repacking.
Do I Need Dry Bags for Nepal Trekking?
Yes. Even with a water-resistant duffel bag, internal waterproofing is essential for Nepal trekking. Rain on the Annapurna Circuit, river spray on the Manaslu Circuit, and condensation on the Everest Base Camp route all threaten your gear from multiple directions. A wet down jacket or damp sleeping bag loses most of its insulating value, which at altitude is a serious safety concern. Dry bags weighing just 150-400g total provide reliable protection that no single duffel exterior can match. At minimum, carry two dry bags: one for your sleeping bag and one for electronics and documents.
What Dry Bags Do I Need for Everest Base Camp?
For the standard EBC trek, carry a 15-20L compression dry bag for your sleeping bag, a 3-5L roll-top dry bag for electronics and power banks, two to three standard stuff sacks for clothing and toiletries, and several gallon zip-lock bags for documents and medications. The Lukla-to-EBC route crosses multiple climate zones where sudden rain and snow are common, and porter-carried duffels are exposed to weather for 6-8 hours daily. This system costs $15-100 and weighs under 400g, making it one of the lightest and cheapest insurance policies in your entire packing list.
Final Recommendation
Every Nepal trekker needs a minimum of two dry bags (sleeping bag and electronics), two to three stuff sacks (clothing, toiletries, laundry), and several zip-lock bags (documents, medications, snacks). The complete system weighs 150-400g and costs $15-100 depending on whether you choose premium brands or budget alternatives. Check our rent vs buy guide for Kathmandu purchasing options.
The investment pays for itself the first time rain hits your porter on a mountain pass. While trekkers around you discover damp sleeping bags and dead electronics at the tea house that evening, your gear emerges from its color-coded, waterproofed dry bags perfectly dry and immediately findable.
Pair your stuff sack system with a quality duffel bag and a well-planned packing list for a complete gear organization system that makes every tea house arrival efficient and every morning departure fast. For route-specific packing advice, see our guides for the Langtang Valley and Gokyo Lakes treks. Your gear deserves protection, and your sanity deserves organization. Dry bags and stuff sacks deliver both at negligible weight.
Planning your Nepal trek?
Get a packing list tailored to your route and book with a verified local agency that supplies porters, duffels, and gear support.