


20,000 mAh for 10-14 day treks
$2-$7 per device per charge
30-50% at sub-zero temps
~65% of rated mAh
Not worth it for most tea house treks
300-500g total power gear
100 Wh (approx 27,000 mAh)
$3-5 per device, often unreliable
Battery Pack for Camping & Trekking: The Nepal Power Guide
The best battery pack for camping or trekking in Nepal is a 20,000 mAh power bank: it delivers roughly 2-3 cold-weather phone charges, weighs 280-420g, stays under the 100 Wh airline carry-on limit, and gives 3-4 days of self-sufficiency between charging stops on routes like Everest Base Camp and the Annapurna Circuit. Size up to 26,800 mAh for photography or 15+ day camping treks.
Running out of battery on a Nepal trek is not just an inconvenience. Your phone is your GPS, your emergency communication tool, your altitude tracker, your camera, and for many trekkers, the only way to contact family back home. When your power bank dies at 4,900m in Lobuche and the tea house solar panel has been cloudy for two days, that dead screen becomes a genuine safety concern.
Power management is one of the most underestimated challenges of trekking in Nepal. Below 3,000m, electricity is cheap and readily available. Above 4,000m, it becomes scarce, expensive, and unreliable. The difference between a trekker who captures the sunrise over Everest and one who stares at a black screen often comes down to a single decision made weeks before the trek started: choosing the right power bank and building a charging strategy that actually works.
This guide covers everything you need to know about keeping your electronics alive from Lukla to Gorak Shep, from Besisahar to Thorong La, and everywhere in between. We compare power bank capacities with real-world weight trade-offs, give an honest assessment of solar chargers (spoiler: they disappoint most trekkers), and lay out charging strategies that work for everything from a minimalist phone-only setup to a full photography kit.
If you are also looking for guidance on offline maps for navigation or getting a SIM card and WiFi access on trek, those companion guides cover the connectivity side of the equation.
Why Power Management Matters on Nepal Treks
If you have never trekked at high altitude in a developing country, the charging situation in the Himalayas will surprise you. Power infrastructure follows a steep gradient: abundant at low elevation, scarce and expensive at high elevation, and nonexistent at the highest points. Understanding this reality before you leave home is the foundation of a good power strategy.
The Charging Cost Gradient
Every 1,000 meters of elevation gain roughly doubles the cost and halves the reliability of charging. This is not an exaggeration. At Lukla (2,860m), many tea houses offer free charging or charge $1 per device. At Gorak Shep (5,164m), charging costs $5 per device with no guarantee of success. On a 14-day EBC trek, a trekker who charges their phone from the wall every night could easily spend $30-50 on charging fees alone.
Here is the charging landscape by altitude band:
| Altitude Band | Typical Cost | Power Source | Reliability | Strategy |
|---|---|---|---|---|
| Below 2,500m | Free to $1 | Grid / micro-hydro | High | Charge everything from the wall |
| 2,500-3,500m | $1-2 | Micro-hydro / solar | High | Top off devices and power bank |
| 3,500-4,500m | $2-4 | Solar / diesel generator | Medium | Use power bank, charge opportunistically |
| 4,500-5,200m | $4-5 | Solar (limited) | Low | Rely entirely on power bank |
| Above 5,200m | Unavailable | None | None | Self-sufficient only |
Why Tea House Charging Is Unreliable Above 4,000m
Above 4,000m, most tea houses rely entirely on rooftop solar panels and small battery banks to power their lights, kitchen equipment, and guest charging. On a clear sunny day, this works reasonably well. But two consecutive overcast days, which happen regularly during trekking season, can drain the tea house battery bank to the point where the owner prioritizes kitchen lighting over guest phone charging. You might arrive at a tea house at 4,500m, pay $4 for a charge, plug in your phone at 6pm, and wake up to find it gained only 30% because the tea house cut power at 10pm to conserve their battery for morning kitchen use.
This is not a worst-case scenario. It is a regular occurrence reported by trekkers on the EBC, Annapurna Circuit, and Manaslu routes every season.
Cold Weather Compounds the Problem
Lithium-ion batteries, the technology inside every power bank, phone, and camera, lose capacity dramatically in cold temperatures. At 0 degrees Celsius, expect a 10-15% capacity reduction. At minus 10 degrees Celsius, that jumps to 20-30%. At minus 20 degrees Celsius, which is common at night above 5,000m, batteries can lose 40-50% of their effective capacity. This is not permanent damage -- the capacity returns when the battery warms up -- but it means your 20,000 mAh power bank may deliver only 10,000-12,000 mAh of actual usable power when you need it most.
The practical implication: if you calculated your power needs assuming full rated capacity, you will run short at the highest, coldest, most critical part of your trek. Always calculate with cold-weather losses factored in.
Pro Tip
Sleep with your power bank and phone inside your sleeping bag at night. Body heat keeps the batteries at 20-30 degrees Celsius instead of the minus 10 to minus 20 degrees Celsius ambient temperature in an unheated tea house room. This single habit can recover 30-40% of your effective battery capacity compared to leaving devices on the nightstand. Tuck them into a sock or stuff sack to prevent them from shifting around as you sleep.
Power Bank Capacity Guide: 10,000 vs 20,000 vs 30,000 mAh
Choosing the right power bank capacity is the single most important decision in your trekking power strategy. Too small and you run out at altitude. Too large and you carry unnecessary weight up every pass. The sweet spot depends on your trek length, the devices you carry, and how disciplined you are about power conservation.
Understanding Real-World Usable Capacity
Before comparing sizes, you need to understand a critical fact: the number printed on a power bank is not the amount of power it will deliver to your devices. Every power bank stores energy at 3.7 volts internally but outputs at 5 volts (USB standard) or higher (USB-C PD). The voltage conversion, combined with heat loss and circuit inefficiency, means you get approximately 60-70% of the rated capacity in actual device charging.
Here is what each size actually delivers:
| Rated Capacity | Real Usable (Warm) | Real Usable (Cold, Below 0C) | Phone Charges (4,500 mAh) |
|---|---|---|---|
| 10,000 mAh | 6,500-7,000 mAh | 5,000-5,500 mAh | 1.1-1.5 full charges |
| 20,000 mAh | 13,000-14,000 mAh | 10,000-11,000 mAh | 2.2-3.0 full charges |
| 26,800 mAh | 17,400-18,700 mAh | 13,400-14,700 mAh | 3.0-4.0 full charges |
| 30,000 mAh | 19,500-21,000 mAh | 15,000-16,500 mAh | 3.3-4.5 full charges |
The "cold" column is what you should plan around for high-altitude sections of your trek.
10,000 mAh: The Minimalist Choice
Best for: Short treks of 5-7 days below 4,000m, minimalist trekkers carrying only a phone, and as a secondary backup bank.
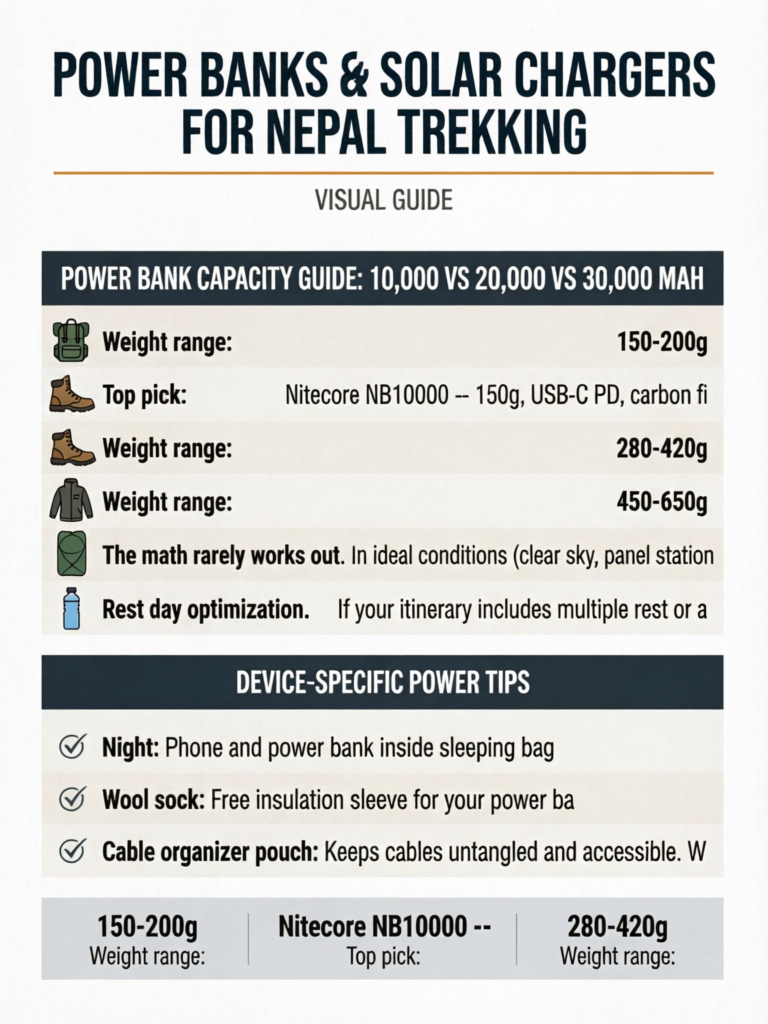
Weight range: 150-200g
A 10,000 mAh bank provides roughly one and a half full phone charges in warm conditions and just over one charge in the cold. For a short trek like the Poon Hill circuit, Ghorepani loop, or lower Langtang, this is sufficient. You can charge from the wall most nights at low cost, and the power bank serves as insurance for the one or two nights where charging is unavailable or inconvenient.
However, a 10,000 mAh bank is risky for any trek that spends more than two consecutive nights above 4,000m. One cloudy day that prevents tea house solar charging, combined with cold-weather battery drain, and you are running on empty with no backup.
Top pick: Nitecore NB10000 -- 150g, USB-C PD, carbon fiber shell. The gold standard for ultralight trekkers.
20,000 mAh: The Sweet Spot for Most Trekkers
Best for: Standard 10-14 day treks including EBC, Annapurna Circuit, Langtang, and Manaslu. Trekkers carrying a phone plus one additional device (GoPro, headlamp, or Kindle).
Weight range: 280-420g
This is the capacity we recommend for the vast majority of Nepal trekkers. A 20,000 mAh bank provides 3-4 days of self-sufficiency between charging stops, which comfortably covers the highest sections of the EBC trek (Dingboche to Gorak Shep and back) and the Thorong La section of the Annapurna Circuit. Even with cold-weather losses factored in, you have enough margin for unexpected situations like an extra rest day at altitude or two consecutive overcast days at a solar-dependent tea house.
The weight penalty over a 10,000 mAh bank is roughly 130-220 grams. On a trek where you are carrying 6-10 kg in your daypack, this is a minimal trade-off for the substantial increase in power security.
Top picks:
- Nitecore NB20000 -- 284g, 45W USB-C PD, aluminum body. The lightest 20,000 mAh bank we have tested. Charges a MacBook Air slowly and phones rapidly. Premium price ($40-50) but exceptional quality.
- Anker PowerCore III 20,000 -- 340g, 18W USB-C PD. Reliable, affordable ($30-35), widely available. The default recommendation for most trekkers.
- Baseus Adaman 20,000 -- 400g, 22.5W, built-in digital display showing exact remaining percentage. Slightly heavier but the display is genuinely useful for power planning on trek.
30,000 mAh: The Heavy-Duty Option
Best for: Extended treks of 15 or more days, photography-focused trekkers with multiple devices, winter trekking where cold-weather losses are severe, and camping treks with zero charging infrastructure.
Weight range: 450-650g
A 30,000 mAh bank is serious weight. At 500-650g, it weighs more than many trekkers' rain jackets or fleece mid-layers. The capacity is enormous -- 5 or more days of self-sufficiency even in cold conditions -- but the weight penalty must be justified. If you are carrying a mirrorless camera with multiple batteries, a drone, a GoPro, a satellite communicator, and a phone, the math works out. If you are carrying only a phone and a headlamp, you are hauling unnecessary grams up every hill.
Before choosing 30,000 mAh, consider carrying two 10,000 mAh banks instead. The total capacity is lower (20,000 mAh vs 30,000 mAh), but you gain redundancy: if one bank fails, you still have backup. Two banks also allow you to keep one warm inside your jacket while the other charges a device in your pack.
Airline Restrictions on Power Banks
Airlines limit lithium-ion battery capacity to 100 watt-hours (Wh) for carry-on and prohibit power banks in checked luggage entirely. A 100 Wh limit translates to approximately 27,000 mAh at 3.7V. Most 30,000 mAh power banks are rated at 108-111 Wh, which technically exceeds the limit. In practice, enforcement varies -- many trekkers carry 30,000 mAh banks without issue -- but some airlines (particularly on domestic Nepal flights from Kathmandu to Lukla) may confiscate oversized banks. A 26,800 mAh bank at 99.16 Wh keeps you safely under the limit. Check your specific airline's policy before packing.
Weight vs Capacity Comparison Table
| Power Bank | Capacity | Weight | Wh Rating | Usable mAh (Cold) | Cost | Best For |
|---|---|---|---|---|---|---|
| Nitecore NB10000 | 10,000 mAh | 150g | 36 Wh | ~5,200 mAh | $30 | Ultralight / short treks |
| Anker 523 | 10,000 mAh | 220g | 36 Wh | ~5,200 mAh | $20 | Budget short treks |
| Nitecore NB20000 | 20,000 mAh | 284g | 72 Wh | ~10,400 mAh | $45 | Best weight-to-capacity |
| Anker PowerCore III | 20,000 mAh | 340g | 72 Wh | ~10,400 mAh | $32 | Best value all-rounder |
| Baseus Adaman | 20,000 mAh | 400g | 74 Wh | ~10,800 mAh | $28 | Budget with display |
| Anker 737 | 24,000 mAh | 480g | 87 Wh | ~12,500 mAh | $55 | Power users |
| Baseus Blade | 26,800 mAh | 450g | 99 Wh | ~13,900 mAh | $50 | Max airline-safe capacity |
| Xiaomi 30,000 | 30,000 mAh | 620g | 111 Wh | ~15,600 mAh | $35 | Maximum capacity (note airline limit) |
Pro Tip
The single best metric for comparing power banks is the mAh-per-gram ratio. The Nitecore NB20000 delivers 70.4 mAh per gram. The Anker PowerCore III delivers 58.8 mAh per gram. The Xiaomi 30,000 delivers 48.4 mAh per gram. As capacity increases, efficiency often decreases because of the heavier casing and circuitry needed to manage the larger battery. For most trekkers, the 20,000 mAh tier offers the best balance of capacity and weight efficiency.
Solar Chargers: An Honest Assessment
Solar chargers are one of the most frequently asked-about trekking accessories, and they are also one of the most frequently disappointing. The concept is compelling: free, unlimited energy from the Himalayan sun. The reality is considerably more complicated.
Why Solar Panels Disappoint Most Trekkers
Let us be direct: for the majority of tea house trekkers on standard 10-14 day routes like EBC, the Annapurna Circuit, or Langtang, a solar panel is not worth carrying. Here is why:
You are walking during peak sun hours. The best solar charging happens between 10am and 2pm when the sun is strongest. On a trekking day, you are walking during those exact hours with the panel bouncing on the back of your pack, partially shaded by your body or the pack itself, and angled suboptimally. Attaching a panel to the outside of a moving backpack produces roughly 20-40% of the panel's rated output. A "21W" panel on a moving pack in real conditions generates 4-8 watts, and that is on a clear day.
Mountains create shade. Unlike desert trekking where the sky is open horizon to horizon, Himalayan trails weave through valleys where mountains block direct sunlight for large portions of the day. North-facing slopes, deep river gorges, and the steep terrain of routes like the Khumbu valley or the Marsyangdi gorge mean your panel spends significant time in shadow even on a cloudless day.
Clouds are common. Even during peak trekking season (October-November), afternoon clouds build regularly over the Himalayas. A panel that was generating 10 watts at noon may produce 2 watts by 2pm when clouds roll in. Winter trekking and spring season bring even more cloud cover.
Weight and bulk add up. A quality 21W solar panel weighs 350-500g and takes up a significant portion of your pack's exterior. That is the same weight as a 20,000 mAh power bank that provides guaranteed, weather-independent power. The panel also snags on branches, catches wind on exposed ridges, and adds complexity to your packing routine.
The math rarely works out. In ideal conditions (clear sky, panel stationary at optimal angle, full sun for 6 hours), a 21W panel can charge a 20,000 mAh power bank in approximately 8-10 hours. In real trekking conditions, expect 4,000-8,000 mAh of charging per full day -- roughly one to two phone charges. You could achieve the same result by paying $3-5 at a tea house and saving yourself 400g of pack weight.
When Solar Panels ARE Worth It
Solar panels make sense in specific situations:
Camping treks with no tea houses. On routes like Upper Dolpo, Makalu Base Camp via Sherpani Col, or any off-grid camping trek where you carry everything and there is zero charging infrastructure for a week or more, a solar panel is genuinely valuable. When the alternative is zero charging, even the modest output of a moving-pack solar panel matters.
Extended expeditions above base camp. Climbers spending multiple weeks at altitude on peaks like Ama Dablam, Manaslu, or Cho Oyu rely on solar panels at base camp and higher camps. Here, the panel sits stationary all day in above-the-cloud sunshine and can fully charge multiple power banks.
Rest day optimization. If your itinerary includes multiple rest or acclimatization days (two days in Namche, a day in Dingboche, a day in Manang), you can deploy the panel on a south-facing surface for 6 or more hours while you explore nearby. This is the most effective use of a solar panel on a tea house trek.
Multi-device setups. Photographers carrying a mirrorless camera, drone, GoPro, and multiple batteries may burn through a 20,000 mAh bank in two to three days. Adding solar charging on top of tea house charging and a power bank creates a viable three-source system that can sustain heavy electronics use.
Solar Panel Recommendations (If You Do Decide to Bring One)
| Panel | Rated Wattage | Weight | Real-World Output (Moving) | Real-World Output (Stationary) | Cost |
|---|---|---|---|---|---|
| Nitecore FSP100 | 100W | 2,100g | N/A (too heavy to carry) | 50-70W | $200 |
| Goal Zero Nomad 20 | 20W | 510g | 4-8W | 12-16W | $100 |
| Anker 625 | 24W | 710g | 5-10W | 14-18W | $75 |
| BioLite SolarPanel 10+ | 10W | 540g | 2-4W | 6-8W | $80 |
| Nitecore FSP30 | 30W | 430g | 6-12W | 18-24W | $70 |
| RAVPower 21W | 21W | 480g | 4-8W | 12-16W | $45 |
For tea house trekkers who want solar as a supplement, the Nitecore FSP30 offers the best wattage-to-weight ratio at 430g. For camping trekkers who need serious charging capability, the Anker 625 at 24W provides reliable output with USB-C and USB-A ports.
The Hybrid Strategy That Actually Works
The most effective power strategy for photography-focused trekkers on tea house routes is a 20,000 mAh power bank as your primary source, tea house wall charging as your secondary source, and a compact solar panel as a supplement for rest days only. Do not plan your power budget around solar output. Treat it as bonus power. If the sun cooperates, great. If not, your power bank and wall charging cover your needs. This mindset prevents the frustration that comes from counting on solar and getting clouds instead.
Charging Strategy by Trek Length and Devices
A good charging strategy is not just about hardware. It is about behavior: knowing when to charge, what to prioritize, and how to conserve power when supply is limited. Here are proven strategies for different trek profiles.
Strategy 1: Minimalist Phone-Only Setup (5-7 Day Trek)
Hardware: Phone + 10,000 mAh power bank Total weight: Phone (200g) + power bank (150-200g) = 350-400g
This is the lightest viable setup for short treks like Poon Hill, Ghorepani, or lower Langtang. Keep your phone in airplane mode during the day, switch to camera mode for photos, and enable WiFi briefly at tea houses in the evening to send messages and check weather.
Daily routine:
- Morning: Check phone battery level. If above 60%, use phone battery for the day. If below 60%, top off from power bank during breakfast.
- Hiking: Airplane mode with GPS enabled only for periodic navigation checks (5 minutes at a time, not continuous tracking).
- Evening: If tea house charging is free or $1-2, charge phone from wall. Save power bank for higher altitudes.
- Night: Phone and power bank inside sleeping bag.
Expected battery usage: 15-25% phone battery per day in airplane mode with moderate photo use. Power bank provides 1.0-1.5 additional charges. Total self-sufficiency: 5-6 days.
Strategy 2: Standard EBC or Annapurna Setup (10-14 Days)
Hardware: Phone + 20,000 mAh power bank + USB-C cables + multi-port charger Total weight: ~550-650g total electronics weight
This covers the vast majority of trekkers on Nepal's most popular routes. The 20,000 mAh bank provides 3-4 days of self-sufficiency, which is enough to get through the high-altitude sections where charging is expensive and unreliable.
Charging plan for a 12-day EBC trek:
| Days | Location | Strategy | Power Bank Status |
|---|---|---|---|
| 1-2 | Lukla to Namche approach | Charge phone from wall (free or $1) | Save power bank -- keep at 100% |
| 3-4 | Namche Bazaar | Top off everything from wall ($2). Full charge power bank. | 100% |
| 5-6 | Tengboche to Dingboche | Begin using power bank for phone top-offs | ~80% remaining |
| 7 | Dingboche acclimatization | Charge phone from wall if available ($3) | ~70% remaining |
| 8-9 | Dingboche to Lobuche to Gorak Shep | Heavy power bank use. This is the critical section. | ~40% remaining |
| 10 | Gorak Shep / EBC day | Prioritize phone for photos. Minimize other use. | ~25% remaining |
| 11-12 | Descent to Namche | Charge from wall as available. Power bank as backup. | Recharge at Namche |
Strategy 3: Photography-Heavy Setup (Any Duration)
Hardware: Phone + mirrorless camera + 2-3 camera batteries + GoPro + 20,000 mAh power bank + spare camera battery charger (USB) + multi-port wall charger Total weight: 1,200-1,800g total electronics weight
Photographers burn through significantly more power than phone-only trekkers. A mirrorless camera body uses one battery per 200-400 shots, and a full day of shooting in cold conditions can drain two batteries. Add GoPro video and you are looking at 4,000-6,000 mAh of daily consumption across all devices.
Key tactics:
- Carry three camera batteries minimum. Charge one from the power bank while shooting with another.
- Use a USB camera battery charger (Nitecore or similar) that connects to your power bank, not a wall-plug charger.
- Prioritize camera battery charging over phone charging. Your phone lasts longer on airplane mode. Camera batteries are the bottleneck.
- At tea houses, charge the power bank itself from the wall ($3-5). Then use the power bank to charge individual camera batteries during the next day's hike.
- Keep spare camera batteries in an inside jacket pocket against your body. Cold batteries lose capacity rapidly; warm batteries perform at full rating.
Pro Tip
Carry a small multi-port USB-C wall charger (like the Anker Nano II 65W or similar compact GaN charger) instead of multiple individual chargers. A single 65W charger with two USB-C ports can simultaneously charge your power bank and phone from one tea house outlet, which is critical when outlets are scarce and shared among a dozen trekkers. The weight penalty is about 100g for the charger, but you save weight by not carrying separate chargers for each device.
Strategy 4: Extended Remote Trek Setup (15+ Days, Limited Infrastructure)
Hardware: Phone + satellite communicator + 20,000 mAh power bank + 10,000 mAh backup bank + optional small solar panel Total weight: 700-1,100g depending on solar panel
For treks like Upper Dolpo (18-25 days), the Great Himalaya Trail sections, or Makalu Base Camp, charging infrastructure may be nonexistent for a week or more at a stretch. This demands a conservative approach.
Core principles:
- Phone stays in airplane mode except for brief photo bursts and one daily GPS check.
- Satellite communicator (Garmin inReach Mini 2 or similar) handles all communication. Its battery lasts 5-10 days in standard tracking mode.
- Primary power bank reserved for phone and sat communicator. Backup bank is emergency-only reserve.
- If carrying a solar panel, deploy it at every lunch stop and on all rest days. Even partial charges matter on long remote treks.
- Consider a phone with exceptional battery life (Samsung Ultra series, iPhone Pro Max) or a dedicated GPS device with AA lithium battery backup.
Device-Specific Power Tips
Smartphone Optimization at Altitude
Your phone is the most versatile and most power-hungry device in your kit. These settings can double or triple your phone's battery life on trek:
- Airplane mode is non-negotiable above 3,000m. A phone constantly searching for cell signal (which is absent on most trekking routes above Namche or Manang) drains battery 3-5 times faster than airplane mode. Enable airplane mode and turn on WiFi manually only at tea houses.
- Download offline maps before your trek. Apps like maps.me or OsmAnd allow GPS navigation without cell data, using only the phone's GPS chip which is highly power-efficient.
- Reduce screen brightness to 30-40%. At altitude, the thin air and strong UV mean your screen is visible at much lower brightness than at sea level.
- Disable background app refresh. On iPhone: Settings, General, Background App Refresh, Off. On Android: Settings, Battery, Background restriction for non-essential apps.
- Use the camera app directly, not Instagram or other social apps that process and upload in the background.
- Enable battery saver or low power mode as your default setting for the entire trek, not just when battery is low.
- Turn off location services except when actively navigating. GPS is the second-largest battery drain after screen.
Camera Battery Management
Camera batteries are the weak link in a photography trekker's power chain. Unlike phones that charge via USB, many camera batteries require dedicated chargers or charge slowly in-camera. Modern solutions are improving this:
- Buy a USB battery charger (Nitecore makes excellent ones for most camera battery types). This lets you charge camera batteries from your power bank while hiking.
- Carry three batteries minimum for anything above a 5-day trek. Two is the absolute minimum for a short trek.
- Keep spare batteries warm. Store them in an inside pocket against your body. A warm battery at 20 degrees Celsius holds 30-40% more charge than the same battery at minus 10 degrees Celsius.
- Turn off image review and chimping. That 2-second preview after each shot uses the screen, which is the camera's biggest power drain.
- Use the viewfinder, not the rear LCD if your camera has an electronic viewfinder. The rear LCD consumes 2-3 times more power.
GoPro and Action Camera Tips
GoPros are notorious battery hogs, especially in cold weather. The small battery (1,220-1,720 mAh depending on model) drains in 45-90 minutes of continuous recording and loses significant capacity in the cold.
- Carry at least two GoPro batteries and rotate them, keeping the spare warm in a pocket.
- Use the Enduro battery (GoPro's cold-weather battery) if available for your model. It performs significantly better below freezing.
- Record short clips, not continuous video. Ten 30-second clips of key moments are more useful (and vastly more power-efficient) than 30 minutes of continuous trail footage.
- Disable WiFi and GPS on the GoPro. These features drain the small battery rapidly.
Pro Tip
If you are debating between carrying a GoPro and a second power bank, choose the second power bank. A GoPro generates hours of video that most trekkers never edit. Your phone shoots excellent video and can use the power bank for charging. The power bank weighs the same as a GoPro plus two batteries but provides far more utility across all your devices.
Cold Weather Performance and Battery Protection
Cold is the enemy of lithium-ion batteries. Understanding how cold affects your power bank and devices -- and taking simple protective steps -- can effectively increase your usable power by 30-40% on the highest sections of your trek.
How Cold Affects Batteries
Lithium-ion batteries work by moving lithium ions through an electrolyte solution between the anode and cathode. Cold temperatures thicken the electrolyte, slowing ion movement and increasing internal resistance. This has two practical effects: the battery delivers less power (voltage sags under load), and the total usable capacity decreases because the battery reaches its cutoff voltage earlier.
The effect is reversible. A power bank that shows 40% capacity in freezing conditions will recover to its full charge when warmed back to room temperature. No permanent damage occurs from cold discharge. However, charging a lithium-ion battery below 0 degrees Celsius can cause permanent damage through lithium plating on the anode. Never charge a frozen power bank. Warm it first.
Temperature and Capacity Loss
| Temperature | Approximate Usable Capacity | Notes |
|---|---|---|
| 25°C (room temperature) | 100% | Baseline performance |
| 10°C | 90-95% | Minimal impact |
| 0°C | 80-85% | Noticeable reduction |
| -10°C | 65-75% | Significant reduction; common tea house bedroom temp above 4,500m |
| -20°C | 50-60% | Severe reduction; common outdoor temp above 5,000m in autumn/winter |
Practical Protection Strategies
Body heat storage. The simplest and most effective strategy. Keep your power bank in an inside jacket pocket during the day and inside your sleeping bag at night. Your body maintains a consistent 37 degrees Celsius core temperature, which keeps the battery comfortably above its performance cliff.
Insulated case. Wrap your power bank in a wool sock or neoprene sleeve for additional insulation. Some trekkers use small dry bags with a hand warmer packet alongside the power bank. This is overkill for most situations but worthwhile for winter trekking above 5,000m.
Charge during warm periods only. If using a solar panel or tea house outlet, charge your power bank during the warmest part of the day (11am-3pm) when ambient temperatures are highest. This is both safer for the battery chemistry and more efficient.
Never charge a cold battery. If your power bank has been sitting in a minus 15 degrees Celsius bedroom all night, warm it inside your jacket for 30-60 minutes before connecting it to a charging source. Charging below 0 degrees Celsius causes irreversible lithium plating that permanently reduces capacity.
Battery Safety at Altitude
Never puncture, crush, or expose a lithium-ion power bank to extreme heat (above 60 degrees Celsius, such as direct sunlight on a dark surface at altitude). The combination of lower air pressure at altitude and battery damage can cause thermal runaway, which results in fire or explosion. If a power bank becomes swollen, hot to the touch, or emits an unusual odor, place it on a non-flammable surface away from combustible materials and do not use it. Dispose of it properly when you return to Kathmandu.
What to Buy at Home vs Buy in Kathmandu
Buy Before You Leave
Power banks: While power banks are available in Kathmandu electronics shops (New Road, Putalisadak area), the selection of quality brands is limited. Genuine Anker and Nitecore products are uncommon. Many locally available power banks from unknown brands have inflated capacity claims -- a bank labeled "30,000 mAh" may actually contain 15,000-20,000 mAh of cells. Buy your power bank from a reputable retailer at home where you can verify the brand and capacity.
USB-C cables: Quality cables matter for charging speed and reliability. A cheap cable may throttle charging to 5W instead of delivering the 18-45W your power bank supports. Bring cables you trust.
Wall charger: Compact GaN chargers from Anker, Ugreen, or similar brands with USB-C PD output are readily available at home and difficult to find in Kathmandu in their genuine versions.
Available in Kathmandu
Basic power banks: Xiaomi and Realme power banks in the 10,000-20,000 mAh range are widely available and genuine in authorized stores. These are adequate if you forgot to bring one.
USB cables: Standard cables are available everywhere in Thamel and New Road, though quality varies.
Phone cases and screen protectors: Readily available for popular phone models.
Adapters: Nepal uses Type C, D, and M plugs (similar to Indian plugs). Most tea houses also have standard two-pin outlets. A universal adapter from Kathmandu costs $2-3.
Pro Tip
If you arrive in Kathmandu without a power bank, the Xiaomi Mi Power Bank 3 (20,000 mAh) is available at authorized Xiaomi stores on New Road for approximately NPR 3,000-3,500 ($23-27). It is a genuine product with reliable capacity ratings. Avoid the no-brand power banks sold in Thamel tourist shops, which often have exaggerated capacity claims and may lack safety certifications.
Cables, Chargers, and Accessories
The Minimum Cable Kit
- One USB-C to USB-C cable (for power bank to phone, or wall charger to power bank)
- One USB-A to USB-C cable (backup, and for charging from older outlets/power banks with only USB-A output)
- One short cable (15-30cm) for connecting power bank to phone in your pocket while hiking. Long cables tangle and snag.
If you carry a camera or GoPro with a different charging connector, add the appropriate cable. Aim for no more than three total cables.
Wall Charger Selection
A good wall charger makes the difference between a full charge in 90 minutes and a half charge in 4 hours. When tea house outlets are shared among ten trekkers and available for limited hours, charging speed matters.
Our recommendation: A compact GaN charger with at least one USB-C PD port delivering 30W or more. This charges a 20,000 mAh power bank in 3-4 hours and a phone in 60-90 minutes. The Anker Nano II 30W (50g) or Anker 735 65W (120g, dual USB-C) are both excellent choices.
Avoid: Carrying the large wall bricks that come with laptops or older devices. Every gram matters on trek.
Useful Accessories
- Small dry bag (1-2L): Protects electronics from rain, river crossings, and condensation. Weight: 20-30g.
- Wool sock: Free insulation sleeve for your power bank at altitude.
- Cable organizer pouch: Keeps cables untangled and accessible. Weight: 20-50g.
- Headlamp with rechargeable battery: Consolidates your lighting into the USB charging ecosystem, reducing the need for spare AAA batteries. See our headlamp guide for recommendations.
Common Mistakes to Avoid
Mistake 1: Bringing too many devices. Every device you add increases your power budget, weight, and complexity. Ask honestly: will you edit drone footage on trek? Will you use that Kindle when you are exhausted at 4,800m? The lighter your electronics kit, the more reliable your power strategy.
Mistake 2: Assuming solar will cover your needs. Solar is supplementary, not primary. Never build a power budget that depends on solar output. Weather is unpredictable.
Mistake 3: Not testing your setup at home. Charge your power bank fully, then charge your phone from it twice. Note how much capacity the bank shows remaining. This gives you a real-world baseline for your specific devices. Discovering your power bank cannot fully charge your phone twice is better learned at home than at 5,000m.
Mistake 4: Leaving devices in cold rooms overnight. A phone left on a tea house nightstand at minus 10 degrees Celsius may not turn on in the morning. Sleep with your electronics.
Mistake 5: Paying for wall charging at low altitude. Below 3,000m, save your cash. Free or very cheap charging is available. Save your budget for the expensive charges at altitude, or skip wall charging above 4,000m entirely by relying on your power bank.
Mistake 6: Forgetting about your headlamp. A USB-rechargeable headlamp integrates into your power bank system beautifully. A headlamp that requires AAA batteries means carrying spare batteries (extra weight) or risking darkness. If you have not yet chosen a headlamp, see our lighting guide.
Power Planning Worksheet
Use this calculation to determine your exact power bank needs:
Step 1: List your devices and daily consumption in mAh.
| Device | Daily Use (mAh) |
|---|---|
| Phone (airplane mode, moderate photos) | 800-1,200 |
| Phone (active use at tea houses) | 1,500-2,500 |
| GoPro (1-2 hours recording) | 1,200-2,400 |
| Mirrorless camera (one battery) | 1,500-2,500 |
| USB headlamp | 150-300 |
| Satellite communicator | 50-100 |
| Kindle | 50-100 (negligible) |
Step 2: Multiply daily total by the number of days between charging opportunities (typically 2-4 days on popular tea house routes).
Step 3: Divide by 0.55 (accounting for both voltage conversion loss and cold-weather capacity reduction). This gives you the rated power bank capacity needed.
Example: Phone (1,000 mAh/day) + GoPro (1,800 mAh/day) = 2,800 mAh/day. Three days between charges = 8,400 mAh needed. Divide by 0.55 = 15,272 mAh rated capacity needed. A 20,000 mAh bank covers this with comfortable margin.
Frequently Asked Questions
What size battery pack do I need for camping in Nepal?
For a tea house trek where you can pay to charge most nights, a 20,000 mAh battery pack is the sweet spot. For a true camping trek with no charging infrastructure for a week or more (Upper Dolpo, Makalu Base Camp, Great Himalaya Trail sections), carry a 20,000 mAh primary pack plus a 10,000 mAh backup so you have redundancy if one fails. Factor in cold-weather losses: a 20,000 mAh pack delivers only about 10,000-11,000 mAh of usable power below freezing. For unsupported camping treks longer than 15 days, add a compact solar panel as a supplement.
Can I charge my power bank at tea houses on the EBC trek?
Yes, at most tea houses up to Gorak Shep (5,164m), though cost and reliability increase with altitude. At Namche Bazaar, charging a power bank costs approximately $2 and is reliable. At Lobuche and Gorak Shep, expect to pay $4-5 with variable reliability depending on weather and solar conditions. A full charge of a 20,000 mAh bank from a tea house outlet takes 3-5 hours depending on your charger and the tea house power output.
Is a solar charger worth bringing to Nepal?
For most tea house trekkers on standard 10-14 day routes, no. The weight of a quality solar panel (350-500g) equals or exceeds a 20,000 mAh power bank, which provides more reliable power regardless of weather. Solar panels make sense for camping treks with no infrastructure, extended expeditions, or as a supplementary source for photographers with heavy electronics needs. If you bring one, treat it as bonus power, not your primary source.
How much does it cost to charge electronics on the Annapurna Circuit?
Charging costs range from $1-2 at lower elevations (Besisahar, Jagat, Dharapani) to $3-4 at higher stops (Manang, Thorong Phedi, Muktinath). The Thorong La high camp charges $4-5 when charging is available at all. Budget $20-30 total for a 14-day circuit if you charge from the wall regularly. Alternatively, a 20,000 mAh power bank charged fully in Manang and once more in Muktinath can largely eliminate wall charging fees on the high section.
Can I bring a power bank on the flight to Lukla?
Yes, but it must be in your carry-on luggage, not checked baggage. Airlines restrict lithium-ion batteries in the cargo hold. For domestic Nepal flights, the standard 100 Wh limit applies, which accommodates power banks up to approximately 27,000 mAh. Power banks above 100 Wh (most 30,000 mAh models) may be confiscated at security, though enforcement varies. To be safe, choose a bank rated at 99 Wh or less.
How long does a 20,000 mAh power bank last on the EBC trek?
With conservative phone use (airplane mode, 20-30 photos per day, brief evening WiFi at tea houses), a 20,000 mAh bank provides 3-4 full phone charges in warm conditions and 2-3 charges in cold conditions. For a phone-only trekker, this covers 6-10 days of use. Combined with wall charging at Namche and optionally at Dingboche, a single 20,000 mAh bank is sufficient for the entire 12-14 day standard EBC itinerary.
What happens if my power bank dies on trek?
Tea house charging remains available at most stops, even if it is expensive. If your power bank fails completely, you can charge your phone from the wall for $2-$7 per charge at most tea houses up to Gorak Shep. This is expensive but functional. For safety, always keep your satellite communicator (if you have one) charged independently. If you are on a camping trek with no infrastructure, a failed power bank is a serious issue -- this is why we recommend carrying two smaller banks instead of one large one for remote routes.
Should I buy a power bank in Kathmandu or bring one from home?
Bring one from home if possible. Genuine branded power banks (Anker, Nitecore, Baseus) are difficult to find in Kathmandu, and many unbranded options sold in tourist shops have inflated capacity claims. If you must buy in Kathmandu, visit an authorized Xiaomi store on New Road for a genuine Xiaomi Mi Power Bank 3 (20,000 mAh) at approximately NPR 3,000-3,500. Avoid Thamel electronics shops for power banks.
Do portable solar chargers work in cloudy weather?
Poorly. Solar panel output drops 60-80% under heavy cloud cover. A 21W panel that generates 12-16W in direct sunlight may produce only 2-4W under clouds, which is barely enough to trickle-charge a phone and insufficient for a power bank. If your trek coincides with extended overcast periods (common in spring and during monsoon shoulder season), a solar panel provides minimal benefit.
Can I charge a laptop on trek?
Technically yes, but it is impractical for most trekkers. A laptop requires significant power -- typically 50-100W and 60-100 Wh per full charge. This would drain a 20,000 mAh power bank completely for a single charge (and some power banks cannot deliver enough sustained power for laptop charging). Wall charging a laptop at a tea house costs $5-10 at higher altitudes. Unless you have a professional need that cannot wait until you return to Kathmandu, leave the laptop behind.
How do I keep my power bank warm at high altitude?
The three most effective methods: First, keep it in an inside jacket pocket during the day where body heat maintains it above 20 degrees Celsius. Second, sleep with it inside your sleeping bag at night. Third, wrap it in an insulating layer (wool sock, neoprene sleeve, or small fleece pouch) when it is in your backpack. Avoid leaving it in the outer mesh pocket of your pack where it is exposed to wind and cold. These simple habits recover 30-40% of the capacity that cold temperatures would otherwise steal.
Is fast charging worth having on a trekking power bank?
Yes, and it matters more on trek than at home. When you have 30 minutes at a tea house outlet shared with other trekkers, a 45W USB-C PD power bank charges 2-3 times faster than a 10W USB-A bank. The same applies when charging your phone from the power bank: fast charging means less time with the power bank connected and more time with both devices operating independently. Look for at least 18W USB-C PD output; 30-45W is ideal.
What about hand-crank chargers or thermoelectric chargers?
Hand-crank chargers (like the Eton FRX5) generate tiny amounts of power -- approximately 1-2 watts with vigorous cranking -- and are impractical for trekking. Thermoelectric chargers (like the BioLite CampStove) require a fire, which is impractical on most Nepal treks where wood fires are prohibited in national park areas. Neither technology is a viable primary or secondary charging solution. Stick with a power bank and optional solar panel.
How should I dispose of a damaged power bank in Nepal?
Do not discard a damaged, swollen, or malfunctioning power bank in regular waste in Nepal. Lithium-ion batteries are hazardous waste and can cause fires in landfills. Carry the damaged bank back to Kathmandu and dispose of it at an electronics recycling center. Several shops on New Road accept used batteries. If the bank is severely damaged (punctured, leaking, or extremely swollen), transport it in a fireproof bag or metal container and keep it away from other flammable materials.
Final Recommendations by Trekker Profile
Budget trekker, phone only, short trek: 10,000 mAh Anker 523 ($20, 220g). Charge from tea house walls at low altitude. Total power gear weight: 250g.
Standard trekker, 12-day EBC or Annapurna: 20,000 mAh Anker PowerCore III ($32, 340g). One spare USB-C cable. Compact 30W wall charger. Total power gear weight: 450g.
Photography trekker, multiple devices: 20,000 mAh Nitecore NB20000 ($45, 284g). USB camera battery charger. 65W dual-port wall charger. Three camera batteries. Total power gear weight: 600-800g.
Extended remote trek, 15+ days: 20,000 mAh primary + 10,000 mAh backup ($60-75 combined, 500g combined). Optional compact solar panel for rest days. Total power gear weight: 600-1,000g.
Your power strategy is only as good as your discipline in executing it. The best power bank in the world does not help if you leave it in a cold bedroom all night or forget to charge it when wall power is available. Plan before you go, conserve throughout the trek, and you will never miss a sunrise shot to a dead battery.
Once your power and charging plan is sorted, round out your kit with the complete trekking gear list and a Nepal trekking packing list. If you would rather not haul heavy electronics from home, our guide on renting vs buying gear in Kathmandu covers what is genuinely worth packing.