


Cho La Pass (5,420m/17,782ft) is the dramatic middle passage of the legendary Three Passes Trek, connecting the Everest Base Camp trail to the stunning turquoise lakes of the Gokyo Valley. Unlike the other two passes, Cho La involves genuine glacier travel, making it the most technical and weather-dependent crossing in the Everest region's classic triumvirate.
This comprehensive guide covers everything you need to successfully navigate Cho La Pass: the technical realities of glacier crossing, optimal timing strategies, essential gear requirements, detailed route descriptions from both directions, emergency protocols, and the critical weather windows that determine safe passage.
The essential truth about Cho La: This isn't a simple high-altitude walk. The pass involves scrambling over rocky terrain, navigating a crevassed glacier, and crossing steep snow slopes that can become treacherous in poor conditions. Respect the mountain, choose your weather window carefully, and you'll be rewarded with one of the most exhilarating experiences in Himalayan trekking.
Quick Facts: Cho La Pass at a Glance
5,420m (17,782ft)
Moderate-Difficult (Class 2-3)
6-9 hours (direction dependent)
8-9 km depending on route
1.5-2 km, crevasse risk
October-November, April-May
Dzongla (4,830m) or Dragnag (4,700m)
Yes, especially for glacier
Essential October-May
85-90% in good weather
Understanding Cho La Pass: What Makes It Special
Cho La sits at the heart of the Three Passes circuit, serving as the critical link between the classic Everest Base Camp route and the ethereal Gokyo Lakes. While Kongma La and Renjo La are higher and lower respectively, Cho La presents unique challenges that set it apart from any other pass in the region.
The Three Passes Context
The Three Passes Trek is often called the ultimate Everest region adventure, circumnavigating the Khumbu with crossings of:
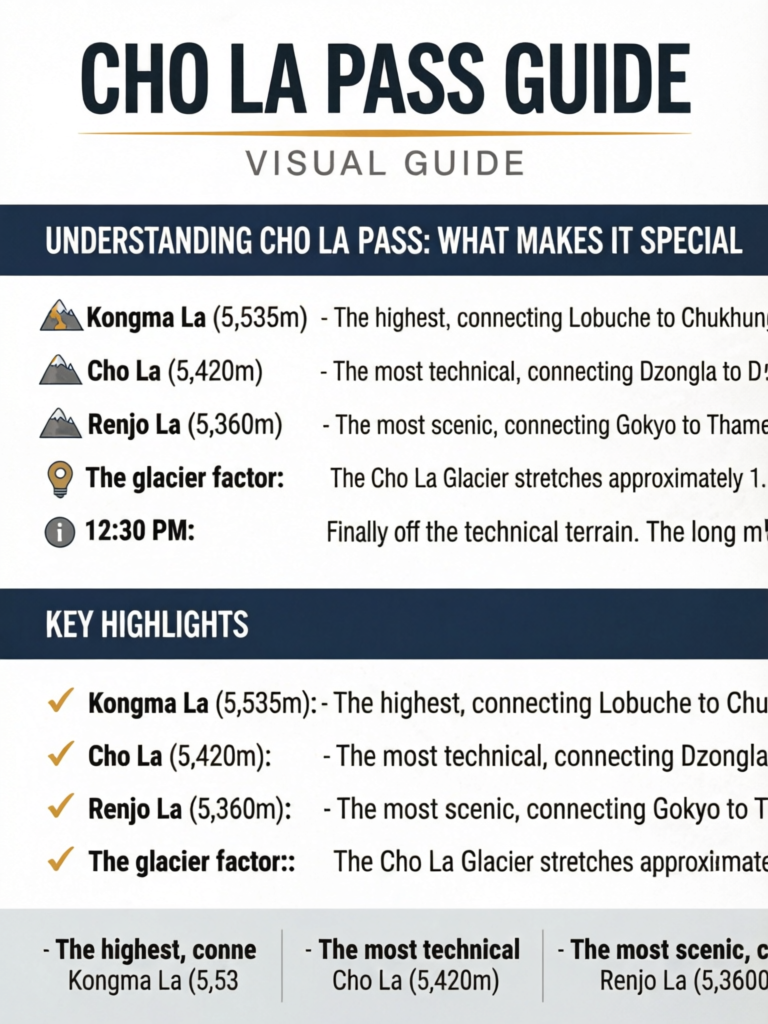
- Kongma La (5,535m) - The highest, connecting Lobuche to Chukhung
- Cho La (5,420m) - The most technical, connecting Dzongla to Dragnag/Gokyo
- Renjo La (5,360m) - The most scenic, connecting Gokyo to Thame
Cho La occupies the middle position both geographically and in terms of difficulty. It's more technical than Renjo La but involves less sustained climbing than Kongma La. What distinguishes Cho La is the glacier crossing—a genuine taste of mountaineering that most trekking passes don't require.
Why Cho La Demands Respect
The glacier factor: The Cho La Glacier stretches approximately 1.5-2 kilometers across the pass zone. While not steep, it harbors crevasses that can be hidden under fresh snow. In 2019, two trekkers required rescue after falling into a crevasse during poor visibility—a stark reminder that this isn't typical trekking terrain.
Weather sensitivity: Cho La is closed more frequently than any other major Everest pass due to:
- Fresh snowfall obscuring the glacier route
- Whiteout conditions making navigation impossible
- Afternoon cloud cover creating dangerous visibility
- Ice formation on the rocky approach sections
Commitment required: Once you begin the crossing, there's no easy retreat from the glacier section. The approach involves scrambling that's difficult to reverse under pressure, and the glacier must be crossed completely—no halfway options exist.
Cho La Closure Reality
During the 2024 autumn season, Cho La was closed for approximately 15 days total due to fresh snow and poor visibility. The longest single closure lasted 5 consecutive days in late October following an unseasonal storm. Always build buffer days into your itinerary when planning a Cho La crossing.
Technical Requirements: Skills and Fitness
Physical Demands
Cho La requires more than standard trekking fitness. The crossing involves:
Cardiovascular endurance: 6-9 hours of sustained effort at extreme altitude, including 700-800m of elevation gain depending on direction
Lower body strength: Steep rocky scrambles demand strong legs, particularly quadriceps for the descent
Core stability: Glacier travel on uneven ice and snow requires balance and core engagement
Mental stamina: The commitment factor and technical terrain require psychological resilience
Minimum fitness benchmarks:
- Comfortable hiking 8+ hours at altitude
- Able to climb 800m elevation gain in a single day
- Experience with rocky, uneven terrain
- No fear of exposure on steep slopes
Technical Skills
Required skills:
- Basic crampon technique (flat-footing on moderate slopes)
- Confidence on exposed rocky terrain
- Ability to follow a guide across a glacier
- Self-arrest awareness (though rarely needed)
Helpful but not essential:
- Previous glacier experience
- Rope work knowledge
- Navigation in limited visibility
Pre-Trip Crampon Practice
If you've never worn crampons before, practice at home before your trek. Rent a pair and walk around on grass, concrete, and if possible, ice. Understanding how crampons grip and how to walk without tripping on your own points will make the glacier crossing significantly less stressful. Most trekking agencies in Kathmandu can arrange a brief crampon lesson before your trek begins.
Acclimatization Requirements
Never attempt Cho La without proper acclimatization. The pass sits at 5,420m—higher than any point on the standard EBC trek except Kala Patthar.
Minimum acclimatization before attempting Cho La:
- At least 2 nights at 4,000m+
- At least 1 night at 4,500m+
- Ideally, previous ascent to 5,000m+ (Kala Patthar or Gokyo Ri)
- No AMS symptoms in the 48 hours before crossing
Recommended approach:
- Complete EBC first, then cross to Gokyo (you'll be well-acclimatized)
- Or spend 2-3 nights in Gokyo with Gokyo Ri ascent before crossing to EBC side
Detailed Route Description: Both Directions
Direction 1: Dzongla to Dragnag (East to West)
This is the more popular direction, typically used by trekkers completing EBC first before heading to Gokyo.
Starting point: Dzongla (4,830m) Ending point: Dragnag (4,700m) or Gokyo (4,750m) Total time: 7-9 hours to Dragnag, add 1.5 hours for Gokyo Elevation profile: +590m ascent, -720m descent to Dragnag
Stage 1: Dzongla to Base of Rocky Section (1.5-2 hours)
Depart Dzongla in pre-dawn darkness (4:00-5:00 AM start recommended). The trail climbs gradually northwest through rocky moraine terrain. The path is generally well-marked with cairns, though can be obscured after fresh snow.
Key landmarks:
- Small frozen lake (seasonal) at approximately 5,000m
- Views of Cholatse and Taboche peaks to your left
- Steepening terrain indicating approach to the rocky climb
Stage 2: Rocky Scramble (1.5-2 hours)
The most technical non-glacier section involves Class 2-3 scrambling up a rocky gully. In icy conditions, this section can be genuinely challenging.
What to expect:
- Large boulder field requiring hands-on scrambling
- Some exposure on the left side—stay right when possible
- Fixed ropes in the steepest section (check condition before relying on them)
- Altitude makes every move more difficult
Stage 3: Cho La Glacier Crossing (1.5-2 hours)
The glacier section begins at approximately 5,350m and continues to the pass itself.
Critical glacier navigation:
-
Following the route: In good conditions, a well-worn track crosses the glacier. In fresh snow, this disappears completely. Guides are essential after snowfall.
-
Crevasse awareness: Most crevasses run perpendicular to the direction of travel. Watch for slight depressions or changes in snow color that indicate hidden crevasses.
-
Crampon technique: Use the flat-foot technique, keeping all crampon points in contact with the ice. Don't lean forward as you would on steep terrain.
-
Rope considerations: Some guided groups rope up for the glacier section. This is advisable after fresh snow or in poor visibility.
Stage 4: The Pass (5,420m)
The pass itself is a broad saddle marked by prayer flags and cairns. On clear days, views include:
- Ama Dablam to the southeast
- Cholatse directly south
- The Gokyo Valley stretching northwest
- Ngozumpa Glacier (largest in Nepal) below
Allow 15-30 minutes at the pass for photos and rest before the challenging descent.
Stage 5: Descent to Dragnag (2-3 hours)
The western descent is steeper and more technical than the eastern approach.
Descent sections:
-
Steep snow/ice slope: Immediately below the pass, a 200m steep section requires careful crampon work. In icy conditions, this is the most dangerous part of the entire crossing.
-
Rocky traverse: After the initial steep section, traverse right (north) across rocky terrain. Route-finding can be confusing here.
-
Moraine descent: Long, knee-punishing descent through loose moraine to Dragnag.
Arrival options:
- Dragnag (4,700m): Basic tea houses, 7-9 hours from Dzongla
- Gokyo (4,750m): Better facilities, add 1.5 hours from Dragnag
Direction 2: Dragnag/Gokyo to Dzongla (West to East)
Less common but equally valid, this direction involves more sustained climbing but an easier descent.
Starting point: Dragnag (4,700m) or Gokyo (4,750m) Ending point: Dzongla (4,830m) Total time: 6-8 hours from Dragnag Elevation profile: +720m ascent from Dragnag, -590m descent
Advantages of west-to-east:
- Steeper section tackled on ascent (easier than descending)
- Morning sun on the glacier earlier
- Less crowded (most trekkers go opposite direction)
Disadvantages:
- More total elevation gain
- Rocky descent can be hard on knees
- Less time pressure (the difficult bits come first)
Which Direction Is Better?
For most trekkers, the east-to-west direction (Dzongla to Gokyo) is preferable because:
- You arrive at the technical descent section earlier in the day when conditions are best
- The EBC-first itinerary provides better acclimatization
- The psychological boost of having EBC completed helps with the challenging crossing
However, if you're doing the Three Passes clockwise (Renjo La first, then Gokyo, then Cho La), the west-to-east direction works well and the steeper ascent isn't as problematic as descending it.
Timing and Weather: The Critical Factor
Optimal Crossing Times
Best time of day:
- Depart: 4:00-5:00 AM
- Reach pass: 9:00-11:00 AM
- Complete crossing: 12:00-2:00 PM
Why early starts matter:
-
Frozen conditions: The glacier and snow slopes are firmest in early morning. By afternoon, softening snow increases crevasse danger.
-
Weather window: Clouds typically build from midday. The pass should be crossed before visibility deteriorates.
-
Time buffer: Early starts provide margin for delays, allowing retreat if necessary.
-
Daylight margin: In autumn/spring, you have about 11 hours of daylight. A 4 AM start ensures completion well before dark.
Seasonal Considerations
Peak autumn (October-November):
- Generally stable weather with clear mornings
- Snow possible, especially late October onwards
- Coldest nighttime temperatures (-10 to -15°C at Dzongla)
- Most crowded period—expect 20-50 people crossing daily
Spring (April-May):
- Warmer temperatures but more variable weather
- Afternoon cloud/precipitation common
- Longer days provide more flexibility
- Less crowded than autumn
Winter (December-February):
- Pass often closed for extended periods
- Extreme cold (-20°C possible)
- Excellent visibility on clear days
- Very few trekkers—may need to break trail
Monsoon (June-September):
- Not recommended—heavy snow, poor visibility
- Extremely high crevasse danger
- Tea houses may be closed
- Route often impassable
Weather Assessment Protocol
Before crossing, assess:
-
Sky conditions at 4 AM: Clear stars = good sign. Cloud cover already present = concerning.
-
Wind at Dzongla: Strong winds overnight often indicate instability. If your tent/room was buffeted all night, conditions on the pass will be severe.
-
Fresh snow: Any snow that fell in the previous 24 hours significantly increases risk. Wait 1-2 days for consolidation.
-
Local intelligence: Ask tea house owners and guides who returned from the pass. They have the most current information.
Go/No-Go Decision Framework:
| Condition | Recommendation |
|---|---|
| Clear sky, no wind, no fresh snow | GO - Optimal conditions |
| Partial cloud, light wind | GO - But start extra early |
| Heavy cloud, moderate wind | WAIT - Likely to deteriorate |
| Fresh snow (less than 24 hours) | WAIT - Crevasse danger elevated |
| Whiteout/heavy precipitation | NO GO - Extremely dangerous |
Never Push Through Bad Weather
The single biggest mistake on Cho La is attempting the crossing in marginal conditions because of schedule pressure. The pass will still be there tomorrow. Your life is not worth a tight itinerary.
In 2018, a trekker died after getting lost in whiteout conditions on the glacier. He had been warned by his tea house owner not to attempt the crossing that day but proceeded anyway to maintain his schedule. His body was found 200m off-route, having fallen into a crevasse.
If in doubt, wait.
Essential Gear for Cho La
Required Equipment
Footwear:
- Sturdy trekking boots with stiff soles (crampon-compatible)
- Gaiters (essential for snow protection)
Traction:
- Crampons (10-point minimum, 12-point preferred)
- Trekking poles with snow baskets
Clothing:
- Full down jacket (temperatures can be -15°C at the pass)
- Windproof shell (wind chill severe on exposed sections)
- Insulated gloves (bring backup pair)
- Balaclava or face protection
- High-quality sunglasses (Category 4, side shields ideal)
Safety:
- Headlamp with fresh batteries (pre-dawn start)
- Emergency shelter/bivy (ultralight emergency)
- Basic first aid including blister treatment
- Whistle and small mirror (emergency signaling)
Navigation:
- Downloaded offline maps (Maps.me, Gaia GPS)
- Compass (phone compasses can fail in cold)
Optional but Recommended
- Ice axe (for self-arrest if you know how to use it)
- Rope (guides may provide for glacier section)
- Thermos with hot drink
- High-energy snacks accessible without removing pack
- Hand warmers
Gear Rental in Khumbu
If you don't have crampons or other technical gear, they're available for rent:
Namche Bazaar: Best selection and prices
- Crampons: NPR 300-500/day
- Ice axes: NPR 200-300/day
- Down jackets: NPR 400-600/day
Lobuche/Gorak Shep: Limited selection, higher prices Gokyo: Very limited options
Check Crampon Compatibility
Before leaving Namche, verify your crampons fit your boots properly. Strap-on crampons work with any stiff boot, but step-in crampons require specific sole compatibility. Nothing is worse than discovering a poor fit at 5,000m in the dark.
Camping and Tea House Options
Eastern Side (Dzongla)
Dzongla (4,830m) - The standard staging point for eastbound crossings
Tea houses available:
- Cho La Pass Guest House - Larger, better facilities
- Dzongla Lodge - More basic but friendly
- Mountain View Lodge - Good dal bhat
Capacity: Approximately 40-60 beds total Prices: NPR 500-800 for room, NPR 700-900 for dal bhat Facilities: Basic rooms, shared toilets, charging available (NPR 300-500)
Important: In peak season, Dzongla fills completely. Arrive by 2 PM to secure a bed. Many trekkers are stuck on the floor or must continue to Lobuche if they arrive late.
Camping alternative: Flat camping spots available near the lodges. Cold and exposed but a backup if lodges are full.
On the Pass
No overnight options on Cho La itself. The crossing must be completed in a single day.
Emergency bivouac areas exist on both sides of the pass, but these are last-resort situations only. If you're forced to bivouac, survival depends on having proper emergency gear.
Western Side Options
Dragnag (4,700m) - First village after crossing from east
Tea houses:
- Dragnag Guest House
- Himalayan Lodge
Capacity: Approximately 20-30 beds Character: Very basic, limited menu options Best for: Tired trekkers who can't face another 1.5 hours to Gokyo
Gokyo (4,750m) - Primary destination on western side
Tea houses (many options):
- Gokyo Resort - Best facilities in town
- Namaste Lodge - Popular with trekkers
- Himalayan Lodge - Good value
Capacity: 150+ beds across multiple lodges Facilities: Hot showers, varied menu, comfortable dining rooms Recommendation: Push to Gokyo if you have energy—the lakeside setting and better facilities are worth the extra effort
Safety Protocols and Emergency Response
Before the Crossing
- Inform your tea house: Tell your lodge owner your plans and expected arrival time at the other side
- Register crossing: Some lodges maintain informal crossing logs
- Buddy up: If trekking solo, partner with other trekkers for the glacier section
- Weather check: Final assessment at 4 AM before departure
- Full charge: Ensure phone and GPS devices are fully charged
During the Crossing
Communication protocol:
- Stay within sight of other trekkers when possible
- Whistle signals: 3 blasts = emergency
- Don't proceed ahead of guides on glacier section
Turn-back triggers:
- Visibility drops below 50m
- You can't identify the route ahead
- Signs of severe weather developing
- Any member of your group showing AMS symptoms
- Equipment failure (crampon breakage, etc.)
Emergency Contacts
Himalayan Rescue Association (HRA):
- Pheriche clinic: +977-1-4440293
- Gokyo seasonal post (autumn only)
Helicopter evacuation:
- Coordinate through your insurance company's 24/7 line
- Secondary: Contact through tea house owner's satellite phone
- Evacuation cost: $3,000-5,000 USD
Crevasse Fall Response
If someone falls into a crevasse:
- Do not approach the hole—the edge may collapse
- Shout to assess consciousness of the fallen person
- Mark the location with trekking poles or bright gear
- Send for help immediately—you cannot perform crevasse rescue without proper equipment and training
- Do not attempt to pull them out unless you have a rope and rescue training
Most crevasse falls on Cho La are partial (person doesn't fall completely in) and the victim can climb out with assistance. Full crevasse falls require professional rescue.
Insurance Requirements
Mandatory coverage for Cho La:
- Helicopter evacuation to at least $10,000
- High-altitude coverage to 6,000m minimum
- Emergency medical treatment abroad
- Repatriation coverage
Recommended insurers:
- Global Rescue
- World Nomads (verify altitude limit)
- IMG (International Medical Group)
Frequently Asked Questions
Planning Your Cho La Crossing: Sample Itineraries
Option 1: EBC First, Then Gokyo (Most Popular)
| Day | Route | Altitude | Notes |
|---|---|---|---|
| 1-9 | Standard EBC trek | Various | Complete EBC, Kala Patthar |
| 10 | Lobuche to Dzongla | 4,830m | Short day, 3-4 hours |
| 11 | Dzongla to Gokyo via Cho La | 4,750m | 8-10 hours |
| 12 | Gokyo rest/Gokyo Ri | 5,357m | Sunrise at Gokyo Ri |
| 13-15 | Return via Namche | Various | Standard return route |
Option 2: Gokyo First, Then EBC
| Day | Route | Altitude | Notes |
|---|---|---|---|
| 1-4 | Lukla to Gokyo | Various | Via Namche, Dole, Machhermo |
| 5 | Gokyo rest/Gokyo Ri | 5,357m | Acclimatization |
| 6 | Gokyo to Dzongla via Cho La | 4,830m | 8-10 hours |
| 7 | Dzongla to Lobuche | 4,940m | Short day, 2-3 hours |
| 8-12 | EBC circuit | Various | Gorak Shep, EBC, Kala Patthar |
Option 3: Full Three Passes Trek
| Day | Route | Pass | Notes |
|---|---|---|---|
| 1-5 | Lukla to Chukhung | - | Via Namche, Tengboche |
| 6 | Kongma La crossing | 5,535m | Chukhung to Lobuche |
| 7 | Lobuche to Dzongla | - | Rest before Cho La |
| 8 | Cho La crossing | 5,420m | Dzongla to Gokyo |
| 9 | Gokyo rest | - | Gokyo Ri optional |
| 10 | Renjo La crossing | 5,360m | Gokyo to Lungden |
| 11-14 | Return to Lukla | - | Via Thame, Namche |
The Cho La Experience: What to Expect
Crossing Cho La is one of the most memorable experiences in Himalayan trekking. Here's what the day typically feels like:
3:30 AM: Alarm sounds in the freezing Dzongla tea house. You dress in every layer you own, eat a quick breakfast of porridge or chapati, and head into the darkness.
4:30 AM: Headlamp beams dance across the moraine as your group begins the climb. The cold is intense—perhaps -12°C—but you're generating heat with the effort.
6:00 AM: First light reveals the scale of the terrain ahead. The rocky gully looms above, and you can see the early starters already scrambling up the boulders.
7:30 AM: After challenging scrambling, you emerge onto the glacier. Crampons go on. The sun is hitting the peaks above, creating an extraordinary alpine glow. You rope up with your group.
9:00 AM: The glacier seems to stretch forever, but you're making steady progress. You can see the prayer flags at the pass now—maybe 45 minutes more.
9:45 AM: The pass. You're standing at 5,420m, surrounded by an amphitheater of peaks. The Gokyo lakes glitter far below, impossibly turquoise against the grey moraine. You take photos, say a small prayer, eat some chocolate.
10:30 AM: The descent begins. The initial steep section demands full concentration—one crampon point at a time, trekking poles planted firmly.
12:30 PM: Finally off the technical terrain. The long moraine slog to Dragnag begins. Your legs are tired, but the hard part is done.
2:00 PM: Dragnag appears. You could stop here, but Gokyo's lakeside setting beckons.
3:30 PM: Gokyo at last. You drop your pack at a tea house, order a celebratory beer (NPR 700 at altitude!), and watch the afternoon light play on the lake. You crossed Cho La.
Related Resources
Final Thoughts: Respecting Cho La
Cho La Pass isn't the highest, longest, or most famous crossing in the Himalayas—but it may be one of the most satisfying. The combination of technical challenge, genuine glacier travel, and the stunning reward of the Gokyo Valley creates an experience that elevates your Nepal trek from excellent to unforgettable.
Approach Cho La with respect. Train adequately, acclimatize properly, choose your weather window carefully, and bring the right gear. Don't let schedule pressure override safety judgment. The pass will still be there tomorrow if today isn't right.
For those who prepare well and wait for good conditions, Cho La delivers one of trekking's great experiences: the moment when skill, preparation, and mountain conditions align, and you stand on that prayer-flag-festooned saddle with the world spread out below you in every direction.
That's what brings trekkers back to the high passes of Nepal, year after year. That's what Cho La offers—if you're ready for it.