


Kongma La (5,535m/18,159ft) stands as the highest and most demanding of the three legendary passes that encircle the Khumbu region. While less famous than Cho La's glacial crossing, Kongma La presents the greatest pure altitude challenge in the Three Passes circuit—reaching heights that surpass even Everest Base Camp by over 300 meters.
This comprehensive guide examines everything required to successfully navigate Kongma La: honest difficulty assessment, critical acclimatization protocols, detailed route descriptions from both directions, technical section analysis, timing strategies, and the alternative approaches available when conditions or fitness don't align with this demanding crossing.
The truth about Kongma La: This pass filters out unprepared trekkers. The sustained altitude, steep rocky terrain, and remote location between Lobuche and Chukhung create a challenging day that rewards only those who arrive properly acclimatized and physically prepared. It's not the hardest technical crossing in Nepal, but it may be the most demanding on your body.
Quick Facts: Kongma La at a Glance
5,535m (18,159ft)
Difficult (Strenuous)
8-11 hours total
10-11 km
~900m from Lobuche, ~800m from Chukhung
October-November, April-May
Rocky scramble, some exposure
No active glacier crossing
70-80% (lower than Cho La)
Strongly advised
Understanding Kongma La: The Highest Challenge
The Three Passes Hierarchy
Kongma La occupies a unique position in the Three Passes circuit. At 5,535m, it exceeds both Cho La (5,420m) and Renjo La (5,360m) by significant margins. This altitude difference matters enormously at extreme elevation, where every additional 100 meters dramatically increases physiological stress.
Pass comparison:
| Pass | Elevation | Technical Difficulty | Primary Challenge |
|---|---|---|---|
| Kongma La | 5,535m | Moderate (rock scramble) | Extreme altitude |
| Cho La | 5,420m | High (glacier crossing) | Technical terrain |
| Renjo La | 5,360m | Low-Moderate | Route length |
Why Kongma La Has the Lowest Success Rate
Statistics from guided trekking companies reveal that approximately 20-30% of trekkers who plan to cross Kongma La ultimately skip it or fail to complete the crossing. This is significantly higher than Cho La (10-15% failure) or Renjo La (5-10%). The reasons are revealing:
1. Altitude effects (50% of failures)
At 5,535m, the oxygen availability is approximately 50% of sea level. Even well-acclimatized trekkers experience:
- Severely reduced exercise capacity
- Impaired decision-making
- Extreme fatigue on technical terrain
- Higher AMS symptom rates
2. Underestimated difficulty (25% of failures)
Kongma La doesn't have Cho La's glacier mystique. Many trekkers assume "it's just a high pass" without understanding the sustained nature of the climb. The 900m elevation gain from Lobuche—much of it on rocky, exposed terrain—exhausts trekkers who haven't trained for this intensity.
3. Poor weather (15% of failures)
Kongma La's exposed saddle catches weather from multiple directions. High winds, sudden snow, and whiteout conditions occur more frequently than at lower passes.
4. Inadequate acclimatization (10% of failures)
Trekkers who rush to Lobuche without proper acclimatization suffer badly on Kongma La day. The pass itself is higher than most people's previous maximum altitude.
Kongma La Altitude Reality Check
If you struggled at Kala Patthar (5,545m) or felt significant AMS symptoms at Gorak Shep, Kongma La will be extremely difficult. The pass is only 108m lower than Kala Patthar, but you'll spend 2-3 hours at this altitude rather than the 30-60 minutes typical of a Kala Patthar visit.
Honest self-assessment: If you experienced more than mild headache at 5,300m+, consider:
- Taking an extra acclimatization day before attempting Kongma La
- Using the alternative low route via Pokalde Base Camp
- Skipping Kongma La and connecting Lobuche to Chukhung via Dingboche
There's no shame in choosing a safer option. Living to trek another day matters more than completing every pass.
Difficulty Assessment: What You'll Face
Physical Demands
Kongma La requires peak fitness for high-altitude trekking. The day involves:
Cardiovascular load:
- 8-11 hours of sustained effort
- 900m elevation gain (Lobuche direction)
- All exertion above 4,600m
Muscular demands:
- Steep rocky terrain requiring quad and glute strength
- Technical downclimbing taxing stabilizer muscles
- Extended duration depleting glycogen reserves
Altitude stress:
- 3+ hours above 5,300m
- Peak exertion at ~5,500m
- Significantly reduced oxygen for muscle function
Benchmark fitness requirements:
- Ability to hike 10+ hours at moderate altitude
- Comfortable with 1,000m+ elevation gain days
- Experience on rocky, uneven terrain
- Strong lower body (especially for descent)
Technical Terrain Analysis
Unlike Cho La's glacier, Kongma La presents different technical challenges:
Rocky scrambling (Class 2-3): The approach from both sides involves sustained scrambling over large boulders and rocky terrain. While no ropes are typically needed, you'll use your hands frequently for balance and occasionally for actual climbing moves.
Exposure: Several sections, particularly near the pass, have significant exposure—steep drops to one side that increase psychological difficulty. Trekkers with fear of heights may find these sections challenging.
Route finding: The trail is less defined than other Everest region passes. Cairns mark the route, but in poor visibility or after fresh snow, finding the correct line requires experience.
Scree and loose rock: Both the ascent and especially the descent involve loose scree that can cause slips and ankle injuries. Trekking poles are essential, not optional.
Grading Comparison
How does Kongma La compare to other Nepal trekking challenges?
| Trek/Pass | Difficulty | Primary Challenge |
|---|---|---|
| Poon Hill | Easy | Short, well-marked |
| ABC Trek | Moderate | Altitude (4,130m) |
| EBC Trek | Moderate-Difficult | Altitude (5,364m) |
| Thorong La | Difficult | Altitude (5,416m), length |
| Cho La | Difficult | Technical glacier |
| Kongma La | Very Difficult | Extreme altitude + terrain |
| Mera Peak | Mountaineering | Technical climbing |
Kongma La sits at the upper end of trekking difficulty—harder than standard Everest treks but not requiring mountaineering skills.
Acclimatization: The Non-Negotiable Foundation
Minimum Acclimatization Profile
Absolute minimum before attempting Kongma La:
- 4+ nights above 4,000m
- 2+ nights above 4,500m
- 1+ ascent above 5,000m (Kala Patthar ideal)
- 48 hours symptom-free at current altitude
Recommended profile:
- Complete EBC trek including Kala Patthar before attempting
- Extra rest day at Dingboche or Lobuche
- Previous altitude experience (ideally 5,500m+)
Why EBC First Makes Sense
The most common Three Passes itinerary places Kongma La second (after EBC, before Cho La) for good reasons:
1. Natural acclimatization progression
By the time you reach Lobuche from EBC, you've spent:
- 2-3 nights at 4,000-4,400m (Namche, Pangboche)
- 2-3 nights at 4,400-4,900m (Dingboche, Lobuche)
- Peak altitude of 5,364m (EBC) or 5,545m (Kala Patthar)
This progression perfectly prepares your body for Kongma La's 5,535m.
2. Familiar high altitude
If you've stood on Kala Patthar, Kongma La feels slightly less extreme. The psychological benefit of knowing you've been higher matters.
3. Recovery time
The 1-2 days between EBC/Kala Patthar and Kongma La allows recovery while maintaining acclimatization.
The Kala Patthar Test
Use your Kala Patthar experience as a Kongma La predictor:
Good signs (proceed with confidence):
- Reached summit with only mild fatigue
- No headache or nausea
- Recovered quickly after descending
- Felt strong throughout the climb
Concerning signs (consider extra rest day):
- Significant fatigue before reaching top
- Mild-moderate headache at altitude
- Took longer than expected
- Needed full day to recover
Warning signs (strongly consider alternative route):
- Unable to reach Kala Patthar summit
- Moderate-severe AMS symptoms
- Persistent symptoms after descending
- General weakness at altitude
Be honest with yourself. Kongma La will be harder than Kala Patthar, not easier.
Acclimatization Day Options
If you need an extra day before Kongma La, consider:
At Lobuche:
- Hike toward Kongma La and ascend partway (to ~5,200m) before returning
- Rest completely if showing any AMS signs
- Hydrate aggressively (4+ liters)
At Dingboche (backtrack option):
- Return to Dingboche (4,410m) for a lower sleep
- Better recovery but adds a day to itinerary
- Consider if you had significant symptoms at Lobuche
At Gorak Shep (forward option):
- If coming from EBC, consider extra night at Gorak Shep
- Very high (5,164m) so only if acclimatizing well
- Shorter next day to Lobuche
Detailed Route Description: Both Directions
Direction 1: Lobuche to Chukhung (West to East)
This is the most common direction, used by trekkers who've completed EBC and are continuing the Three Passes circuit.
Starting point: Lobuche (4,940m) Ending point: Chukhung (4,730m) Total time: 9-11 hours Elevation profile: +595m to pass, -805m to Chukhung
Stage 1: Lobuche to Kongma Dingma (2-3 hours)
Departure: 4:00-5:00 AM recommended
The day begins with a gradual climb southeast from Lobuche toward the Khumbu Glacier's lateral moraine. The trail is reasonably defined but traverses rocky terrain even in these early stages.
Route details:
- Cross small stream (may be frozen early morning)
- Climb moraine ridge with views of Khumbu Glacier
- Traverse undulating terrain toward Kongma Dingma
- Pass small seasonal lakes (tarns)
Key landmarks:
- Khumbu Glacier to your right
- Nuptse wall becoming prominent
- Cairns marking the route
Stage 2: Kongma Dingma to Pass Approach (2-3 hours)
The terrain steepens significantly as you approach the pass. This section involves:
Technical elements:
- Large boulder fields requiring scrambling
- Steeper gradient (15-25% incline)
- Some sections with exposure to left
- Loose scree demanding careful foot placement
Challenges:
- Altitude effects becoming noticeable (5,200m+)
- Physical fatigue accumulating
- Route-finding if visibility is poor
Key point: At approximately 5,300m, the route makes a decisive turn east toward the pass saddle. Miss this turn and you'll be heading toward Pokalde peak instead.
Stage 3: Final Ascent to Kongma La (1-1.5 hours)
The final push to the pass is the hardest section physically:
What to expect:
- Sustained steep climbing (25-35% gradient)
- Rocky terrain with significant scrambling
- Extreme altitude effects—you're above 5,400m
- Possible wind exposure
- Final push through rocky notch to prayer flags
Altitude challenge: This section breaks many trekkers. The combination of steep terrain, loose rock, and extreme altitude creates a grueling final hour. Rest frequently, breathe deliberately, and maintain a sustainable pace. There's no shame in needing 20+ minutes for the final 100 vertical meters.
Stage 4: Kongma La Pass (5,535m)
The pass is marked by prayer flags strung between rocky outcrops. On clear days, the views are extraordinary:
Panorama includes:
- Makalu (8,485m) to the east—world's 5th highest peak
- Lhotse (8,516m) and Everest (8,849m) to the north
- Ama Dablam's iconic profile to the south
- Island Peak rising from the Chukhung Valley
- Baruntse and the Amphu Lapcha peaks
Allow 20-30 minutes at the pass for rest, photos, and to prepare for the long descent. Check your time—you should reach the pass before 11:00 AM to have adequate daylight for the descent.
Stage 5: Descent to Chukhung (3-4 hours)
The eastern descent is longer and in some ways more challenging than the western ascent:
Initial descent (1-1.5 hours):
- Very steep rocky terrain
- Loose scree requiring extreme care
- Some exposure—stay focused
- Knees take significant impact
Middle section (1-1.5 hours):
- Gradient eases but terrain remains rocky
- Views of Imja Valley and Island Peak
- Kongma Tse (5,820m) visible to the left
- Cross seasonal streams
Final approach (1 hour):
- Gradual descent into Chukhung Valley
- Terrain finally becomes easier
- Chukhung village visible ahead
- Cross yak pastures to reach lodges
Arrival in Chukhung: Expect to arrive between 2:00-5:00 PM depending on your pace. The village has several lodges with basic facilities—book ahead in peak season as it's a small settlement.
Direction 2: Chukhung to Lobuche (East to West)
Less common but equally valid, this direction is used by trekkers doing the Three Passes in reverse or approaching from Island Peak.
Starting point: Chukhung (4,730m) Ending point: Lobuche (4,940m) Total time: 8-10 hours Elevation profile: +805m to pass, -595m to Lobuche
Advantages of Chukhung to Lobuche:
- More elevation gain means you warm up during steepest section
- Descent to Lobuche is less technical
- Arrive closer to main trail (more options)
Disadvantages:
- Total elevation gain is higher
- Steeper terrain tackled at start when less warmed up
- Less acclimatized if you haven't done EBC first
Route notes: The trail essentially reverses the above description. Key points for this direction:
- Start at 4:00 AM from Chukhung
- Expect 4-5 hours to the pass (longer than reverse)
- The initial steep climb is relentless—pace yourself
- Navigation is easier in this direction (following the obvious high point)
- Descent to Lobuche is more gradual and forgiving
Which Direction Is Better?
For most Three Passes trekkers: Lobuche to Chukhung is superior because:
- You're better acclimatized after EBC
- The steeper technical terrain is encountered on descent (when you're lower)
- The natural flow of the circuit works better
Chukhung to Lobuche makes sense if:
- You're coming from Island Peak
- You're doing the Three Passes counter-clockwise
- You prefer tackling steep terrain going up rather than down
Either direction is achievable for prepared trekkers. Choose based on your overall itinerary.
Technical Sections: Detailed Analysis
The Kongma Dingma Scramble
Location: Approximately 5,100-5,300m on the western approach Duration: 45-90 minutes Difficulty: Class 2-3 scrambling
What you'll face:
- Large granite boulders requiring hands-on navigation
- Some sections where route choice matters
- Potential ice on shaded rock (early morning)
- Loose rocks that can shift under weight
Techniques:
- Keep three points of contact when possible
- Test each handhold before committing weight
- Follow cairns carefully—wrong turns lead to harder terrain
- Don't rush; steady progress beats speed
The Pass Notch
Location: Final 50m to the pass, approximately 5,490-5,535m Duration: 15-30 minutes Difficulty: Steep, exposed, altitude-impaired
What you'll face:
- Narrow rocky gully leading to the saddle
- Some exposure on the left side
- Extreme altitude making every move harder
- Possible wind channeling through the notch
Techniques:
- Take very small steps
- Rest every 10-15 steps if needed
- Don't look down on exposed sections
- Focus on the prayer flags above—you're almost there
The Eastern Scree Field
Location: First 200m below the pass on the Chukhung side Duration: 30-45 minutes Difficulty: Steep loose terrain, knee-intensive
What you'll face:
- 35-45 degree loose scree slope
- Rocks that slide with each step
- Significant impact on knees and ankles
- Tired legs after the long ascent
Techniques:
- Use trekking poles for stability
- Lean back slightly, weight on heels
- Take zigzag line to reduce gradient
- Don't fight the slide—controlled descent with the moving scree
Protecting Your Knees on the Descent
Kongma La's eastern descent destroys unprepared knees. Prevention strategies:
- Trekking poles: Use them continuously, not occasionally
- Shorter steps: Half your normal stride length
- Zigzag pattern: Cross the slope rather than descending straight
- Knee supports: Consider elastic knee bands if you have previous issues
- Pain management: Take ibuprofen before the descent if knees are already sore
- Pole technique: Plant poles ahead and lean into them to absorb impact
Your knees need to last the rest of your trek. Protect them now.
Timing and Weather Considerations
Optimal Crossing Window
Departure time: 4:00-5:00 AM (earlier in spring for longer day) Target pass arrival: 9:00-11:00 AM Target Chukhung arrival: 2:00-4:00 PM
Why timing matters:
- Morning stability: Weather is typically calmest before midday
- Frozen conditions: Ice and snow are firmest in early morning
- Visibility: Cloud buildup usually begins after noon
- Time buffer: Early start provides margin for slower progress
Weather Patterns
Autumn (October-November):
- Generally stable with clear mornings
- Afternoon clouds common
- Cold at altitude (-15 to -20°C at pass)
- Best overall season for crossing
Spring (April-May):
- More variable weather patterns
- Higher chance of morning cloud
- Warmer temperatures (slightly)
- Longer days provide more flexibility
Winter (December-February):
- Very cold (-25°C possible)
- Often clear but windy
- Snow may obscure route
- Very few trekkers—solitude guaranteed
Monsoon (June-September):
- Not recommended for Kongma La
- Poor visibility, wet rock, snow
- Route often impassable
Go/No-Go Decision Making
Morning assessment checklist:
| Factor | GO | WAIT/NO-GO |
|---|---|---|
| Sky at 4 AM | Clear stars | Overcast, clouds on peaks |
| Wind | Calm or light | Strong, gusting |
| Fresh snow | None in 48 hours | Any fresh accumulation |
| Your condition | Well-rested, no AMS | Tired, any AMS symptoms |
| Weather forecast | Stable | Deterioration expected |
Critical rule: If three or more factors fall in the WAIT/NO-GO column, don't attempt the crossing that day.
Alternative Routes: When Kongma La Isn't Right
Option 1: The Low Route via Dingboche
Route: Lobuche → Pheriche → Dingboche → Chukhung Duration: 2 days instead of 1 Max altitude: 4,940m (Lobuche—you're already there)
Who should consider this:
- Trekkers with AMS symptoms
- Those who struggled at Kala Patthar
- Anyone uncertain about fitness for long day
- When Kongma La has poor conditions for multiple days
What you'll miss:
- The pass itself and its views
- The accomplishment of the highest crossing
- The dramatic Kongma La terrain
What you'll gain:
- Safety and certainty
- Time in Dingboche (interesting village)
- Energy conservation for Cho La ahead
Option 2: Pokalde Base Camp Route
Route: Lobuche → Pokalde BC → Kongma Dingma → Chukhung Duration: Same day, slight route variation Max altitude: ~5,200m (bypasses pass)
This partial alternative follows the Kongma La trail to approximately 5,200m before traversing to Pokalde Base Camp and descending to join the normal Chukhung trail. It's not a common route and requires good navigation skills.
Considerations:
- Less altitude exposure but still a long day
- Route-finding more challenging
- Not well-marked—guide strongly recommended
Option 3: Skip Kongma La Entirely
If Kongma La doesn't fit your trek, remember:
- Cho La and Renjo La are magnificent experiences
- The Gokyo Valley is arguably more scenic than the Kongma La route
- Many complete Three Passes trekkers skip Kongma La
- You can always return for it another time
No single pass defines your Nepal experience. A safe, enjoyable trek beats a dangerous, miserable one every time.
Essential Gear for Kongma La
Required Equipment
Footwear:
- Sturdy trekking boots with ankle support
- Gaiters (snow likely even in main season)
Traction:
- Microspikes or light crampons (conditions vary)
- Trekking poles (absolutely essential)
Clothing:
- Down jacket (temperatures can reach -20°C)
- Windproof outer layer
- Warm gloves (carry spare pair)
- Balaclava or face protection
- High-quality sunglasses
Safety:
- Headlamp with fresh batteries
- Basic first aid kit
- Emergency shelter (optional but wise)
- Whistle
Navigation:
- Offline maps on phone (Maps.me, Gaia)
- Physical compass backup
Food and Water
Unlike some passes with intermediate tea houses, Kongma La offers nothing between Lobuche and Chukhung. Carry:
- 2-3 liters of water (fill at Lobuche)
- High-energy snacks: chocolate, nuts, energy bars
- Lunch: packed the night before at your lodge
- Thermos with hot drink (optional but wonderful)
Water and Hydration
Dehydration worsens altitude effects. Even in cold conditions, you'll lose significant moisture through breathing at altitude.
Strategy:
- Drink 500ml before leaving Lobuche
- Sip continuously throughout the day
- Don't wait until you're thirsty
- Plan water sources: there are none on the crossing
Warning signs of dehydration:
- Dark urine (should be clear to light yellow)
- Headache (can mimic AMS)
- Unusual fatigue
- Dry mouth and lips
Safety and Emergency Protocols
Pre-Crossing Preparation
The evening before:
- Confirm weather forecast with lodge owner
- Prepare all gear and pack thoroughly
- Eat well—high carbohydrate dinner
- Hydrate aggressively
- Set alarm for 3:30 AM
- Inform lodge of your plans
Morning of crossing:
- Check weather at 4:00 AM (stars visible? wind?)
- Eat breakfast (something, even if not hungry)
- Final gear check: headlamp, poles, layers
- Note your planned arrival time at Chukhung
- Consider leaving emergency info with lodge
Emergency Response
If someone in your group develops AMS:
- Stop ascending immediately
- Assess symptoms: mild vs. severe
- Mild AMS: rest, hydrate, monitor. Consider descent.
- Severe AMS (confusion, ataxia, extreme fatigue): descend immediately—minimum 500m elevation loss
- Call for help if descent impossible
If you become lost:
- Stop and assess location using GPS
- Look for cairns—they mark the route
- In good visibility: identify landmarks and relocate
- In poor visibility: stay put if safe, wait for improvement
- Use whistle (3 blasts) to signal other trekkers
- If with a group: do not separate
Emergency contacts:
- Himalayan Rescue Association (Pheriche): +977-1-4440293
- Everest ER (Everest region emergency): +977-1-5551033
- Your insurance company 24/7 line (keep number accessible)
Helicopter Evacuation
Helicopter evacuation is possible from both sides of Kongma La:
Lobuche side: Well-established landing zones Chukhung side: Landing area near village Pass itself: No landing possible—must descend
Cost: $3,000-5,000 USD Coverage: Ensure insurance covers 6,000m+ and helicopter evacuation
Frequently Asked Questions
Sample Itineraries Including Kongma La
Three Passes: Standard Circuit
| Day | Route | Altitude | Notes |
|---|---|---|---|
| 1-6 | Lukla to Gorak Shep | Various | Standard EBC approach |
| 7 | EBC and Kala Patthar | 5,545m | Complete EBC objectives |
| 8 | Gorak Shep to Lobuche | 4,940m | Short recovery day |
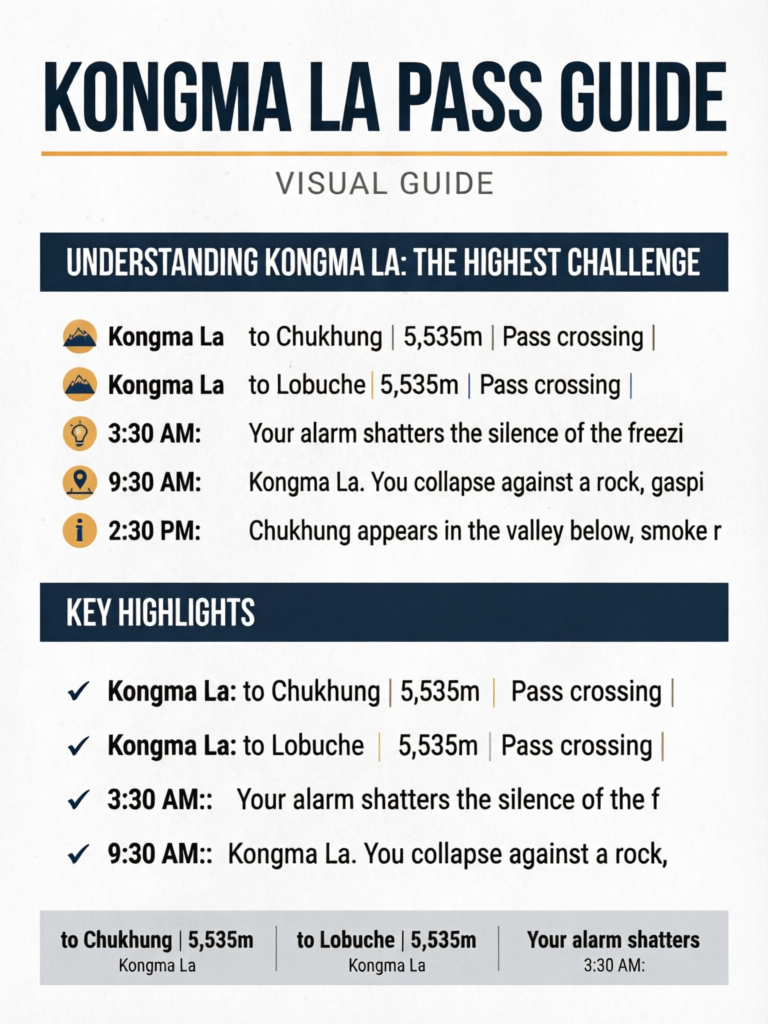
| 9 | Kongma La to Chukhung | 5,535m | Pass crossing |
| 10 | Chukhung rest | 4,730m | Recovery day |
| 11 | Chukhung to Dzongla | 4,830m | Via Dingboche |
| 12 | Cho La to Gokyo | 5,420m | Second pass |
| 13-14 | Gokyo and Gokyo Ri | 5,357m | Lakes exploration |
| 15 | Renjo La to Lungden | 5,360m | Third pass |
| 16-18 | Return to Lukla | Various | Via Thame, Namche |
Kongma La Focus Trip
If Kongma La is your primary objective:
| Day | Route | Altitude | Notes |
|---|---|---|---|
| 1 | Fly Lukla, trek Phakding | 2,610m | Arrival |
| 2 | Phakding to Namche | 3,440m | Steep climb |
| 3 | Namche acclimatization | 3,440m | Hike to Hotel Everest View |
| 4 | Namche to Pangboche | 3,985m | Via Tengboche |
| 5 | Pangboche to Dingboche | 4,410m | Gradual climb |
| 6 | Dingboche acclimatization | 4,410m | Hike to Nagarjun Hill |
| 7 | Dingboche to Chukhung | 4,730m | Short day |
| 8 | Chukhung rest/EBC viewpoint | 4,730m | Acclimatization |
| 9 | Kongma La to Lobuche | 5,535m | Pass crossing |
| 10 | Lobuche to Dingboche | 4,410m | Descent |
| 11-13 | Return to Lukla | Various | Standard route |
The Kongma La Experience: What to Expect
Crossing Kongma La is an intense, demanding, and ultimately rewarding experience. Here's what a typical crossing day feels like:
3:30 AM: Your alarm shatters the silence of the freezing Lobuche tea house. The thermometer shows -12°C. You dress in every warm layer, forcing down porridge despite lack of appetite.
4:30 AM: Headlamps pierce the darkness as your small group departs. The cold is brutal—perhaps -15°C with windchill. But within 30 minutes of climbing, you're generating enough heat to loosen a layer.
6:15 AM: First light reveals your surroundings. The Khumbu Glacier stretches to your right, a frozen river of ice catching the dawn. Ahead, the terrain steepens ominously.
7:30 AM: You're deep in the boulder field now. Every step requires thought—where to place your foot, what to grab for balance. The altitude is making itself felt. You're at 5,200m and the air feels thin.
8:45 AM: The final approach. You can see the prayer flags above, maybe 200 vertical meters away. It might as well be 2,000. Every step is a conscious effort. Rest. Breathe. Step. Rest. Breathe. Step.
9:30 AM: Kongma La. You collapse against a rock, gasping in the thin air. Then you look up—and the Himalayas reveal themselves in all directions. Makalu. Lhotse. Everest itself, so close you feel you could touch it. The suffering of the morning dissolves into pure wonder.
10:00 AM: Time to descend. The scree awaits—endless, loose, knee-destroying. You move carefully, poles planted firmly, as the altitude slowly releases its grip.
12:30 PM: You're below 5,000m. The air feels richer. Your pace quickens.
2:30 PM: Chukhung appears in the valley below, smoke rising from tea house chimneys. You've crossed the highest of the Three Passes. Your legs are destroyed, your lungs still recovering, but something inside you has changed. You've tested yourself against one of Nepal's great challenges—and you've prevailed.
Related Resources
Final Thoughts: Is Kongma La Right for You?
Kongma La isn't for everyone—and that's exactly what makes it special. This pass rewards preparation, respects experience, and punishes overconfidence. It's the kind of challenge that separates ambitious dreams from tested accomplishments.
If you're considering Kongma La, ask yourself honestly:
- Have I acclimatized properly, with successful time above 5,000m?
- Am I genuinely fit for 10+ hours at extreme altitude?
- Can I make an honest go/no-go decision, even if it means abandoning plans?
- Do I have proper gear, including traction devices and cold-weather clothing?
- Am I prepared for the consequences if something goes wrong?
If you can answer yes to all these questions, Kongma La will reward you with one of trekking's great experiences—standing on the highest of the Three Passes, surveying a kingdom of peaks that includes four of the world's six highest mountains.
If you're uncertain about any answer, consider the alternative routes. They're not failures—they're smart decisions that keep you safe for future adventures.
The mountains will always be here. Your job is to make sure you're here to climb them.