


Blister Prevention and Treatment for Nepal Trekking: Complete Foot Care Guide
50 km of walking before your trek
Leukotape P (adhesive zinc oxide tape)
Friction from poorly fitted boots or wet socks
Thin liner sock + padded outer sock
Heels, toes, ball of foot
Drain large blisters, protect small ones
Low if properly managed, watch for redness spreading
90%+ with proper preparation
Blisters are the most common injury on Nepal treks, and they are almost entirely preventable. A single blister on your heel can turn an extraordinary Himalayan experience into a painful endurance test. Yet every trekking season, hundreds of trekkers develop preventable blisters because they skipped boot break-in, chose wrong socks, or ignored the early warning signs.
This guide covers everything you need to know about preventing blisters before your trek and treating them effectively if they develop on the trail. Whether you are heading to Everest Base Camp, Annapurna Circuit, or any other Nepal route, your feet are your most important piece of equipment. Take care of them.
Understanding Blisters: Why They Form
Before discussing prevention, understanding the mechanism helps you recognize and address problems early.
The Science of Blisters
A blister forms when repeated friction causes the outer layer of skin (epidermis) to separate from the layer beneath (dermis). The space fills with clear fluid (serum), creating the characteristic raised pocket. Three factors must be present simultaneously for a blister to form:
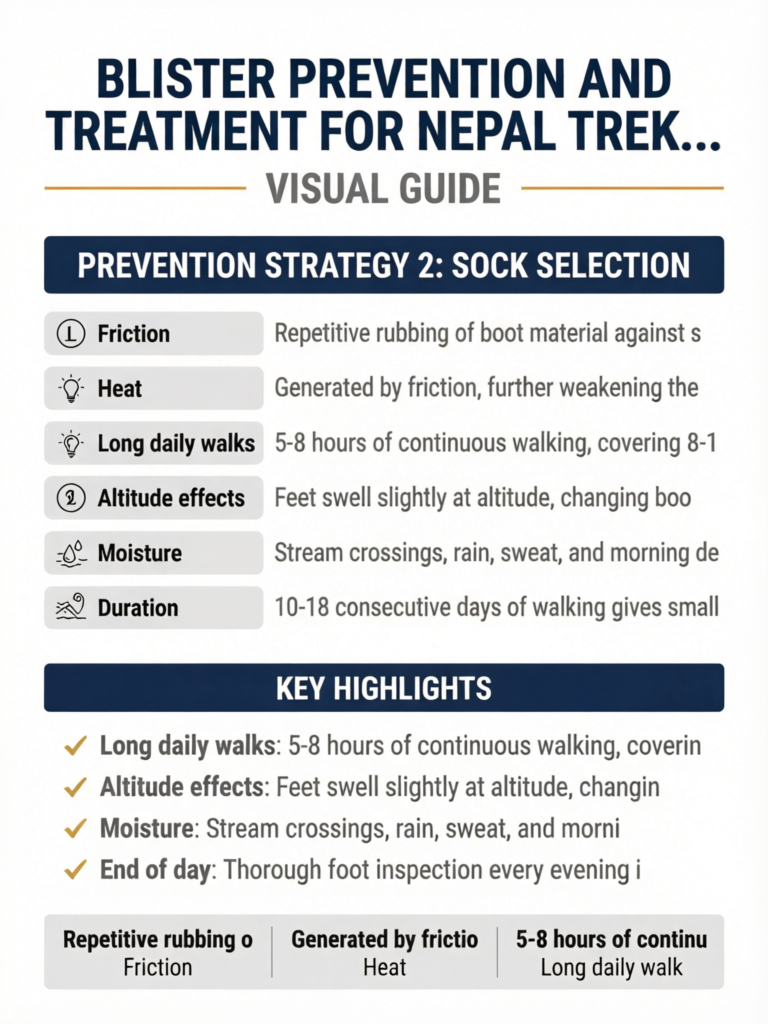
- Friction: Repetitive rubbing of boot material against skin
- Moisture: Wet skin is more vulnerable to friction damage (the coefficient of friction increases with moisture)
- Heat: Generated by friction, further weakening the skin layers
Remove any one of these three factors and blisters are dramatically less likely.
Why Nepal Treks Are Blister-Prone
Nepal trekking conditions create a perfect storm for blisters:
- Long daily walks: 5-8 hours of continuous walking, covering 8-18 km per day
- Varied terrain: Steep ascents and descents cause different friction patterns than flat walking
- Altitude effects: Feet swell slightly at altitude, changing boot fit
- Moisture: Stream crossings, rain, sweat, and morning dew
- New boots: Many trekkers buy boots shortly before the trek and do not break them in adequately
- Duration: 10-18 consecutive days of walking gives small problems time to become big ones
- Stone steps: Countless stone stairs in the Khumbu and Annapurna regions create repetitive impact on specific foot areas
The Day 2-3 Danger Zone
Most blisters develop on days 2-3 of a trek. Your feet have not yet toughened, the terrain is new, and early enthusiasm leads to ignoring hot spots. Pay extra attention to your feet during the first three days, even if they feel fine.
Prevention Strategy 1: Boot Break-In
Boot break-in is the single most important blister prevention measure. No amount of tape or fancy socks will compensate for boots that have not been properly broken in.
What Break-In Means
Breaking in boots means:
- The boot material softens and conforms to your foot shape
- Your feet develop minor calluses at contact points
- You identify fit issues before they become trail problems
- The boot-sock-foot system settles into a stable configuration
The 50 km Minimum
Walk at least 50 km in your trekking boots before departing for Nepal. This is not a suggestion; it is a minimum based on podiatry and wilderness medicine recommendations.
Break-in schedule:
| Week | Activity | Distance |
|---|---|---|
| Week 1 | Short walks around town, errands | 5-10 km total |
| Week 2 | Longer walks, some hills | 10-15 km total |
| Week 3 | Day hike with loaded pack | 10-15 km |
| Week 4 | Weekend hiking, varied terrain | 15-20 km |
| Week 5+ | Continue regular use | Ongoing |
Break-In Tips
- Wear the same socks you plan to trek in during break-in walks
- Gradually increase distance: Start with 30-minute walks, building to full-day hikes
- Include hills: Walk up and down slopes to test how your foot moves inside the boot on inclines
- Carry weight: Once comfortable walking, add a loaded daypack (5-8 kg) to simulate trek conditions
- Walk on varied surfaces: Pavement, dirt trails, gravel, and stairs
The Wet Break-In Test
When Boots Fail Break-In
If after 50+ km of break-in your boots are still causing hot spots or pain, you have a fit problem, not a break-in problem. Options:
- Different insoles: Aftermarket insoles (Superfeet, Sole) can transform fit
- Lacing adjustments: Different lacing techniques solve many pressure issues (see section below)
- Professional fitting: Visit a proper outdoor store for expert assessment
- Different boots: Sometimes the boot is simply wrong for your foot. Better to discover this at home than in Nepal. Consider trying boots from a different brand or switching to trail runners.
Prevention Strategy 2: Sock Selection
The right socks are your second most important defense against blisters.
The Two-Sock System
The proven blister prevention system uses two socks on each foot:
- Liner sock (inner): Thin, moisture-wicking synthetic or silk sock
- Outer sock: Padded, cushioned trekking sock (merino wool or synthetic blend)
How it works: Friction occurs between the two sock layers instead of between sock and skin. The liner sock also wicks moisture away from the skin, keeping it drier and more resistant to friction damage.
Sock Material Guide
| Material | Moisture Wicking | Odor Resistance | Durability | Warmth | Blister Prevention |
|---|---|---|---|---|---|
| Merino wool | Excellent | Excellent | Good | Excellent | Excellent |
| Synthetic blend | Good | Fair | Excellent | Good | Good |
| Silk (liner only) | Good | Fair | Fair | Light | Good (as liner) |
| Cotton | Poor | Poor | Fair | Cold when wet | Poor - never use |
| Bamboo | Good | Good | Fair | Moderate | Good |
The golden rule: Never wear cotton socks for trekking. Cotton absorbs moisture, stays wet, and dramatically increases friction. This applies to both liner and outer socks.
Sock Recommendations for Nepal Treks
Liner socks: Look for thin, snug-fitting socks made from CoolMax, polypropylene, or silk. They should be wrinkle-free when worn. Brands include Injinji liner toe socks, Wigwam Silk Liners, and Fox River Wick Dry.
Outer socks: Medium-weight cushioned trekking socks made from merino wool blend (60-80% merino). Key features: reinforced heel and toe, flat seams, arch support. Brands include Darn Tough, Smartwool PhD, Icebreaker Hike+, and Bridgedale.
For detailed sock recommendations, see our trekking socks guide.
How Many Socks to Bring
| Item | Quantity | Notes |
|---|---|---|
| Liner socks | 3-4 pairs | Quick-dry, rotate daily |
| Trekking socks | 3 pairs | Alternate days, wash when possible |
| Sleep socks | 1 pair | Clean, dry socks for sleeping (not for walking) |
The Dry Sock Rotation
Prevention Strategy 3: Hot Spot Detection
A hot spot is the pre-blister warning signal. It is a warm, reddened, slightly tender area where friction is occurring. Catching hot spots early and treating them immediately prevents nearly all blisters.
How to Detect Hot Spots
- During walking: Any area of warmth, tenderness, or irritation is a hot spot. Do not ignore it.
- During breaks: Remove boots and socks at every rest stop. Inspect your feet visually and feel for tender areas.
- End of day: Thorough foot inspection every evening is mandatory.
Immediate Hot Spot Response
When you detect a hot spot, stop immediately. Yes, immediately. Do not finish the hill. Do not wait until the next rest stop. Every additional step drives the hot spot closer to becoming a blister.
Treatment steps:
- Remove boot and sock
- Dry the area completely
- Apply Leukotape, moleskin, or Second Skin over the hot spot
- Ensure the tape is smooth with no wrinkles
- Replace sock and boot
- Check again after 30 minutes of walking
The 10-Second Rule
If you feel a hot spot, you have approximately 10-20 minutes of continued walking before it becomes a blister. This is your window. Experienced trekkers stop at the first sign of a hot spot without exception. The 5 minutes you spend taping a hot spot saves you days of painful walking.
Prevention Strategy 4: Taping Techniques
Preventive taping is the most effective blister prevention method once boots are broken in and socks are sorted. Many experienced trekkers tape known trouble areas every morning before even putting on socks.
Leukotape P: The Gold Standard
Leukotape P is a zinc oxide adhesive tape specifically designed for blister prevention. It is the most recommended blister prevention product among trekking guides, wilderness medicine practitioners, and experienced long-distance hikers.
Why Leukotape works:
- Extremely sticky (stays on for days, even in wet conditions)
- Smooth surface reduces friction
- Thin enough to not change boot fit
- Flexible enough to conform to curves of the foot
- Does not bunch or wrinkle easily
How to apply:
- Clean and dry the skin thoroughly
- Apply tincture of benzoin (optional but improves adhesion)
- Cut a piece of Leukotape slightly larger than the hot spot area
- Round the corners (prevents peeling)
- Apply smoothly, pressing firmly with no wrinkles or air bubbles
- Rub vigorously for 30 seconds to activate adhesive
Moleskin
Moleskin is a soft, padded adhesive material traditionally used for blister prevention.
Pros: Readily available, cushioning effect, easy to cut to shape Cons: Less adhesive than Leukotape (peels off when wet), thicker (may change boot fit), can bunch up
Application: Cut a piece larger than the affected area. For existing blisters, cut a donut shape with the blister visible through the hole, so the moleskin cushions around the blister without pressing on it.
KT Tape / Athletic Tape
KT Tape and athletic tape are alternatives if Leukotape is unavailable.
Pros: Easy to find worldwide, multiple uses Cons: Less adhesive in wet conditions, not specifically designed for blister prevention
Preventive Taping Locations
If you know your blister-prone areas (from your break-in walks), tape them every morning before starting:
| Location | Taping Method |
|---|---|
| Heel | Single strip of Leukotape covering entire heel cup area |
| Toes (between) | Small pieces between toes that rub |
| Toe tips | Cap the end of prone toes with tape |
| Ball of foot | Oval patch over the metatarsal heads |
| Achilles area | Strip from mid-heel upward where boot collar rubs |
| Bunion area | Patch over the medial bump |
Pre-Cut Your Tape at Home
Prevention Strategy 5: Boot Fit and Lacing
Even well-broken-in boots can cause blisters if laced incorrectly for the terrain.
Lacing for Descents
Downhill walking causes the foot to slide forward, jamming toes against the boot's toe box. This is the primary cause of toe blisters and black toenails.
Solution: Use the "heel lock" lacing technique:
- Lace normally up to the second-to-last eyelet
- Create a loop with the lace through each of the top eyelets
- Cross the laces through the opposite loops
- Pull tight and tie normally
This locks the heel in place and prevents forward slide.
Lacing for Ascents
Uphill walking puts pressure on the top of the foot and can create hot spots on the heel as it lifts repeatedly.
Solution: Loosen the lacing over the top of the foot (mid-section) while keeping the ankle and heel area snug. This reduces top-of-foot pressure while maintaining heel lock.
Lacing for Swollen Feet
At altitude and after long days, feet swell. If your boots feel tight:
- Stop and re-lace more loosely
- Remove the insole temporarily for more volume
- Consider switching to lighter footwear (sandals or trail runners) for the final hour of the day
Trim Your Toenails
Long toenails are a hidden blister and black toenail cause. Trim your toenails short (but not too short) 2-3 days before your trek. Cut straight across, slightly rounded at the corners, and file smooth. Long toenails push against the toe box on descents, causing blisters on adjacent toes and bruising under the nail.
Prevention Strategy 6: Moisture Management
Keeping feet dry is critical because wet skin blisters far more easily than dry skin.
Sources of Moisture on Nepal Treks
- Sweat: Primary source during warm days and uphill sections
- Rain: Penetrates non-waterproof boots and enters from the top of waterproof boots
- Stream crossings: Common on lower sections of Annapurna and Langtang trails
- Morning dew: Wet grass and vegetation brush against boots
- Snow: At higher elevations, particularly above 4,000m
- Washing: Splashing at water sources
Moisture Management Strategies
- Gaiters: Prevent water, mud, and debris from entering the boot top. Essential in wet conditions.
- Waterproof boots: Keep external water out (but trap sweat). Best for Khumbu and high-altitude routes.
- Quick-dry socks: Merino and synthetic blends dry much faster than cotton.
- Change socks at lunch: Carry a dry pair and switch at the midday break. Dry the morning pair on your pack.
- Foot powder: Apply moisture-absorbing powder (talc or cornstarch-based) each morning before socking up.
- Waterproof sock liners: Products like SealSkinz provide a waterproof layer between liner and outer sock.
The Drying Routine
Every evening in the tea house:
- Remove boots and socks immediately
- Wipe feet dry with a small towel
- Inspect for hot spots, blisters, or skin breakdown
- Apply foot powder or anti-chafe balm
- Wear clean, dry sleep socks
- Place boots upside down to air out (stuff newspaper inside to absorb moisture if available)
- Hang wet socks near (not on) the dining room stove to dry
Treating Blisters on the Trail
Despite best prevention efforts, blisters sometimes develop. Here is how to treat them effectively.
Small Blisters (Under 1 cm)
Do not pop them. Small blisters often resolve on their own if protected from further friction.
Treatment:
- Clean the area with antiseptic wipe
- Apply a donut-shaped piece of moleskin around the blister (hole in center)
- Cover with Leukotape or medical tape
- Add padding if in a high-pressure area (heel, ball of foot)
- Monitor daily for signs of infection
Large Blisters (Over 1 cm)
Large blisters should be drained to relieve pressure and prevent them from tearing open on their own (which is more likely to cause infection).
Draining procedure:
- Clean the blister and surrounding skin with antiseptic
- Sterilize a safety pin or needle with an alcohol wipe or flame
- Pierce the blister at the base (lowest point) with two small holes
- Gently press the fluid out through the holes
- Do NOT remove the overlying skin - it serves as a natural bandage
- Apply antibiotic ointment (Neosporin or similar)
- Cover with a non-stick gauze pad
- Secure with Leukotape or medical tape
- Re-dress daily, checking for infection
Blood Blisters
Blood blisters contain blood in addition to serum, indicating deeper tissue damage. Treat these more carefully:
- Do not drain unless absolutely necessary (blood blisters have higher infection risk)
- Cushion with a donut pad and protect from further friction
- If draining is necessary (blister is very large or painful), follow the same sterile procedure but be extra vigilant about infection monitoring
Torn Blisters (Roof Removed)
If a blister has already torn open and the skin is gone:
- Clean thoroughly with antiseptic
- Apply antibiotic ointment generously
- Cover with a hydrocolloid blister bandage (Compeed or similar)
- If no hydrocolloid available, use non-stick gauze secured with tape
- Change dressing daily or when it gets wet/dirty
- This is now an open wound - infection risk is higher
The Hydrocolloid Miracle
Common Blister Locations and Specific Prevention
Heel Blisters
Cause: Boot collar rubbing during walking, especially on ascents when the heel lifts Prevention: Heel lock lacing, Leukotape on the heel area each morning, ensure boots are snug in the heel Treatment: Donut pad around the blister, extra cushioned heel sock
Toe Blisters (Tips)
Cause: Toes jamming into the toe box on descents Prevention: Proper boot sizing (full thumb-width in front of longest toe), heel lock lacing for descents, trimmed toenails Treatment: Toe caps (small silicone sleeves), individual toe taping
Toe Blisters (Between Toes)
Cause: Adjacent toes rubbing together, especially when swollen at altitude Prevention: Injinji toe socks (individual toe sleeves), small pieces of moleskin or lamb's wool between toes Treatment: Separate toes with gauze or wool, tape to hold in place
Ball of Foot Blisters
Cause: Heavy impact on rocky terrain, thin boot soles, heavy pack weight Prevention: Boots with adequate sole cushioning, quality insoles (Superfeet Green), metatarsal pads Treatment: Cushioned donut pad, reduce pack weight if possible
Arch Blisters
Cause: Boots that are too wide, allowing lateral foot movement, or debris inside the boot Prevention: Properly fitted boots with arch support, gaiters to keep debris out Treatment: Tape and pad, check boot fit
When Blisters Become a Medical Concern
Most blisters are minor annoyances. However, watch for these signs that indicate a more serious problem:
Signs of Infection
| Symptom | Concern Level | Action |
|---|---|---|
| Redness spreading beyond blister edge | Moderate | Clean, apply antibiotic ointment, monitor closely |
| Red streaks extending from blister | High | Seek medical attention same day |
| Pus (yellow/green discharge) | High | Antibiotics needed - visit health post |
| Fever or chills | Urgent | Infection may be systemic - descend and seek medical help |
| Increasing pain despite treatment | Moderate-High | Reassess treatment, consider medical evaluation |
| Foul odor from blister | High | Likely infected - seek medical attention |
Medical Resources on the Trail
If a blister becomes infected on the trail, medical help is available:
- Himalayan Rescue Association (HRA) clinics: Manang (Annapurna Circuit), Pheriche/Dingboche (Everest region) - staffed by volunteer doctors during trekking season
- Health posts: Basic medical facilities in larger villages along most trekking routes
- Trekking guide: Many guides have first aid training and carry basic wound care supplies
- Telemedicine: Some travel insurance providers offer remote doctor consultations via phone or app
Do Not Ignore Infected Blisters at Altitude
At high altitude, your immune system is compromised and wounds heal more slowly. An infected blister at 4,000-5,000 meters can become serious more quickly than at sea level. If you see signs of infection, treat aggressively with antibiotics (carry a course in your first aid kit) and consider descending to lower elevation where healing is faster.
The Evening Foot Care Routine
Develop this routine and perform it every evening in the tea house. It takes 10 minutes and prevents most foot problems:
Step-by-Step Evening Routine
- Remove boots and socks immediately upon arriving at the tea house
- Wash feet with warm water and soap if available (ask the tea house for a basin of warm water)
- Dry thoroughly, especially between toes
- Inspect each foot: Check for hot spots, blisters, redness, swelling, cuts, or fungal signs
- Treat any issues: Apply tape, treat blisters, address hot spots
- Apply foot cream or balm: Prevents cracking, especially at higher dry altitudes
- Massage feet briefly: Improves circulation and identifies tender areas
- Put on clean, dry sleep socks: Never walk around the tea house barefoot (cold floors, hygiene)
- Elevate feet for 15-20 minutes if possible (reduces swelling)
- Prepare tomorrow's socks: Ensure a dry pair is ready for the morning
Evening Foot Care Products
Keep these in a small zip-lock bag in your daypack:
- Antiseptic wipes (individually wrapped)
- Leukotape P (pre-cut pieces)
- Moleskin or Compeed bandages
- Antibiotic ointment (Neosporin)
- Foot powder (Gold Bond or similar)
- Foot balm or cream (Bag Balm, Body Glide, or vaseline)
- Safety pin (for draining)
- Small scissors or blade (for cutting tape)
- Small towel (dedicated foot towel)
Your First Aid Kit: Blister-Specific Items
In addition to your general first aid kit, carry these blister-specific items:
| Item | Quantity | Weight | Purpose |
|---|---|---|---|
| Leukotape P | 1 roll (2-3 meters) | 45g | Prevention taping, hot spot treatment |
| Compeed bandages | 6-10 assorted | 30g | Blister treatment |
| Moleskin sheets | 2-3 sheets | 20g | Donut pads, cushioning |
| Tincture of benzoin | 5 individual packets | 10g | Tape adhesion enhancement |
| Antiseptic wipes | 10-15 | 15g | Wound cleaning |
| Antibiotic ointment | 1 small tube | 15g | Infection prevention |
| Non-stick gauze pads | 5-6 | 10g | Wound dressing |
| Safety pins | 3 | 3g | Blister draining |
| Small scissors | 1 | 20g | Cutting tape and moleskin |
| Foot powder | Small container | 30g | Moisture management |
| Total | - | ~200g | Complete blister kit |
This entire kit weighs about 200 grams - a tiny investment for potentially saving your trek from foot misery.
Frequently Asked Questions
How long before my trek should I break in new boots?
Start breaking in new boots at least 6-8 weeks before your trek departure. Walk a minimum of 50 km in them, gradually increasing distance and difficulty. Begin with short walks and progress to full-day hikes with a loaded pack. If boots are still causing discomfort after 50 km of break-in, consider different insoles or a different boot entirely.
Are trail runners better than boots for preventing blisters?
Trail runners generally cause fewer blisters because they are lighter, more flexible, and dry faster. However, they offer less ankle support and protection on rocky terrain. Trail runners work well for experienced trekkers on well-established trails like the Annapurna Circuit. For rocky, uneven terrain in the Khumbu region or for trekkers carrying heavier packs, boots remain the safer choice. See our footwear guide for a detailed comparison.
Should I pop a blister or leave it intact?
Small blisters (under 1 cm) should be left intact and protected with padding and tape. Large blisters (over 1 cm) should be drained using a sterilized needle to relieve pressure, but the overlying skin should be left in place as a natural bandage. Never tear off blister skin. Always apply antibiotic ointment after draining.
What is the best sock material for blister prevention?
Merino wool blends (60-80% merino) are the best outer sock material for blister prevention. Merino wicks moisture effectively, regulates temperature, resists odor, and provides natural cushioning. For liner socks, thin synthetic (CoolMax, polypropylene) or silk works best. Cotton should never be worn for trekking under any circumstances.
Can I continue trekking with a blister?
Yes, in most cases you can continue trekking with a properly treated blister. Drain large blisters, apply Compeed or padding, and adjust your lacing. However, if a blister shows signs of infection (spreading redness, pus, red streaks, fever), you need medical attention and should not continue until the infection is treated.
Where can I buy blister prevention supplies in Kathmandu?
Leukotape, Compeed, and moleskin are available at pharmacies and trekking shops in Thamel. However, selection is limited and quality can vary. We strongly recommend buying these supplies at home where you can verify authenticity. Leukotape P in particular may be difficult to find in Kathmandu.
How do I prevent blisters between my toes?
Blisters between toes are caused by adjacent toes rubbing together. Prevention options include: Injinji toe socks (individual toe sleeves that eliminate skin-to-skin contact), small pieces of lamb's wool placed between prone toes, thin strips of moleskin between toes, or silicone toe separators. Keep the spaces between toes dry.
Do altitude and cold affect blister formation?
Yes. At altitude, feet tend to swell due to fluid retention, which changes boot fit and increases friction. Cold temperatures reduce blood flow to feet, making skin more vulnerable to damage and slower to heal. Altitude also impairs the immune response, meaning blisters take longer to heal and are more susceptible to infection above 4,000 meters.
How do I manage blisters during multi-day rain?
Continuous rain makes blister management challenging because feet stay wet. Strategies include: waterproof boots with gaiters, applying Leukotape preventively (it adheres well even when damp), changing socks at every opportunity, wringing out wet socks at rest stops, using waterproof sock liners, and drying feet and socks at the tea house stove every evening.
What role do insoles play in blister prevention?
Aftermarket insoles (Superfeet, Sole, Currex) can significantly improve boot fit and reduce blister risk. They provide better arch support, improved heel cupping, and reduced movement inside the boot. If your boots are slightly loose or you experience sliding, quality insoles may solve the problem. Break in new insoles the same way you break in boots - gradually, starting with short walks.
Can I use Vaseline to prevent blisters?
Vaseline (petroleum jelly) can reduce friction temporarily but has significant drawbacks: it breaks down quickly, migrates off the applied area, can saturate sock material, and creates a slippery mess. Better alternatives for friction reduction include Body Glide (wax-based anti-chafe stick), Trail Toes cream, or preventive taping. If Vaseline is all you have, it provides some short-term benefit.
How should I adjust my walking technique to prevent blisters?
Consistent foot placement reduces blister risk. Plant your entire foot flatly rather than landing heavily on heels. On descents, keep knees slightly bent to absorb impact. Take shorter steps on steep terrain. Avoid twisting your foot inside the boot when turning. Walk at a steady pace rather than alternating between fast and slow. Use trekking poles to reduce foot impact.
Summary: The Complete Blister Prevention Checklist
Before leaving home:
- Break in boots (minimum 50 km)
- Purchase proper socks (liner + outer, merino wool)
- Buy blister prevention supplies (Leukotape, Compeed, moleskin)
- Trim toenails
- Identify your blister-prone areas during break-in walks
- Practice taping techniques
On the trek:
- Apply preventive tape to known trouble spots each morning
- Wear liner socks under outer trekking socks
- Change socks when damp (carry a dry rotation pair)
- Stop immediately at the first sign of a hot spot
- Inspect feet at every rest stop
- Complete the evening foot care routine daily
- Keep feet dry (gaiters, waterproof boots, foot powder)
- Re-lace boots for terrain changes (uphill vs. downhill)
Following these guidelines eliminates over 90% of blister risk. Your feet carry you through one of the most spectacular landscapes on Earth. Treat them well.
For more foot care and gear information, see our trekking boots guide, trekking socks guide, and first aid kit guide.