


Medical Emergency Reality Check
In 2026, over 800 trekkers required medical evacuation from Nepal's mountain regions. The most common causes weren't dramatic accidents—they were preventable conditions like untreated blisters leading to cellulitis, dehydration-induced altitude sickness, and gastrointestinal infections that could have been managed with proper medications. A well-stocked medical kit isn't optional equipment—it's potentially life-saving.
Every year, thousands of trekkers turn back from their Nepal adventure not because of lack of fitness or bad weather, but because of preventable medical issues. A simple blister becomes infected. Mild diarrhea becomes severe dehydration. A tension headache is mistaken for altitude sickness. And in each case, the right medication or first aid supply could have kept the trek on track.
But here's the critical challenge: you're trekking in one of the most remote regions on Earth. When you're three days' walk from the nearest road, you can't just pop into a pharmacy. The tea house might have basic painkillers, but they won't stock Diamox, antibiotics, or specialized blister treatments. Your medical kit needs to function as a portable pharmacy capable of handling everything from minor annoyances to serious medical emergencies.
This comprehensive guide provides everything you need to prepare medically for Nepal trekking. We cover essential medications with specific dosages, complete first aid supplies, treatment protocols for common trekking ailments, when to descend versus when to push on, emergency evacuation procedures, and specialized considerations for pre-existing conditions and women's health. Written with input from Kathmandu's leading travel medicine clinics and the Himalayan Rescue Association, this is your complete medical preparation resource.
Table of Contents
- Essential Medications Checklist
- Altitude Sickness Prevention & Treatment
- Complete First Aid Supplies
- Blister Prevention & Treatment
- Gastrointestinal Issues
- Pain Management
- Infection Prevention
- Prescription Medications
- Pharmacy Access in Nepal
- Common Trekking Ailments
- When to Descend
- Emergency Evacuation Protocols
- Pre-existing Medical Conditions
- Vaccinations & Preventive Medicine
- Women's Health Considerations
- Dental Emergencies
- Eye Care & Vision Issues
- Cold Weather Injuries
- Medical Kit Organization
- Insurance & Medical Documentation
- Telemedicine Options
- Medical Facilities Along Trek Routes
- Frequently Asked Questions
Essential Medications Checklist
Your trekking medical kit should function as a portable pharmacy capable of treating the most common and serious conditions you'll encounter in Nepal's mountains. This isn't about bringing every possible medication—it's about strategic preparation for the specific medical challenges of high-altitude trekking.
Core Medication Categories
Altitude Sickness Medications
Acetazolamide (Diamox)
- Primary use: Altitude sickness prevention and treatment
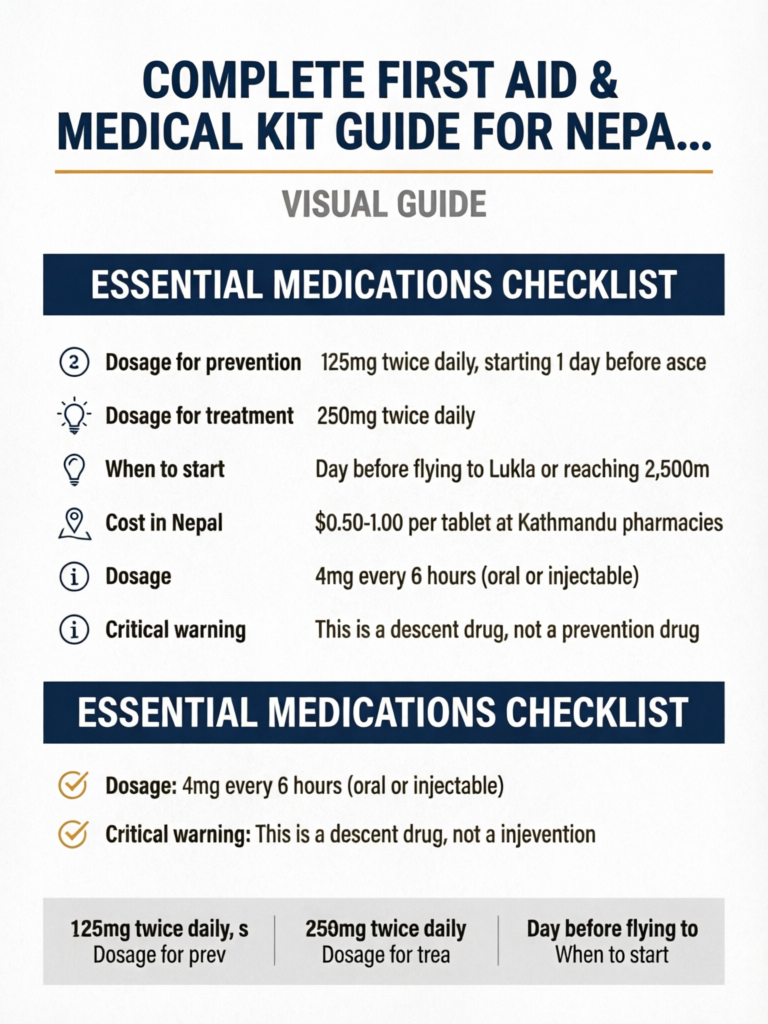
- Dosage for prevention: 125mg twice daily, starting 1 day before ascent
- Dosage for treatment: 250mg twice daily
- How it works: Increases breathing rate, speeds acclimatization, reduces fluid retention
- Quantity needed: 30-40 tablets for a 2-week Everest Base Camp trek
- Side effects: Tingling fingers/toes (harmless), increased urination, carbonated drinks taste flat, rare sun sensitivity
- When to start: Day before flying to Lukla or reaching 2,500m
- Prescription required: Yes
- Cost in Nepal: $0.50-1.00 per tablet at Kathmandu pharmacies
Diamox Dosing Strategy from Altitude Medicine Specialists
The Himalayan Rescue Association recommends starting with 125mg twice daily rather than the older 250mg dosing. Research shows 125mg provides equivalent acclimatization benefits with significantly fewer side effects. Take with breakfast and dinner. If you develop mild AMS symptoms despite prophylaxis, increase to 250mg twice daily and halt ascent until symptoms resolve.
Dexamethasone
- Primary use: Emergency treatment of severe altitude sickness (HACE/HAPE)
- Dosage: 4mg every 6 hours (oral or injectable)
- Critical warning: This is a descent drug, not a prevention drug
- Use only when: Severe AMS symptoms, HACE suspected, or descent impossible due to weather
- How it works: Reduces brain swelling, provides 6-12 hours of symptom relief
- Quantity needed: 8-12 tablets (4mg) minimum
- Prescription required: Yes
- Important: Dexamethasone masks symptoms—you MUST descend even if you feel better
Nifedipine
- Primary use: Emergency treatment of High Altitude Pulmonary Edema (HAPE)
- Dosage: 30mg extended-release every 12 hours, or 20mg immediate-release every 8 hours
- When to use: Severe shortness of breath at rest, gurgling sounds in chest, blue lips
- Quantity needed: 6-8 tablets
- Prescription required: Yes
- Must combine with: Immediate descent and supplemental oxygen if available
Gastrointestinal Medications
Loperamide (Imodium)
- Primary use: Symptomatic relief of diarrhea
- Dosage: 4mg initial dose, then 2mg after each loose stool (max 16mg/24 hours)
- When to use: Non-infectious diarrhea, or when you must continue trekking
- When NOT to use: High fever (>38.5°C/101°F), bloody diarrhea, severe abdominal pain
- Quantity needed: 12-16 tablets
- Prescription: Not required
- Cost in Nepal: Widely available, $2-4 per packet
Ciprofloxacin (Cipro)
- Primary use: Bacterial gastrointestinal infections
- Dosage: 500mg twice daily for 3-5 days
- When to use: Moderate-severe diarrhea with fever, bloody stools, or symptoms >24 hours
- Alternative: Azithromycin 500mg once daily for 3 days (better for some travelers)
- Quantity needed: 10 tablets (500mg)
- Prescription required: Yes (in Western countries; available OTC in Kathmandu)
- Important: Take on empty stomach, avoid dairy within 2 hours
Antibiotic Resistance Concerns
The Kathmandu CIWEC Clinic reports increasing resistance to fluoroquinolones like Cipro in Nepal. Consider bringing both Ciprofloxacin AND Azithromycin as backup. Azithromycin has higher efficacy against common trekking-acquired pathogens in recent studies and requires only 3 days of treatment versus 5 days for Cipro.
Azithromycin (Z-Pack)
- Primary use: Bacterial GI infections, respiratory infections
- Dosage for GI issues: 500mg once daily for 3 days
- Dosage for respiratory: 500mg day 1, then 250mg days 2-5
- Advantages: Single daily dose, shorter course, effective against resistant strains
- Quantity needed: 5 tablets (500mg or 250mg combination)
- Prescription required: Yes
- Interactions: Generally fewer than Cipro
Oral Rehydration Salts (ORS)
- Primary use: Rehydration during diarrhea, vomiting, or excessive sweating
- Dosage: 1 packet dissolved in 1 liter clean water, drink as needed
- When to use: ANY diarrhea episode, even mild
- Why critical: Dehydration dramatically increases altitude sickness risk
- Quantity needed: 10-15 packets minimum
- Prescription: Not required
- Nepal availability: Widely available as "Jeevan Jal" or WHO-ORS packets ($0.10-0.20 each)
- DIY alternative: 6 teaspoons sugar + ½ teaspoon salt in 1 liter water (not ideal but works)
Pain & Inflammation Medications
Ibuprofen (Advil, Motrin)
- Primary use: Pain, inflammation, fever, headaches
- Dosage: 400mg every 6-8 hours as needed (max 2,400mg/24 hours)
- Advantages: Reduces inflammation (helpful for sore muscles, sprains)
- Cautions: Take with food, avoid if stomach ulcer history, can affect kidneys at altitude
- Quantity needed: 30-40 tablets (400mg)
- Prescription: Not required
- Important: Some research suggests NSAIDs may slightly increase HAPE risk—use acetaminophen for altitude headaches
Paracetamol/Acetaminophen (Tylenol, Panadol)
- Primary use: Pain and fever (first choice for altitude headaches)
- Dosage: 500-1000mg every 6-8 hours (max 4,000mg/24 hours)
- Advantages: Safer at altitude than NSAIDs, no kidney concerns
- Quantity needed: 30-40 tablets (500mg)
- Prescription: Not required
- Nepal availability: Extremely common, available at most tea houses
Aspirin
- Primary use: Headache, mild pain, blood thinner at altitude
- Dosage: 325mg as needed for pain; 81mg daily as prevention (controversial)
- Altitude use: Some trekkers take low-dose aspirin to prevent blood clots at altitude
- Quantity needed: 10-20 tablets
- Caution: Blood-thinning effects can worsen injuries
Allergy & Cold Medications
Antihistamine (Cetirizine/Loratadine)
- Primary use: Allergies, insect bites, mild allergic reactions
- Dosage: 10mg once daily as needed
- Non-drowsy: Cetirizine (Zyrtec), Loratadine (Claritin)
- Quantity needed: 10-14 tablets
- Prescription: Not required
Diphenhydramine (Benadryl)
- Primary use: Severe allergic reactions, sleep aid (sparingly at altitude)
- Dosage: 25-50mg every 6 hours for allergies
- Warning: Causes drowsiness—don't use while trekking
- Sleep aid caution: Suppresses breathing—dangerous above 4,000m
- Quantity needed: 10 tablets (25mg)
Decongestant (Pseudoephedrine)
- Primary use: Sinus congestion, head colds
- Dosage: 60mg every 4-6 hours
- Caution: Can increase heart rate and blood pressure at altitude
- Alternative: Nasal saline spray is safer
- Quantity needed: 10-15 tablets if bringing
Topical Medications
Antibiotic Ointment (Neosporin/Bacitracin)
- Primary use: Prevent infection in cuts, blisters, abrasions
- Application: Clean wound, apply thin layer, cover with bandage
- Quantity needed: 1 small tube (15-30g)
- Nepal alternative: Betadine ointment widely available
Antifungal Cream (Clotrimazole)
- Primary use: Athlete's foot, jock itch, fungal rashes
- Application: Twice daily to affected areas
- Prevention: Apply to feet before trek starts
- Quantity needed: 1 tube (15g)
Hydrocortisone Cream 1%
- Primary use: Itching, rashes, minor skin irritation, insect bites
- Application: Apply thin layer 2-3 times daily
- Quantity needed: 1 small tube (15g)
Hemorrhoid Cream
- Primary use: Hemorrhoids (common from dehydration and squatting toilets)
- Quantity needed: 1 small tube
- Often forgotten: But really helpful if needed
Emergency Medications
EpiPen (Epinephrine Auto-injector)
- Primary use: Severe allergic reactions (anaphylaxis)
- When to bring: If you have ANY history of severe allergies
- Dosage: 0.3mg auto-injector for adults
- Quantity needed: 2 injectors minimum (may need second dose)
- Prescription required: Yes
- Storage: Keep at body temperature (freezes in cold weather)
- Important: Even after EpiPen use, immediate evacuation required
Carrying Injectable Medications Across Borders
If bringing EpiPens, injectable dexamethasone, or other injectables, carry a doctor's letter explaining medical necessity. Keep medications in original packaging with prescription labels. Nepal customs rarely questions personal medical supplies, but documentation prevents issues at intermediate stops.
Specialized Medications
Ondansetron (Zofran)
- Primary use: Severe nausea and vomiting
- Dosage: 4-8mg every 8 hours as needed
- When useful: Altitude sickness nausea, food poisoning
- Prescription required: Yes
- Formulation: Dissolving tablets don't require water
Sleeping Aid (Sparingly)
- Options: Melatonin 3-5mg (safest), Zolpidem 5mg (prescription)
- Caution: Most sleeping medications suppress breathing—dangerous above 4,000m
- Safer alternative: Acetazolamide actually improves sleep quality at altitude
- When to use: Only at lower elevations if severely jet-lagged
Antibiotics for Respiratory Infections
- Primary use: Bronchitis, pneumonia
- Options: Azithromycin (dual use with GI antibiotic), Amoxicillin-Clavulanate
- When to suspect: Productive cough with colored phlegm, chest pain, fever
- Important: Differentiate from HAPE (which presents with cough but requires descent)
Altitude Sickness Prevention & Treatment
Altitude sickness is the single greatest health risk for Nepal trekkers, affecting 50-85% of people ascending to Everest Base Camp. Understanding prevention, recognition, and treatment can literally save your life.
Understanding Altitude Sickness Types
Acute Mountain Sickness (AMS)
- Altitude onset: Typically above 2,500m (8,200ft)
- Onset timing: Usually 6-24 hours after altitude gain
- Symptoms: Headache (required) PLUS one or more: nausea, fatigue, dizziness, poor sleep
- Severity: Mild to moderate—manageable but uncomfortable
- Treatment: Stop ascent, rest, hydrate, medication
- Prognosis: Usually resolves in 24-48 hours with acclimatization
High Altitude Cerebral Edema (HACE)
- Severity: LIFE-THREATENING—brain swelling
- Symptoms: Severe AMS symptoms PLUS confusion, ataxia (loss of coordination), altered consciousness
- Test: Cannot walk heel-to-toe in straight line
- Treatment: IMMEDIATE DESCENT + Dexamethasone 8mg initial dose, then 4mg every 6 hours
- Descent requirement: Minimum 500-1000m immediately
- Prognosis: Fatal if not descended; full recovery with timely treatment
High Altitude Pulmonary Edema (HAPE)
- Severity: LIFE-THREATENING—fluid in lungs
- Symptoms: Severe shortness of breath at rest, gurgling/rattling in chest, blue lips, extreme fatigue
- Warning signs: Can't catch breath after 20 minutes of rest, wet cough with pink/frothy sputum
- Treatment: IMMEDIATE DESCENT + Nifedipine 30mg extended release + oxygen if available
- Descent requirement: As low as necessary, continue until symptoms improve
- Prognosis: Can progress rapidly (hours)—descent is mandatory, not optional
The Golden Rules of Altitude Sickness
- If you have symptoms of AMS, DO NOT ASCEND until symptoms resolve
- If symptoms are getting worse, DESCEND immediately
- Never ascend with symptoms of HACE or HAPE—DESCEND NOW
- Descent is the only definitive treatment for severe altitude sickness
- Medications are temporary measures to facilitate descent, not replacements for descent
Diamox Prevention Protocol
The Himalayan Rescue Association and Wilderness Medical Society endorse Diamox prophylaxis for rapid ascents like Lukla-to-EBC treks.
Who should take Diamox prophylactically:
- Anyone flying to high altitude (Lukla at 2,860m)
- Trekkers with history of altitude sickness
- Rapid ascent itineraries (reaching 4,000m+ within 4 days)
- People susceptible to periodic breathing/poor sleep at altitude
Who might skip Diamox:
- Gradual ascent itineraries with proper acclimatization days
- Previous successful high-altitude experience without AMS
- Allergies to sulfa drugs (Diamox is a sulfonamide)
Dosing schedule:
- Start: 1 day before reaching 2,500m (for most trekkers, this means starting in Kathmandu before Lukla flight)
- Dosage: 125mg twice daily (morning and evening with food)
- Duration: Continue until starting descent from maximum altitude, or 2 days after reaching maximum altitude
- EBC example: Start in Kathmandu, continue through Namche-Dingboche-Gorak Shep-EBC, can stop after summiting Kala Patthar or returning to Dingboche
Expected side effects (normal and harmless):
- Tingling in fingers, toes, lips (paresthesia)—occurs in 80% of users
- Increased urination—means it's working
- Altered taste, especially carbonated beverages taste flat
- Rarely: sun sensitivity, mild fatigue
Concerning side effects (stop medication):
- Severe rash or hives (allergic reaction)
- Severe dizziness or confusion
- Difficulty breathing (very rare)
Managing Diamox Side Effects
The finger tingling from Diamox can be annoying but is completely harmless. It's caused by carbon dioxide changes in nerve cells. To minimize: take with food, stay well-hydrated, and consider reducing dose to 62.5mg twice daily if tingling is bothersome (though efficacy may decrease slightly). The tingling usually lessens after 3-4 days as your body adapts.
Treating AMS (Acute Mountain Sickness)
Step 1: Recognize symptoms early
- Headache that doesn't respond to painkillers
- Nausea or loss of appetite
- Unusual fatigue despite adequate rest
- Dizziness
- Poor sleep quality
Step 2: Stop ascending
- Stay at current altitude until symptoms resolve
- This might mean an extra rest day at Namche, Dingboche, or Lobuche
- Do NOT push on thinking symptoms will improve higher up
Step 3: Treatment measures
- Hydration: Drink 4-5 liters of water daily (dehydration worsens AMS)
- Pain relief: Paracetamol 500-1000mg for headache (avoid ibuprofen initially)
- Diamox treatment dose: If not already taking prophylaxis, start 250mg twice daily
- Rest: Avoid exertion; take it very easy
- Avoid: Alcohol, sleeping pills, heavy meals
Step 4: Reassess after 24 hours
- Improving: Can consider slow ascent, maintaining treatment measures
- No change: Remain at altitude another day OR descend 300-500m
- Worsening: Descend immediately to last altitude where you felt well
Step 5: Know when to descend
- Symptoms persist beyond 48 hours at same altitude
- Any worsening despite rest and medication
- Development of HACE/HAPE symptoms
- Persistent vomiting preventing hydration/medication
- Severe symptoms that interfere with basic functions
Emergency Treatment for HACE
High Altitude Cerebral Edema is a medical emergency requiring immediate action.
Recognition:
- Severe headache unresponsive to medication
- Confusion, disorientation, personality changes
- Loss of coordination (ataxia)—cannot walk straight line
- Severe fatigue, extreme weakness
- Progression to stupor, coma if untreated
Immediate actions:
- Dexamethasone: 8mg initial dose (oral, or IM injection if available), then 4mg every 6 hours
- Oxygen: If available, 2-4 liters per minute
- Descend NOW: Even at night, even in bad weather—descent is essential
- Portable altitude chamber: Use Gamow bag if descent impossible due to weather
- Never leave alone: Severe HACE patients cannot make rational decisions
Descent protocol:
- Descend minimum 500-1000m immediately
- Continue descending until symptoms improve
- Most patients need evacuation to Kathmandu or lower elevation clinic
- Do NOT stop descending just because dexamethasone makes patient feel better—the medication masks symptoms but doesn't cure the problem
Emergency Treatment for HAPE
High Altitude Pulmonary Edema is fluid accumulation in lungs—life-threatening if untreated.
Recognition:
- Extreme shortness of breath, even at rest
- Cannot catch breath after 20-30 minutes of rest
- Persistent cough (dry or productive)
- Gurgling or rattling sounds in chest
- Pink or frothy sputum (late sign)
- Blue lips or fingernails (cyanosis)
- Extreme fatigue, weakness
Immediate actions:
- Nifedipine: 30mg extended-release tablet immediately, then 30mg every 12 hours (or 20mg immediate-release every 8 hours)
- Oxygen: If available, 4-6 liters per minute—critical
- Descend NOW: Even at night—HAPE can be rapidly fatal
- Minimize exertion: Patient should be carried/assisted if possible; exertion worsens HAPE
- Keep warm: Cold stress worsens pulmonary pressures
Descent protocol:
- Descend as low as necessary until breathing improves
- Even 500m descent can be life-saving
- Continue nifedipine during descent
- Most patients require medical evacuation
HAPE Can Kill Quickly
HAPE can progress from mild symptoms to life-threatening crisis within 4-6 hours. The Himalayan Rescue Association documents cases where healthy trekkers went from "slight breathlessness" to unconsciousness in under 12 hours. Any shortness of breath at rest should trigger immediate concern and preparation for descent. Don't wait to see if it gets better—HAPE always requires descent.
Altitude Sickness Prevention Strategies
Acclimatization schedule:
- Follow "climb high, sleep low" principle on proper itineraries
- Include designated rest/acclimatization days (Namche, Dingboche are critical)
- Avoid ascending more than 500m sleeping altitude per day above 3,000m
- If ascending >500m, include extra rest day every 3-4 days
Hydration:
- Drink 4-5 liters of fluids daily at altitude
- Urine should be clear to pale yellow
- Dark urine = dehydration = increased AMS risk
- Don't rely on thirst—drink on schedule
Nutrition:
- Maintain high-carbohydrate diet (70% of calories from carbs)
- Eat even when not hungry—appetite suppression is common at altitude
- Avoid heavy meals that cause bloating
- Small, frequent meals better than large meals
Avoid:
- Alcohol (dehydrates, suppresses breathing, masks symptoms)
- Sleeping medications (suppress breathing)
- Overexertion (gradual activity is fine; exhaustion is counterproductive)
- Tobacco (worsens oxygenation)
Helpful practices:
- Light activity (walking around camp) superior to total rest
- Proper sleep position (slightly elevated head)
- Keep warm (cold stress increases altitude symptoms)
- Monitor symptoms daily using Lake Louise AMS scoring
Complete First Aid Supplies
Beyond medications, your first aid kit needs supplies to treat injuries, wounds, and common trekking ailments. This comprehensive list covers what you'll actually use on a 2-3 week trek.
Wound Care & Bandaging
Adhesive Bandages (Band-Aids)
- Assorted sizes: 10 small, 10 medium, 5 large
- Heavy-duty fabric type (stays on better than plastic)
- Waterproof variety for blister protection
- Purpose: Minor cuts, abrasions, hot spots before they become blisters
Gauze Pads (Sterile)
- 4x4 inch: 10 pads
- 2x2 inch: 5 pads
- Purpose: Wound cleaning, covering larger wounds or deep blisters
Roll Gauze
- 2-inch width: 1 roll
- 4-inch width: 1 roll
- Purpose: Wrapping wounds, securing gauze pads, makeshift compression bandage
Medical Tape
- 1-inch cloth tape: 1 roll
- Purpose: Securing bandages, taping blisters (though Leukotape is superior)
- Tip: Test tape on skin before trek—some people react to adhesive
Elastic Bandage (ACE wrap)
- 3-inch width: 1 bandage with metal clips
- Purpose: Sprains, strains, compression for swelling, securing splints
- Alternative: Cohesive self-adherent wrap (sticks to itself, not skin)
Moleskin/Molefoam
- 1 sheet of each (roughly 4x6 inches)
- Purpose: Blister prevention, padding around blisters
- Cut to size and apply to hot spots before blisters form
- Thicker than regular bandages—provides cushioning
Leukotape P (Essential)
- 1 roll (1.5 inch width)
- Purpose: THE gold standard for blister prevention and treatment
- Apply to areas prone to blisters (heels, toes) before trek starts
- Far superior to regular tape—stays on through sweat, water
- Used by ultrarunners and professional trekkers worldwide
Compeed/Hydrocolloid Blister Bandages
- 5-8 bandages (mixed sizes)
- Purpose: Advanced blister treatment—creates moist healing environment
- Stays on for days, even while trekking
- More expensive than moleskin but highly effective
- Apply to existing blisters (after draining if necessary)
Wound Cleaning & Antiseptics
Antiseptic Wipes/Alcohol Pads
- 15-20 individual packets
- Purpose: Clean wounds, sterilize tweezers/scissors before use
- Alcohol or benzalkonium chloride-based
- Expire after 2-3 years—check dates
Povidone-Iodine Wipes (Betadine)
- 10-15 wipes
- Purpose: Superior antiseptic for wound cleaning
- Broader antimicrobial coverage than alcohol
- Less painful than alcohol on open wounds
Antibiotic Ointment (covered in medications)
Saline Solution (Optional)
- Small bottle or single-use ampoules
- Purpose: Irrigating wounds, flushing dirt from deep cuts
- Can improvise with clean boiled water + pinch of salt
Blister Care (Critical Category)
Given blisters' status as the #1 trekking complaint, dedicated supplies are essential:
Prevention:
- Leukotape P applied to heels, toes, anywhere shoes rub
- Foot powder or anti-chafe balm (Body Glide, 2Toms Blistershield)
- Liner socks under trekking socks to reduce friction
Treatment:
- Sterile needle or safety pin for draining
- Alcohol wipes for sterilization
- Compeed advanced blister bandages
- Gauze pads for covering large blisters
- Leukotape for additional protection over dressing
When to drain blisters:
- If blister is large (>1cm) and painful
- If you must continue trekking
- If blister is in location that will experience continued friction
How to drain properly:
- Sterilize needle with alcohol or flame
- Pierce blister at edge, allow fluid to drain
- Do NOT remove skin covering blister
- Apply antibiotic ointment
- Cover with Compeed or gauze + Leukotape
- Monitor daily for signs of infection
See detailed blister prevention and treatment section below.
Tools & Equipment
Tweezers (High-Quality)
- Fine-point precision tweezers
- Purpose: Removing splinters, thorns, ticks
- Test before trip—cheap tweezers don't grip well
Scissors (Small Bandage Scissors)
- Blunt-tip safety scissors or trauma shears
- Purpose: Cutting tape, gauze, moleskin, clothing in emergencies
- Size: 4-5 inches long sufficient
Safety Pins
- 4-6 pins in assorted sizes
- Purpose: Securing bandages, draining blisters, gear repairs
- Bring several—they get lost
Thermometer (Digital)
- Purpose: Detecting fever (infection indicator)
- Armpit or oral type (rectal unnecessary)
- Critical for distinguishing altitude sickness from infection
- Normal range at altitude: 36.5-37.5°C (97.7-99.5°F)
- Fever definition: >38°C (100.4°F)
Irrigation Syringe (Optional but Useful)
- 10-20ml syringe without needle
- Purpose: Irrigating deep wounds, removing dirt/debris
- Especially useful for mountain abrasions from falls
Splinter Probes (Optional)
- If trekking through forested areas
- Helps remove embedded splinters tweezers can't grasp
Sun & Skin Protection
Sunscreen (High SPF)
- SPF 50+ broad spectrum
- Water-resistant formula
- 1-2 small bottles (50-100ml total)
- UV radiation increases 10% per 1,000m altitude
- Reapply every 2-3 hours on face, neck, ears
- See detailed sun protection guide
Lip Balm with SPF
- SPF 30+ minimum
- 2-3 sticks (lips burn/crack easily at altitude)
- Apply constantly throughout day
Zinc Oxide Stick
- For nose, cheeks, ears (areas that burn worst)
- Physical barrier—doesn't absorb into skin
- Essential for multi-hour exposed ridge walks
Moisturizer
- Small tube of basic moisturizer
- Extreme dryness at altitude causes cracked skin
- Face, hands, knuckles most affected
Eye Care
Eye Drops (Artificial Tears)
- Lubricating drops for dry, irritated eyes
- Altitude and sun cause severe eye dryness
- 1 small bottle
Eye Irrigation Solution
- For flushing dust, debris from eyes
- Common issue on dusty trails
- Saline solution works
Spare Contact Lenses/Glasses
- If you wear corrective lenses, bring backups
- Glasses are safer than contacts at altitude (dryness issues)
- Store extras in protective case
Dental Supplies
Temporary Filling Material (Dentemp)
- For lost fillings or broken teeth
- Available at pharmacies
- Small kit sufficient
Dental Floss
- Dual purpose: oral hygiene + emergency sewing/cord
- Food trapped between teeth can cause pain at altitude
Clove Oil
- Natural toothache pain relief
- Apply to affected tooth with cotton swab
Miscellaneous Essential Items
Cotton Swabs (Q-tips)
- 10-15 swabs
- Purpose: Applying ointments, cleaning wounds, ear care
Disposable Gloves
- 2-3 pairs nitrile gloves
- Purpose: Treating others' wounds, hygiene
- Essential if treating bleeding injuries
Triangular Bandage
- 1-2 bandages
- Purpose: Arm sling, head wrap, makeshift tourniquet (extreme emergencies)
- Versatile emergency item
Emergency Blanket
- Compact mylar space blanket
- Purpose: Hypothermia prevention, shock treatment
- Weighs almost nothing, can save lives
SAM Splint (Optional)
- Lightweight malleable splint
- Purpose: Stabilizing fractures, severe sprains
- Can improvise with trekking poles + padding
- Mainly for more remote/technical treks
CPR Face Shield
- If you're CPR trained
- One-way valve prevents disease transmission
Medical Reference Card
- Laminated quick-reference guide for altitude sickness, CPR, wound care
- Several organizations publish trekking-specific cards
- Helpful when you're stressed/sleep-deprived and can't remember protocols
Organization System
First Aid Kit Container:
- Waterproof stuff sack or rigid container
- Clearly labeled "FIRST AID"
- Bright color so easily found in pack
- Size: Roughly 1-2 liters capacity for comprehensive kit
Organization tips:
- Use small ziplock bags to group items by category
- Label bags: "Blister Care," "Wound Care," "Medications," etc.
- Keep most-used items in outer pocket
- Maintain medication list with dosages inside kit
- Include waterproof paper and pen for medical notes
Weight consideration:
- Comprehensive first aid kit: 500-800 grams
- If using porter: weight not an issue
- If carrying yourself: every gram counts, but don't skimp on essentials
- Consider sharing some items with trekking partner (one thermometer for two people)
First Aid Kit Testing Before Departure
Two weeks before your trek, unpack your entire first aid kit and go through every item. Check expiration dates, test that tape actually sticks, ensure scissors cut cleanly, verify medication quantities match your calculations. I've seen trekkers discover their "comprehensive kit" contained 3 bandaids and expired aspirin the night before flying to Lukla. Don't be that person.
Blister Prevention & Treatment
Blisters send more trekkers home early than any other medical condition except severe altitude sickness. The good news: they're largely preventable with proper preparation and early intervention.
Understanding Blister Formation
How blisters form:
- Friction between skin and sock/boot creates heat
- Heat causes skin layers to separate
- Fluid fills the gap between separated skin layers
- Blister forms, causing pain and potential infection
Risk factors:
- New boots not properly broken in
- Boots too large (foot slides forward on descents)
- Boots too small (toes compressed, rubbing)
- Wet feet (moisture softens skin, increases friction)
- Long downhill sections (toes jam forward)
- Poor sock choice (cotton instead of wool/synthetic)
- Dirty feet (grit acts like sandpaper)
- Going too fast early in trek before feet toughen
Prevention Strategies (Most Important)
Pre-Trek Preparation:
- Break in boots for minimum 50-80km before trek
- Test your exact sock combination during training
- Identify personal blister-prone areas during training hikes
- Pre-tape problem areas with Leukotape BEFORE trek starts
- Toughen feet with progressive training hikes
Boot Fitting:
- Proper trekking boot selection is critical
- Boots should fit snugly in heel (no lift when walking)
- Adequate toe room (thumbnail width between longest toe and boot front)
- Try boots with your actual trekking socks
- Lace properly: snug at top, looser at toes on descents
Sock Selection:
- Never cotton (holds moisture, creates friction)
- Merino wool or synthetic wicking materials
- Liner socks + thicker outer socks = friction reduction
- Change socks daily (wash and air-dry old pair)
- Carry 3-4 pairs total, rotating daily
Daily Prevention Routine:
Morning (before starting trek):
- Inspect feet for hot spots (reddened areas that feel warm)
- Apply Leukotape to any hot spots immediately
- Consider prophylactic taping of known problem areas (heels, little toes)
- Apply foot powder or anti-friction balm to feet
- Ensure socks are completely dry
During trek:
- Stop at FIRST sign of hot spot or rubbing
- Apply Leukotape or moleskin immediately (don't wait for blister)
- Adjust lacing if boots feel too tight/loose in certain areas
- Keep feet dry (change socks if wet from sweat or stream crossings)
Evening:
- Remove boots/socks ASAP upon reaching tea house
- Wash feet with soap and water
- Air-dry feet completely before putting on camp shoes
- Inspect entire foot surface for problems
- Apply Compeed to any small blisters that formed during day
The Hot Spot Rule: Stop Immediately
The difference between a preventable blister and a trek-ending disaster is 30 seconds. The moment you feel a hot spot or rubbing sensation, STOP, remove your boot, and inspect. Apply Leukotape or moleskin to the exact area. This 2-minute intervention can save you from 10 days of agony. I've never met a trekker who regretted stopping to deal with a hot spot, but I've met dozens who regretted pushing on "just to the next tea house."
Leukotape Application Technique
Leukotape P is the gold standard for blister prevention used by ultrarunners, thru-hikers, and professional trekking guides.
Why Leukotape works:
- Much stronger adhesive than regular tape
- Doesn't stretch (reduces friction movement)
- Stays on through sweat, moisture, multi-day wear
- Creates protective "second skin" barrier
- Can apply directly to intact skin or over small blisters
How to apply:
-
Prepare skin:
- Wash and completely dry area
- Optionally apply tincture of benzoin (adhesive enhancer)—let dry 30 seconds
-
Cut tape:
- Cut piece 1-2 inches larger than problem area
- Round corners (sharp corners peel off easily)
-
Apply tape:
- Place on skin with light tension (don't stretch)
- Press firmly, rubbing to activate adhesive
- Smooth out any wrinkles (wrinkles create new friction points)
-
Edges:
- Ensure edges are firmly adhered
- Consider applying second layer if edges in high-friction zone
-
Monitor:
- Check edges daily
- Can stay on for 3-5 days if properly applied
- Remove if it starts peeling (partial peeling creates worse friction)
Common application areas:
- Back of heels (most common blister location)
- Little toes (cramped in boots)
- Ball of foot (long downhills)
- Between toes (if toes rub together)
Blister Treatment
Despite best prevention, blisters sometimes happen. Proper treatment prevents infection and allows continued trekking.
Small Intact Blisters (<1cm):
- Leave unpopped if possible
- Cover with Compeed blister bandage
- Add Leukotape over Compeed for extra protection
- Monitor daily for signs of growth or infection
Large Blisters (>1cm) or Painful Blisters:
- Drain to allow continued trekking
- Do NOT remove roof (skin covering blister)
Drainage procedure:
- Wash hands and blister area with soap and water
- Sterilize needle or safety pin (alcohol wipe or hold in flame for 10 seconds)
- Pierce blister at edge (not center)
- Gently press to express all fluid
- Leave blister roof intact—it protects underlying tissue
- Apply antibiotic ointment to puncture site
- Cover with Compeed or gauze pad + Leukotape
- Change dressing daily, watching for infection
Blood Blisters:
- Contain blood instead of clear fluid
- Result from significant trauma/friction
- Generally do NOT drain unless very large and painful
- Blood will reabsorb over several days
- Protect with padding and Leukotape
- Higher infection risk if drained—avoid unless necessary
Blister Care While Continuing to Trek:
- Change dressing each morning before starting
- Reapply Leukotape if edges are peeling
- Monitor for signs of infection
- Consider rest day if blister is severe
Signs of Blister Infection (Serious):
- Increasing redness spreading beyond blister margin
- Red streaks extending from blister (lymphangitis)
- Increasing pain, warmth, swelling
- Cloudy or foul-smelling drainage
- Fever
Infected blister treatment:
- Clean 2-3x daily with antiseptic
- Apply antibiotic ointment
- Keep covered with clean dressing
- Start oral antibiotics (Cipro or Azithromycin)
- Consider rest day or evacuation if severe
- Infected blisters can progress to cellulitis (serious soft tissue infection)
Specific Blister Locations
Heel Blisters:
- Most common location
- Often from boots too large (heel lift)
- Prevention: heel-lock lacing technique, Leukotape on heel before trek
- Treatment: drain if large, use donut-shaped moleskin to pad around blister
Toe Blisters:
- From toes hitting boot front (long descents) or compression
- Prevention: Proper boot fit, toe-loosened lacing on downhills
- Treatment: very difficult to bandage—use small pieces of Leukotape or liquid bandage
Between-Toe Blisters:
- From toes rubbing together (usually 4th-5th toes)
- Prevention: Small cotton/gauze pad between toes
- Treatment: Almost impossible to bandage—foam toe separators or just padding
Ball of Foot:
- From prolonged downhill walking
- Prevention: Insoles with metatarsal pads, proper boot flex
- Treatment: Large Compeed bandage or multiple layers moleskin for padding
Arch/Instep (Rare but Serious):
- Often from boot lacing too tight across instep
- Treatment: Requires significant padding—may need rest day
The Duct Tape Myth
You'll see advice to use duct tape for blister prevention. DON'T. Duct tape adhesive isn't designed for skin—it's too aggressive and will peel off your skin when removed. It also doesn't breathe, creating moisture buildup. Leukotape costs more but is specifically designed for athletic/medical skin use. It's worth the extra $8.
Gastrointestinal Issues
Digestive problems are the second most common medical complaint on Nepal treks (after blisters). Understanding prevention, treatment, and when to worry is essential.
Types of GI Issues
Traveler's Diarrhea
- Cause: Bacterial contamination (E. coli most common), sometimes viral or parasitic
- Onset: Usually 3-7 days after arrival in Nepal
- Symptoms: Loose stools 3+ times per day, cramping, urgency, sometimes low fever
- Duration untreated: 3-5 days typically
- Severity: Mild to moderate—inconvenient but manageable
Giardiasis (Giardia)
- Cause: Parasite Giardia lamblia from contaminated water
- Onset: 1-3 weeks after exposure (often shows up after trek)
- Symptoms: Explosive watery diarrhea, severe gas, bloating, sulfurous belching, weight loss
- Duration untreated: Weeks to months
- Severity: Moderate to severe—very unpleasant
Food Poisoning
- Cause: Bacterial toxins from improperly stored/prepared food
- Onset: 2-6 hours after eating contaminated food
- Symptoms: Sudden severe nausea, vomiting, diarrhea, cramping
- Duration: 12-48 hours typically
- Severity: Moderate to severe but short-lived
Altitude-Related GI Issues
- Cause: Altitude itself affects GI system
- Symptoms: Loss of appetite, mild nausea, occasional loose stools, bloating
- Not infectious: Won't respond to antibiotics
- Management: Smaller frequent meals, stay hydrated, acetazolamide may help
Prevention Strategies
Water Safety:
- Never drink untreated water from streams, taps, or wells
- Use proper water purification methods
- Bottled water: check seal is unbroken
- Hot drinks (tea, coffee) generally safe—boiling kills pathogens
- Avoid ice in drinks (made from untreated water)
- Brush teeth with purified water only
Food Safety:
- Eat at busy tea houses (high turnover = fresher food)
- Choose freshly cooked hot foods over room temperature items
- Avoid raw vegetables and salads (washed in untreated water)
- Peel fruits yourself
- Avoid dairy products (no refrigeration)
- Dal bhat is safest option—served piping hot, vegetarian, high turnover
- See complete trekking food guide
Hand Hygiene:
- Wash hands with soap before eating (most important prevention)
- Hand sanitizer after toilet use (60%+ alcohol content)
- Avoid touching face with unwashed hands
- Carry personal hand sanitizer—not all tea houses have soap
Toilet Hygiene:
- Squat toilets are standard—don't let clothes touch floor
- Bring own toilet paper (tea houses often don't provide)
- Many trekkers bring antimicrobial wet wipes for personal cleaning
Treatment Protocol
Mild Diarrhea (3-5 loose stools, no fever, otherwise feeling okay):
-
Hydration (most critical):
- Oral rehydration salts: 1 packet per liter, drink 1 liter every 2-3 hours
- Continue drinking beyond thirst
- Signs of adequate hydration: pale urine, moist mouth, normal skin turgor
-
Diet modification:
- BRAT diet: Bananas, Rice, Applesauce (rare on trek), Toast
- Plain rice, boiled potatoes, crackers
- Avoid dairy, spicy food, alcohol, caffeine
- Small frequent meals rather than large meals
-
Rest:
- Consider rest day if symptoms moderate
- Avoid strenuous trekking—save energy for recovery
-
Monitor:
- Track stool frequency
- Watch for worsening symptoms (blood, high fever, severe pain)
- Continue hydration aggressively
Moderate Diarrhea (>6 stools/day, interfering with trek, mild fever <38.5°C):
Add to above:
-
Loperamide (Imodium):
- Initial dose: 4mg (2 tablets)
- Then 2mg after each loose stool (max 16mg/24 hours)
- Reduces stool frequency and cramping
- Important: This is symptom management, not cure
- Allows you to trek to lower altitude or reach evacuation point
-
Antibiotic consideration:
- If symptoms not improving after 24 hours
- If you must continue trekking
- Cipro 500mg twice daily for 3-5 days OR
- Azithromycin 500mg once daily for 3 days
Severe Diarrhea (>8 stools/day, fever >38.5°C, bloody stools, severe pain, dehydration):
-
Start antibiotics immediately:
- Ciprofloxacin 500mg twice daily OR
- Azithromycin 500mg once daily
- Do NOT wait—severe bacterial diarrhea needs treatment
-
Aggressive hydration:
- ORS: 1 liter every 1-2 hours if tolerated
- If vomiting prevents oral intake: medical evacuation needed
-
Anti-nausea medication:
- Ondansetron 4mg dissolving tablet if vomiting
- Allows you to keep down fluids and medications
-
Avoid Imodium with:
- High fever (>38.5°C)
- Bloody stools
- Severe abdominal pain
- Loperamide can worsen certain bacterial infections by retaining toxins
-
Consider evacuation if:
- Unable to stay hydrated
- Symptoms worsening despite antibiotics after 24-48 hours
- Signs of severe dehydration (dizziness, confusion, very dark urine, no urination)
Antibiotic Choice
Ciprofloxacin (Cipro):
- Broad spectrum fluoroquinolone
- Effective against most bacterial causes of traveler's diarrhea
- Dosage: 500mg twice daily for 3-5 days
- Take on empty stomach (1 hour before or 2 hours after food)
- Avoid dairy products within 2 hours of dose
- Side effects: Nausea (take with small amount of food if problematic), sun sensitivity, rarely tendon issues
Azithromycin (Z-Pack):
- Macrolide antibiotic, increasingly preferred
- Growing evidence of superiority over Cipro in Nepal/Asia
- Dosage: 500mg once daily for 3 days (or 1000mg single dose in some protocols)
- Can take with or without food
- Better tolerated than Cipro for many people
- Particularly effective against Campylobacter (common in Nepal)
Which to choose:
- Both work for most cases
- Azithromycin if available: shorter course, fewer side effects, better compliance
- Cipro if that's what you have: still effective for majority of infections
- Ideally bring both: use Azithro first, Cipro as backup if no improvement
Giardia Treatment
Giardia often doesn't manifest until during or after your trek, so recognition is important.
Symptoms:
- Explosive watery diarrhea
- Severe bloating and gas
- Sulfurous ("rotten egg") burps and flatulence
- Floating, greasy, foul-smelling stools
- Significant fatigue
- Weight loss if prolonged
Treatment:
- Metronidazole (Flagyl): 250mg three times daily for 5-7 days (prescription needed)
- Tinidazole: Single 2g dose (easier but less available)
- Nitazoxanide: Alternative if others unavailable
On the trek:
- If you suspect Giardia mid-trek, try antibiotics first (Azithro/Cipro)
- Giardia-specific treatment may need to wait until return to Kathmandu
- Available from travel clinics in Kathmandu (CIWEC Clinic, Nepal International Clinic)
Prevention:
- Proper water purification (filters must be <1 micron to catch Giardia cysts)
- Chemical treatment: iodine or chlorine dioxide
- Avoid drinking from streams even if water looks clear
Dehydration at Altitude: Double Danger
Diarrhea and altitude create a dangerous combination. Dehydration dramatically increases altitude sickness risk and severity. If you develop diarrhea above 4,000m, aggressive hydration with ORS is critical—aim for 5-6 liters daily. Many cases diagnosed as "severe AMS" are actually dehydration-induced symptoms. The combination can necessitate evacuation even if either condition alone would be manageable.
Nausea and Vomiting
Causes on trek:
- Altitude (most common above 3,500m)
- Food poisoning
- Migraine
- Severe AMS/HACE (concerning)
Management:
Mild nausea:
- Small frequent meals instead of large meals
- Ginger tea (available at tea houses)
- Avoid greasy, spicy foods
- Fresh air, rest
Moderate-severe nausea or vomiting:
- Ondansetron (Zofran) 4mg dissolving tablet
- Repeat every 8 hours if needed
- Continue hydration in small frequent sips
- ORS if tolerating any fluids
Persistent vomiting (concerning):
- If unable to keep down fluids for >6 hours
- If combined with severe headache, confusion (HACE warning)
- If accompanied by high fever (infection)
- Consider evacuation—IV fluids may be needed
When GI Issues Require Evacuation
Absolute indications:
- Severe dehydration unresponsive to oral rehydration
- Inability to keep down fluids for >12 hours
- Bloody diarrhea with high fever and severe pain
- Signs of peritonitis (rigid, tender abdomen)
- Confusion or altered mental status (could be dehydration or HACE)
- Worsening despite appropriate treatment for 48-72 hours
Relative indications (consider evacuation):
- Moderate symptoms preventing any upward progress
- Symptoms lasting >5 days
- Significant weakness precluding safe trekking
- Limited tea house options ahead (unable to rest/recover)
Pain Management
Effective pain management allows you to continue trekking safely and comfortably. Understanding which medication to use for which type of pain is important.
Pain Medication Categories
Non-Steroidal Anti-Inflammatory Drugs (NSAIDs)
Ibuprofen (Advil, Motrin):
- Best for: Muscle soreness, joint pain, sprains, inflammation, fever
- Dosage: 400mg every 6-8 hours as needed (max 2,400mg/24 hours)
- Advantages: Reduces inflammation in addition to pain relief
- Cautions:
- Take with food (reduces stomach irritation)
- Avoid if history of stomach ulcers
- Can affect kidney function, especially with dehydration at altitude
- Some research suggests NSAIDs may increase HAPE risk slightly
- Altitude consideration: Use acetaminophen instead for altitude headaches
Naproxen (Aleve):
- Best for: Similar to ibuprofen, longer-lasting
- Dosage: 220-440mg every 8-12 hours (max 660mg/24 hours)
- Advantages: Less frequent dosing than ibuprofen
- Same cautions: As ibuprofen
Acetaminophen/Paracetamol (Tylenol, Panadol)
- Best for: Headaches (especially altitude headaches), fever, general pain when inflammation isn't primary issue
- Dosage: 500-1000mg every 6-8 hours (max 4,000mg/24 hours)
- Advantages: Safer at altitude than NSAIDs, no kidney concerns, no stomach irritation
- Cautions: Liver toxicity if overdosed—carefully track daily total
- First choice: For altitude-related headaches
Combination Approach
- Can alternate ibuprofen and acetaminophen for better pain control
- Example: Ibuprofen 400mg at 8am, acetaminophen 500mg at 11am, ibuprofen 400mg at 2pm, etc.
- Addresses pain via different mechanisms
- Commonly used for severe headaches or muscle pain
Specific Pain Scenarios
Altitude Headaches:
- First-line: Acetaminophen 500-1000mg
- Hydration: Drink 500ml water with medication
- Rest: Stop ascending, rest 1-2 hours
- If persistent: May indicate AMS—see altitude sickness section
- Avoid: Sleeping in same day—can suppress breathing
Muscle Soreness:
- Expected: Quad soreness on long descents, calf soreness on steep ascents
- First-line: Ibuprofen 400mg with food
- Non-medication: Gentle stretching, massage, warm tea house shower if available
- Prevention: Adequate fitness preparation before trek
Joint Pain (Knees, Ankles):
- Common: Knee pain on descents from repetitive impact
- First-line: Ibuprofen 400mg (anti-inflammatory properties help)
- Support: Consider trekking poles to reduce joint stress
- If severe: Elastic bandage for compression, may need rest day
- Prevention: Proper trekking technique, controlled descent speed
Sprains and Strains:
- Immediate: RICE protocol (Rest, Ice—cold stream water, Compression—elastic bandage, Elevation)
- Pain control: Ibuprofen 400mg every 6 hours
- Assessment: Determine if you can continue trekking
- Mild sprain: Can usually continue with elastic bandage support and poles
- Moderate-severe: May need porter assistance or evacuation
- Red flags: Inability to bear weight, severe swelling, deformity
Back Pain:
- Common causes: Heavy pack, poor sleeping positions (thin tea house mattresses)
- First-line: Ibuprofen 400mg, gentle stretching
- Prevention: Proper backpack fit and weight distribution
- Serious warning signs: Pain radiating down legs, numbness, weakness—possible disc issue
Dental Pain:
- Common: Altitude can exacerbate existing dental issues
- First-line: Ibuprofen 400mg + acetaminophen 500mg combination
- Topical: Clove oil applied to affected tooth
- Temporary filling: If filling lost—see dental section below
- If severe: May require evacuation—dental infection can become serious
Menstrual Cramps:
- First-line: Ibuprofen 400mg (more effective than acetaminophen for cramps)
- Start early: Take at first sign of cramping
- Heat: Hot water bottle (ask tea house staff) applied to abdomen
- See: Women's health section for complete information
Pain as Warning Sign
Not all pain should be "powered through." Certain pain types indicate serious problems:
Chest Pain:
- Possible causes: HAPE, heart issues, muscle strain, pneumonia
- Warning signs: Chest tightness, pain with breathing, pain radiating to jaw/arm
- Action: Stop immediately, assess other symptoms, consider emergency descent
- When to evacuate: Any significant chest pain unexplained by obvious muscle strain
Severe Abdominal Pain:
- Possible causes: Appendicitis, perforated ulcer, kidney stones, ectopic pregnancy
- Warning signs: Severe pain, rigid abdomen, fever, vomiting
- Action: Cannot rule out surgical emergency—evacuation required
Severe Headache Unresponsive to Medication:
- Possible causes: HACE, meningitis, intracranial bleeding (after head injury)
- Warning signs: "Worst headache of life," confusion, vision changes, neck stiffness
- Action: Immediate descent if at altitude, evacuation if other concerning signs
Calf Pain:
- Possible causes: Muscle strain (common), deep vein thrombosis/DVT (rare but serious)
- DVT warning signs: Asymmetric swelling (one calf much larger), warmth, redness
- Action: If suspected DVT, do NOT massage, evacuate for medical evaluation
- Risk factors: Dehydration, prolonged sitting (flights), oral contraceptives
Pain Medication Timing
For predictable pain (like muscle soreness), take medication preventatively rather than waiting for pain to become severe. Take ibuprofen 30 minutes before starting a long descent day if your knees typically hurt. Pain is easier to prevent than to treat once severe. But never use pain medication to mask concerning pain that should stop you from trekking (severe headache, chest pain, etc.).
Infection Prevention
Infections can derail your trek and, in remote areas, become life-threatening if not treated promptly. Prevention and early treatment are key.
Wound Infections (Cellulitis)
The most common serious infection on treks develops from untreated blisters or minor cuts.
How wounds become infected:
- Break in skin (blister, cut, abrasion)
- Bacteria enter wound (often from dirty hands, clothing, or environment)
- Bacteria multiply in wound
- Infection spreads to surrounding tissue
Signs of wound infection:
- Early: Increasing redness around wound (>1cm from wound edge), warmth, swelling
- Moderate: Red streaks extending from wound (lymphangitis), increased pain, pus
- Severe: Fever, chills, rapid spread of redness, severe swelling
Prevention:
- Clean all wounds immediately with soap and water or antiseptic wipes
- Apply antibiotic ointment
- Cover wounds with clean bandage
- Change bandages daily
- Keep wounds dry when possible
- Don't pick at scabs
Treatment:
Early infection (redness <2cm, no fever):
- Increase cleaning frequency to 3x daily
- Warm compresses (warm wet cloth) 3-4x daily
- Antibiotic ointment at each dressing change
- Monitor closely—24 hours to improve or escalate treatment
Moderate infection (spreading redness, red streaks, OR fever):
- Start oral antibiotics immediately:
- First choice: Cephalexin 500mg four times daily (if you brought it)
- Alternative: Ciprofloxacin 500mg twice daily
- Alternative: Azithromycin 500mg once daily
- Continue local wound care
- Rest—avoid trekking if possible
- Mark edge of redness with pen—track if spreading
Severe infection (rapid spread, high fever, severe pain):
- Start antibiotics as above
- Evacuation strongly recommended
- Cellulitis can progress to sepsis without IV antibiotics
- Do NOT delay—infections spread faster at altitude
Blister Infection Case Study
In 2023, a trekker developed a small heel blister on day 2 of an EBC trek. She drained it but didn't keep it clean. By day 5, at Dingboche, the blister site was severely infected with red streaks up her calf. She required helicopter evacuation to Kathmandu for IV antibiotics. What could have been managed with antiseptic and bandages became a $12,000 evacuation and 5 days in hospital. Clean your blisters.
Respiratory Infections
Upper respiratory infections and bronchitis are common on treks due to dust, dry air, close quarters in tea houses, and reduced immune function at altitude.
Prevention:
- Hand hygiene (avoid touching face)
- Stay warm and dry
- Adequate hydration (dry airways more susceptible)
- Avoid sharing water bottles, utensils
- Consider buff/mask on dusty trails
Symptoms:
Common cold (viral):
- Runny nose, sore throat, mild cough
- Low-grade fever or none
- Usually improves in 5-7 days
- No specific treatment needed
Bronchitis (bacterial):
- Productive cough with colored sputum (yellow/green)
- Chest discomfort
- Possibly fever
- May need antibiotics
Treatment:
Viral URI (common cold):
- Rest, fluids, symptom management
- Acetaminophen for fever/discomfort
- Lozenges for sore throat
- Can usually continue trekking if feeling okay
- Symptoms persist but stable: viral, wait it out
Suspected bacterial bronchitis:
- If productive cough >5 days with colored sputum
- If fever developing or worsening
- Start antibiotics:
- Azithromycin 500mg day 1, then 250mg days 2-5, OR
- Amoxicillin-clavulanate 875mg twice daily for 7 days (if you brought it)
- Consider rest day
- Monitor for progression
Distinguishing bronchitis from HAPE (critical):
| Feature | Bronchitis | HAPE |
|---|---|---|
| Onset | Gradual over days | Rapid, 24-48 hours |
| Cough | Productive, colored sputum | Initially dry, later pink frothy |
| Shortness of breath | With exertion only | At rest |
| Fever | Common | Rare |
| Chest sounds | Coarse crackles/wheezing | Fine crackles, gurgling |
| Response to descent | No change | Dramatic improvement |
If uncertain: Descend. HAPE is life-threatening and can present similarly to pneumonia.
Urinary Tract Infections (UTIs)
Especially common in women trekkers due to dehydration, infrequent urination, and hygiene challenges.
Prevention:
- Drink plenty of fluids (don't limit water to avoid bathroom stops)
- Urinate regularly—don't "hold it" for hours
- Wipe front to back
- Urinate after sexual activity (if trekking with partner)
- Avoid tight clothing
- Consider prophylactic cranberry supplements if prone to UTIs
Symptoms:
- Burning or pain with urination
- Frequent urge to urinate with little output
- Cloudy or bloody urine
- Lower abdominal discomfort
- If kidney infection: fever, back pain, severe illness
Treatment:
Uncomplicated UTI (bladder infection):
- Ciprofloxacin 500mg twice daily for 3 days, OR
- Azithromycin 500mg once daily for 3 days (less ideal but works), OR
- Nitrofurantoin 100mg twice daily for 5 days (if you brought it specifically for UTIs)
- Increase fluid intake dramatically
- Cranberry supplements if available
- Phenazopyridine (Pyridium/AZO) for pain relief (over-the-counter)
Kidney infection (pyelonephritis):
- Fever, back/flank pain, severe illness
- Requires stronger/longer antibiotics
- Consider evacuation—can become septic
- Start antibiotics immediately while arranging evacuation
Women-specific: See women's health section for detailed UTI prevention strategies.
Skin Infections
Fungal Infections (Athlete's Foot, Jock Itch):
- Prevention: Keep feet/groin dry, antifungal powder in boots, change socks daily
- Treatment: Clotrimazole or miconazole cream twice daily
- Continue treatment for 7 days after symptoms resolve
Heat Rash/Prickly Heat:
- From occlusive clothing, sweat accumulation
- Prevention: Moisture-wicking fabrics, air skin when possible
- Treatment: Keep area dry, hydrocortisone cream for itching
When to Start Antibiotics
Decision framework:
Definitely start antibiotics:
- Moderate-severe diarrhea with fever or blood
- Spreading wound infection with red streaks or fever
- Productive cough with fever and colored sputum >5 days
- UTI symptoms
- Any severe infection signs: high fever, rapid spread, severe pain
Probably start antibiotics:
- Diarrhea interfering with trek, not improving after 24-48 hours
- Wound infection with spreading redness (even without fever)
- Cough producing colored sputum for >3 days
Probably don't need antibiotics (viral):
- Common cold symptoms (clear runny nose, dry cough, mild sore throat)
- Mild diarrhea improving with conservative measures
- Small wound with minimal redness, no spread
When in doubt: Telemedicine consultation (see telemedicine section), or err on side of starting antibiotics in remote setting where deterioration is high-risk.
Prescription Medications
If you take prescription medications regularly, careful planning ensures you don't run out mid-trek.
Bringing Existing Medications
Quantity:
- Bring 150% of what you need (for 14-day trek, bring 21 days' worth)
- Accounts for: delayed return flights, lost pills, extended trek
- Insurance may not cover extra—pay out-of-pocket if necessary
Packaging:
- Keep in original prescription bottles with pharmacy labels
- Labels should show: your name, medication name, dosage, prescribing doctor
- This prevents customs issues and proves legitimacy
- Bring copies of prescriptions (paper or phone photo)
Doctor's Letter:
- For controlled substances or large quantities
- On letterhead, should state: diagnosis, medication, dosage, necessity
- Particularly important for: opioids, stimulants, injectable medications, large quantities
Storage:
- Some medications require specific storage (refrigeration, protect from heat/light)
- Insulin: keep in insulated case, avoid freezing (difficult in winter)
- Most medications: keep in waterproof bag, protect from extreme temperatures
- High altitude affects some medication stability—ask pharmacist
Splitting Supply:
- Keep half in personal bag, half in porter's bag or partner's bag
- If one bag is lost/stolen, you still have supply
Common Chronic Conditions
Hypertension (High Blood Pressure):
- Critical: Don't skip doses—blood pressure can spike at altitude
- Medication considerations:
- Most BP medications safe at altitude
- Diuretics: may increase dehydration risk—discuss with doctor
- Nifedipine: typically used for BP, also treats HAPE (can serve dual purpose)
- Monitoring: Consider bringing small blood pressure cuff if concerned
- See doctor: 4-6 weeks before trek to optimize medications
Diabetes:
- Type 1 (insulin-dependent):
- Bring 2x insulin needed (can't replace on trail)
- Multiple insulin pens/vials in case one breaks
- Extra glucose monitoring supplies
- Fast-acting glucose for hypoglycemia (juice, candy)
- Glucagon emergency kit if prescribed
- Keep insulin from freezing (body warmth, insulated case)
- Altitude and exertion increase insulin sensitivity—may need less insulin
- Type 2:
- Bring sufficient oral medications
- Monitor blood sugar more frequently
- Adjust food intake for long trekking days
- Carry fast-acting carbs for hypoglycemia
- Pre-trek: Ensure excellent glucose control for 3+ months before trek
- Considerations: See pre-existing conditions section
Asthma:
- Bring multiple inhalers (albuterol rescue, maintenance inhaler if using)
- Inhalers can freeze at high altitude—keep close to body
- Consider spacer device for improved delivery
- Altitude may worsen asthma—discuss with doctor
- Have action plan for exacerbation
- Some asthmatics improve at altitude (dry air), others worsen
- See pre-existing conditions section
Thyroid Disease:
- Bring full supply of thyroid medication (levothyroxine, etc.)
- Take consistently at same time daily
- Generally well-tolerated at altitude
Mental Health Medications:
- Antidepressants/Anti-anxiety: Continue as prescribed
- Don't discontinue before trek—withdrawal can be severe
- Some medications (SSRIs) may slightly increase serotonin syndrome risk with altitude—discuss with doctor
- Generally safe and important to continue
- Sleep medications: Discuss altitude safety with doctor
- Most sleep medications suppress breathing—dangerous at altitude
- If needed for severe insomnia, use only at lower elevations
- Acetazolamide actually improves sleep at altitude
Seizure Disorders:
- Never skip anti-seizure medications
- Bring extra supply—missed doses can trigger seizures
- Altitude and sleep deprivation may lower seizure threshold
- Have emergency action plan
- Trek with partner who knows seizure first aid
- Consider evacuation insurance that covers pre-existing conditions
Oral Contraceptives:
- Continue as prescribed
- Bring full supply plus extra
- Some concern about DVT risk at altitude—discuss with doctor
- If using for period suppression: continue without placebo week (see women's health section)
- Alternative: IUD doesn't require carrying supplies
ADHD Medications:
- Stimulant medications (Adderall, Ritalin) are controlled substances
- Require doctor's letter
- Nepal generally permits with prescription
- Keep in original bottle
- Altitude may affect medication needs—some find concentration affected anyway
- Discuss with doctor whether continuing at altitude is advisable
Obtaining Medications in Kathmandu
Many medications available over-the-counter in Kathmandu that require prescription in Western countries.
Reputable Pharmacies:
- Kathmandu: Tourist areas have many pharmacies
- Thamel: High concentration of pharmacies familiar with trekker needs
- Hospital pharmacies: CIWEC Clinic, Nepal International Clinic—more reliable quality
What's available:
- Diamox (acetazolamide): Widely available, $0.50-1/tablet
- Cipro, Azithromycin: Available OTC
- Pain medications: Ibuprofen, paracetamol, aspirin
- Dexamethasone, nifedipine: Usually available
- Common prescription medications: Usually available but brands may differ
Quality concerns:
- Counterfeit medications exist in Nepal
- Buy from reputable pharmacies
- Check expiration dates
- Verify packaging looks professional (not hand-written labels)
- Generic medications are cheaper and usually fine
What to buy before trek:
- Diamox (if not bringing from home)
- Antibiotics (Cipro/Azithromycin)
- Extra pain medications if needed
- Specific items you forgot
What's NOT available:
- Specialized medications for rare conditions
- Some newer brand-name medications
- Anything requiring refrigeration
- Controlled substances without local prescription
Timing:
- Allow 1-2 days in Kathmandu before trek to shop for medications
- Pharmacies in Lukla and Namche have very limited selection
- Essentially nothing available higher than Namche
Pharmacy Shopping in Thamel
Visit 2-3 pharmacies in Thamel and compare prices—variation can be significant. The pharmacy at the Himalayan Rescue Association office (near Thamel) is generally reliable for trek-specific medications and staff can advise on dosing. For critical medications, buy from hospital pharmacies even if more expensive—counterfeit risk is lower.
When to Descend
Knowing when to descend versus when you can safely continue trekking can literally save your life. This section provides clear decision-making frameworks.
Absolute Indications for Immediate Descent
These situations require descent regardless of time of day, weather, or proximity to your goal:
High Altitude Cerebral Edema (HACE) Symptoms:
- Severe ataxia (cannot walk straight line heel-to-toe)
- Altered mental status, confusion, irrational behavior
- Severe headache unresponsive to medication
- Persistent vomiting
- Loss of consciousness or near-loss
- Action: Descend immediately, minimum 500-1000m, give dexamethasone
High Altitude Pulmonary Edema (HAPE) Symptoms:
- Severe shortness of breath at rest (cannot catch breath after 20 minutes rest)
- Gurgling/rattling in chest
- Pink or frothy sputum
- Extreme fatigue/weakness
- Blue lips or fingernails
- Action: Descend immediately as far as necessary, give nifedipine, oxygen if available
Severe Infection with Systemic Signs:
- High fever (>39°C/102°F) not responding to treatment
- Spreading cellulitis with red streaks and fever
- Signs of sepsis (confusion, rapid heart rate, low blood pressure)
- Suspected appendicitis or other surgical emergency
- Action: Descend to evacuation point, start antibiotics, arrange helicopter if necessary
Cardiac Symptoms:
- Chest pain not clearly musculoskeletal
- Irregular heartbeat with dizziness/weakness
- Severe shortness of breath disproportionate to altitude/exertion
- Action: Descend, arrange evacuation
Severe Trauma:
- Suspected fracture with inability to bear weight
- Deep laceration requiring sutures
- Head injury with loss of consciousness, confusion, or vomiting
- Action: Splint/stabilize, descend or evacuate depending on severity
Strong Indications to Descend
These situations usually require descent but allow for some assessment/stabilization:
Worsening AMS Despite Treatment:
- AMS symptoms worsening after 24 hours at same altitude
- AMS symptoms not improving after 48 hours rest and treatment
- Any progression toward HACE symptoms
- Action: Descend to last altitude where you felt well, reassess
Moderate-Severe Dehydration:
- Unable to keep down fluids due to vomiting
- Severe diarrhea causing significant fluid loss
- Dark urine, dizziness, confusion
- Action: Attempt oral rehydration, descend if unable to rehydrate
Respiratory Infection Not Improving:
- Productive cough with fever despite antibiotics for 48 hours
- Increasing shortness of breath (rule out HAPE)
- Chest pain with breathing
- Action: Descend to lower altitude, continue antibiotics, evacuate if severe
Infected Wound:
- Cellulitis spreading despite oral antibiotics
- Any wound infection with fever
- Action: Descend to medical facility, may need IV antibiotics
Inability to Trek Safely:
- Severe weakness/fatigue preventing safe walking
- Dizziness risking falls on exposed trail
- Any condition preventing you from self-rescuing if needed
- Action: Assess whether porter assistance sufficient or evacuation needed
When You Can Likely Continue
These situations usually allow continued trekking with treatment and monitoring:
Mild AMS with Improvement:
- Mild headache, nausea, fatigue
- Symptoms stable or improving with rest and medication
- No progression after 24 hours rest
- Action: Take extra acclimatization day, then continue slowly if improving
Managed Diarrhea:
- Diarrhea controlled with Imodium + antibiotics
- Staying hydrated with ORS
- No fever, no blood in stool
- Feeling well enough to trek
- Action: Continue with frequent rest stops, monitor for worsening
Minor Wounds/Blisters:
- Treated blisters without signs of infection
- Minor cuts with clean dressings
- Stable condition
- Action: Continue with daily wound care, monitor for infection
Mild Respiratory Symptoms:
- Common cold symptoms (viral URI)
- No fever or minimal fever
- Productive cough with clear/white sputum
- Feeling relatively well
- Action: Continue at pace you're comfortable with, rest if needed
Musculoskeletal Pain:
- Muscle soreness, joint aches from trekking
- Responding to NSAIDs/rest
- No injury/trauma
- Action: Continue with pain management, trekking poles for support
Decision-Making Framework
When uncertain whether to descend, work through this checklist:
1. Identify the problem:
- What are your symptoms?
- When did they start?
- Are they getting better, worse, or staying the same?
2. Rule out life-threatening conditions:
- HACE symptoms? → Descend now
- HAPE symptoms? → Descend now
- Chest pain/cardiac symptoms? → Descend now
- Severe infection? → Descend to medical care
3. Assess trajectory:
- Improving with treatment? → Likely okay to stay/continue
- Stable but not improving? → Extra rest day, reassess
- Worsening? → Descend
4. Evaluate treatment options:
- Can I effectively treat this at current altitude? → May continue
- Does this require medical facilities I don't have? → Descend
- Will ascending make this worse? → Don't ascend
5. Consider logistics:
- How far am I from help/evacuation if needed?
- What's the weather forecast? (Can I descend safely if needed tomorrow?)
- Am I with a group or alone? (Alone = lower threshold for descent)
- What's my insurance/evacuation plan?
6. When in doubt, descend:
- It's always safer to go down
- You can return after recovering
- The mountain will still be there
- Your health won't if you ignore warning signs
Summit Fever Is Dangerous
The most common cause of bad medical outcomes on treks is "summit fever"—the overwhelming desire to reach your goal despite warning signs. Trekkers push on with worsening AMS symptoms because "we're so close to EBC." They continue despite infected wounds because "I've planned this for years." Your health is more important than any summit or destination. Descend when indicated, recover, and come back another time if needed.
Night Descent Considerations
Sometimes descent is required at night or in bad weather.
When night descent is worth the risk:
- HACE or HAPE symptoms (life-threatening)
- Severe systemic infection with deterioration
- Cardiac emergency
How to descend safely at night:
- Multiple headlamps (primary + backup)
- Guide/porter assistance essential
- Slow, careful pace—falling while descending is worse than altitude illness
- Stay on main trail (don't take shortcuts)
- Communicate with tea houses ahead that you're coming
- Consider stopping at closest lower tea house rather than going all the way to target
When to wait for morning:
- Moderate AMS that's stable (give dexamethasone, descend at first light)
- Situations where dangerous terrain makes night descent more risky than waiting
- If weather is severe (heavy snow, high winds making descent impossible)
- Use portable altitude chamber (Gamow bag) if available while waiting
Descending vs. Helicopter Evacuation
Descend on foot when:
- You're physically able to walk with assistance
- Condition is serious but not immediately life-threatening
- Helicopter unavailable due to weather/logistics
- First tea house downhill is only 2-3 hours away
- Cost is prohibitive and condition doesn't justify expense
Helicopter evacuation when:
- Unconscious or severely altered mental status
- Unable to walk even with full assistance
- Life-threatening condition (severe HACE/HAPE, suspected heart attack)
- Rapid deterioration despite descent
- Injury preventing descent (fracture, severe trauma)
- Weather/terrain make foot descent impossible
- Medical facility needed urgently (surgical emergency)
See Emergency Evacuation Protocols section for details on arranging helicopter rescue.
Emergency Evacuation Protocols
Understanding how emergency evacuation works in Nepal helps you act quickly and effectively in a crisis.
When Evacuation Is Needed
Medical Emergencies Typically Requiring Evacuation:
- Severe HACE or HAPE not improving with descent
- Suspected heart attack or serious cardiac event
- Severe trauma (fractures, head injury, major lacerations)
- Surgical emergencies (appendicitis, etc.)
- Severe infection not responding to treatment
- Any unconscious or semi-conscious patient
- Severe dehydration/vomiting preventing oral intake
- Serious allergic reaction (anaphylaxis)
Urgency Levels:
- Immediate (arrange now): Life-threatening conditions, unstable patients
- Urgent (within 6-12 hours): Serious conditions, patient stable for now but needs hospital
- Semi-urgent (within 24 hours): Conditions requiring medical care but stable
Helicopter Evacuation Process
Step 1: Stabilize Patient
- Provide first aid/medications
- Keep warm
- Monitor vital signs if possible
- Document symptoms and treatments given
Step 2: Contact Insurance Company
- Call emergency number on insurance card
- Explain situation
- Get authorization code for helicopter evacuation
- Insurance will typically coordinate directly with helicopter company
- Critical: Get this authorization BEFORE calling helicopter (unless literally dying)
Step 3: Arrange Helicopter
- If insurance is coordinating: They'll contact helicopter company
- If self-paying or emergency: Contact helicopter companies directly:
- Simrik Air: +977-1-4485222
- Fishtail Air: +977-1-4465888
- Altitude Air: +977-1-4465896
- Manang Air: +977-1-4425082
Step 4: Provide Information
- Patient condition and symptoms
- Exact location (name of tea house/village, GPS coordinates if available)
- Elevation
- Weather conditions at your location
- Landing zone availability
- Contact number
Step 5: Prepare Landing Zone
- Flat area minimum 25m x 25m
- Clear of obstacles (rocks, trees, poles, prayer flags)
- Mark with large "H" using bright clothing or rocks
- Secure loose items (tent flaps, tarps, etc.)
- Keep people/animals clear during landing (rotor wash is powerful)
Step 6: Communication
- Helicopter will radio when en route
- Tea house staff often have radio/phone contact
- Be ready to assist patient to helicopter quickly
- Have passport, insurance information, medical documentation ready
Step 7: Evacuation
- Patient loaded first
- Usually one companion allowed (space permitting)
- Weight restrictions—pilot decides
- Flight typically to Kathmandu (or Lukla if weather/weight issues)
Step 8: Hospital Transfer
- Helicopter flies to Kathmandu hospital helipad or airport
- Ambulance transfers to hospital if needed
- Insurance should coordinate hospital admission
- Companion handles documentation
Costs and Insurance
**helicopter rescue costs $1,800-$5,000 depending on location (EBC to Lukla $1,800-$2,500, EBC to Kathmandu $4,500-$5,000) USD
- Namche to Kathmandu: $5,000-7,000 USD
- Dingboche to Kathmandu: $7,000-9,000 USD
- Gorak Shep/EBC to Kathmandu: $10,000-15,000 USD
- Factors affecting cost: Weather, time of day, helicopter type, fuel, altitude
Payment:
- Most helicopter companies require immediate payment or insurance guarantee
- Credit cards usually accepted (often with surcharge)
- Insurance pre-authorization allows direct billing
- If self-paying: you pay upfront, then claim reimbursement from insurance
Insurance Requirements:
- Policy must specifically cover:
- Helicopter evacuation/rescue
- Coverage to altitude you're trekking (minimum 6,000m for EBC)
- Emergency medical treatment in Nepal
- Medical evacuation/repatriation to home country if needed
- Minimum coverage: $50,000-100,000 for evacuation
- See comprehensive travel insurance guide
Without Insurance:
- You're still responsible for full payment
- Helicopter companies may refuse without payment guarantee
- Some will fly on compassionate grounds but pursue payment aggressively
- Embassy cannot pay for evacuation (common misconception)
- Can result in severe financial hardship
Insurance is Mandatory
Since 2026, travel insurance is legally required for all trekking permits in Nepal. But beyond the legal requirement, it's a financial necessity. A helicopter evacuation can cost more than $15,000. Without insurance, you may be denied evacuation even in a life-threatening emergency until payment is arranged. Do not trek in Nepal without proper insurance covering helicopter rescue.
Weather and Evacuation Limitations
Weather Restrictions:
- Helicopters cannot fly in:
- Heavy clouds/fog (visibility issue)
- High winds (dangerous)
- Heavy snowfall
- Severe storms
- Weather windows often brief in mountain regions
- Morning typically better flying weather than afternoon
- Monsoon season: evacuations frequently delayed 24-48 hours
Altitude Limitations:
- Most helicopters can fly to 5,500-6,000m maximum
- Thin air at high altitude reduces helicopter performance
- May require two-stage evacuation (helicopter to lower staging area, refuel, continue to Kathmandu)
- EBC evacuations often stage through Pheriche or Lukla
Timing:
- Evacuations usually happen during daylight only
- Helicopter companies prefer early morning (better weather, more fuel options)
- Night evacuations very rare (only extreme emergencies, special circumstances)
- If emergency happens late afternoon/evening, likely wait until morning
Alternative Evacuation Methods
Yak/Horse Evacuation:
- For patients who can sit up but can't walk
- Much cheaper than helicopter ($100-300)
- Much slower (can take full day or more)
- Only viable if patient stable and time not critical
- Mostly used Lukla-Namche section where trail is gentler
Porter-Assisted Walking:
- For patients who can walk with significant help
- Porters provide arm support, carry patient's pack
- Very slow but gets patient lower
- Usually free or minimal cost
- Best for mild-moderate altitude sickness descents
Stretcher Carry:
- For unconscious or severely ill patients who can't sit up
- Requires 6-8 porters rotating
- Very expensive (hundreds of dollars)
- Very slow and physically demanding
- Last resort if helicopter unavailable and patient must descend
- Rarely used except in desperate situations
Medical Facilities for Evacuation
Kathmandu Hospitals (Helicopter Destinations):
- CIWEC Clinic: Western-standard travel medicine clinic, most trekker evacuations
- Nepal International Clinic: Similar to CIWEC
- Grande Hospital: Large modern hospital with helipad
- Norvic Hospital: International-standard care
- Mediciti Hospital: Modern facility in Lalitpur
On-Trail Medical Posts:
- Pheriche HRA Clinic (4,371m): Staffed by Western doctors in season (March-May, Oct-Nov)
- Manang HRA Clinic (3,540m): Similar to Pheriche
- These are for consultation and stabilization, not full medical treatment
- Can provide oxygen, medications, advice
- No surgical capability, limited diagnostics
Lukla Health Posts:
- Basic health posts
- Can stabilize patients for helicopter evacuation
- Limited supplies and capabilities
Communication for Emergencies
Satellite Phones:
- Most reliable in emergency
- Can rent in Kathmandu ($7-10/day)
- Direct dial to helicopter companies, insurance
- Recommended for: solo trekkers, very remote routes, anyone concerned about emergencies
Cell Phones:
- Ncell and Nepal Telecom have coverage in many areas
- Coverage in: Lukla, Namche, Tengboche, Dingboche, Lobuche (spotty)
- No coverage in many areas
- Cannot rely on as only communication method
- See Nepal SIM cards guide
Tea House Phones:
- Most tea houses have satellite phones
- Available for emergency calls (charge per minute)
- Can be used to contact helicopter companies
- Staff often help coordinate evacuations (they're experienced)
Emergency Beacons:
- Garmin inReach, SPOT devices
- Can send SOS signal with GPS coordinates
- Signals go to rescue coordination centers
- Must have valid subscription
- Primarily for areas with no other communication
Pre-Evacuation Documentation
Have ready for helicopter/hospital:
Medical Information:
- List of symptoms and timeline
- Medications taken (name, dose, time)
- Known allergies
- Chronic medical conditions
- Recent vital signs if available (temperature, pulse, breathing rate)
Identity Documents:
- Passport (original)
- Copy of passport (in case original with porter/partner)
- Trekking permit (TIMS card)
Insurance Documents:
- Insurance card with policy number
- Emergency contact number for insurance
- Copy of policy showing coverage details
- Any pre-authorization codes obtained
Financial:
- Credit card for payment if needed
- Cash (some evacuation services require cash deposit)
Contact Information:
- Embassy contact for your country
- Family emergency contacts
- Trekking agency contact (if using one)
Document Your Trek
Take photos each day showing you at different elevations with date/timestamps. If insurance later questions whether your evacuation was legitimate (sadly, this happens), photographic evidence of your trek progression helps verify your claim. Also photograph your trekking permit, insurance card, and passport info page on your phone in case documents are lost during emergency.
Pre-existing Medical Conditions
Many people with chronic medical conditions successfully trek in Nepal with proper preparation. Here's condition-specific guidance.
Cardiovascular Conditions
Hypertension (High Blood Pressure):
- Can you trek?: Usually yes, if well-controlled on medication
- Requirements:
- Blood pressure controlled (<140/90) for 3+ months before trek
- Stable medication regimen
- Doctor's clearance
- Medications: Continue all BP medications—don't skip doses
- Some concern about diuretics causing dehydration—discuss with doctor
- Consider adding nifedipine (also treats HAPE if needed)
- Precautions:
- Monitor BP during trek if possible (bring small BP cuff)
- Stay well-hydrated
- Slow, conservative ascent profile
- Avoid overexertion
- Altitude effects: BP often increases initially at altitude, then decreases
- See doctor: 4-6 weeks before trek to optimize medications
Coronary Artery Disease/Prior Heart Attack:
- Can you trek?: Maybe—requires careful evaluation
- Requirements:
- Event >6 months ago with good recovery
- Normal stress test within 3 months of trek
- Cardiologist clearance
- No symptoms with exertion at sea level
- Medications: Continue all cardiac medications
- Precautions:
- Very conservative ascent
- Monitor for chest pain, shortness of breath
- Consider pulse oximeter to monitor oxygen levels
- Some doctors recommend supplemental oxygen above 4,500m
- Carry nitroglycerin if prescribed
- Red flags: Any chest pain or unusual shortness of breath → descend immediately
- Consider: Lower-altitude treks (Langtang, lower Annapurna)
Arrhythmias (Irregular Heartbeat):
- Can you trek?: Depends on type and severity
- Benign arrhythmias (occasional premature beats): Usually fine
- Controlled atrial fibrillation: Possible with doctor clearance
- Significant arrhythmias: High risk—may not be advisable
- Medications: Continue all medications
- Altitude effects: Can trigger or worsen arrhythmias
- See cardiologist: For personalized assessment
Heart Failure:
- Generally not recommended: High risk
- Mild, stable heart failure: Possibly very low-altitude treks only (<3,000m) with cardiologist clearance
- Moderate-severe: Too dangerous
Respiratory Conditions
Asthma:
- Can you trek?: Usually yes, with good control
- Requirements:
- Well-controlled asthma (no frequent attacks)
- Familiar with your triggers and how to manage
- Excellent adherence to preventive medications
- Medications:
- Bring multiple rescue inhalers (albuterol)
- Continue controller medications (inhaled corticosteroids, etc.)
- Keep inhalers warm (they can freeze at high altitude—body warmth pocket)
- Consider spacer device for better medication delivery
- Altitude effects:
- Some asthmatics improve (dry air, fewer allergens)
- Others worsen (cold air, exertion, lower oxygen)
- Individual response unpredictable
- Precautions:
- Test response at moderate altitude before committing to high trek
- Slow ascent
- Avoid overexertion (triggers attacks)
- Keep warm
- When to descend: Increasing rescue inhaler use, poor symptom control, inability to maintain oxygen saturation
Chronic Obstructive Pulmonary Disease (COPD):
- Can you trek?: Mild COPD possibly; moderate-severe usually not advisable
- Requirements:
- Doctor clearance
- Pulmonary function tests showing adequate reserve
- No recent exacerbations
- Challenges:
- Already limited pulmonary function further compromised by altitude
- High risk of severe hypoxemia
- Consider supplemental oxygen above 4,000m
- Alternative: Lower-altitude treks or treks with oxygen support
- Not recommended: For moderate-severe COPD
Sleep Apnea:
- Can you trek?: Yes, with precautions
- CPAP challenges:
- Most tea houses lack electricity for CPAP
- Battery-powered CPAP options exist but heavy
- Consider CPAP for Kathmandu/Lukla acclimatization nights only
- Acetazolamide helpful: Reduces both central and obstructive sleep apnea events
- Altitude effects: Periodic breathing (normal at altitude) can worsen sleep quality
- See doctor: About temporarily discontinuing CPAP if not feasible to bring
Metabolic Conditions
Diabetes Mellitus:
Type 1 Diabetes:
- Can you trek?: Yes, with excellent preparation
- Requirements:
- Excellent glucose control for 3+ months (HbA1c <7.5%)
- Extensive experience managing diabetes during exercise
- Comfortable with insulin adjustments
- Doctor clearance
- Insulin supplies:
- Bring 2x insulin needed
- Multiple pens/vials (redundancy critical)
- Keep from freezing (insulated case, body warmth)
- Altitude/exertion typically increase insulin sensitivity → may need less insulin
- Glucose monitoring:
- Continuous glucose monitor (CGM) ideal if you use one
- Extra test strips, lancets, batteries
- Test more frequently than usual
- Hypoglycemia risk:
- Carry fast-acting carbs (juice, candy, glucose tablets)
- Glucagon kit if prescribed
- Trek partners must know how to recognize and treat hypoglycemia
- Exertion + altitude increase hypo risk
- Hyperglycemia:
- Altitude itself can raise blood sugar
- Infections raise blood sugar
- Diabetic ketoacidosis at altitude is very dangerous
- Food challenges:
- Tea house menus carb-heavy (dal bhat, noodles, potatoes)
- Limited protein options
- Bring protein bars/supplements
- Meal timing may differ from usual schedule
- Trek considerations:
- More conservative ascent profile
- Avoid getting too cold (affects glucose metabolism)
- Meticulous foot care (diabetes + blister = high infection risk)
Type 2 Diabetes:
- Can you trek?: Usually yes, if well-controlled
- Requirements:
- Good glucose control (HbA1c <8%)
- Stable on medications
- No significant complications (neuropathy, retinopathy, nephropathy)
- Medications:
- Bring full supply
- If on insulin: same precautions as Type 1
- Oral medications: continue as prescribed
- Metformin: ensure adequate kidney function before trek (altitude can stress kidneys)
- Monitoring:
- Regular blood sugar checks
- Watch for hypoglycemia if on insulin/sulfonylureas
- Foot care critical:
- Diabetic neuropathy + blisters = very high infection risk
- Daily foot inspection
- Aggressive blister prevention
- Any wound infection → descend immediately
Thyroid Disease:
- Can you trek?: Yes, generally well-tolerated
- Hypothyroidism: Continue levothyroxine, bring sufficient supply
- Hyperthyroidism: Continue anti-thyroid medications, ensure well-controlled
- Altitude effects: Minimal impact on thyroid function
- Main concern: Don't run out of medication (can't replace on trek)
Neurological Conditions
Epilepsy/Seizure Disorders:
- Can you trek?: Possibly, requires careful assessment
- Requirements:
- Seizure-free for minimum 6-12 months
- On stable medication regimen
- Neurologist clearance
- Trek with companions who know seizure first aid
- Medications:
- Never skip doses (missed doses can trigger seizures)
- Bring extra supply
- Keep on strict schedule despite time zone changes
- Altitude effects:
- Hypoxia can lower seizure threshold
- Sleep deprivation (common on treks) lowers threshold
- Some studies suggest increased seizure risk at altitude
- Precautions:
- Very conservative ascent
- Prioritize sleep
- Stay well-hydrated
- Avoid alcohol
- Consider acetazolamide (but check interaction with seizure meds)
- Seizure on trek:
- Companions provide first aid
- After seizure: assess for injury, consider descent
- Multiple seizures or prolonged seizure: emergency evacuation
- Insurance: Ensure covers pre-existing conditions (many exclude)
Migraine Headaches:
- Can you trek?: Yes, but altitude often triggers migraines
- Challenges:
- Distinguishing migraine from AMS headache (critical)
- Altitude is common migraine trigger
- Dehydration, exertion, sun exposure also trigger migraines
- Medications:
- Bring usual migraine medications (triptans, etc.)
- Preventive medications if you take them
- Acetaminophen/ibuprofen
- Distinguishing migraine from AMS:
- Migraine: Often unilateral, throbbing, visual aura, nausea (but AMS also causes nausea)
- AMS: Bilateral, pressure-like, improves with oxygen, accompanied by other AMS symptoms
- If uncertain: Treat as AMS (safer approach)
- Precautions:
- Aggressive hydration
- Sunglasses, sun protection
- Avoid known triggers if possible
- Slow ascent
Multiple Sclerosis (MS):
- Can you trek?: Depends on severity and symptoms
- Challenges:
- Heat sensitivity (less issue in mountains)
- Fatigue
- Balance/coordination issues (dangerous on steep trails)
- Exacerbations can be triggered by stress, exertion
- Requirements:
- Stable disease (no recent flares)
- Neurologist clearance
- Able to handle physical demands
- Medications: Continue all disease-modifying treatments
- Precautions:
- Very gradual pace
- Adequate rest
- Consider easier treks
- Individual assessment needed
Hematologic Conditions
Sickle Cell Trait:
- Can you trek?: Controversial—some sources say yes with precautions, others say no
- Risks:
- Altitude hypoxia can trigger sickling
- Splenic infarction reported at altitude in sickle trait carriers
- Risk increases significantly above 2,500-3,000m
- If attempting trek with sickle trait:
- Hematologist consultation essential
- Very gradual ascent
- Aggressive hydration
- Avoid cold exposure
- Stop immediately if abdominal pain (possible splenic infarction)
- Consider lower-altitude treks only
- Sickle cell disease: Absolute contraindication—do not trek at altitude
Anemia:
- Can you trek?: Mild anemia possibly; moderate-severe no
- Challenges:
- Already reduced oxygen-carrying capacity further compromised by altitude
- Symptoms similar to altitude sickness
- Requirements:
- Iron supplementation before trek
- Hemoglobin >11 g/dL for women, >12 g/dL for men
- Identify and treat underlying cause
- Precautions:
- Very slow ascent
- Monitor for excessive fatigue, shortness of breath
- Consider lower altitude treks
Clotting Disorders:
- Hypercoagulable states: Increased DVT/PE risk at altitude
- Anticoagulation: If on blood thinners, bleeding risk if injured
- See hematologist: For individual risk assessment
Other Conditions
Kidney Disease:
- Mild kidney disease: Possibly okay
- Moderate-severe: Generally not recommended
- Concerns:
- Altitude stresses kidneys further
- Dehydration risk high
- Many medications (NSAIDs, Diamox) can affect kidney function
- Difficult to monitor kidney function on trek
- If trekking with kidney disease:
- Nephrologist clearance
- Excellent hydration
- Avoid NSAIDs (use acetaminophen)
- Consider avoiding Diamox (discuss with doctor)
Pregnancy:
- Can you trek?: Not recommended, especially above 3,000m
- Concerns:
- Fetal oxygen supply compromised at altitude
- Limited research on safe altitude limits
- Most obstetric guidelines recommend avoiding >2,500m during pregnancy
- Risk of miscarriage, preterm labor in remote setting
- No medical facilities for obstetric emergencies on trail
- If early pregnancy suspected: Descend immediately
- Post-pregnancy: Wait 3+ months postpartum before high-altitude trekking
Previous Stroke or TIA:
- Generally not recommended: High risk
- If considering:
- Event >12 months ago
- Full recovery
- No residual symptoms
- All risk factors controlled
- Neurologist clearance
- Conservative trek choice
- Very high risk: Recurrence at altitude
General Recommendations for Pre-existing Conditions
Pre-Trek Medical Consultation:
- See your specialist 6-8 weeks before trek
- Obtain medical clearance letter
- Optimize medications
- Discuss altitude-specific concerns
- Get prescriptions for extra medications
Documentation:
- Carry doctor's letter describing condition and medications
- List of medications with dosages
- Emergency contact for your doctor
- Medical summary card in wallet
Insurance:
- Ensure policy covers pre-existing conditions (many don't)
- Specialized policies available for pre-existing conditions
- More expensive but essential
- See insurance guide
Trek Planning:
- Choose appropriate trek for your condition (consider lower altitude options)
- More conservative ascent profile
- Build in extra rest days
- Consider private trek (more flexible than group)
- Hire porter (reduce physical strain)
Risk Acceptance:
- Understand you're accepting higher risk
- Have honest conversation with doctor and family
- Have backup plan if condition worsens
- Accept you may need to turn back
Vaccinations & Preventive Medicine
No vaccinations are legally required to enter Nepal, but several are strongly recommended for health protection.
Recommended Vaccinations
Routine Vaccinations (Should be Up-to-Date):
Tetanus-Diphtheria-Pertussis (Tdap):
- Why needed: Tetanus from wounds (very common on treks), diphtheria, whooping cough
- Schedule: Booster every 10 years; get booster before trek if >5 years since last dose
- Timing: Can be given up to departure day
- Availability: Widely available
Measles-Mumps-Rubella (MMR):
- Why needed: Measles outbreaks occur in Nepal
- Who needs: Anyone born after 1957 without documented immunity
- Schedule: 2 doses if never vaccinated; 1 booster if prior single dose
- Timing: At least 4 weeks before departure
**No COVID vaccination, PCR test, or quarantine required for Nepal entry. All COVID protocols lifted (Twinrix) available
Japanese Encephalitis:
- Why needed: Mosquito-borne viral infection
- Risk level: LOW for trekkers (mainly affects rural lowland areas during monsoon)
- Who should get:
- Traveling to Terai region during monsoon season
- Long-term travelers (>1 month)
- Trekking during monsoon in lower elevation areas
- Who can skip: Most trekkers (risk in Everest/Annapurna regions is negligible)
- Schedule: 2 doses, 28 days apart
- Timing: Start minimum 4 weeks before departure
- Cost: Expensive ($300-400 for series)
Rabies (Pre-Exposure Prophylaxis):
- Why considered: Rabies is endemic in Nepal; stray dogs common
- Risk level: LOW but consequences are fatal
- Who should get:
- Long-term travelers
- Those trekking in very remote areas far from medical care
- Children (higher bite risk)
- Adventure travelers likely to encounter animals
- Who can skip: Short-term trekkers on main routes (post-exposure treatment available in Kathmandu)
- Schedule: 3 doses over 3-4 weeks
- Timing: Start minimum 4 weeks before departure
- Cost: Expensive ($300-500 for series)
- Important: Pre-exposure vaccination does NOT eliminate need for post-exposure treatment if bitten, but simplifies it (2 shots instead of 4-5, no rabies immunoglobulin needed)
Vaccines Generally Not Needed:
Yellow Fever:
- Not present in Nepal
- Only required if arriving from yellow fever-endemic country (parts of Africa, South America)
- If coming from endemic area, must have yellow fever vaccination certificate
Cholera:
- Rare in Nepal
- Vaccine provides limited protection
- Generally not recommended
Meningococcal:
- Not elevated risk in Nepal
- Only for specific circumstances (crowded accommodation during outbreaks)
Malaria Prophylaxis
Malaria Risk in Nepal:
- Trekking regions (Everest, Annapurna, Langtang): NO malaria risk
- Kathmandu valley: NO malaria risk
- Chitwan, Terai lowlands: Malaria present, mainly during monsoon
- Most trekkers: Do not need malaria prophylaxis
If Visiting Terai/Chitwan:
- Antimalarial medication recommended during monsoon season (June-September)
- Options:
- Atovaquone-proguanil (Malarone): Daily, start 1-2 days before, continue 7 days after
- Doxycycline: Daily, start 1-2 days before, continue 4 weeks after
- Mefloquine (Lariam): Weekly, not recommended (side effects)
- Alternative: Just use mosquito prevention (DEET, long clothing, bed nets)—risk is low
Altitude Sickness Prevention
Covered extensively in altitude sickness section, but bears repeating:
- Diamox (acetazolamide): Start 125mg twice daily, beginning day before reaching altitude
- Prescription required
- Available in Kathmandu if you don't bring from home
Traveler's Diarrhea Prevention
Water Safety:
- Never drink untreated water
- Purification methods in water guide
Food Safety:
- Eat hot, freshly cooked foods
- Avoid raw vegetables, salads
- Peel fruits yourself
- See food safety guidelines
Prophylactic Antibiotics:
- Generally NOT recommended for Nepal trekking
- Creates antibiotic resistance
- Side effects
- False sense of security
- Better: careful food/water choices + bring antibiotics to treat if needed
Bismuth Subsalicylate (Pepto-Bismol):
- Some evidence for prevention if taken regularly
- Dose: 2 tablets 4x daily
- Impractical for long trek (lots of tablets)
- Turns stool black (alarming but harmless)
- Interacts with some medications
- Most trekkers skip this
Vaccination Timeline
Ideal Timeline (8+ Weeks Before Trek):
- Week -8: Hepatitis A (1st dose), Typhoid (injectable or start oral), Tdap booster if needed
- Week -6: Rabies (1st dose), Japanese Encephalitis (1st dose) if getting
- Week -4: Rabies (2nd dose), Japanese Encephalitis (2nd dose)
- Week -3: Rabies (3rd dose)
- Week -1: Typhoid oral (if using oral vaccine)
Minimum Timeline (2 Weeks Before Trek):
- Week -2: Hepatitis A, Typhoid injectable, Tdap
- Note: This covers the essentials but rushes immunity development
Last-Minute (<2 Weeks):
- Hepatitis A still worthwhile (partial immunity better than none)
- Tdap booster
- Skip vaccines that require multiple doses (not enough time)
Where to Get Vaccinated
Home Country (Before Departure):
- Travel medicine clinics: Specialized in travel vaccinations
- Primary care doctor: May offer some travel vaccines
- Pharmacies: Some offer travel vaccines (CVS, Walgreens, Boots, etc.)
- Advantage: More reliable vaccine quality, familiar healthcare system
- Cost: Can be expensive ($200-500 for full travel vaccine series)
Kathmandu:
- CIWEC Clinic: Western-standard travel clinic, reliable vaccine supply
- Nepal International Clinic: Similar to CIWEC
- Advantage: Much cheaper than Western countries
- Timing: Allows last-minute vaccination, but requires being in Kathmandu several days before trek
- Quality: Generally good at reputable clinics
Vaccine Side Effects
Common (Minor):
- Sore arm at injection site
- Mild fever, fatigue for 1-2 days
- Headache
Uncommon:
- Moderate fever
- Flu-like symptoms for 2-3 days
- Allergic reaction (rare)
Recommendations:
- Get vaccines at least 3-4 days before departure (in case side effects)
- Don't get all vaccines same day if possible (spreads out any side effects)
- Plan light schedule for 1-2 days after vaccination
- Ibuprofen/acetaminophen for sore arm or fever
Documentation
Yellow Fever Certificate:
- Only needed if arriving from yellow fever country
- Required for entry if applicable
Other Vaccines:
- Documentation generally not required for entry
- Useful to keep vaccination record for future travel
- Can be helpful for medical care if needed
Travel Medicine Consultation
Consider a comprehensive travel medicine consultation 6-8 weeks before your trek, even if just for vaccine review. Travel medicine specialists provide personalized advice on vaccinations, altitude sickness prevention, malaria prophylaxis, and other health concerns. They're familiar with Nepal-specific risks and current recommendations. Often worth the consultation fee for peace of mind and comprehensive medical preparation.
Women's Health Considerations
Women have specific health considerations for Nepal trekking that require planning and preparation.
Menstruation at Altitude
Altitude Effects on Periods:
- Cycle timing may change (earlier or later than expected)
- Flow may be heavier or lighter than usual
- Cramps may be worse (or better—unpredictable)
- Some women skip periods at altitude entirely
- Changes usually temporary—normalize after return
Period Management Strategies:
Option 1: Allow Natural Cycle
- Manage period while trekking
- See supplies needed below
- Perfectly manageable with proper supplies
Option 2: Suppress Period with Birth Control
- Combined oral contraceptives: Skip placebo week, start next pack immediately
- Can delay period for 1-3 months
- Discuss with doctor first (not all pills suitable for continuous use)
- Start practicing this approach 2-3 months before trek (ensure it works for you)
- Hormonal IUD (Mirena): Often stops periods entirely
- Must be placed months before trek
- Not a short-term solution
- Contraceptive injection (Depo-Provera): Often stops periods
- Must be given 3 months before trek
- Progestin-only pills: Can be used continuously
- NuvaRing or patch: Can use continuously (skip ring-free/patch-free weeks)
Birth Control and Altitude:
- DVT (blood clot) concern: Altitude + estrogen-containing contraceptives both increase DVT risk
- Absolute risk still low for young, healthy women
- Risk higher for: age >35, smokers, obesity, personal/family history of blood clots
- Progestin-only options don't increase DVT risk
- Doctor discussion: If using estrogen-containing contraceptives, discuss risks
- Prevention: Stay hydrated, avoid prolonged sitting, move around on flights
- See doctor: 2-3 months before trek to plan period suppression
Supplies for Trekking with Period:
Products to bring:
- Tampons/pads: Bring full supply—not available above Namche
- Calculate needs + extra (cycles can be heavier at altitude)
- Tampons more practical than pads for trekking
- Menstrual cup: Excellent option for trekking
- Reusable—no waste to pack out
- Can wear 12 hours
- Requires handwashing facilities (available at tea houses)
- Practice using before trek
- Period underwear: Can supplement other methods
- Ziplock bags: For packing out used products
- Hand sanitizer: Critical for hygiene
- Baby wipes: For cleaning when water limited
- Pain medication: Ibuprofen most effective for cramps
Disposal:
- Tea houses: Most have trash bins, but waste often burned or buried
- Environmental: Pack out used products if possible (ziplock bags)
- Toilet: Do NOT flush tampons in Nepal—plumbing can't handle it
- Burning: Some trekkers burn used products in stove (discuss with tea house)
- Realistic: Most trekkers dispose in tea house trash—not ideal but practical
Cultural Considerations:
- Traditional Nepali culture considers menstruating women "polluted"
- Cannot enter temples or monasteries during menstruation (traditional belief)
- Modern Nepal less strict, but still observed in some areas
- Tea houses will accommodate you regardless
- Most trekkers don't encounter issues
- If attempting temple entry, no one will check or ask
Urinary Tract Infections (UTIs)
Women are at higher risk for UTIs during trekking due to dehydration, infrequent urination, and hygiene challenges.
Prevention:
- Hydrate aggressively: Dilute urine reduces bacteria growth
- Urinate frequently: Don't "hold it" for hours because toilets are inconvenient
- Wipe front to back: Always
- Urinate after sex: If trekking with partner
- Change underwear daily: Synthetic wicking fabrics better than cotton
- Avoid tight pants: Allow airflow
- Clean genital area daily: Even if full shower not available
- Consider cranberry supplements: Some evidence for prevention
Supplies:
- Ziplock bag with toilet paper (most tea houses don't provide)
- Hand sanitizer
- Wet wipes for personal hygiene
- Extra underwear (4-5 pairs for 2-week trek)
Female Urination Device (FUD):
- Products: Shewee, GoGirl, pStyle, etc.
- Purpose: Allows urinating standing up (useful for squat toilets, outdoor stops)
- Pros: Less exposure, warmer in cold, more dignified on trail
- Cons: Takes practice, must be cleaned
- Recommendation: Practice at home before trek if using
Treatment of UTI:
- See Infection Prevention section for full UTI treatment protocol
- Ciprofloxacin or Azithromycin
- Bring treatment course even if not prone to UTIs (prevention)
Pregnancy and Altitude
Pregnant or Possibly Pregnant:
- Do not trek above 2,500-3,000m
- Fetal oxygenation compromised at altitude
- Risk of miscarriage, preterm labor
- No obstetric care available on trek
- Even if early pregnancy (before you know), altitude poses risks
Planning to Get Pregnant:
- Wait until after trek
- Ensure effective contraception before/during trek
- If surprise pregnancy discovered after booking: postpone or cancel trek
Recent Pregnancy:
- Wait minimum 3 months postpartum before high-altitude trekking
- Allow body to fully recover
- Breastfeeding considerations: supply may decrease at altitude, discuss with doctor
Vaginal Health
Yeast Infections:
- Risk may increase (sweaty clothing, limited shower access)
- Prevention: Change underwear daily, allow airflow, stay dry
- Treatment: Bring antifungal cream (miconazole, clotrimazole)
- 1-day or 3-day treatment course
- Apply at night (less messy)
- If prone: Consider prophylactic use
Bacterial Vaginosis:
- Can occur due to hygiene challenges
- Symptoms: Fishy odor, thin grayish discharge
- Treatment: Requires metronidazole (prescription)
- Bring treatment course if prone to BV
- 500mg twice daily for 7 days
Breast Health
Sports Bra:
- Essential for trekking comfort
- Bring 2-3 high-quality sports bras
- Chafing can be significant issue with heavy backpack
Nipple Chafing:
- Common with heavy backpack straps
- Prevention: Well-fitting sports bra, anti-chafe balm, tape nipples if necessary
- Treatment: Antibiotic ointment, protective covering
Pelvic Health
Pelvic Floor:
- Heavy backpack can stress pelvic floor
- If prone to pelvic floor issues: Use porter for main pack, carry daypack only
- Kegel exercises: Strengthen before trek
Safety Considerations
Solo Female Trekking:
- Nepal is generally very safe for solo female trekkers
- See comprehensive solo female trekking guide
- Tea houses are safe
- Harassment is rare
Emergency Contraception:
- Consider bringing Plan B (levonorgestrel)
- In case of assault or contraceptive failure
- Available in Kathmandu pharmacies without prescription
Menopause and Perimenopause
Hot Flashes:
- Layering system helps (can remove layers quickly)
- See layering guide
Vaginal Dryness:
- Bring lubricant if sexually active with partner
- Moisturizer for comfort
Hormone Replacement Therapy:
- Continue as prescribed
- Bring sufficient supply
- Generally compatible with altitude
Packing List—Women's Specific
Hygiene Products:
- Tampons/pads/menstrual cup (full supply + extra)
- Panty liners
- Ziplock bags for disposal
- Hand sanitizer (large bottle)
- Baby wipes/wet wipes
- Toilet paper (full roll)
Medications:
- Birth control pills (full supply + extra week)
- UTI treatment antibiotics
- Yeast infection treatment
- Pain medication for cramps
- Any hormone medications
Clothing:
- Sports bras (2-3)
- Underwear (4-5 pairs, synthetic wicking fabric)
- Pee funnel if using
Other:
- Anti-chafe balm (Body Glide, etc.)
- Moisturizer (face and body)
- Lip balm with SPF
Period Timing Strategy
If you're using birth control and have flexibility in timing, plan to start your period the day you fly home from Nepal. Dealing with first-day heavy flow during the long trek days is miserable, but dealing with it on the plane home is manageable. Count backwards from your departure date and adjust your pill schedule so your period starts just as you're leaving Kathmandu. This requires careful planning 2-3 months ahead.
Dental Emergencies
Dental problems at altitude can be excruciating and may require evacuation. Prevention and basic treatment knowledge are important.
Common Dental Issues at Altitude
Barodontalgia (Altitude-Related Tooth Pain):
- Cause: Air trapped in dental cavities, under fillings, or in root canals expands at altitude
- Symptoms: Severe tooth pain that begins or worsens with altitude gain
- Who's affected: People with recent dental work, cavities, or root canals
- Treatment: Descend—pressure equalizes at lower altitude
- Prevention: Complete all dental work 4+ weeks before trek
Lost Filling:
- Cause: Chewing hard foods, altitude pressure changes, old filling
- Symptoms: Hole in tooth, sensitivity, pain
- Treatment: Temporary filling material (Dentemp, Cavit)
- How to apply:
- Clean and dry tooth cavity
- Roll temporary filling material into small ball
- Press into cavity firmly
- Have patient bite down to shape
- Remove excess
- Avoid chewing on that side
- Duration: Can last days to weeks
- Follow-up: See dentist after trek for permanent filling
Broken Tooth:
- Cause: Trauma, biting hard food
- If sharp edges: File with nail file (covered with gauze)
- If large piece broken: Temporary filling material to protect exposed area
- If nerve exposed (severe pain): Temporary filling + clove oil for pain
- May require evacuation: If very painful or large fracture
Toothache:
- Causes: Cavity, infection, abscess, sinus pressure, altitude
- Pain management:
- Ibuprofen 400mg + paracetamol 500mg (can combine for better pain relief)
- Clove oil applied directly to affected tooth
- Avoid very hot or cold foods/drinks
- Sleep with head elevated
- If infection suspected (swelling, fever, pus):
- Start antibiotics: Amoxicillin 500mg three times daily for 7 days
- Or Azithromycin if penicillin allergy
- Continue to Kathmandu for dental care
- If abscess: Evacuation may be needed (can become serious)
Knocked-Out Tooth:
- Immediate action:
- Find tooth, handle by crown (not root)
- Rinse with clean water (don't scrub)
- Try to reinsert into socket if possible
- If can't reinsert: store in milk, saliva, or saline
- Get to dentist ASAP (unlikely on trek—evacuate if valuable tooth)
- Pain management: Ibuprofen, ice (cold water)
- Realistic: Permanent tooth loss likely if occurs on trek
Prevention
Pre-Trek Dental Checkup:
- Schedule 4-6 weeks before departure
- Address all cavities, loose fillings, needed dental work
- Ask dentist about any teeth that might be problematic at altitude
- Complete any root canals or crowns
- X-rays if you haven't had them recently
Timing:
- Don't have dental work done <2 weeks before trek
- Allows healing and ensures work is stable
- If emergency dental work needed close to departure, consider postponing trek
Dental Hygiene on Trek:
- Brush teeth twice daily with purified water
- Floss (removes food particles that can cause issues)
- Bring travel toothbrush and small toothpaste
- Avoid chewing very hard foods (nuts, hard candy can break teeth)
Dental Supplies to Bring:
- Temporary filling material (Dentemp)
- Clove oil (topical pain relief)
- Dental floss (also useful as emergency cord)
- Small bottle of pain medication specifically for dental pain
- Antibiotic course (if not already in your kit)
When to Evacuate
- Severe uncontrolled pain despite medication
- Facial swelling suggesting abscess
- Fever with dental pain (infection)
- Inability to eat/drink due to pain
- Major trauma to teeth/jaw
High-Altitude Toothache Mystery
Some trekkers develop severe toothaches at high altitude that completely resolve upon descent, with no dental pathology found later. This poorly understood phenomenon may relate to sinus pressure, nerve changes, or blood flow alterations at altitude. If you develop sudden severe toothache above 4,500m with no prior dental issues, trial descent of 500m may resolve symptoms without other intervention.
Eye Care & Vision Issues
The high-altitude environment creates unique eye challenges: intense UV radiation, extreme dryness, dust, and cold.
UV Protection
UV Exposure at Altitude:
- UV radiation increases 10-12% per 1,000m of elevation
- At EBC (5,364m): 50%+ more UV than sea level
- Snow/ice reflect 80% of UV (double exposure)
- Clouds provide minimal protection
- Sunburn of eyes (photokeratitis) can occur in hours
Proper Sunglasses:
- UV protection: 100% UVA and UVB blocking (category 3-4)
- Coverage: Wraparound style to block side light
- Visible light transmission: 5-10% for high altitude
- Polarization: Helpful for reducing glare
- See comprehensive sunglasses guide
Consequences of Inadequate Protection:
- Photokeratitis (snow blindness)
- Long-term: cataracts, macular degeneration, eye cancers
Snow Blindness (Photokeratitis)
Cause:
- Sunburn of cornea from excessive UV exposure
- Can occur in 2-3 hours without proper eye protection
- Worse with snow/ice reflection
Symptoms:
- Severe eye pain (usually 6-12 hours after exposure)
- Feeling of sand/grit in eyes
- Extreme light sensitivity
- Excessive tearing
- Blurred vision
- Redness, swelling of eyes
- Headache
Treatment:
- Pain management: Ibuprofen 400mg
- Eye protection: Dark room or very dark sunglasses
- Cool compresses: Clean cloth soaked in cool water over eyes
- Artificial tears: Lubricating eye drops frequently
- No contact lenses: Remove and don't wear until healed
- Rest eyes: Close eyes as much as possible
- Pain can be severe: Prescription pain medication may be needed
Recovery:
- Usually 24-48 hours
- Symptoms temporary—no permanent damage
- Can continue trek after recovery with proper eye protection
Prevention:
- Wear proper sunglasses 100% of time in sunlight
- Backup sunglasses essential
- Even on cloudy days
- Especially important on snow/glaciers
Dry Eyes
Causes:
- Low humidity at altitude
- Wind exposure
- Dust
- Reduced blinking (focused on trail)
Symptoms:
- Gritty sensation in eyes
- Redness
- Burning
- Blurred vision
- Paradoxically: excessive tearing (reflex tearing)
Treatment:
- Artificial tears/lubricating eye drops: Use frequently (every 2-3 hours)
- Preservative-free: Better for frequent use
- Nighttime: Lubricating gel or ointment before sleep
- Sunglasses: Reduce wind exposure even when not sunny
- Hydration: Drink plenty of fluids
Contact Lens Wearers:
- Dry eyes much worse with contacts
- Consider switching to glasses for trek
- If wearing contacts:
- Extra lubricating drops
- Limit wearing time (use glasses mornings/evenings)
- Daily disposable lenses (can discard if eyes too dry)
- Bring glasses as backup
Dust and Foreign Bodies
Trail Dust:
- Trails are very dusty, especially in dry season
- Yak trains create dust clouds
- Helicopter landings create dust storms
Prevention:
- Sunglasses (even when not sunny) block dust
- Buff or bandana over face in very dusty sections
- Avoid rubbing eyes
Foreign Body in Eye:
- If visible on white of eye:
- Pull upper lid over lower lid (may dislodge)
- Flush with eyewash or clean water
- Remove with moistened cotton swab or corner of clean cloth
- If stuck or on cornea:
- Don't rub
- Flush with water/eyewash
- If doesn't dislodge, patch eye and descend for medical care
- After removal:
- Antibiotic eye ointment if abrasion suspected
- Artificial tears for comfort
Vision Changes
Altitude-Related Vision Changes:
- Blurred vision (usually mild, temporary)
- Halos around lights
- Temporary nearsightedness or farsightedness
- Usually resolves with acclimatization or descent
Concerning Vision Changes:
- Sudden vision loss (partial or complete)
- Double vision
- Persistent blurred vision not explained by dry eyes
- Visual field loss
- These may indicate HACE or retinal hemorrhage—descend and seek medical evaluation
High-Altitude Retinal Hemorrhage (HARH):
- Small bleeds in retina from altitude
- Usually asymptomatic (no symptoms)
- Only detected with ophthalmoscope
- If large or involving macula: blurred vision, blind spots
- Treatment: Descend
- Usually resolves without permanent damage
- More common above 5,000m
Corrective Lenses
Glasses vs. Contacts:
- Glasses recommended: Easier to manage, no dry eye issues
- Contacts: More challenging (dry eyes, hygiene, solution access)
If Wearing Contacts:
- Bring full supply plus extras
- All necessary solutions (may freeze—keep warm)
- Lubricating drops specifically for contacts
- Glasses as backup (essential)
- Hand hygiene critical (hand sanitizer before touching eyes)
- Consider daily disposables (don't need cleaning solution)
If Wearing Glasses:
- Bring backup pair (essential—if glasses break/lost, trek over)
- Glasses strap/retainer to prevent loss
- Anti-fog coating helpful
- Prescription sunglasses ideal (expensive but convenient)
- Clip-on sunglasses over regular glasses (cheaper alternative)
Prescription Sunglasses:
- Ideal solution
- Expensive but worth it for frequent trekkers
- Transitions lenses not ideal (don't darken enough at altitude)
Eye Care Supplies to Bring
Essential:
- Sunglasses (category 3-4, 100% UV protection)
- Backup sunglasses
- Artificial tears/lubricating eye drops (several bottles)
- Spare glasses/contacts + solutions
- Sunscreen (avoid getting in eyes)
Optional:
- Lubricating gel for nighttime
- Antibiotic eye ointment (erythromycin)
- Eye wash solution
- Eye patch (if foreign body injury)
When to Seek Medical Care
- Sudden vision loss or severe vision changes
- Eye pain not explained by snow blindness or foreign body
- Eye injury with possible penetration
- Foreign body that won't flush out
- Severe redness with discharge (possible infection)
- Flashing lights, floaters (possible retinal detachment—very rare)
Goggle Strategy for High Passes
Above 5,000m, especially on high passes like Thorong La or when there's snow, ski goggles provide better protection than sunglasses. They seal around eyes (blocking wind and UV from all angles), don't fog as easily as glasses, and stay on in high winds. Many experienced high-altitude trekkers carry lightweight ski goggles in addition to sunglasses and use them for exposed high-altitude sections.
Cold Weather Injuries
At high altitude, especially in winter, cold injuries are a serious risk. Recognition and treatment are essential.
Frostbite
What is frostbite:
- Freezing of skin and underlying tissues
- Occurs when tissue temperature drops below 0°C (32°F)
- Ice crystals form in cells, damaging tissue
Risk Factors:
- Temperature below -15°C (5°F)
- Wind chill (removes warming layer of air)
- Wet skin (water conducts heat 25x faster than air)
- Tight clothing/boots (restricts blood flow)
- Dehydration
- Altitude (decreased blood flow to extremities)
- Exhaustion
- Previous frostbite
Vulnerable Areas:
- Toes (most common)
- Fingers
- Nose
- Ears
- Cheeks
Degrees of Frostbite:
Frostnip (Superficial):
- Reversible, no permanent damage
- Skin pale or red, cold, numb
- Tingling or pain
- Skin feels hard on surface but soft underneath
- Treatment: Rewarm immediately (skin-to-skin, warm water)
- Full recovery
Superficial Frostbite:
- Involves skin and subcutaneous tissue
- Skin white/pale, waxy appearance
- Hard to touch
- After rewarming: red, painful, blisters form (clear fluid)
- Recovery: Usually complete, may take weeks
Deep Frostbite:
- Involves muscle, bone, tendons
- Skin white or blue-gray, hard, cold
- No sensation (numb)
- After rewarming: Large blood-filled blisters, black discoloration
- Recovery: Often incomplete—may lose tissue (amputation)
Prevention:
- Proper clothing: Insulated boots, gloves, face protection
- Keep dry: Wet = cold; change socks if sweaty
- Not too tight: Tight boots/gloves restrict blood flow
- Stay warm: Don't let yourself get cold (hard to rewarm)
- Hydration: Dehydration reduces peripheral blood flow
- Nutrition: Eat regularly (fuel for heat production)
- Avoid alcohol: Causes vasodilation (heat loss)
- Monitor extremities: Wiggle toes/fingers frequently, check sensation
- Hand/toe warmers: Chemical warmers in boots/gloves for extreme cold
Recognition:
- Numbness in toes/fingers
- White or pale skin
- Hardness to touch
- Loss of dexterity
Field Treatment:
DO:
- Get to warm shelter immediately
- Remove wet clothing, replace with dry
- Rewarm gradually:
- Skin-to-skin contact (place cold fingers in armpit, warm hands on frozen ears)
- Warm water bath (37-39°C / 98-102°F)—feels quite warm but not painful to normal skin
- Takes 15-30 minutes for complete rewarming
- Very painful as sensation returns (give pain medication)
- Protect thawed tissue:
- Cover with sterile dressing
- Separate frozen toes/fingers with gauze
- DO NOT rewrap tightly
- Evacuate to medical facility (if deep frostbite)
DO NOT:
- Do NOT rewarm if risk of refreezing: Walking on frozen feet better than walking on thawed feet (refreezing causes much worse damage)
- Do NOT rub or massage: Causes more tissue damage
- Do NOT use direct heat: Fire, hot water bottle, heating pad—causes burns
- Do NOT pop blisters: Sterile cover, leave intact
- Do NOT let patient smoke or drink alcohol: Constricts blood vessels
Evacuation:
- Superficial frostbite: Continue trek if able, monitor for infection
- Deep frostbite: Evacuation recommended for evaluation
- Large area affected: Immediate evacuation
Long-Term:
- Previously frostbitten areas more susceptible to repeat injury
- Permanent cold sensitivity
- May lose tissue (toes, fingertips) if severe
Hypothermia
What is hypothermia:
- Core body temperature drops below 35°C (95°F)
- Whole-body cooling (vs. frostbite = localized)
- Can be life-threatening
Causes:
- Cold exposure (doesn't have to be extreme cold)
- Wet clothing (sweat or rain)
- Wind (wind chill)
- Exhaustion
- Inadequate food intake
- Dehydration
- Altitude (decreased ability to generate heat)
Degrees:
Mild Hypothermia (32-35°C / 90-95°F):
- Shivering (vigorous)
- Cold skin
- Pale
- Slurred speech
- Confusion, poor judgment
- Clumsy movements
- Still conscious and alert-ish
Moderate Hypothermia (28-32°C / 82-90°F):
- Shivering slows or stops
- Severe confusion, irrational behavior
- Drowsiness
- Weak pulse
- Slow, shallow breathing
- Loss of coordination
Severe Hypothermia (<28°C / <82°F):
- No shivering
- Unconscious or barely conscious
- Very weak or absent pulse
- Slow, barely detectable breathing
- Rigid muscles
- Dilated pupils
- Appears dead (but may still be savable)
"Umbles" Rule (Mild Hypothermia):
- Grumbles
- Mumbles
- Fumbles
- Stumbles If someone is exhibiting the "umbles," suspect hypothermia.
Prevention:
- Proper clothing (layering system)
- Stay dry (change out of wet clothes immediately)
- Eat and drink regularly (fuel for heat production)
- Avoid exhaustion
- Recognize early signs (shivering, cold) and act immediately
- Don't push on when cold and wet—stop, rewarm, dry off
Treatment:
Mild Hypothermia:
- Get to shelter (tea house, tent)
- Remove wet clothing, replace with dry
- Insulate from ground (sleeping pad)
- Rewarm:
- Dry sleeping bag
- Hot drinks (tea, hot chocolate—if patient can swallow safely)
- Hot water bottles in armpits, groin (wrap in cloth—don't burn)
- Skin-to-skin contact (another person in sleeping bag)
- High-calorie food once patient can eat
- Monitor until fully recovered
Moderate-Severe Hypothermia:
- Handle patient gently (rough handling can cause cardiac arrest)
- Get to shelter, insulate from ground
- Remove wet clothing (cut off if necessary—don't make patient move)
- Passive rewarming:
- Dry sleeping bag with warm person (skin-to-skin)
- Insulation (blankets, emergency blanket)
- Hot water bottles to trunk only (not extremities)
- NO food or drink (may aspirate if semi-conscious)
- Evacuate immediately:
- Helicopter if possible
- Carry patient (don't make them walk)
- Continue rewarming during evacuation
Severe Hypothermia (Appears Dead):
- Do NOT assume dead: "Not dead until warm and dead"
- CPR if no detectable pulse (very difficult to feel in hypothermia)
- Evacuate immediately
- Rewarm during evacuation
- Cases of full recovery after appearing dead in severe hypothermia
After-Drop:
- Phenomenon where core temperature continues to drop even after starting rewarming
- Happens when cold blood from extremities returns to core
- Why extremities shouldn't be rewarmed aggressively in severe hypothermia
- Can cause cardiac arrest
- Reason to rewarm trunk, not limbs, in severe cases
Chilblains
What are chilblains:
- Inflammatory skin condition from repeated exposure to cold (but not freezing) temperatures
- Skin blood vessels damage from cold + warming cycles
- Not frostbite (temperature doesn't reach freezing)
Symptoms:
- Red, itchy patches on toes, fingers, ears, nose
- Swelling
- Burning sensation
- Sometimes blisters
- Occur hours after cold exposure
Treatment:
- Rewarm gradually (not too fast)
- Protect from further cold exposure
- Hydrocortisone cream for itching
- Do NOT scratch (can cause infection)
- Usually resolve in 1-3 weeks
Prevention:
- Keep extremities warm
- Avoid repeated cold exposure + rewarming cycles
- Proper clothing
Altitude and Cold
Why altitude makes cold injuries worse:
- Decreased peripheral blood flow (body prioritizes core)
- Lower oxygen availability (affects healing, tissue survival)
- Often combined with exhaustion, dehydration
- Weather more extreme at altitude
High-Altitude Cold Exposure:
- Even moderate cold (-5 to -10°C) can be dangerous with wind, exhaustion, altitude
- What would be tolerable at sea level can cause hypothermia at 5,000m
- Monitor group members for cold injuries
- Don't be afraid to turn back if conditions too severe
The Summit Trap
More cold injuries occur on summit pushes than any other time. Trekkers leave early morning (coldest time), push hard (exhaustion), often in high winds (wind chill), and many are reluctant to turn back after coming so far. Kala Patthar at sunrise sees multiple frostbite cases every season. Know your limits, watch your extremities, and turning back is always an option. The view isn't worth your toes.
Medical Kit Organization
A well-organized medical kit ensures you can find what you need quickly during an emergency.
Packing Strategy
Container Options:
Soft Kit (Stuff Sack/Pouch):
- Pros: Lightweight, packable, fits in pack easily
- Cons: Items can get jumbled, harder to keep organized
- Best for: Minimalist trekkers, those with porters (weight not issue)
Hard Case:
- Pros: Protects contents, keeps organized, easy to find items
- Cons: Heavier, bulkier, less packable
- Best for: Group leader kits, comprehensive kits
Combination:
- Hard case for base kit in porter pack
- Small soft pouch with essentials in your daypack
- Best of both worlds
Color:
- Bright color (red, orange, yellow) easily identified
- Label clearly "FIRST AID" or medical cross symbol
Organization System
Category Separation:
Use small ziplock bags or pouches to group items:
Bag 1: Medications (Oral)
- All pills/tablets organized by type
- Each medication in labeled bag
- Dosage instructions written on bag
Bag 2: Blister Care
- Leukotape
- Compeed bandages
- Moleskin
- Foot powder
- Everything for blister prevention/treatment in one place
Bag 3: Wound Care
- Bandages
- Gauze
- Tape
- Antiseptic wipes
Bag 4: Topical Medications
- Antibiotic ointment
- Antifungal cream
- Hydrocortisone cream
- Sunscreen
- Lip balm
Bag 5: Tools
- Scissors
- Tweezers
- Thermometer
- Safety pins
Bag 6: Women's Products (if applicable)
- Tampons/pads
- UTI medication
- Women-specific items
Accessibility
Daypack (Carry Daily):
- Small first aid pouch with essentials:
- Blister supplies (Leukotape, Compeed, bandages)
- Pain medication (ibuprofen, paracetamol)
- Diamox (if taking)
- Antiseptic wipes
- Personal prescriptions
- Sunscreen, lip balm
- Items you might need during trekking day
Main Pack (Porter Carries):
- Comprehensive kit with everything else
- Accessed at tea house each evening
Personal Pocket:
- Diamox (if taking twice daily)
- Pain medication
- Lip balm
- Items needed multiple times per day
Documentation
Include in Kit:
Medication List:
- Name of each medication
- Indication (what it treats)
- Dosage
- Side effects/warnings
- Expiration dates
- Laminated card or waterproof paper
Medical Reference Card:
- Quick reference for:
- Altitude sickness recognition and treatment
- CPR steps
- Wound care basics
- When to descend
- Wilderness medicine organizations publish these
- Helpful when stressed/tired and can't remember protocols
Personal Medical Information:
- Your allergies
- Chronic conditions
- Regular medications
- Blood type
- Emergency contacts
- Doctor contact information
Inventory:
- Complete list of everything in kit
- Check off items as used
- Helps with restocking
- Insurance claims (if items used for evacuation)
Maintenance
Pre-Trek Check (2 Weeks Before):
- Unpack entire kit
- Check expiration dates
- Replace expired medications
- Test that scissors cut, tape sticks, thermometer works
- Ensure adequate quantities
- Replace depleted items from previous trips
Post-Trek:
- Restock used items immediately
- Note what you used heavily (bring more next time)
- Note what you never used (consider reducing quantity)
- Check expiration dates
- Clean and dry any wet items
Weight Considerations
Complete Kit Weight:
- Comprehensive medical kit: 500-800 grams
- Minimal kit: 200-300 grams
If Weight Critical (Carrying Own Pack):
- Reduce quantities (but don't eliminate categories):
- 20 bandages → 10 bandages
- 40 ibuprofen → 30 ibuprofen
- 1 roll gauze → ½ roll gauze
- Share with trekking partner:
- One thermometer for two people
- One scissors for two people
- Split blister supplies
- Repackage into smaller containers:
- Transfer pills to smaller bottles
- Small tubes instead of large tubes of creams
Don't Skimp On:
- Altitude medications (Diamox, dexamethasone, nifedipine)
- Antibiotics
- Blister care supplies
- Personal prescription medications
- Pain medication
Group vs. Personal Kit
Personal Kit (Solo Trekker or Each Person in Group):
- All personal prescription medications
- Diamox for yourself
- Blister care supplies
- Basic pain medication
- Small wound care supplies
- Personal items (women's products, etc.)
Group Kit (If Trekking with Others):
- Shared items:
- Scissors, tweezers, thermometer (1 per group, not per person)
- Large wound care supplies
- Emergency medications (dexamethasone, nifedipine, EpiPen)
- One person designated as kit keeper
- Everyone knows where kit is and how to access
Guide/Porter Kit:
- If trekking with guide, they often carry group first aid kit
- Ask what's included (often basic)
- Don't rely solely on guide kit—bring your own
- Guide kit is backup, not replacement
Special Considerations
Cold Weather Storage:
- Some medications affected by freezing:
- Liquid medications can freeze and lose potency
- Insulin cannot freeze
- Inhalers can malfunction if frozen
- Keep critical medications in inside jacket pocket (body warmth)
- Insulated pouch for temperature-sensitive items
Waterproofing:
- Medical kit should be in waterproof bag
- Medications in ziplock bags
- River crossings, rain can soak packs
Accessibility at Night:
- Keep small pouch with nighttime medications in sleeping bag:
- Diamox (if taking evening dose)
- Pain medication (for nighttime headache)
- Personal prescriptions
- Headlamp to find items in dark
The 3am Headache Test
Before you leave home, set your packed medical kit on your bedroom floor. At 3am, wake up, don't turn on the lights, and see if you can find and open a paracetamol bottle in under 30 seconds. That's the situation you'll be in at high altitude when altitude headache wakes you up. If you can't find medication quickly in the dark, reorganize your kit. Put frequently needed items in consistent, easy-to-access locations.
Insurance & Medical Documentation
Proper documentation can make the difference between seamless medical care and insurance nightmares.
Insurance Requirements
Coverage Needed:
- Helicopter evacuation: Minimum $50,000-100,000
- Emergency medical treatment in Nepal: $50,000+
- Medical evacuation to home country: $100,000+
- Altitude coverage: Minimum 6,000m for EBC/ABC treks
- Pre-existing conditions coverage if applicable
Comprehensive guide: See Nepal trekking insurance guide
Pre-Departure Documentation
Gather Before Trek:
Insurance Documents:
- Insurance card (laminated or in waterproof sleeve)
- Policy number
- Emergency contact number (international)
- Copy of full policy showing:
- Altitude coverage limit
- Helicopter evacuation coverage
- Pre-existing conditions coverage
- Exclusions
- Email copy to yourself (accessible from phone anywhere)
Medical Documents:
- List of allergies
- Chronic medical conditions
- Regular medications (names, dosages)
- Recent vaccinations
- Blood type
- Doctor contact information
- For pre-existing conditions: Doctor's letter explaining condition, stability, medications
Emergency Contacts:
- Family contact with phone/email
- Doctor contact
- Embassy/consulate contact for your country
- Trekking agency contact (if using one)
Carrying Documentation
Physical Copies:
- Waterproof sleeve in pack
- Laminated cards for most critical info
- Keep with passport
Digital Copies:
- Photos on phone
- Email to yourself
- Cloud storage (Dropbox, Google Drive)
- Accessible without internet if downloaded
Distributed:
- Copy with trekking partner
- Copy left with family at home
- Copy with guide (if using one)
Documentation During Trek
Daily:
- If taking altitude medication, note in phone:
- Altitude reached each day
- Diamox doses taken
- Any symptoms
- Creates record if insurance questions legitimacy later
If Medical Issue Develops:
Document:
- Date and time symptoms began
- Altitude when symptoms began
- Symptoms (be specific)
- Treatments tried
- Medications taken (name, dose, time)
- Response to treatment
- Decision to descend/evacuate and why
Photos:
- Injuries (before treatment, after treatment)
- Location where incident occurred (if relevant)
- Timestamps (phones do this automatically)
Witnesses:
- If serious injury/illness, get witness statements from:
- Trekking companions
- Guide
- Tea house owners
- Other trekkers
- Include contact information
Evacuation Documentation
Critical to Obtain:
Helicopter Company:
- Receipt showing:
- Full cost
- Date
- Patient name
- Route flown (pickup and destination)
- Company name and contact
- Pilot/company contact information
- Flight manifest if available
Medical Facility:
- Hospital admission records
- Diagnosis
- Treatment provided
- Medications given
- Doctor's statement about necessity of evacuation
- Itemized bills for all services
- Receipts for all payments
- Discharge summary
Supporting:
- Tea house receipts showing your trek progression and location
- Trekking permit (proves you were on trek)
- Guide statement (if using guide)
- Companion statement
Filing Insurance Claim
Timing:
- File ASAP after incident (within days to weeks, not months)
- Most policies have time limits for filing claims
Required Documents (Typical):
- Completed claim form
- Itemized bills and receipts (originals)
- Medical records and doctor statements
- Proof of payment
- Evacuation company receipts
- Explanation of what happened
- Any supporting documentation (witness statements, photos, etc.)
Process:
- Submit complete package (incomplete claims delayed)
- Keep copies of everything submitted
- Follow up within 2 weeks if no response
- Be persistent—insurance companies sometimes "lose" claims
- Appeal if denied (many denials are overturned on appeal)
Common Claim Denials:
- Insufficient documentation
- Pre-existing condition not disclosed
- Altitude limit exceeded
- Activity exclusion (if policy doesn't cover trekking)
- Failure to seek immediate treatment
- Intoxication (alcohol/drugs)
Avoiding Denial:
- Read policy carefully before trek
- Disclose all pre-existing conditions
- Keep meticulous records
- Get proper medical evaluation
- Don't exaggerate or falsify anything
Cost Tracking
Keep Receipts For:
- All medical expenses (doctors, medications, hospitals)
- Evacuation costs
- Transportation related to medical care
- Accommodation if extending stay due to medical issue
- Meals if hospitalized/unable to trek
- Flight changes due to medical issue
Even Small Expenses:
- Medications purchased in Nepal
- Doctor consultation fees
- Over-the-counter items for medical issue
- Everything adds up
Embassy/Consulate Role
What They Can Do:
- Provide list of local doctors/hospitals
- Contact family on your behalf
- Facilitate money transfer from family (if you can't access funds)
- Issue emergency passport if yours lost
- Visit you in hospital
What They CANNOT Do:
- Pay for medical care or evacuation
- Demand you receive better care than locals
- Get you out of legal trouble
- Force helicopter company to fly without payment
Contact Information:
- Know your embassy/consulate location and contact in Nepal before trek
- Most are in Kathmandu
- Have contact info saved in phone
The Documentation Difference
In 2026, two trekkers were evacuated from Gorak Shep with HAPE, both by the same helicopter company, both insured with reputable companies. Trekker A took photos, kept medication log, got witness statements, obtained detailed receipts, and filed complete claim within 1 week—fully reimbursed within 30 days. Trekker B had none of this, filed incomplete claim 3 months later—claim initially denied, took 6 months and an appeal to get partial reimbursement. Documentation matters.
Telemedicine Options
Modern technology allows medical consultation even from remote trails. Several telemedicine services serve trekkers.
When to Use Telemedicine
Good Use Cases:
- Uncertain whether symptoms are serious
- Need antibiotic prescription advice
- Managing pre-existing condition with new symptoms
- Distinguishing AMS from other conditions
- Medication dosing questions
- Determining whether evacuation needed
- Reassurance or second opinion
Not Appropriate For:
- Obvious emergencies (use emergency protocols, don't delay)
- Physical examination required (injuries, suspicious lumps, etc.)
- Diagnostic testing needed
- Anything requiring hands-on care
Telemedicine Services for Travelers
Global Rescue:
- 24/7 emergency response coordination
- Medical consultation via phone
- Coordinates evacuations
- Membership required (can purchase before trek)
- Works in conjunction with travel insurance
- Website: globalrescue.com
CIWEC Clinic (Kathmandu):
- Email consultation service
- Send detailed description of symptoms
- Doctor responds with advice
- Small fee per consultation
- Delayed response (not real-time)
- Email: clinic@ciwec-clinic.com
MedAire (Med Link):
- 24/7 medical assistance
- Phone consultation with emergency physicians
- Available through some insurance companies
- Can arrange medical care
Your Home Doctor:
- If your doctor offers telehealth, phone/video consultation possible
- Knows your medical history
- May not be familiar with altitude medicine
- Time zone challenges
Travel Insurance Telemedicine:
- Many travel insurance policies include 24/7 medical consultation
- Check your policy benefits
- Usually via phone
- Doctors familiar with travel medicine
Using Telemedicine from Nepal Trek
Communication Requirements:
Phone Signal:
- Cell coverage in many areas (Lukla, Namche, Tengboche, Dingboche, etc.)
- See Nepal SIM cards guide for coverage maps
- No coverage in many sections
- Satellite phone: Most reliable option
- Rent in Kathmandu ($7-10/day)
- Works everywhere
- Worth it for solo trekkers or those with medical concerns
Internet:
- WiFi available at most tea houses (for fee)
- Often slow/unreliable
- Email consultation possible
- Video consultation may not work (bandwidth)
Preparation:
Before Trek:
- Register with telemedicine service (don't wait until emergency)
- Save contact numbers in phone
- Test service (make trial call to ensure it works)
- Understand costs/coverage
During Trek:
- Have detailed medical information ready:
- Current symptoms (specific details)
- When symptoms started
- Altitude
- Treatments tried
- Medical history
- Current medications
- Vital signs if available (temperature, pulse, etc.)
- The more specific, the better advice doctor can give
Information to Provide
Essential Details:
- Age and gender
- Current altitude and trek route
- Symptoms (onset, severity, progression)
- Medical history and current medications
- Treatments attempted and response
- Vital signs (temperature, pulse rate, breathing rate, if available)
- Physical findings (rash, swelling, etc.—photos helpful)
Altitude-Specific:
- Ascent profile (how fast you've been ascending)
- Previous altitude experience
- Whether taking Diamox
- Other group members' status (if they're fine, less likely to be bad water/food)
Limitations
Cannot Replace:
- Physical examination
- Diagnostic tests (X-ray, blood tests, etc.)
- Hands-on procedures
- Definitive care for serious conditions
Delays:
- May not be immediate (depending on service)
- Email consultations can take hours
- Time zone differences
Communication Challenges:
- Language barriers (less issue with international services)
- Poor phone connection
- Difficulty describing medical issues remotely
Cost
Telemedicine Services:
- Some included with travel insurance
- Some membership-based (Global Rescue $100-300/year)
- Some per-consultation fee ($50-150)
Satellite Phone:
- Rental $7-10/day
- Per-minute charges for calls (can be expensive)
- Emergency coordination calls may be covered by insurance
Worth It?
- Relatively small cost for peace of mind
- Can prevent unnecessary evacuation (saving thousands)
- Can provide reassurance when uncertain
- Particularly valuable for solo trekkers or those with pre-existing conditions
Pre-Trek Telemedicine Test Run
Two weeks before your trek, test your telemedicine service. Call the consultation line with a minor, non-urgent question (like "I'm taking Diamox, what side effects should I expect?"). This verifies the service works, you know the process, and the contact number is correct. Much better to discover problems before you're at 5,000m with a medical emergency.
Medical Facilities Along Trek Routes
Understanding what medical facilities exist along your route helps plan for emergencies.
Kathmandu Medical Facilities
International-Standard Clinics:
CIWEC Clinic:
- Location: Durbar Marg, Kathmandu
- Services: Travel medicine, general care, 24-hour emergency
- Doctors: Western-trained, English-speaking
- Specialties: Altitude medicine, traveler's diarrhea, tropical diseases
- Helipad: Can receive evacuations
- Insurance: Works with most international insurers
- Contact: +977-1-4424111
- Website: ciwec-clinic.com
Nepal International Clinic:
- Location: Uttardhoka, Lazimpat, Kathmandu
- Services: Similar to CIWEC
- Doctors: International staff
- 24-hour emergency services
- Insurance: Direct billing with many insurers
- Contact: +977-1-4435357
Grande International Hospital:
- Location: Dhapasi, Kathmandu
- Services: Full-service hospital, ICU, surgery
- Modern facility
- Helipad for evacuations
- 24-hour emergency
- Contact: +977-1-5159266
Norvic International Hospital:
- Location: Thapathali, Kathmandu
- Services: Full hospital services
- International standards
- Emergency department
- Contact: +977-1-5970032
Mediciti Hospital:
- Location: Nakhu, Lalitpur (near Kathmandu)
- Services: Large modern hospital
- All specialties
- ICU, surgery
- Contact: +977-1-5900123
Nepal Medical College:
- Teaching hospital
- Full services
- More affordable than private hospitals
- Longer waits
Government Hospitals:
- Tribhuvan University Teaching Hospital
- Bir Hospital
- Lower cost
- Longer waits
- Variable quality
- Last resort for most international travelers
Everest Region Medical Facilities
Lukla:
- Pasang Lhamu Nicole Niquille Hospital:
- Basic health post
- Can stabilize for evacuation
- Limited diagnostic capability
- No surgery
- Oxygen available
- Helpful for minor issues (wound care, etc.)
Namche Bazaar:
- Small health posts:
- Basic care
- Can provide oxygen
- Limited medications available
- Several pharmacies:
- Basic medications (pain relievers, antibiotics, Diamox)
- Quality variable
Pheriche (4,371m):
- Himalayan Rescue Association (HRA) Aid Post:
- Operated by HRA
- Staffed by volunteer Western doctors (in season: March-May, Oct-Nov)
- Altitude medicine specialists
- Services:
- Consultation and advice
- Altitude illness assessment
- Oxygen therapy
- Pulse oximetry
- Basic medications
- Stabilization for evacuation
- What they DON'T have:
- No surgery
- No X-ray
- No IV fluids (limited)
- No hospitalization (unstable patients evacuated)
- Daily health talks (free, highly recommended)
- Consultation fee: ~$50-100 USD
- Hours: Typically morning and evening clinics
- Off-season: Closed (only operates peak trekking seasons)
- This is THE medical resource in Everest region
Khunde Hospital:
- Near Namche, slightly off main trail
- More comprehensive than health posts
- Sir Edmund Hillary foundation hospital
- Can handle more complex cases
- Not for emergencies (Pheriche HRA quicker access)
Higher Than Pheriche:
- No medical facilities
- Lobuche, Gorak Shep, EBC: No clinics
- Some tea houses have basic first aid supplies and oxygen
- Any medical issue: Self-treat or descend to Pheriche or evacuate
Annapurna Region Medical Facilities
Manang (3,540m):
- HRA Aid Post:
- Similar to Pheriche clinic
- Volunteer Western doctors (in season)
- Altitude medicine focus
- Daily health talks
- Consultation, oxygen, medications, pulse oximetry
- Peak season: March-May, Oct-Nov
- Critical resource for Annapurna Circuit trekkers
Jomsom:
- Small hospital
- More comprehensive than health posts
- Can stabilize for evacuation
- Airstrip for medical flights
Pokhara:
- Western Regional Hospital: Main government hospital
- Several private clinics: Varying quality
- More limited than Kathmandu facilities
- Can handle moderate emergencies
- Serious cases often transferred to Kathmandu
Annapurna Base Camp Region:
- Minimal facilities on ABC route
- Small health posts in some villages (limited capability)
- Chhomrong has small clinic
Langtang Region Medical Facilities
- Very limited medical facilities
- Small health posts in some villages
- No HRA clinics
- Any significant medical issue: Evacuate to Kathmandu
What Medical Facilities Can Provide
HRA Aid Posts (Pheriche, Manang):
- ✓ Consultation and diagnosis
- ✓ Altitude illness assessment and advice
- ✓ Pulse oximetry (oxygen saturation measurement)
- ✓ Oxygen therapy
- ✓ Basic medications (altitude meds, antibiotics, pain relief)
- ✓ Wound care
- ✓ Stabilization for evacuation
- ✓ Advice on whether to descend/evacuate
- ✗ Surgery
- ✗ X-rays or advanced imaging
- ✗ Blood tests
- ✗ IV fluids (very limited if any)
- ✗ Hospitalization
Village Health Posts:
- ✓ Very basic first aid
- ✓ Sometimes oxygen
- ✓ Limited basic medications
- ✗ Diagnosis
- ✗ Most medications
- ✗ Any advanced care
Using Medical Facilities
When to Go:
- Uncertain diagnosis (AMS vs. other conditions)
- Need oxygen therapy
- Want expert assessment of whether safe to continue
- Need medications you don't have
- Want reassurance about symptoms
Cost:
- HRA clinics: ~$50-100 USD for consultation
- Village health posts: Minimal fee or donation
- Oxygen therapy: Additional cost
- Medications: Pay for any provided
What to Bring:
- Medical history
- List of current medications
- Insurance information
- Cash (USD or Nepali rupees—credit cards not accepted)
Limitations:
- Even HRA clinics are basic by Western standards
- Can provide advice and stabilization but not definitive care for serious conditions
- Serious illness/injury still requires evacuation
- Don't expect hospital-level care
Daily Health Talks at HRA Clinics
Highly Recommended:
- Free daily presentations about altitude sickness
- Usually afternoon/early evening
- Topics:
- Recognizing AMS, HACE, HAPE
- When to descend
- Medication use
- Acclimatization strategies
- Question and answer session
- Even if you feel fine, attend—knowledge may save your life later
- Non-patients welcome (don't need to be seeing doctor)
Schedule:
- Pheriche: Usually daily at 3 PM (check current schedule)
- Manang: Usually daily at 3 PM (check current schedule)
- Timing may vary
- Only during peak season when clinic is staffed
The Pheriche/Manang Stop
If you're on the EBC or Annapurna Circuit trek, strongly consider timing your trek to spend a night at Pheriche/Manang when the HRA clinic is open. Even if you feel great, attend the daily health talk. The information provided by these altitude medicine specialists is invaluable. Many trekkers credit these talks with giving them the knowledge to recognize AMS early and make smart descent decisions that prevented serious illness.
Frequently Asked Questions
Essential Medications
Q: Is Diamox really necessary, or is it cheating?
A: Diamox is not cheating—it's a legitimate medication recommended by altitude medicine experts. The Himalayan Rescue Association, Wilderness Medical Society, and every major altitude medicine authority endorse Diamox for rapid ascents like flying to Lukla. It doesn't give you "fake" acclimatization; it speeds up the natural acclimatization process by increasing your breathing rate and kidney function. Given that flying to Lukla (2,860m) is an extremely rapid altitude gain, prophylactic Diamox significantly reduces AMS risk. That said, it's mandatory since April 2023—some trekkers do fine without it. But it's certainly not cheating any more than training before a trek is "cheating."
Q: What's the minimum medical kit I can get away with?
A: Absolute bare minimum for 2-week EBC/ABC trek:
- Diamox 30 tablets (125mg)
- Dexamethasone 8 tablets (4mg) for emergency
- Ibuprofen 30 tablets (400mg)
- Paracetamol 30 tablets (500mg)
- Ciprofloxacin or Azithromycin (antibiotic course)
- Imodium 12 tablets
- Oral rehydration salts 10 packets
- Leukotape 1 roll
- Compeed blister bandages 5
- Bandaids 10 assorted
- Antiseptic wipes 10
- Antibiotic ointment 1 small tube
- Any personal prescription medications
This is about 300 grams and covers the most likely and most serious issues. But I strongly recommend a more comprehensive kit as outlined in this guide—the extra weight is minimal and the additional capability significant.
Q: Can I buy medications in Kathmandu instead of bringing from home?
A: Yes, many medications are available over-the-counter in Kathmandu that require prescriptions in Western countries. Diamox, antibiotics (Cipro/Azithro), pain medications, and most common drugs are available. Quality is generally good at reputable pharmacies in Thamel, though counterfeit medications do exist. Buy from well-established pharmacies or hospital pharmacies. Allow 1-2 days in Kathmandu for shopping.
Advantages: Cheaper, lighter to fly, can adjust quantities based on what you actually need. Disadvantages: Quality concerns, time required, brands may differ from what you know, controlled substances not available, if you forget something critical it may not be available.
I recommend bringing critical/unique medications from home (personal prescriptions, altitude meds if you have them) and supplementing in Kathmandu if needed.
Q: How much does Diamox cost in Nepal?
A: Diamox (acetazolamide) costs approximately $0.50-1.00 USD per tablet at Kathmandu pharmacies (2026 prices). A 2-week trek supply (28 tablets at 125mg 2x/day) costs $15-30. This is cheaper than most Western countries. Available at pharmacies in Thamel and other tourist areas without prescription. Not reliably available above Namche.
Q: What if I'm allergic to sulfa drugs (can't take Diamox)?
A: Acetazolamide (Diamox) is a sulfonamide. If you have true sulfa allergy, you cannot take Diamox. Alternatives:
- Very gradual ascent profile (walk from Jiri instead of flying to Lukla, extra acclimatization days)
- Dexamethasone 4mg twice daily (but this has more side effects and is controversial for prophylaxis)
- Ginkgo biloba (some limited evidence, much weaker than Diamox)
- Ibuprofen 600mg 3x daily starting before ascent (some evidence, but concerns about HAPE risk)
Bottom line: Slow, conservative ascent is your best strategy if you can't take Diamox. Consider longer itineraries with more rest days.
Note: Many people who think they're allergic to sulfa drugs actually aren't (childhood rash, etc.). If you're uncertain, ask your doctor about allergy testing before the trek.
Altitude Sickness
Q: How do I know if my headache is AMS or just dehydration?
A: This is one of the most common diagnostic challenges on treks. Here's how to differentiate:
Dehydration headache:
- Usually frontal (forehead) or temple region
- Responds quickly to hydration + paracetamol
- Not accompanied by nausea (unless severe dehydration)
- Urine dark yellow/amber
- Improves within 1-2 hours of drinking water
- Can occur at any altitude
AMS headache:
- Often more diffuse (whole head) or back of head
- Doesn't improve significantly with hydration alone
- Usually accompanied by nausea, fatigue, or loss of appetite
- Urine may be normal color (Diamox makes you pee a lot)
- Doesn't improve quickly (persistent despite treatment)
- Worsens with exertion
- Occurs after gaining altitude (6-24 hours delay)
What to do when uncertain:
- Treat both: Drink 1 liter of water + take paracetamol + rest
- Check other AMS symptoms (nausea, dizziness, fatigue)
- If headache resolves in 1-2 hours: Probably dehydration
- If headache persists despite hydration: Probably AMS
- When in doubt, treat as AMS (safer)—don't ascend until resolved
Q: My pulse oximeter shows 85% oxygen saturation at 5,000m. Should I be worried?
A: Probably not—this is normal at 5,000m. Oxygen saturation drops significantly at altitude:
- Sea level: 95-100%
- 3,000m: 90-95%
- 4,000m: 85-90%
- 5,000m: 80-85%
- 5,500m: 75-80%
An oxygen saturation of 85% at 5,000m is completely normal for an acclimatized person. What matters more than the absolute number is:
- Symptoms: How do you feel? Asymptomatic with 85% is fine. Severe shortness of breath with 85% is concerning.
- Trend: Is your saturation stable or dropping? Stable 85% over days is fine. Dropping from 88% to 85% to 82% over hours is concerning.
- Heart rate: Resting heart rate >120 bpm at altitude is concerning, even if saturation okay.
- At rest vs. exertion: 85% at rest is okay. 85% after 30 minutes of rest (should recover higher) might indicate acclimatization issues.
HAPE concern: Oxygen saturation dropping despite rest, especially if accompanied by shortness of breath at rest, cough, or fatigue.
Bottom line: Don't obsess over pulse oximeter numbers. How you feel is more important than the number. Pulse oximeters are tools, not crystal balls.
Q: I developed mild AMS symptoms at Dingboche. Should I skip the Lobuche/Gorak Shep section and go straight back down?
A: Not necessarily. Mild AMS at Dingboche (4,410m) is common and doesn't mean you can't continue to EBC with proper management. Here's the decision framework:
If AMS is mild (mild headache, slight nausea, tired but functional):
- Take an extra rest day at Dingboche
- Start Diamox 250mg twice daily if not already taking
- Hydrate aggressively
- Reassess after 24 hours:
- Improving: Can probably continue slowly
- Stable: Take another rest day
- Worsening: Descend to Namche
If AMS is moderate (significant headache despite medication, vomiting, very tired):
- Do NOT continue up
- Rest at Dingboche for 24-48 hours
- If not improving or worsening: Descend to Namche (800m lower)
- Only continue up if complete resolution
If AMS is severe (confusion, ataxia, shortness of breath at rest):
- This is HACE or HAPE—descend immediately
- Do not wait to see if it gets better
Many people develop mild AMS at Dingboche and successfully continue to EBC with an extra rest day. The key is honest assessment, not pushing through worsening symptoms, and having flexibility in your itinerary.
Q: Can I take Diamox just for the Thorong La/Kala Patthar summit day instead of the whole trek?
A: Not recommended. Diamox takes 6-24 hours to reach full effectiveness. Starting it the morning of your high pass/summit is too late—you want it in your system before you gain significant altitude.
Better strategy:
- Start Diamox 125mg 2x daily when you reach ~3,500m (Namche or Manang)
- Continue through your highest point (Thorong La, Kala Patthar, etc.)
- Can stop 1-2 days after reaching maximum altitude or when starting descent
If you only want to use Diamox minimally:
- Start 1-2 days before your highest altitude day
- Continue 1 day after
- This gives shorter usage period but still provides benefit when you need it most
Taking Diamox just one day is essentially ineffective.
Women's Health
Q: Will my period stop or change at altitude?
A: Maybe. Altitude affects menstruation differently for each woman:
- 30-40% of women experience irregular periods at altitude
- Periods may come early, late, or be skipped entirely
- Flow may be heavier or lighter
- Cramps may be worse or better
- Changes are temporary—cycles normalize after returning home
You cannot predict how you'll respond. Therefore:
- Be prepared to manage your period on the trek (bring supplies)
- If you want to suppress period, start birth control method well before trek (3+ months to ensure it works for you)
- Don't assume your period won't come just because you're trekking
Q: How do I deal with periods when there's no toilet paper and only squat toilets?
A: It's definitely more challenging than home, but manageable:
Supplies to bring:
- Your own toilet paper (tea houses rarely provide—bring full roll)
- Hand sanitizer (essential)
- Wet wipes for personal hygiene
- Ziplock bags for used products
- Tampons (more practical than pads for trekking activity)
- Or menstrual cup (reusable, less waste, but requires washing)
Squat toilet technique:
- Face uphill side of toilet (easier balance)
- Pants completely off one leg (gives more room to maneuver)
- Take your time (not a race)
- Use hand sanitizer liberally
Disposal:
- Most tea houses have trash bins (products usually burned or buried)
- Environmentally: Pack out used products in ziplock bags if possible
- Never flush products down toilet (plumbing can't handle it)
Cup users:
- Tea houses have washing facilities (usually outdoor taps)
- Cold water washing is fine
- Sanitize with boiling water when possible (ask tea house for hot water)
- More practical than it sounds—many female trekkers swear by cups
Q: I'm prone to UTIs. Should I take prophylactic antibiotics during the trek?
A: No, prophylactic antibiotics aren't recommended for UTI prevention during trekking. Instead:
Prevention strategies:
- Hydrate aggressively (4-5 liters daily)—most important prevention
- Urinate frequently—don't "hold it" for hours
- Wipe front to back always
- Change underwear daily
- Urinate after sex (if trekking with partner)
- Consider d-mannose or cranberry supplements (some evidence for prevention)
- Wear moisture-wicking synthetic underwear (not cotton)
Bring treatment:
- Ciprofloxacin or Azithromycin (antibiotic course)
- Start immediately if UTI symptoms develop
- Don't wait—UTIs can progress to kidney infections quickly
- 3-day course usually sufficient for uncomplicated UTI
If very prone to UTIs:
- Bring 2 courses of antibiotics
- Consider asking your doctor for prophylactic antibiotic to take after sex
- Very aggressive hydration during trek
Prophylactic antibiotics create resistance and have side effects. Prevention + immediate treatment if needed is better strategy.
Q: I'm on birth control pills. Should I be worried about blood clots at altitude?
A: There is theoretical increased risk, but absolute risk remains low for most women. Here's the risk breakdown:
Risk factors that combine:
- Estrogen-containing birth control (combined pills, patch, ring): Increases blood clot risk 2-4x
- High altitude: Increases blood clot risk (degree uncertain, but real)
- Dehydration: Increases blood clot risk
- Prolonged sitting (long flights): Increases blood clot risk
Additional risk factors:
- Age >35
- Smoking
- Obesity
- Personal or family history of blood clots
- Immobility
What to do:
Low risk (young, healthy, no risk factors):
- Continue birth control as usual
- Stay extremely well-hydrated
- Move around on flights (aisle walks every 1-2 hours)
- Monitor for DVT symptoms (one-sided calf swelling, warmth, redness)
Moderate risk (age 35-40, one risk factor):
- Discuss with doctor before trek
- Consider switching to progestin-only method (no clot risk)
- Or discontinue birth control for trek duration (use other contraception)
High risk (multiple risk factors, age >40, prior clot):
- Strongly consider discontinuing estrogen birth control before trek
- Switch to progestin-only or non-hormonal method
DVT symptoms to watch for:
- Asymmetric calf swelling (one leg much larger)
- Pain, warmth, redness in calf
- Shortness of breath, chest pain (if clot travels to lung)
- If suspected: Descend immediately, don't massage leg, seek medical care
Talk to your doctor if concerned—they can help assess your individual risk.
Medications and Treatment
Q: Can I combine ibuprofen and acetaminophen/paracetamol?
A: Yes, combining ibuprofen and acetaminophen is safe and often more effective than either alone. They work via different mechanisms and don't interact negatively.
Combination strategies:
- Alternate: Ibuprofen 400mg at 8am, acetaminophen 500mg at 11am, ibuprofen at 2pm, acetaminophen at 5pm, etc.
- Together: Ibuprofen 400mg + acetaminophen 500mg at same time, every 6-8 hours
- Either approach provides better pain control than single medication
Don't exceed:
- Ibuprofen: 2,400mg/24 hours
- Acetaminophen: 4,000mg/24 hours (3,000mg if consuming alcohol)
Best for:
- Severe headaches (altitude or otherwise)
- Significant muscle soreness
- Dental pain
- Moderate injuries
Altitude consideration: For altitude headaches, start with acetaminophen alone (safer for kidneys at altitude). If inadequate, add ibuprofen.
Q: My antibiotics say to avoid sun exposure. How do I do that while trekking in Nepal?
A: Some antibiotics, particularly fluoroquinolones like Ciprofloxacin, cause photosensitivity (increased sun sensitivity). In Nepal's high-altitude intense sun, this is challenging. Here's how to manage:
Sun protection:
- SPF 50+ sunscreen, applied every 2-3 hours (see sun protection guide)
- Long sleeves (sun hoodie)
- Wide-brim hat or cap + buff for neck
- Sunglasses
- Stay in shade during breaks when possible
Timing:
- If taking Cipro for diarrhea, you're likely resting at tea house anyway (not trekking)
- If must trek while on photosensitizing antibiotic, start very early (finish by noon)
- Use tea house rest day to start antibiotic course
Alternative antibiotic:
- Azithromycin doesn't cause photosensitivity (advantage over Cipro)
- Consider bringing Azithromycin specifically for this reason
- Discuss with doctor when getting prescriptions
Reality check:
- Many trekkers take Cipro while trekking and manage fine with good sun protection
- The photosensitivity warning is important but doesn't make it impossible
- Just requires extra sun protection vigilance
Q: How long can medications be stored at high altitude before they lose potency?
A: For a 2-3 week trek, medication potency is not a concern. Most medications are stable for months to years, and a few weeks at altitude won't significantly degrade them.
Factors that affect medication stability:
- Temperature extremes: Main concern
- Most medications stable at -20°C to 40°C
- Higher than 40°C: Some degradation possible
- Freezing: Liquid medications may separate/degrade
- Humidity: Keep medications dry
- Light: Some medications photosensitive (keep in dark container)
- Time: Expiration dates assume room temperature storage; cold storage can extend shelf life
For trekking:
- Keep medications in waterproof container (dry)
- Protect from extreme heat (don't leave in sun)
- Liquid medications and insulin: Keep from freezing (body warmth pocket)
- Otherwise, normal storage is fine
Special cases:
- Insulin: Cannot freeze—keep in insulated case or inner jacket pocket
- EpiPens: Can freeze but may still work—keep at body temperature if possible
- Inhalers: Can freeze and malfunction—keep warm
- Liquids: Generally more sensitive than pills
After trek:
- If medications exposed to extreme conditions, consider replacing
- Pills that look discolored, crumbled, or smell odd: Replace
- Otherwise, use until expiration date
Blisters and Foot Care
Q: Should I pop a blister or leave it intact?
A: Depends on size and whether you need to continue trekking.
Small blister (<1cm), not painful:
- Leave intact if possible (roof protects underlying tissue)
- Cover with Compeed or moleskin padding
- Monitor daily
Large blister (>1cm) or painful:
- Drain it if you must continue trekking
- Draining allows continued walking without further damage
- DO NOT remove roof (skin covering)
Drainage procedure:
- Wash hands and blister with soap and water
- Sterilize needle (alcohol wipe or hold in flame 10 seconds)
- Pierce blister at edge (multiple small holes if large blister)
- Gently press to express all fluid
- Leave skin roof intact
- Apply antibiotic ointment to puncture
- Cover with Compeed or gauze + Leukotape
- Change dressing daily, watch for infection
Never drain:
- Blood blisters (unless very large and painful)
- If you can rest and not continue trekking (let heal naturally)
- If you're not confident you can keep it clean
Infection risk:
- Higher in Nepal (dusty, limited washing facilities)
- Meticulous cleaning and antibiotic ointment essential
- Watch for increasing redness, red streaks, pus, fever
- Start oral antibiotics if infection develops
Q: My boots gave me terrible blisters. Can I buy new boots in Namche/Lukla and continue?
A: You can buy boots in Namche, but this is problematic:
Problems with buying boots on trek:
- Limited selection (whatever happens to be available)
- Sizing may not be accurate
- Likely used/rental boots (already broken in for someone else's feet)
- Cannot test boots before committing
- No breaking-in period (new boots = new blisters)
- Usually lower quality than what you'd buy at home
Better alternatives:
- Treat blisters aggressively with Leukotape and Compeed
- Take rest day to let blisters heal
- Adjust lacing to reduce pressure on blister areas
- Add insoles for better fit
- Wear two pairs of socks (liner + outer) to reduce friction
- Continue in same boots with better blister management
When buying boots might make sense:
- Your boots are completely destroyed (sole separating, etc.)
- Boots are comically wrong size (borrowed/rental boots that don't fit at all)
- Multiple severe blisters making continued trekking impossible
If you must buy boots in Namche:
- Go to most reputable shop (ask tea house owner for recommendation)
- Size carefully (Nepali sizing differs from Western)
- Expect to pay $50-150 USD
- Apply Leukotape preemptively to known blister areas before first use
- Take short test walk before committing to multi-day trek in them
Prevention for next time:
- Break in boots for minimum 50-80km before trek
- Test exact sock combination you'll use on trek
- Consider boot fitting service before trek
Medical Emergencies and Evacuation
Q: How quickly can a helicopter reach me if I need evacuation?
A: Depends on weather, location, and helicopter availability.
Ideal conditions:
- From Kathmandu to Everest region: 30-45 minutes flight time
- From point of call to arrival: 1-3 hours (including coordination, flight prep, flight)
Realistic timing:
- If weather is good and helicopter available: 2-4 hours from emergency call to evacuation
- If weather is marginal: May wait hours to full day for weather window
- If night: Usually wait until morning (helicopters don't fly at night except extreme circumstances)
- If monsoon season: Weather delays very common, may wait 24-48 hours
Location factors:
- Main trail areas (Namche, Dingboche, Lobuche): Faster—well-known landing zones
- Off-trail or very remote locations: Longer—need to find/prepare landing zone
- Very high altitude (>5,500m): May require staging (helicopter lands, refuels at lower elevation, continues)
Monsoon season:
- Clouds and weather significantly delay evacuations
- Can be multi-day wait in worst cases
- Reason many trekkers avoid monsoon season
Bottom line:
- Don't count on immediate evacuation
- Be prepared to stabilize patient and wait
- Weather is biggest variable—beyond anyone's control
- Night emergencies: Treat overnight, evacuate at first light
Q: What happens if I need evacuation but my insurance won't pre-approve?
A: You have several options, none ideal:
Option 1: Self-pay and claim reimbursement later
- Pay helicopter company upfront (credit card usually accepted)
- Cost: $4,000-15,000 depending on location
- File insurance claim after
- Keep all receipts and documentation
- Insurance should reimburse if covered (but delay in getting money back)
Option 2: Family emergency wire transfer
- Contact family to wire money to Nepal
- Western Union or bank transfer
- Takes time (hours to days)
- Only works if patient stable enough to wait
Option 3: Embassy assistance
- Embassy can help coordinate money transfer from family
- Embassy will NOT pay directly
- Can provide list of helicopter companies
- Can advocate on your behalf but cannot force companies to fly without payment
Option 4: Helicopter company compassion
- Some companies will fly first, collect payment later (rare)
- Usually only for life-threatening emergencies
- Will pursue payment aggressively
- Not guaranteed—company decides
Prevention:
- Choose insurance known for good emergency response (see insurance guide)
- Have 24/7 emergency number programmed in phone
- Call insurance FIRST (before helicopter) when possible
- Have credit card with $15,000+ limit available (backup)
- Ensure family at home has access to funds and knows situation
Worst case:
- If truly no way to pay and company won't fly on compassion grounds
- Descend on foot if possible (porter/yak assistance)
- Seek help from trekking agency if you used one
- Contact embassy
- Most companies will eventually fly (don't want death on their hands) but situation is stressful and complicated
This is why insurance with emergency assistance services is critical.
Q: Can I be evacuated to my home country directly from the mountains?
A: No. Evacuation happens in stages:
Stage 1: Mountain to Kathmandu
- Helicopter from trek location to Kathmandu hospital
- Usually directly to hospital helipad (CIWEC, Grande, etc.)
- Or to Kathmandu airport, then ambulance to hospital
Stage 2: Stabilization in Kathmandu
- Hospital evaluation and treatment
- Stabilize for international travel
- May require days to weeks depending on condition
- Doctor determines when fit to fly
Stage 3: Medical evacuation to home country (if needed)
- Commercial flight (if stable and condition allows)
- Air ambulance with medical escort (if needed but stable)
- Full medical flight (if critical—very expensive, $50,000-150,000+)
- Requires insurance pre-approval (medical repatriation coverage)
You cannot:
- Helicopter directly from Everest to Bangkok/Delhi/Singapore
- Arrange medical flight directly from mountains
- Skip Kathmandu evaluation
Even minor issues:
- If evacuated for non-critical issues (like bad blisters), you'll still go to Kathmandu
- Can likely fly home commercially after brief medical check
- But helicopter goes to Kathmandu, not straight to airport
Insurance coverage:
- "Emergency evacuation": Usually covers helicopter to nearest adequate facility (Kathmandu)
- "Medical repatriation": Covers transport back to home country (if medically necessary)
- Need both types of coverage for complete protection
Pre-existing Conditions
Q: I have well-controlled asthma. Can I trek to EBC?
A: Probably yes, but with precautions and doctor clearance.
Requirements:
- Asthma well-controlled (no frequent attacks)
- No recent hospitalizations for asthma
- Familiar with your triggers and management
- Pulmonologist clearance
- Excellent medication adherence
Altitude effects on asthma:
- Variable—some asthmatics improve at altitude (dry air, fewer allergens)
- Others worsen (cold air, exertion, stress)
- Individual response unpredictable
- Cannot know until you try
Precautions:
- Bring multiple rescue inhalers (albuterol)—extras in case one fails
- Continue controller medications (inhaled corticosteroids)
- Keep inhalers warm (freeze at high altitude—keep in inner pocket)
- Consider spacer device
- Very gradual ascent
- Monitor peak flow if you use peak flow meter
- Don't push through worsening symptoms
Testing:
- Before committing to EBC, test response at moderate altitude
- Try 3,000-4,000m trek first
- Or spend few days at altitude destination before booking EBC
- If you do fine at moderate altitude, likely okay at high altitude
When to descend:
- Increasing rescue inhaler use (needing it more frequently than usual)
- Poor symptom control despite medication
- Difficulty maintaining oxygen saturation
- Any respiratory distress
Alternative:
- If very concerned, choose lower-altitude trek
- Langtang Valley, Poon Hill, lower Annapurna routes
- Still beautiful, less altitude stress
Most trekkers with well-controlled asthma complete EBC successfully with proper preparation. The key is honest assessment of your control and not pushing through warning signs.
Q: I take daily medication for depression/anxiety. Will altitude affect this?
A: Probably not significantly, and you should continue your medications.
Continue your medications:
- Don't discontinue antidepressants/anti-anxiety medications before trek
- Withdrawal can be severe and dangerous
- Abrupt discontinuation can cause relapse
- Bring full supply plus extra
Altitude and mental health:
- Altitude itself doesn't usually worsen depression/anxiety
- Stress of trekking might affect mood
- Sleep deprivation (common at altitude) can affect mental state
- Some people find trekking mentally therapeutic
Medication considerations:
- SSRIs/SNRIs (Prozac, Zoloft, Lexapro, etc.): Safe at altitude
- Very rare concern about serotonin syndrome with altitude—discuss with doctor
- Overall considered safe
- Benzodiazepines (Xanax, Ativan, Valium): Safe but can suppress breathing
- Use cautiously above 4,000m
- For panic attacks: Still use if needed (benefit outweighs risk)
- For sleep: Avoid—use other methods
- Tricyclics: Generally safe
- Atypicals: Generally safe
Precautions:
- Bring medication in original bottle
- Consider bringing doctor's letter (especially for controlled substances)
- Have plan for managing mental health symptoms if they worsen
- Trek with supportive companions who know your situation
- Don't be afraid to descend/end trek if mental health deteriorating
Stigma:
- Mental health conditions are common
- Many trekkers take antidepressants/anti-anxiety medications
- No need to hide this from trekking companions (they can help if needed)
When to reconsider trek:
- If currently in mental health crisis
- If recently changed medications (wait until stable on new med)
- If doctor advises against
- Otherwise, trekking is generally fine for people with depression/anxiety
Miscellaneous
Q: What's the most important single item to bring in a medical kit?
A: If forced to choose one: Diamox (acetazolamide) for altitude sickness prevention.
Rationale: Altitude sickness is the single greatest health risk on Nepal treks. It's potentially fatal (HACE/HAPE), and it's largely preventable with Diamox. You can improvise for many other conditions—treat blisters with duct tape if needed, manage diarrhea with rice and rest, deal with pain through toughing it out. But severe altitude sickness requires either Diamox/dexamethasone or descent, and descent may not be possible in all weather conditions.
That said, a close second is antibiotics (Cipro or Azithro)—GI infections and wound infections can end treks and become serious without treatment.
In reality, bring a complete kit—it weighs 500-800 grams and covers dozens of scenarios.
Q: Can I get altitude sickness at the Kathmandu airport when I arrive in Nepal?
A: No. Kathmandu airport elevation is 1,338m (4,390ft)—not high enough to cause altitude sickness. Most people don't develop AMS symptoms below 2,500m (8,200ft).
However:
- You may feel mild effects of elevation (slightly out of breath, sleeping less well)
- Jet lag may make you feel poorly (often confused with altitude)
- Air pollution in Kathmandu may affect breathing (not altitude sickness)
Don't start Diamox just for being in Kathmandu. Start when you:
- Fly to Lukla (2,860m)—recommended to start in Kathmandu before flight
- Drive to Syabrubesi (1,460m) for Langtang—start when reaching ~2,500m
- Drive to Pokhara (820m)—start when reaching ~3,000m
Q: I'm vegan. Will I be able to get enough nutrition on the trek?
A: Yes, but it requires some planning. Nepal is actually quite vegan-friendly.
Vegan options at tea houses:
- Dal bhat (lentil soup and rice): Staple food, vegan, available everywhere
- Vegetable curry and rice: Common
- Tibetan bread (usually vegan): Available at most tea houses
- Noodle/pasta dishes: Many are vegan or can be made vegan
- Potatoes: Boiled, fried—carb source
- Spring rolls, momos (some are vegan): Especially in Namche and larger villages
- Porridge made with water: Breakfast option
- Fruit: Limited but some available (apples, oranges in season)
Challenges:
- Limited protein variety (mostly lentils)
- Dairy is common—need to specify no cheese, no butter
- Higher villages have less variety
- May get tired of dal bhat (you'll eat it twice a day)
What to bring:
- Protein powder (plant-based)
- Nut butter packets
- Energy bars (vegan)
- Nutritional supplements if concerned about deficiencies
Communicate:
- "Dudh chhaina" (doo chh-eye-nah) = "No milk/dairy"
- "Maasu chhaina" (mah-su chh-eye-nah) = "No meat"
- Most tea house staff understand "vegan" in tourist areas
Nutrition concern:
- Focus on eating enough calories (trekking burns 3,000-5,000 calories/day)
- Protein quantity may be lower than ideal (dal provides some)
- Bring supplemental protein sources
Many vegan trekkers complete EBC/ABC successfully. Main challenge is monotony, not inadequate nutrition.
Q: How do I carry my medical kit through airport security?
A: Medical supplies and medications generally pass through security easily with a few precautions:
Medications:
- Carry in carry-on bag (not checked luggage) in case checked bag is lost
- Keep in original prescription bottles with pharmacy labels
- Doctor's letter for controlled substances or large quantities
- Liquid medications: Follow TSA liquid rules (<100ml containers or in checked bag)
- Nepal customs: Typically no issues with personal medical supplies for trek
Injectables:
- EpiPens, insulin pens: Usually okay in carry-on
- Bring prescription and doctor's letter
- Inform security screener
Sharp objects:
- Small scissors (<4 inches) usually allowed in carry-on, but not guaranteed
- Better to pack scissors in checked luggage or buy in Kathmandu
- Safety pins: No problem
Checked vs. carry-on:
- Medications: Carry-on (redundancy—half in checked if you have a lot)
- First aid supplies (bandages, etc.): Can go in checked luggage
- Critical items (Diamox, personal prescriptions, EpiPen): Carry-on
International flights:
- Some countries stricter than others
- Original bottles and prescriptions = rarely any issues
- If questioned, explain you're trekking at high altitude and need medical supplies
Nepal customs:
- Typically very relaxed about trekking medical supplies
- Have doctor's letter if carrying large quantities or injectables
- Declare controlled substances if asked
Lost luggage contingency:
- If checked bag with medical supplies is lost, pharmacies in Kathmandu stock most items
- Critical medications should be in carry-on precisely for this reason
Q: What medical issues are trekking agencies/guides responsible for?
A: This depends entirely on your specific contract, but general framework:
Guide/Agency Typically Responsible For:
- Basic first aid treatment
- Recognizing serious conditions and advising descent/evacuation
- Coordinating helicopter evacuation (calling company, communicating location)
- Carrying basic group first aid kit
- Assisting trekkers to safety during descent/evacuation
- Providing porters/yaks for assisted descent if needed
Guide/Agency NOT Responsible For:
- Your personal medical kit (you bring your own)
- Cost of medications or medical treatment
- Cost of evacuation (you or your insurance pays)
- Advanced medical care (they're guides, not doctors)
- Pre-existing conditions that worsen
- Conditions resulting from your own poor decisions (ignoring advice, etc.)
Your Responsibilities:
- Bring adequate personal medical kit
- Have valid insurance for evacuation
- Accurately disclose medical conditions to guide
- Follow guide's advice about acclimatization, descent, etc.
- Pay for any medical care or evacuation needed
Gray areas:
- If guide pushes pace too fast and you develop altitude sickness: Arguably agency's fault, but hard to prove
- If guide fails to recognize serious condition: Potentially negligent, but you're also responsible for your own health
- If agency markets "budget" trek with inexperienced guides: You get what you pay for
Choosing agency:
- Ask about guide training (Wilderness First Aid, altitude medicine knowledge)
- Ask what's in their group first aid kit
- Understand what support they provide for medical emergencies
- Read reviews about how they handle trekker medical issues
- See how to choose trekking agency guide
Bottom line:
- Don't rely on guide/agency for your medical preparedness
- Bring your own complete medical kit
- Have your own insurance
- Guides are helpful resources but you're responsible for your health
Related Resources
Essential Planning Guides
- Best Travel Insurance for Nepal Trekking 2025 - Comprehensive insurance comparison including helicopter evacuation coverage
- Everest Base Camp 14-Day Itinerary - Proper acclimatization schedule reduces medical risks
- Annapurna Base Camp 10-Day Itinerary - Conservative altitude gain profile
Health & Safety
- Water Purification & Hydration Guide - Prevent GI illness, critical for altitude acclimatization
- Fitness Requirements for Nepal Trekking - Physical preparation reduces injury risk
- Solo Female Trekking Nepal Safety Guide - Women-specific health and safety considerations
Gear & Equipment
- Everest Base Camp Packing List - Complete gear list including medical kit section
- Trekking Boots & Footwear Guide - Proper footwear prevents blisters
- Layering System Guide - Clothing to prevent hypothermia and cold injuries
- Down Jackets for Nepal Trekking - Essential cold weather protection
- Sun Protection & Sunglasses Guide - UV protection critical at altitude
Practical Information
- Nepal SIM Cards & WiFi Guide - Communication for emergencies
- Nepal Money, ATMs & Currency Guide - Paying for medical care and evacuation
- Nepal Visa Guide - Entry requirements
Trek-Specific Routes
- Everest Base Camp Complete Guide - EBC altitude profile and medical facilities
- Annapurna Circuit Guide - AC altitude and health considerations
- Langtang Valley Trek - Lower altitude alternative for health concerns
Support Services
- How to Choose a Trekking Agency - Agencies provide medical support
- Hiring Guides & Porters - Guide first aid training considerations
Final Thoughts
Medical preparation for Nepal trekking isn't about paranoia—it's about empowerment. A comprehensive medical kit and solid knowledge transform potential emergencies into manageable situations. You're trekking in one of the most remote regions on Earth, where the nearest hospital may be a three-day walk or a $15,000 helicopter ride away. Self-sufficiency isn't optional; it's essential.
The good news: most medical issues on treks are minor and easily managed with the supplies and knowledge outlined in this guide. Blisters, headaches, mild diarrhea, sore muscles—these are normal trekking experiences, not emergencies. With proper preparation, you'll handle them confidently and continue enjoying your adventure.
The critical knowledge is recognizing when something isn't minor—when that headache is severe AMS, when that blister is becoming infected, when that stomach bug requires antibiotics, when descent is non-negotiable. Trust your gut. When in doubt, err on the side of caution. The mountain will still be there next year, but your health won't if you ignore serious warning signs.
Your medical kit is one of the few pieces of gear you genuinely hope you won't need. But when you do need it—whether it's Leukotape for a hot spot at Namche, Diamox for headache at Dingboche, or dexamethasone for confusion at Gorak Shep—you'll be profoundly grateful you prepared properly.
Trek smart, trek safe, and bring the medical kit.
This guide was compiled with input from the Himalayan Rescue Association, CIWEC Clinic Kathmandu, the Wilderness Medical Society, and experienced high-altitude trekking physicians. Information current as of February 2026.