


$2-$7 per charge
20,000mAh for 10-14 day treks
30-50% capacity below 0°C
~15-20% in airplane mode
Variable — 4-6 hours for full panel charge
300-500g for power bank
Power Banks & Electronics for Trekking in Nepal: The Charging Guide
For power banks and electronics on a Nepal trek, carry a 20,000mAh power bank for an 8-14 day trek, charge from tea house wall outlets at lower elevations ($2-7 per device above 3,000m), and keep batteries warm — cold below 0°C cuts usable capacity by 30-50%. Above 4,000m, charging is scarce and solar-dependent, so arrive self-sufficient.
Staying charged on a Nepal trek is a real challenge that catches many trekkers off guard. Tea houses charge $2-5 per device per charge, wall outlets become increasingly scarce above 4,000m, and cold temperatures drain batteries 30-50% faster than you would experience at sea level. A good power strategy means the difference between capturing that once-in-a-lifetime summit sunrise photo and staring at a dead phone screen when the Himalayan peaks light up in gold.
Your phone is not just a camera on trek. It is your GPS navigation, your emergency communication device, your altitude tracker, your entertainment during long cold evenings, and your connection to the outside world. Losing power is not merely an inconvenience -- it can be a genuine safety issue.
This guide covers everything you need to know about keeping your electronics alive on Nepal's most popular trekking routes, including Everest Base Camp, the Annapurna Circuit, and beyond. We break down real charging costs at specific tea house stops, calculate exactly how much power bank capacity you need based on your devices, and give honest assessments of solar chargers, cold weather performance, and camera gear trade-offs.
Whether you are a minimalist trekker carrying only a smartphone or a photography enthusiast loaded with a mirrorless camera, drone, and GoPro, this guide will help you build a power strategy that works.
Charging Availability on Nepal Treks
Charging infrastructure in the Himalayas follows a predictable pattern: the higher you go, the more expensive and unreliable it becomes. Understanding this gradient helps you plan when to charge your devices and when to rely on your power bank.
Below 3,000m: Readily Available
At lower elevations -- Lukla (2,860m), Phakding (2,610m), Birethanti (1,025m), Jagat (1,300m) -- most tea houses have multiple electrical outlets available. Many places offer free charging if you are staying and eating there, though some charge $1-2 per device. Power comes from Nepal's national grid or local micro-hydro systems, and it is generally reliable. This is your best opportunity to top off everything: phone, power bank, camera batteries, headlamp.
At this altitude, do not waste your power bank capacity. Charge directly from the wall whenever possible. Save your portable power for the higher elevations where outlets are scarce and expensive.
3,000-4,000m: Available but Costly
Villages like Namche Bazaar (3,440m), Manang (3,540m), Tengboche (3,867m), and Chame (2,710m) typically have charging available but at a cost. Expect to pay $2-3 per device per charge. Most tea houses have limited outlet availability -- often just one or two outlets shared among a dozen trekkers -- and they operate on a first-come, first-served basis.
Power at these elevations often comes from solar panels and small micro-hydro generators. Cloudy days can reduce solar capacity significantly, meaning some tea houses may limit charging hours or increase prices when power is scarce. Namche Bazaar is the notable exception on the EBC route, with relatively good infrastructure including bakeries and internet cafes that offer charging.
4,000-5,000m: Limited and Expensive
This is where the charging situation gets genuinely difficult. At Dingboche (4,410m), Lobuche (4,940m), Thorong Phedi (4,450m), and similar high-altitude stops, charging costs $3-5 per device. Outlets are extremely limited, power supply is unreliable (entirely solar-dependent in many locations), and you may find that charging is unavailable for a full day during bad weather.
At these elevations, your power bank is no longer a convenience -- it is a necessity. Plan to be self-sufficient for 2-3 days at a time between charging opportunities.
Above 5,000m: Almost No Charging Available
At Gorak Shep (5,164m), Everest Base Camp (5,364m), and high camp locations, charging is either unavailable or absurdly expensive ($5+ per device with no guarantee of success). Some lodges at Gorak Shep have solar setups that work intermittently, but you cannot count on them. Above base camp altitudes, on routes like the Three Passes Trek or any high-altitude camping section, there is zero charging infrastructure.
Arrive at these elevations with your power bank fully charged and your devices ready to go.
Charging Costs by Specific Stop
| Location | Altitude | Charging Cost | Power Source | Reliability |
|---|---|---|---|---|
| Lukla | 2,860m | Free-$1 | Grid/Micro-hydro | High |
| Namche Bazaar | 3,440m | $2 | Micro-hydro/Solar | High |
| Tengboche | 3,867m | $2-3 | Solar | Medium |
| Dingboche | 4,410m | $3 | Solar | Medium |
| Lobuche | 4,940m | $3-4 | Solar | Low-Medium |
| Gorak Shep | 5,164m | $5 | Solar | Low |
| Manang | 3,540m | $2 | Micro-hydro | High |
| Thorong Phedi | 4,450m | $4 | Solar | Low-Medium |
| Upper Pisang | 3,300m | $2 | Solar/Micro-hydro | Medium |
| Muktinath | 3,710m | $2-3 | Solar/Grid | Medium |
Prices as of late 2024/early 2025. Expect 10-20% annual increases at higher-altitude stops.
Power Source Types on the Trail
Understanding how tea houses generate electricity helps explain why charging can be so unreliable:
- Solar panels: The most common source above 3,500m. Works well on sunny days, but output drops 60-80% on overcast days. Many tea houses have batteries that store solar energy, but these are small and shared among all guests and the tea house's own lighting and cooking needs.
- Micro-hydro: Small water-powered generators common in valleys with flowing streams. These provide the most consistent power and are the reason lower-altitude villages have better charging. However, they can fail during dry winter months when streams freeze.
- Diesel generators: Some remote tea houses run diesel generators for a few hours in the evening. These are noisy, expensive to operate (fuel must be carried up by porters or yaks), and run only during limited hours -- typically 6-9 PM.
- National grid: Only available at the lowest elevations and in larger towns. Increasingly reaching higher villages but still rare above 3,000m on most trekking routes.
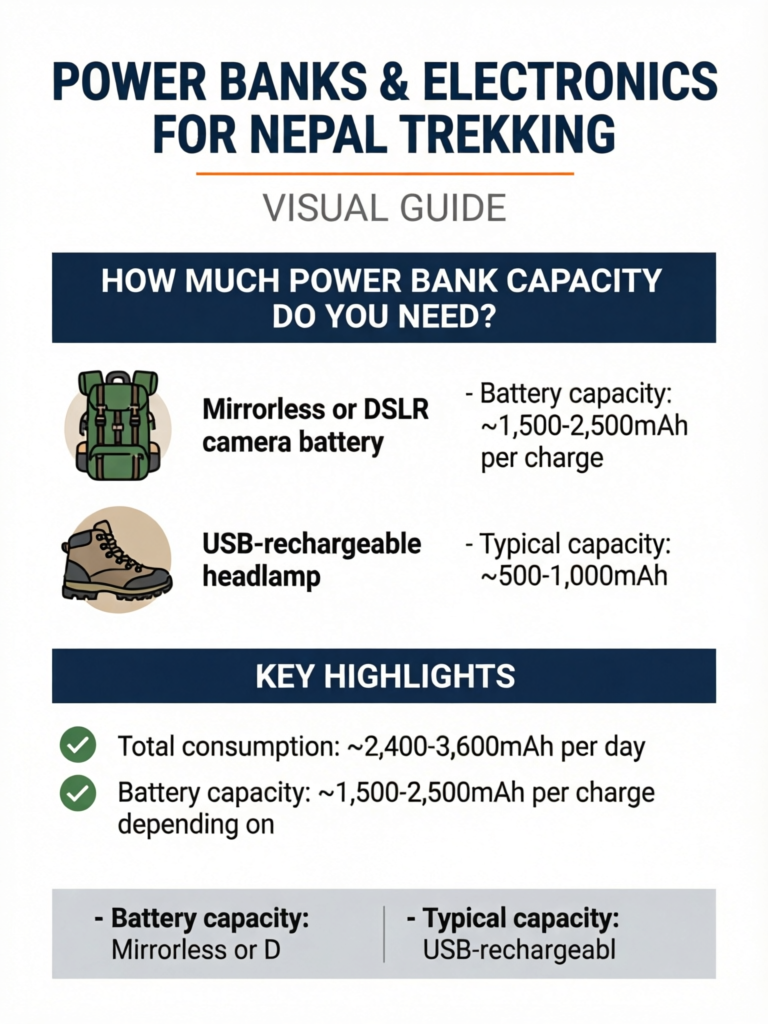
How Much Power Bank Capacity Do You Need?
For trekking in Nepal, match power bank capacity to trek length:
- 5-7 day trek (Poon Hill, short Annapurna): 10,000mAh is enough.
- 8-14 day trek (Everest Base Camp, Annapurna Circuit, Langtang): 20,000mAh is the sweet spot.
- 15+ day trek (Three Passes, Manaslu Circuit, Upper Dolpo): 20,000-30,000mAh, or two 10,000mAh banks for redundancy.
Remember that real usable capacity is only about 65% of the rated number, and even less in the cold. This is the most common question trekkers ask, and the exact answer depends on what devices you carry and how you use them. Here is a practical breakdown.
Daily Power Consumption Estimates
Understanding your daily drain is the foundation of a good power strategy:
Smartphone (airplane mode, occasional GPS and photos)
- Daily drain: 15-25% of a typical 4,000-5,000mAh phone battery
- Actual consumption: ~600-1,000mAh per day
- This is the minimum use scenario: airplane mode on, screen brightness low, GPS used sparingly for navigation checks, 20-30 photos per day
Smartphone (active use, social media at tea houses)
- Daily drain: 40-60% of battery
- Actual consumption: ~1,500-2,500mAh per day
- WiFi browsing at tea houses, uploading a few photos, messaging, using apps with screen on frequently
GoPro or action camera
- Battery capacity: ~1,220mAh per battery (GoPro Hero 12/13)
- Heavy use: 2-3 batteries per day for video and timelapses
- Total consumption: ~2,400-3,600mAh per day
Mirrorless or DSLR camera battery
- Battery capacity: ~1,500-2,500mAh per charge depending on model
- Moderate shooting (100-200 photos): 1 battery per day
- Heavy shooting with video: 2 batteries per day
USB-rechargeable headlamp
- Typical capacity: ~500-1,000mAh
- Charging frequency: Every 2-4 days with moderate use
- Consider carrying a spare headlamp with disposable lithium AAA batteries as backup
Kindle or e-reader
- Consumption: Negligible (charges last 2-4 weeks with daily reading)
- Not worth factoring into your power budget
Satellite communicator (Garmin inReach, ZOLEO)
- Tracking mode: ~50-100mAh per day
- These devices last 5-10 days on a single charge with moderate use
- Low drain but critical safety device -- prioritize keeping it charged
Recommended Capacities by Trek Length
Based on the consumption figures above and typical charging opportunities, here is what you need:
5-7 day trek (Poon Hill, Ghorepani circuit, short Annapurna treks)
- 10,000mAh is sufficient
- Charging available most nights at reasonable cost
- Lightweight option: Nitecore NB10000 (150g)
8-14 day trek (EBC standard, Annapurna Circuit, Langtang)
- 20,000mAh recommended
- Allows 3-4 days of self-sufficiency between charging stops
- Sweet spot of capacity vs. weight for most trekkers
15+ day trek (EBC with Three Passes, Manaslu Circuit, Upper Dolpo)
- 20,000-30,000mAh, or two smaller power banks (e.g., 2x 10,000mAh)
- Extended periods above 4,000m with limited charging
- Two smaller banks offer redundancy -- if one fails, you still have backup
Pro Tip
Real-world usable capacity from a power bank is approximately 65-70% of its rated capacity. A 20,000mAh power bank delivers roughly 13,000-14,000mAh of actual charging power. This loss comes from voltage conversion (the bank stores at 3.7V but outputs at 5V), heat dissipation, and cold weather efficiency reduction. When calculating your needs, use the 65% figure, not the number printed on the label. In freezing temperatures, expect even less -- closer to 55-60% of rated capacity.
Sample Power Budget: 12-Day EBC Trek
Here is a worked example for a trekker carrying a smartphone and GoPro on the standard 12-day EBC itinerary:
- Days 1-3 (Lukla to Namche): Charge from wall outlets. No power bank drain.
- Day 4 (Namche acclimatization): Full charge at Namche. Top off power bank.
- Days 5-7 (Namche to Dingboche): Use power bank. Estimated drain: 3,000-4,500mAh.
- Day 8 (Dingboche acclimatization): Charge phone from wall if available ($3). Top off power bank if possible.
- Days 9-12 (Dingboche to Gorak Shep and back to Namche): Heaviest power bank use. Estimated drain: 5,000-7,000mAh.
Total power bank drain: ~8,000-11,500mAh. A 20,000mAh bank with 65% real capacity (13,000mAh usable) covers this comfortably with margin for cold weather and unexpected needs.
Power Bank Recommendations
Not all power banks are equal. For trekking in Nepal, you need a balance of capacity, weight, reliability, and charging speed. Here are tested recommendations across three price tiers.
Best Power Banks for Nepal Trekking at a Glance
| Best For | Power Bank | Capacity | Weight | Price |
|---|---|---|---|---|
| Overall (most treks) | Anker PowerCore III | 20,000mAh | 340g | ~$35 |
| Ultralight 20,000mAh | Nitecore NB20000 | 20,000mAh | 284g | ~$40 |
| Minimalist / short treks | Nitecore NB10000 Gen 3 | 10,000mAh | 150g | ~$50 |
| Budget | Xiaomi Mi Power Bank 3 | 20,000mAh | 405g | ~$20 |
| Big devices / laptops | Goal Zero Sherpa 100PD | ~27,000mAh | 590g | ~$80 |
The Anker PowerCore III 20,000mAh is the default pick for most trekkers on the Everest Base Camp or Annapurna Circuit routes — enough capacity for 3-4 days of self-sufficiency without a heavy weight penalty.
Budget: $15-25
Xiaomi Mi Power Bank 3 20,000mAh (~$20)
- Weight: 405g
- Output: 18W fast charge
- Pros: Excellent value, widely available in Kathmandu, reliable brand
- Cons: Heavier than premium options, no USB-C PD on older models
Anker PowerCore 10,000mAh (~$18)
- Weight: 180g
- Output: 12W
- Pros: Compact, lightweight, trustworthy brand
- Cons: Only 10,000mAh may be tight for longer treks
Mid-Range: $25-45
Anker PowerCore III 20,000mAh (~$35)
- Weight: 340g
- Output: 18W USB-C PD
- Pros: USB-C Power Delivery for fast charging, dual output, reliable
- Cons: Nothing significant -- this is the default recommendation for most trekkers
Nitecore NB20000 (~$40)
- Weight: 284g
- Output: 45W USB-C PD
- Pros: Remarkably lightweight for 20,000mAh, fast charging, carbon fiber shell
- Cons: Higher price, less widely available
Premium: $45-80
Nitecore NB10000 Gen 3 (~$50)
- Weight: 150g
- Output: 35W USB-C PD
- Pros: Ultralight (lighter than most smartphones), perfect for minimalist trekkers
- Cons: Only 10,000mAh -- best for short treks or as a supplement to a larger bank
Goal Zero Sherpa 100PD (~$80)
- Weight: 590g
- Output: 60W USB-C PD, 100Wh capacity (~27,000mAh)
- Pros: Massive capacity, can charge laptops, Qi wireless charging, premium build
- Cons: Heavy, expensive, overkill for most trekkers
Key Features to Prioritize
When choosing a power bank for Nepal trekking, look for:
- USB-C PD (Power Delivery): Charges your devices 2-3x faster than standard USB-A. Critical when you only have a 2-hour window at a tea house outlet.
- Multiple output ports: Charge your phone and headlamp simultaneously.
- LED capacity indicators: Know exactly how much power you have left. Percentage displays are better than 4-dot LEDs.
- Low weight-to-capacity ratio: Aim for under 20g per 1,000mAh. The Nitecore NB20000 achieves 14.2g/1,000mAh -- industry-leading.
- Quality brand: This matters. Stick to Anker, Nitecore, Xiaomi, Samsung, or Goal Zero.
Avoid No-Name Power Banks
Fake capacity ratings are rampant among unbranded power banks. A unit labeled "50,000mAh" selling for $15 almost certainly has real capacity closer to 5,000-8,000mAh. These products use low-quality lithium cells that degrade fast in cold weather, and some pose genuine fire risks. You can find cheap no-name power banks in Kathmandu's Thamel district, but for a device your safety may depend on, buy from a reputable brand before your trip. If you must purchase in Kathmandu, buy from authorized Xiaomi or Samsung stores.
Airline Battery Regulations
Power banks must be carried in your hand luggage (never checked baggage). Most airlines allow power banks up to 100Wh (~27,000mAh at 3.7V) without special approval. Banks between 100-160Wh require airline approval. Banks over 160Wh are generally prohibited on commercial flights. A standard 20,000mAh power bank at 3.7V equals 74Wh -- well within limits.
Solar Chargers: Do They Actually Work?
Let's be honest: solar chargers are marginally useful for Nepal trekking and should never be your primary power source. That said, they can serve as a helpful supplement under the right conditions.
When Solar Works
Solar charging can deliver meaningful power when you have:
- Clear, sunny days with direct sunlight for 5-6+ continuous hours
- A panel hung on the outside of your backpack facing the sun during the day's march
- A mid-range panel (10-21W) -- tiny 5W panels are essentially useless
- Patience: Even under ideal conditions, a 10W panel charges a phone from 0 to 100% in roughly 4-6 hours of direct sunlight
On clear trekking days in the Himalayan dry season (October-November, March-May), a good panel clipped to the outside of your pack can produce 3,000-5,000mAh over a full day of walking. That is roughly one smartphone charge -- not bad as free energy.
When Solar Fails
The problem is that "ideal conditions" are uncommon in the mountains:
- Cloudy or overcast days reduce output by 60-80%. In the pre-monsoon season or during weather systems, you might get multiple cloudy days in a row.
- Short winter days (November-February) give you fewer sunlight hours and lower sun angle.
- Terrain shadows: Deep valleys and north-facing trails can block direct sunlight for hours.
- Snow and dust: Panel efficiency drops when dirty, and mountain environments are dusty.
- Inconsistent orientation: A panel bouncing on the back of a moving pack does not maintain optimal sun angle.
Realistic Output Expectations
- 10W panel, ideal day: ~3,000-4,000mAh (one phone charge)
- 10W panel, overcast day: ~500-1,000mAh (practically useless)
- 21W panel, ideal day: ~5,000-7,000mAh (respectable)
- 21W panel, overcast day: ~1,000-2,000mAh (barely worth the weight)
Panel Recommendations
If you decide to bring one, these are the better options:
- BioLite SolarPanel 10+ (~$60, 400g): Includes built-in 3,000mAh battery that stores power during intermittent sun. Best for trekking because it smooths out cloud gaps.
- Goal Zero Nomad 10 (~$55, 430g): Rugged, foldable, pairs with Goal Zero power banks. No built-in battery.
- Anker 21W Solar Charger (~$55, 360g): Highest wattage in a portable package. Three panels fold out wide. Best for basecamp rest days rather than on-the-move charging.
Pro Tip
If you bring a solar panel, use it to charge your power bank directly rather than your phone. The power bank handles voltage fluctuations better than most phone charging circuits, and it stores energy for nighttime use when you actually need it. Clip the panel to the outside of your pack, connect it to your power bank via a short cable inside the pack, and let it trickle-charge all day. On a good day, you might add 3,000-5,000mAh to your bank -- the equivalent of saving $3-5 in tea house charging fees.
Cold Weather Battery Tips
Cold is the silent killer of battery performance on Nepal treks. Understanding why and how to mitigate it can save you from losing 30-50% of your usable power.
Why Cold Kills Batteries
Lithium-ion batteries (the type in your phone, power bank, and camera) rely on chemical reactions that slow dramatically in cold temperatures. When the electrolyte inside the battery cools, its internal resistance increases, reducing the rate at which ions can flow between the anode and cathode. The practical effects:
- At 0°C, a lithium-ion battery delivers roughly 80% of its room-temperature capacity
- At -10°C, that drops to 60-70%
- At -20°C (common at Gorak Shep overnight), capacity can fall to 50% or less
- Voltage sags in cold can cause devices to shut down even when the battery still has charge remaining
This means your phone showing 30% battery at -10°C might shut off completely when you try to take a photo. The charge is not actually gone -- the battery simply cannot deliver it in the cold. Warm the phone up and you will see the percentage partially recover. But you cannot count on this in the moment you need to make an emergency call.
Keep Your Power Banks and Phone Warm
Sleep with your power bank in your sleeping bag. This is the single most important cold-weather battery tip. At night, temperatures inside tea house rooms regularly drop to -10°C or colder (rooms are unheated). A power bank left on the nightstand will lose significant effective capacity overnight. Tuck it into your sleeping bag near your core and it stays at body temperature.
Keep your phone in an inner jacket pocket, not an outer pocket. Your body heat keeps the battery warm. An inner chest pocket or a pocket against your base layer is ideal. Outer jacket pockets expose the phone to ambient air temperatures. If you are wearing a hip belt, some trekkers keep their phone in a small pouch against their stomach under their jacket.
Use hand warmers near electronics in extreme cold. On summit day or at the highest elevations, tucking a disposable hand warmer next to your phone or camera battery in your pocket can maintain enough warmth to prevent unexpected shutdowns. This is especially useful for pre-dawn starts (Kala Patthar sunrise, for example) when temperatures are at their lowest.
Lithium vs. Alkaline: Choose Lithium for Cold
If your headlamp runs on disposable batteries, bring lithium AA or AAA batteries (such as Energizer Ultimate Lithium), not alkaline. Lithium disposable batteries maintain nearly full output down to -40°C, while alkaline batteries lose 40-60% of their capacity below freezing. The price difference ($2-3 extra per pack) is negligible given the performance advantage. This is particularly relevant for headlamps, which you often use in the coldest hours of the day (pre-dawn starts, evening toilet trips).
Other Cold Weather Strategies
- Charge devices in the warmest part of the day: Batteries charge more efficiently when warm. If you have a midday break at a tea house, that is the best time to plug in.
- Do not trust battery percentage readings in cold: Your phone's battery gauge is calibrated for room temperature. In the cold, it might show 20% and then die immediately, or show 5% and then recover to 30% once warmed up. Use it as a rough guide, not gospel.
- Turn off your phone completely in extreme cold if not needed: A powered-off phone drains almost nothing and is protected from cold-induced shutdown damage.
- Avoid charging lithium batteries when they are below 0°C: Charging in freezing temperatures can permanently damage lithium-ion cells. Warm the power bank in your sleeping bag first, then charge your phone.
The Sleeping Bag Charging Trick
Here is a tested strategy for cold nights: before getting into your sleeping bag, plug your phone into your power bank and place both inside the bag near your feet or tucked against your torso. The warmth of your body keeps the battery chemistry efficient, and by morning your phone is fully charged without losing extra capacity to cold. Just be careful not to roll onto the cable and disconnect it.
Camera Gear Considerations
Choosing what camera equipment to bring on a Nepal trek is one of the most personal gear decisions. The Himalayas offer some of the most photogenic landscapes on earth, and every trekker wants to bring home stunning images. But weight, battery drain, fragility, and practicality all factor in. Here is an honest breakdown by camera type.
Smartphone Only (Lightest Option: 0g Extra Weight)
Modern smartphone cameras -- especially the iPhone 15/16 Pro and Samsung Galaxy S24/S25 Ultra -- produce exceptional photos that satisfy the vast majority of trekkers. For social media, personal memories, and even large prints, a flagship smartphone from the past 2-3 years is genuinely excellent.
Pros:
- Always in your pocket, ready to shoot in seconds
- Built-in GPS geotagging
- Doubles as your navigation, communication, and entertainment device
- Night mode and computational photography bridge much of the gap with dedicated cameras
- No additional weight
Cons:
- Battery drain is your biggest enemy -- every photo costs power you need for other functions
- Small sensor struggles in very low light (pre-dawn, inside tea houses)
- Limited optical zoom (3-5x on most flagships, digital zoom degrades quality)
- Touchscreen gloves or bare fingers required in cold
Best for: Trekkers prioritizing weight savings, casual photographers, those who plan to share primarily on social media.
GoPro or Action Camera (95-150g)
Action cameras shine for video, wide-angle perspectives, and rugged conditions. The GoPro Hero series and DJI Action cameras are popular with trekkers who want to document the experience in motion.
Pros:
- Exceptional wide-angle for mountain landscapes
- Waterproof without a case
- Superb video and timelapse capabilities
- Compact and rugged -- survives drops and dust
- Mounting options for creative angles
Cons:
- Extremely battery-hungry: expect to burn through 2-3 batteries per day with heavy video use (~3,600mAh/day)
- No viewfinder -- the small rear screen is nearly invisible in bright high-altitude sunlight with glare
- Image quality for stills is mediocre compared to phones or dedicated cameras
- Touchscreen is difficult to operate with gloves
Battery tip: Carry 3 batteries minimum. Keep spares warm in your inner pocket. GoPro batteries are small and light (about 25g each).
Mirrorless or DSLR Camera (400-1,200g with One Lens)
For serious photographers, a mirrorless camera (Sony Alpha, Fujifilm X-T series, or Canon R series) delivers unmatched image quality. The Himalayas deserve the best glass you can carry -- if you are willing to pay the weight penalty.
Pros:
- Best image quality available: large sensor, interchangeable lenses, RAW files
- Excellent in low light (pre-dawn summit shoots, star photography)
- Optical zoom with dedicated lenses (24-105mm covers most trekking needs)
- Weather-sealed bodies handle dust and light moisture
Cons:
- Heavy: a body plus one lens runs 600-900g; add a second lens and you are over 1,200g
- Fragile: requires a padded case, careful handling on rough terrain
- Dust exposure at altitude is constant -- sensor cleaning kit recommended
- Extra batteries needed: 1-2 per day depending on shooting intensity (~2,500mAh each)
- Requires a dedicated protective case in your pack
Lens recommendation for Nepal trekking: A single 24-105mm f/4 or 24-70mm f/2.8 covers 90% of trekking photography needs. If you can only bring one lens, make it a versatile zoom. Add a wide-angle (16-35mm) if landscape photography is your priority.
Drone (DJI Mini Series: 249g)
Drones offer a perspective no other camera can match -- soaring aerial views of Himalayan valleys, mountain walls, and your tiny figure crossing a suspension bridge over a roaring river. But the regulatory and practical challenges in Nepal are significant.
Drone Regulations in Nepal
Drones are ILLEGAL in Sagarmatha (Everest) National Park without special permits that are extremely difficult and expensive to obtain. They are heavily restricted in Annapurna Conservation Area and most other national park and conservation areas. Flying without authorization risks confiscation of your drone, fines, and potential legal issues. Battery performance degrades significantly at altitude and in cold. If you are serious about drone photography in Nepal, research current regulations months in advance, budget $200-500+ for permit fees, and accept that you may still be told no. For most trekkers, the hassle and risk are not worth it.
Weight-to-Quality Trade-Off by Trekker Type
| Trekker Profile | Recommended Setup | Added Weight | Daily Power Drain |
|---|---|---|---|
| Ultralight/Minimalist | Smartphone only | 0g | 600-1,500mAh |
| Casual photographer | Smartphone + GoPro | 150g | 1,500-4,000mAh |
| Enthusiast photographer | Mirrorless + 1 lens + smartphone | 800g | 3,000-5,500mAh |
| Serious content creator | Mirrorless + 2 lenses + GoPro + drone | 2,000g+ | 6,000-10,000mAh |
For most trekkers, the smartphone-only or smartphone-plus-GoPro setup hits the right balance. You will not regret leaving the heavy camera at home when you are grinding uphill for 6 hours at 4,500m. But if photography is a primary reason for your trek, carrying a mirrorless system is absolutely worth it -- the images from a full-frame sensor in the Himalayas are in a different class entirely.
Other Electronics: Smartwatches, Headphones & Satellite Devices
Beyond your phone, power bank, and camera, a few other electronics show up on trekkers' packing lists. Here is how they fit into your power budget on a Nepal trek.
GPS Smartwatches
A GPS sports watch (Garmin, COROS, Suunto, Apple Watch Ultra) is genuinely useful at altitude: it tracks elevation gain, heart rate, sleep, and blood oxygen (SpO2) — the last being a handy informal acclimatization signal alongside a dedicated pulse oximeter. Battery life varies enormously: a Garmin Fenix or COROS Vertix lasts 1-3 weeks in smart mode but only 1-2 days with continuous GPS recording, while an Apple Watch needs charging almost daily. Turn off all-day GPS, lower the screen-on time, and you can stretch most outdoor watches across the higher, charge-scarce sections of the trek.
Headphones and Earbuds
Wireless earbuds (AirPods, etc.) draw very little power — the case recharges them from your power bank in minutes and adds negligible drain to your overall budget. They are worth it for the long, cold tea house evenings above 4,000m. The catch is the cold: lithium cells in tiny earbuds shut down fast in freezing rooms, so keep the case in an inner pocket. Wired earbuds (or a USB-C/Lightning adapter) are a zero-power backup that never needs charging.
Satellite Communicators
A satellite messenger like the Garmin inReach Mini 2 or ZOLEO is the single most important safety electronic above the tree line, where there is no mobile signal for help. In tracking mode it draws only ~50-100mAh per day and lasts 5-10 days per charge, so it barely dents your power budget — but it is the device you should prioritize keeping topped up. See our full satellite communication guide and Nepal SIM cards and WiFi guide for how connectivity actually works on the trail.
Essential Apps to Download Before Your Trek
Your smartphone is only as useful as the apps you prepare in advance. Data connectivity on Nepal's trekking routes is poor to nonexistent above 3,500m, and even where WiFi exists at tea houses, it is painfully slow and expensive ($2-5 for an hour of unusable speeds). Download everything before leaving Kathmandu.
Offline Navigation Maps
- Maps.me: Free offline maps with trekking trails marked. Download the Nepal region map (roughly 150MB). Reliable GPS positioning works without cell service. This is the single most useful app for navigation on trek. For a full rundown, see our guides to the best trekking apps for Nepal and the best offline maps.
- Gaia GPS: Premium ($40/year) but excellent topo maps with elevation profiles and trail data. Download offline areas before departure. Used by professional guides.
- AllTrails: Good trail database with user-submitted GPS tracks for popular Nepal routes. Download specific trek maps for offline use.
Altitude and Weather
- Altimeter app (various free options): GPS-based altitude reading. Useful for tracking your elevation gain and confirming location.
- Windy: The best weather forecasting app for mountain environments. Download offline data for the Himalayan region. Check forecasts at tea houses when you have WiFi -- weather windows matter for high passes and summit days.
Translation and Communication
- Google Translate: Download the Nepali language pack for offline translation (~50MB). Useful for basic communication in remote villages where English is limited. The camera translation feature can help with Nepali signage.
- WhatsApp: Pre-installed for most trekkers. When you do find WiFi, a quick message home takes minimal data. Send text rather than photos to conserve bandwidth and battery.
Emergency and Safety
- What3Words: Divides the entire world into 3m x 3m squares, each with a unique three-word address. Can communicate your exact location to rescue services even in remote areas.
- Offline first aid guide: Download a mountaineering first aid PDF or app before departure. Covers altitude sickness symptoms, wound care, and emergency protocols.
- Nepal Emergency numbers saved in contacts: Tourist Police: 1144), Himalayan Rescue Association, your trekking agency's emergency number, and your travel insurance company's hotline.
Entertainment (for Long Tea House Evenings)
- Kindle app: Download 5-10 books. Reading is the most battery-efficient entertainment available. Negligible power drain.
- Podcasts (Spotify, Apple Podcasts, Pocket Casts): Download episodes before leaving Kathmandu. A few hours of podcasts use minimal battery compared to video.
- Music (Spotify offline, Apple Music downloads): Download playlists. Music playback with screen off uses very little power.
- Avoid: Video streaming, social media scrolling, and any app that requires constant data. These are battery killers and will not work above 3,500m anyway.
Pro Tip
Download everything before leaving Kathmandu -- data connectivity is poor to nonexistent above 3,500m. On the morning of your trek departure, put your phone in airplane mode and leave it there. Turn airplane mode off only when you intentionally want to connect at a tea house WiFi spot. This single habit will cut your daily battery drain from 40-60% to 15-20%, making the difference between a phone that lasts 5 days on a charge versus one that dies in 2 days.
Packing Your Electronics: Protect from Moisture and Impact
The Himalayan trekking environment is hostile to electronics: dust, moisture, extreme temperature swings, and physical impacts from rough handling of gear bags. Proper packing protection is essential.
Waterproofing
- Dry bags: Pack all electronics in a lightweight dry bag (1-3 liters, about 30g). Even in the dry season, unexpected rain, river crossings, and condensation from temperature changes can damage electronics. Sea to Summit and Osprey make reliable lightweight options.
- Ziplock bags: The simplest and cheapest waterproofing. Double-bag your phone, power bank, and camera batteries in gallon-sized Ziplock bags. Replace them every few days as they wear. This costs almost nothing and works surprisingly well.
- Silica gel packets: Toss a few into your electronics dry bag to absorb condensation from temperature changes (entering a warm tea house from freezing outside).
Impact Protection
- Padded camera case: If bringing a mirrorless or DSLR, invest in a small padded insert (like a Tenba or Peak Design camera cube) that fits inside your daypack. Your camera should be accessible for quick shots but protected from drops and bumps.
- Screen protector: If you have not already, put a tempered glass screen protector on your phone before the trek. Scratched screens from dusty pockets are common.
- Hard-shell case for power bank: Not strictly necessary for most power banks (they are fairly rugged), but if you are carrying a 20,000mAh+ unit, a simple neoprene sleeve adds impact protection and a bit of cold insulation.
Cable and Accessory Organization
- Cable organizer pouch: A small zippered pouch containing: USB-C cable, Lightning cable (if applicable), micro-USB cable (for older devices), wall charger adapter, and any camera-specific cables. Keeping cables organized prevents the infuriating "digging through your bag for 10 minutes to find a cable" problem.
- Multi-port wall charger: Instead of multiple single-port chargers, bring one compact multi-port USB wall charger (like Anker Nano or similar). This lets you charge your phone and power bank simultaneously from a single tea house outlet -- critical when outlets are scarce.
Power Adapter
Nepal uses Type C (European 2-pin round), Type D (Indian 3-pin round), and Type M (South African 3-pin large round) electrical sockets. Voltage is 230V at 50Hz.
Recommendation: Bring a universal travel adapter that handles Type C and Type D. A compact universal adapter from brands like Ceptics or EPICKA covers Nepal and most other countries. Many tea houses have multi-socket power strips that accept various plug types, but do not count on it -- bring your own adapter.
If you check our complete gear list and packing list, you will find electronics listed alongside all other essential gear categories. Also note that if you are carrying a UV water purification device like a SteriPEN, that is one more item competing for your limited charging capacity -- factor it into your power budget.
The Complete Electronics Packing Checklist
Here is a summary checklist of electronics and accessories for a standard 10-14 day Nepal trek:
Essential:
- Smartphone (with offline maps, emergency apps pre-loaded)
- Power bank, 20,000mAh (charged to 100% before trek start)
- USB-C cable (or appropriate cable for your devices)
- Multi-port wall charger
- Universal power adapter (Type C/D compatible)
- Headlamp (USB rechargeable or with spare lithium batteries)
- 2-3 Ziplock bags for waterproofing
Recommended:
- Action camera (GoPro) with 3 batteries (if you want video)
- Cable organizer pouch
- Small dry bag (1-3L) for electronics
- Spare USB cable
- Disposable hand warmers (for warming electronics in extreme cold)
Optional/Specialist:
- Mirrorless camera with padded case and spare batteries
- Solar panel (10-21W, only if you want supplemental charging)
- Satellite communicator (Garmin inReach Mini)
- Kindle e-reader
- Portable battery case for phone (adds bulk but extends phone life)
Frequently Asked Questions
Final Thoughts: Build Your Power Strategy Before You Leave
The best power strategy for Nepal trekking is simple: carry more capacity than you think you need, charge from the wall whenever it is cheap, and protect your batteries from cold. A quality 20,000mAh power bank, proper cold-weather habits, and disciplined airplane mode usage will keep you powered through any standard Nepal trek.
Do not let dead batteries ruin your trek. The sunrise over Ama Dablam, the first glimpse of Everest from Kala Patthar, the windswept prayer flags at Thorong La -- these are moments you want to capture. Plan your power, pack smart, and focus on the experience.
For detailed gear recommendations beyond electronics, check our complete gear list and Nepal packing list. If photography is a priority, our photography gear guide goes deeper on cameras and lenses, and you can compare power options in our power banks and solar chargers guide. If you are still deciding on a trek route, our Everest Base Camp guide and Annapurna Circuit guide cover everything from itineraries to permits. When you are ready to plan your trek, you can book with a verified local agency through our team.