


Best Treks in Nepal for Photography: A Photographer's Guide
Nepal is, without exaggeration, one of the most photographically rich destinations on Earth. Eight of the world's fourteen 8,000-meter peaks, hundreds of glaciers, deep river gorges, subtropical jungles, high-altitude deserts, medieval monasteries, dozens of distinct ethnic cultures, and some of the most dramatic light conditions anywhere combine to create a landscape where virtually every turn of the trail presents a composition worth capturing.
But not all treks are equal when it comes to photography. Some routes offer unmatched mountain panoramas. Others provide intimate cultural encounters that translate into powerful portrait work. Some deliver diverse landscapes that change dramatically over the course of a single day. And certain specific locations, at specific times of day, produce images that have come to define Himalayan photography itself.
This guide is designed for photographers of all levels, from smartphone shooters to professional landscape photographers. We rank the top 10 treks specifically for their photographic potential, identify signature shots on each route, recommend optimal times and conditions, and provide practical advice on gear protection, battery management, drone regulations, and the ethics of photographing people and sacred sites.
Whether you are building a travel portfolio, creating memories for personal enjoyment, or pursuing professional assignment work, this guide will help you choose the right trek and return with images that do justice to the extraordinary visual wealth of the Nepal Himalaya.
October (clearest air), followed by November and January
Exceptional - warm light on snow peaks
Mountain panorama, cultural portrait, wildlife, landscape
Three Passes, Gokyo Ri, ABC, Kala Patthar
Upper Mustang, Tsum Valley, Tamang Heritage Trail
Restricted - permit required, banned in national parks
Cold battery drain, dust protection, weight management
Batteries lose 30-50% capacity above 4,000m in cold
6:00-7:30 AM and 4:30-6:00 PM (October)
Clear mornings, clouds building by afternoon in most seasons
Understanding Nepal's Photographic Light
Before diving into specific treks, understanding Nepal's light conditions helps you plan your shooting schedule on any route.
The Morning Advantage
Nepal's weather follows a remarkably consistent daily pattern during trekking season (October-November and March-May):
- 5:30-6:00 AM: Pre-dawn blue light. Mountains emerge as silhouettes. Best for dramatic mood shots.
- 6:00-7:00 AM: Golden hour. Warm light strikes the highest peaks first, creating alpenglow on snow and rock. This is the single most productive photography hour in Nepal.
- 7:00-9:00 AM: Excellent directional light. Side-lighting reveals texture on mountain faces. Perfect for both landscapes and portraits.
- 9:00 AM-12:00 PM: Good light, becoming increasingly flat. Mountain detail remains visible. Best for wide-angle landscapes and trekking action shots.
- 12:00-2:00 PM: Harsh overhead light. Least productive for mountain photography. Good time for walking, resting, or processing images.
- 2:00-4:00 PM: In monsoon and transitional months, clouds often build in valleys. In peak season, conditions may remain clear but light is still relatively flat.
- 4:30-6:00 PM: Evening golden hour. Western-facing peaks receive warm light. Valleys fill with shadow while peaks glow. Second-best shooting window.
- 6:00-7:00 PM: Blue hour and twilight. Mountain silhouettes against warm sky. Excellent for long exposures if you carry a tripod.
The Monthly Clarity Scale
| Month | Atmospheric Clarity | Mountain Visibility | Photography Rating |
|---|---|---|---|
| October | 10/10 | Exceptional | Best overall |
| November | 9.5/10 | Exceptional | Excellent |
| December | 9/10 | Excellent | Excellent (cold light) |
| January | 9.5/10 | Exceptional | Excellent (coldest, clearest) |
| February | 8.5/10 | Very Good | Very Good |
| March | 7.5/10 | Good (increasing haze) | Good |
| April | 7/10 | Good (haze and dust) | Good (rhododendrons) |
| May | 5/10 | Moderate (pre-monsoon haze) | Fair |
| June-September | 3/10 | Poor (monsoon cloud) | Poor (rain shadow exceptions) |
Pro Tip
The single best photography decision you can make for a Nepal trek is timing. October and November offer dramatically better conditions than any other months. If you are investing in a photography-focused trek, schedule it for the last two weeks of October or the first two weeks of November. The difference in image quality between October and March can be the difference between a portfolio-defining trip and a frustrating one.
Top 10 Photography Treks in Nepal (Ranked)
1. Three Passes Trek (Everest Region)
Photography Rating: 10/10
The Three Passes Trek is the ultimate photography trek in Nepal. Crossing Renjo La (5,360m), Cho La (5,420m), and Kongma La (5,535m) over 18-21 days, this route provides an extraordinary variety of high-altitude panoramas, glacial landscapes, alpine lakes, and mountain views that simply cannot be matched by any other single trek.
Signature Shots:
- Gokyo Ri Sunrise: From the summit of Gokyo Ri (5,357m), the sunrise panorama includes Everest, Lhotse, Makalu, and Cho Oyu (four of the six highest peaks on Earth) with the turquoise Gokyo Lakes in the foreground. This is arguably the single greatest mountain photography viewpoint accessible to trekkers.
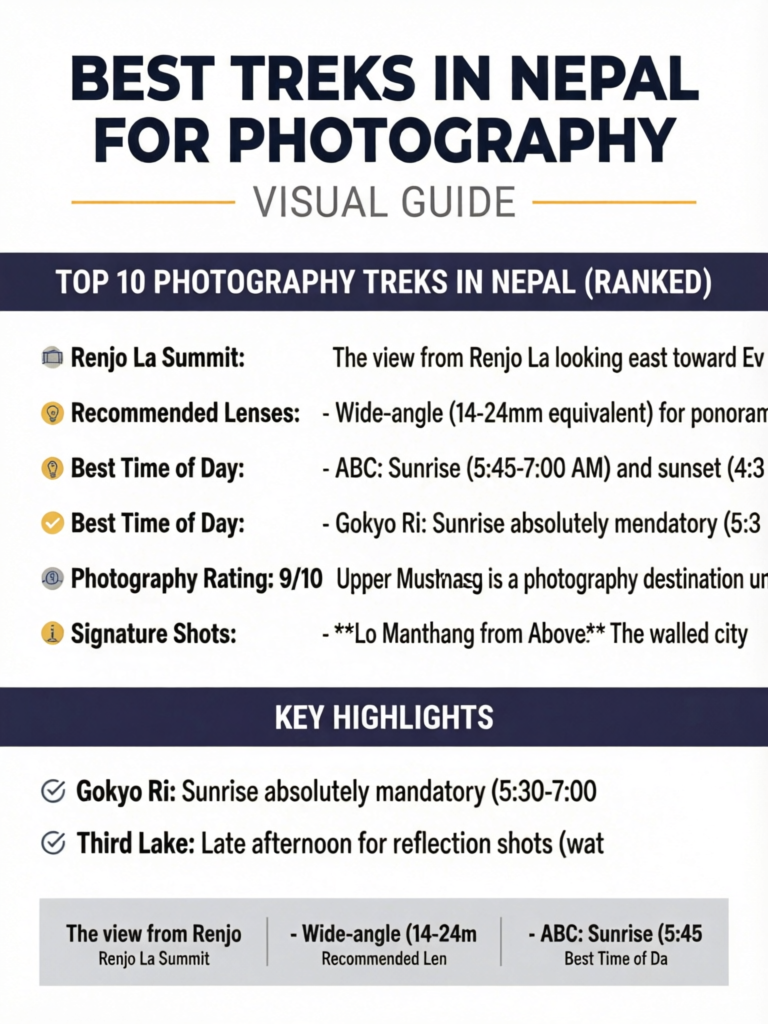
- Renjo La Summit: The view from Renjo La looking east toward Everest with the Ngozumpa Glacier below is a dramatically different perspective from EBC or Kala Patthar.
- Cho La Glacier Crossing: The ice landscape of Cho La provides otherworldly textures and patterns, with Ama Dablam and Thamserku as backdrops.
- Kongma La Descent: Looking south from Kongma La toward the Imja valley with Island Peak and Baruntse creates powerful high-altitude desert compositions.
- Gokyo Lakes: The five (and more) turquoise glacial lakes at different altitudes offer color contrasts against rocky terrain and snow peaks that are unique in the Himalaya.
Best Time of Day:
- Gokyo Ri: 5:30-7:00 AM (alpenglow on Everest, reflection in lakes)
- Renjo La: Early morning crossing for best light on eastern peaks
- Cho La: Morning for dramatic glacial light
- Kongma La: Afternoon for warm light on southern faces
Recommended Lenses:
- Wide-angle (14-24mm equivalent) for panoramas from passes
- Standard zoom (24-70mm) for mountain compositions
- Telephoto (70-200mm) for isolating individual peaks and glacial detail
See our guides to Renjo La, Cho La, and Kongma La.
2. Annapurna Base Camp Trek
Photography Rating: 9.5/10
The ABC trek culminates in one of the world's most extraordinary natural amphitheaters: a 360-degree ring of peaks including Annapurna I (8,091m), Annapurna South, Machapuchare (6,993m), Hiunchuli, and Gangapurna. The amphitheater at sunrise and sunset provides photography that is almost impossible to take badly.
Signature Shots:
- Sunrise at ABC: The golden light climbing down the amphitheater walls as the sun rises behind Machapuchare is Nepal's most iconic trekking image. The entire basin turns gold, then pink, then white as full daylight arrives.
- Machapuchare from MBC: The distinctive fishtail peak seen from Machhapuchhre Base Camp (3,700m) in evening light, often with dramatic cloud formations.
- Bamboo Forest Trail: The section between Chomrong and Dovan passes through atmospheric bamboo and rhododendron forests, where shafts of light create magical conditions for nature photography.
- Chomrong Village: The terraced village of Chomrong with Annapurna South rising behind it provides a classic culture-meets-mountain composition.
- Star Trails at ABC: The high altitude, clear air, and 360-degree mountain horizon at ABC make it one of the best locations in Nepal for astrophotography.
Best Time of Day:
- ABC: Sunrise (5:45-7:00 AM) and sunset (4:30-5:30 PM) for amphitheater light
- Bamboo forest: 9:00-11:00 AM for light shafts through canopy
- Chomrong: Late afternoon for warm light on terraces
Recommended Lenses:
- Ultra-wide (12-16mm) essential for the amphitheater panorama
- Standard zoom for mountain compositions from various camp locations
- Macro or close-up capability for forest detail shots
3. Gokyo Lakes Trek
Photography Rating: 9.5/10
The Gokyo route rivals the full Three Passes Trek for photography but in a shorter timeframe. The combination of turquoise glacial lakes, the Ngozumpa Glacier (the largest in Nepal), and the four-eight-thousander panorama from Gokyo Ri creates a photography experience that is more focused and intense than the classic EBC route.
Signature Shots:
- Gokyo Ri Four-Peak Panorama: The summit panorama of Everest, Lhotse, Makalu, and Cho Oyu in a single frame is one of the Himalaya's definitive images.
- Third Lake (Dudh Pokhari): The turquoise Third Lake with Gokyo village on its shore and Cho Oyu rising behind it is one of Nepal's most photogenic landscapes.
- Ngozumpa Glacier: The massive glacier, with its debris-covered surface and ice formations, provides abstract landscape compositions that contrast with the grand mountain panoramas.
- Fifth Lake (Ngozumpa Tsho): The most remote of the accessible lakes, backed by the ice wall of Cho Oyu, with minimal human presence.
- Sunset from Gokyo Village: West-facing views from Gokyo across the glacier toward Renjo La and Gyachung Kang provide dramatic sunset compositions.
Best Time of Day:
- Gokyo Ri: Sunrise absolutely mandatory (5:30-7:00 AM)
- Third Lake: Late afternoon for reflection shots (water is calmer)
- Glacier: Midday works (the textures are best in flat light that reveals detail)
4. Upper Mustang
Photography Rating: 9/10
Upper Mustang is a photography destination unlike any other in Nepal. The landscape is not the lush green mountains most people associate with the Himalaya - instead, it is a high-altitude desert of eroded sandstone, red and ochre cliff faces, cave-pocked walls, and ancient walled cities. Combined with one of the most photogenic Buddhist cultures in the world, Mustang offers imagery that is strikingly different from mainstream Nepal.
Signature Shots:
- Lo Manthang from Above: The walled city seen from the surrounding hills, with its medieval layout visible, is one of the most remarkable cultural landscape photographs available in the Himalaya.
- Dhakmar Red Cliffs: The blood-red cliffs above Dhakmar village create surreal geology shots, especially in the warm light of morning and evening.
- Kali Gandaki Erosion Formations: Wind-sculpted sandstone pillars and formations along the Kali Gandaki valley resemble an Asian American Southwest.
- Monastery Interiors: The ancient wall paintings of Thubchen and Jampa Gompas in Lo Manthang, with their rich colors and gold leaf, provide extraordinary cultural photography opportunities (where photography is permitted).
- Horseback Riders: Loba people on horseback against desert landscapes create timeless images of Central Asian life.
- Prayer Flag Strings: Long lines of prayer flags connecting chortens across the barren landscape create graphic compositions that symbolize Himalayan Buddhism.
Best Time of Day:
- Lo Manthang: Early morning from hilltop viewpoints
- Cliff formations: Late afternoon golden light
- Monasteries: Midday (interior light through windows), or with guide and flashlight
Recommended Lenses:
- Telephoto essential for cave details, horseback riders, monastery details
- Wide-angle for canyon landscapes and city panoramas
- Fast prime (50mm or 35mm) for monastery interiors and portraits
Pro Tip
Upper Mustang's eroded sandstone landscapes look completely different depending on the time of day. The same formation that appears flat and unremarkable at noon becomes a sculpture of light and shadow at 6 AM or 5 PM. Plan to revisit key locations at different times if your itinerary allows. A good guide will understand this and build shooting time into the schedule.
5. Everest Base Camp via Kala Patthar
Photography Rating: 9/10
The classic EBC trek, culminating in the sunrise view from Kala Patthar (5,545m), remains one of the world's greatest mountain photography experiences. While the trail to Base Camp itself is well-documented, the photographic opportunities along the entire route are varied and rich.
Signature Shots:
- Kala Patthar Sunrise: Everest, Nuptse, and Changtse bathed in the first light of dawn. This is the defining image of Himalayan trekking photography and can only be captured from this location.
- Ama Dablam from Tengboche: The perfectly symmetrical form of Ama Dablam (6,812m) seen from the Tengboche Monastery area, often with prayer flags in the foreground, is one of the most recognizable mountain images in the world.
- Namche Bazaar Viewpoint: The Sherpa capital nestled in its bowl with Everest visible above Lhotse in the background creates a powerful culture-and-mountain composition.
- Suspension Bridges: The high suspension bridges over the Dudh Kosi River, often decorated with prayer flags, provide dramatic leading-line compositions with trekkers and porters.
- Tengboche Monastery: The monastery with Ama Dablam rising behind it is perhaps the most photographed scene in the Khumbu, and for good reason.
- Khumbu Icefall: Visible from Base Camp and Gorak Shep, the chaotic ice formations of the icefall provide dramatic texture and scale compositions.
Best Time of Day:
- Kala Patthar: Sunrise only (4:30-6:30 AM, depending on season). Do not miss this.
- Ama Dablam from Tengboche: Afternoon light (3:00-5:00 PM) for warm tones
- Namche viewpoint: Morning (8:00-10:00 AM) for front lighting
- Suspension bridges: Midday (best for silhouette and backlight effects)
6. Annapurna Circuit
Photography Rating: 8.5/10
The Annapurna Circuit provides the greatest landscape diversity of any trek in Nepal. Over 14-21 days, you traverse subtropical forest, rice terraces, alpine meadows, high-altitude desert, glacial moraine, and the deepest gorge on Earth (the Kali Gandaki). For photographers who prize variety over single iconic shots, the circuit is unmatched.
Signature Shots:
- Thorong La Pass Panorama: Views of Dhaulagiri and the Annapurna range from the highest point (5,416m) provide dramatic high-altitude panoramas.
- Braga Village and Monastery: The medieval stone citadel of Braga, built into a cliff face with the Annapurna range behind it, is one of Nepal's most atmospheric cultural landscape compositions.
- Tilicho Lake: If you take the side trip, the impossibly blue lake at 4,919 meters backed by glaciated peaks provides otherworldly landscape images.
- Kali Gandaki Gorge: The deepest gorge in the world, flanked by Dhaulagiri and Annapurna, offers dramatic scale compositions.
- Marpha Village: Whitewashed stone walls, narrow alleys, and apple orchards with mountain backdrops create intimate cultural photography opportunities.
- Rice Terraces (Lower Circuit): The sculpted agricultural landscapes of the lower Marshyangdi valley, particularly at harvest time (October), provide classic Nepal imagery.
Recommended Lenses:
- Versatile zoom range essential (24-105mm covers most situations)
- Wide-angle for gorges, passes, and village panoramas
- Telephoto for isolating peaks from valley floor
7. Tsum Valley
Photography Rating: 8.5/10
Tsum Valley is a photographer's dream for those specializing in cultural documentation. The valley's isolation and sacred status have preserved visual elements that have disappeared from more accessible areas. Combined with dramatic mountain backdrops and a light quality unique to the trans-Himalayan zone, Tsum offers photographic rewards that feel like documentary-level work.
Signature Shots:
- Mu Gompa Monastery: The ancient monastery perched on a hillside above the valley, with mountain peaks behind, provides one of Nepal's most atmospheric monastic images.
- Mani Walls: Tsum Valley's enormous, centuries-old mani walls, stretching through villages and across hillsides, create unique cultural landscape compositions.
- Village Architecture: The stone and mud-brick villages with prayer flags, flat roofs, and integrated religious structures are visually rich from every angle.
- Monks and Nuns at Prayer: The active religious communities at Mu Gompa and Rachen Gompa provide opportunities for devotional photography that is increasingly rare in accessible Himalayan regions.
- Nubri People Portraits: The faces of Tsum Valley's Nubri people, with their distinctive Tibetan features and traditional clothing, tell stories of a culture that exists at the edge of the modern world.
Best Time of Day:
- Monasteries: Morning prayer (5:30-7:00 AM) for atmospheric interior shots
- Village architecture: Late afternoon (4:00-5:30 PM) for warm light on stone buildings
- Portraits: Midday or overcast conditions for even lighting
8. Langtang Valley
Photography Rating: 8/10
Langtang Valley offers a condensed photography experience with mountain panoramas, cultural subjects, wildlife potential, and diverse landscapes all within a relatively short 7-10 day itinerary. Its proximity to Kathmandu (no flights needed) makes it the most accessible serious photography trek.
Signature Shots:
- Kyanjin Ri Panorama: The 360-degree view from Kyanjin Ri (4,773m) encompasses Langtang Lirung (7,227m), the Langtang Glacier, and distant peaks extending to the Tibetan border.
- Langtang Village Memorial: The earthquake memorial and rebuilt village, set against Langtang Himal, creates a powerful documentary landscape that tells a story of resilience.
- Yak Herds: Langtang's high pastures are home to yak herds that provide classic Himalayan pastoral photography, especially in morning mist.
- Tamang Portraits: The Tamang people of Langtang Valley, with their distinctive cultural dress and warm expressions, are welcoming subjects.
- Langtang Lirung: The north face of Langtang Lirung, viewed from the valley floor, is one of Nepal's most dramatic mountain walls, especially in morning light when the ice face glows gold.
Wildlife Photography Potential: Langtang Valley is one of the few trekking regions where red pandas have been spotted (though sightings are rare). Himalayan thar, musk deer, and pheasants are more regularly seen, particularly in the quieter months.
9. Mardi Himal Trek
Photography Rating: 8/10
The Mardi Himal trek has rapidly become a favorite among photographers for its unique ridge-walk perspective. Unlike most Nepal treks, which follow river valleys and look up at peaks, Mardi Himal places you on a narrow ridge with mountain views in virtually every direction.
Signature Shots:
- Machapuchare Close-Up: The fishtail peak seen from the Mardi Himal ridge at close range, with its twin summits clearly visible, provides the most intimate view of this mountain available to trekkers.
- Ridge Walk Panorama: The exposed ridge above the treeline, with the Annapurna range on one side and the Modi Khola valley on the other, creates dramatic leading-line compositions.
- Cloud Sea: The ridge position frequently places you above valley clouds, creating sea-of-clouds imagery with mountain peaks emerging as islands.
- Forest-to-Alpine Transition: The dramatic transition from dense rhododendron forest to open alpine ridge happens over a short distance, providing contrasting environments within the same day.
Best Time of Day:
- Ridge walk: Sunrise (5:30-7:00 AM) for cloud-sea and alpenglow
- Machapuchare close-ups: Morning and late afternoon
- Forest section: Late morning for light filtering through canopy
10. Poon Hill Trek
Photography Rating: 7.5/10
While Poon Hill is the most photographed viewpoint in the Annapurna region, its accessibility (3-5 days, moderate altitude) makes it an excellent option for photographers with limited time. The sunrise panorama from Poon Hill, while no longer a hidden gem, remains one of Nepal's greatest photography experiences.
Signature Shots:
- Poon Hill Sunrise Panorama: Dhaulagiri (8,167m), Tukuche Peak, Annapurna I, Annapurna South, and Machapuchare lit by the first rays of dawn, spread across the northern horizon.
- Ghandruk Village: The traditional Gurung village of Ghandruk with its stone houses, slate roofs, and Annapurna South towering behind, especially in late afternoon golden light.
- Rhododendron Forests (Spring): In March-April, the forests between Ghorepani and Tadapani erupt in rhododendron blooms ranging from white to deep red, providing vibrant foreground color.
- Stone Steps at Sunrise: The famous stone steps between Tikhedhunga and Ghorepani, with morning light filtering through forest, create atmospheric trail-life images.
For camera and lens details: see our photography gear guide for Nepal trekking.
Photography Categories: Choosing Your Focus
Mountain Panorama Photography
Best Treks: Three Passes, Gokyo Ri, Kala Patthar, ABC, Poon Hill, Mardi Himal Ideal Conditions: October-November, January (clearest air) Essential Gear: Wide-angle lens, polarizing filter, tripod for blue hour/star trails Key Technique: Shoot in RAW format. The dynamic range between bright snow peaks and dark valley shadows exceeds what JPEG can capture. Bracket exposures for HDR processing when the range is extreme.
Cultural Portrait Photography
Best Treks: Upper Mustang, Tsum Valley, Tamang Heritage Trail, Helambu Ideal Conditions: Any trekking season (culture is year-round); overcast days provide soft, even portrait light Essential Gear: Fast prime lens (85mm or 50mm), moderate telephoto for candid shots Key Technique: Always ask permission. Engage with your subject first. Use your guide as translator. Natural environmental portraits (people in their context) tell richer stories than studio-style headshots.
Photography Ethics: Portraits
Never photograph people without their awareness and implicit or explicit consent. This is both an ethical imperative and a practical one: candid photographs of unwilling subjects lack the connection that makes portraits powerful. The best cultural portraits emerge from genuine interaction.
Children present a particular sensitivity. Do not photograph children without the presence and consent of their parents or guardians. Never offer money, candy, or gifts in exchange for photos. See our photography etiquette guide for comprehensive guidelines.
Wildlife Photography
Best Treks: Langtang (red panda potential, Himalayan thar), Lower Annapurna (birds, including Danphe/Impeyan pheasant), Pikey Peak (bird diversity) Ideal Conditions: Winter months (animals descend to lower altitudes, vegetation is thinner for visibility) Essential Gear: Long telephoto (300mm or more), fast aperture for forest shade, patience Key Technique: Wildlife on Nepal treks is a bonus, not a guarantee. Carry a telephoto but do not base your trek choice solely on wildlife expectations. The exception is bird photography, which is reliably productive in the Annapurna and Langtang forests.
Landscape Diversity Photography
Best Treks: Annapurna Circuit (greatest climate zone diversity), Upper Mustang (desert landscapes), Langtang (valley to glacier), Manaslu Circuit Ideal Conditions: October-November for maximum clarity across all zones Essential Gear: Versatile zoom range, graduated neutral density filters for bright sky / dark land contrasts Key Technique: Change your perspective constantly. Wide shots establish scale, but close-ups of textures, plants, water, and geological detail provide the variety that turns a travel album into a story.
Protecting Your Gear on Trek
Cold Weather Challenges
Battery Drain: Cold temperatures dramatically reduce lithium-ion battery capacity. Above 4,000 meters in October or November (and above 3,000m in winter), expect batteries to lose 30-50% of their normal capacity.
Mitigation Strategies:
- Carry at least 3 fully charged batteries for your primary camera
- Keep spare batteries inside your jacket, against your body, at all times
- At night, keep batteries in your sleeping bag
- Start each shooting session with a warm battery and rotate cold ones to your body pocket
- Power banks also lose capacity in cold. Keep them warm.
Condensation: Moving a cold camera into a warm teahouse dining room causes immediate condensation on lenses and electronics. This moisture can damage equipment over time.
Mitigation:
- Place your camera inside a sealed ziplock bag before entering warm spaces. The condensation forms on the bag exterior, not on the camera
- Allow 15-20 minutes for the camera to equalize before opening the bag
- Alternatively, leave the camera in your room (which is nearly as cold as outside) and only bring it into the warm dining room when needed
Dust Protection
- Use a protective UV or clear filter on all lenses (cheaper to replace than the front element)
- Carry a lens cloth and air blower for cleaning
- Change lenses as infrequently as possible in dusty conditions
- Keep rear lens caps clean
- Store cameras in sealed bags inside your pack when not shooting
Rain and Moisture
- A simple camera rain cover (available cheaply or can be improvised from a plastic bag) protects against unexpected showers
- Silica gel packets in your camera bag absorb ambient moisture
- Waterproof stuff sacks for all camera equipment inside your pack
For complete camera protection advice: photography gear guide.
Pro Tip
Carry a lens-cleaning pen (like the LensPen) in your jacket pocket. It is the most used piece of camera accessory on any trek. Breathing on a cold lens causes fog that a cloth alone cannot quickly clear. The LensPen's compound side removes fog instantly. You will use it dozens of times per day at altitude.
Battery Management Strategy
Battery management is one of the most critical practical challenges for photography on Nepal treks. Here is a systematic approach.
Before the Trek
- Purchase high-quality spare batteries (at least 2-3 for your primary camera)
- Bring a high-capacity power bank (20,000mAh or more) for recharging
- Ensure all chargers work with Nepal's 230V/50Hz electrical system (most modern USB chargers are universal)
- Consider a small solar panel if doing a long or remote trek
On the Trek
Daily Routine:
- Morning: Start with a warm, fully charged battery. Carry one spare warm battery in your jacket
- When main battery dies, swap to the warm spare. Put the dead battery against your body to warm it (it will recover some charge)
- Evening: Charge batteries at the teahouse. Typical charging cost is NPR 200-500 per device per hour
- Prioritize camera battery charging over phone if power is limited
- Keep power bank charged as a backup for days when teahouse charging is not available
Power Hierarchy for Remote Sections:
- Camera batteries (primary purpose of the trip)
- Headlamp (safety)
- Phone (communication and GPS backup)
- Other electronics (e-reader, etc.) lowest priority
Charging Costs on Trek
Teahouses charge for electricity, and prices increase with altitude. Typical costs:
- Below 3,000m: NPR 200-300 per device per charge
- 3,000-4,000m: NPR 300-500 per device per charge
- Above 4,000m: NPR 500-800 per device per charge
Some premium lodges include charging in room rates. Budget for NPR 500-1,000 per day if you are charging camera batteries, phone, and power bank regularly.
Storage and Backup Strategy
On-Trek Data Management
- Primary storage: High-capacity SD cards (128GB or 256GB). Bring at least two.
- Backup: A portable hard drive or SSD with a card reader. At the end of each day, copy images from your card to the drive.
- Redundancy: Do not delete images from your SD card after copying. Keep them on both the card and the drive until you are home.
- Cloud backup: At lodges with Wi-Fi (Namche, Manang, etc.), upload critical images to cloud storage if bandwidth allows. Do not rely on this as your primary backup.
Storage Capacity Planning
| Camera Type | Images Per Day (Estimated) | Storage Per Day | 14-Day Trek Total |
|---|---|---|---|
| Smartphone | 50-100 photos, some video | 1-3 GB | 15-40 GB |
| Mirrorless (RAW) | 100-300 photos | 5-15 GB | 70-200 GB |
| Full-frame (RAW) | 100-300 photos | 8-20 GB | 110-280 GB |
| Video (4K) | 30-60 min per day | 15-30 GB per day | 200-400 GB |
Pro Tip
On a serious photography trek, shoot more than you think you need. You can delete at home, but you cannot go back for the shot you missed. Storage is cheap; the trek is not. Carry at least 50% more storage capacity than your estimates suggest you will need.
Drone Photography in Nepal
Current Regulations (2026)
Drone use in Nepal is regulated and restricted. The following guidelines apply as of early 2026:
General Requirements:
- A drone flying permit must be obtained from the Civil Aviation Authority of Nepal (CAAN) before flying
- The permit process requires application, fees, and documentation of the drone's specifications
- Processing time is typically 7-15 business days
- Permit fees vary based on drone type and intended use
National Park Restrictions:
- Drone flying is prohibited inside all national parks and conservation areas without specific additional permission from the Department of National Parks and Wildlife Conservation
- This means no drones in Sagarmatha (Everest) National Park, Langtang National Park, Annapurna Conservation Area, or Manaslu Conservation Area without a separate park permit
- Violations can result in equipment confiscation and fines
Restricted Areas:
- Upper Mustang, Tsum Valley, and other restricted trekking areas have additional drone prohibitions
- Military installations, government buildings, and airports have strict no-fly zones
Practical Reality: Most trekkers will find the permit process prohibitively complicated for casual drone photography. Professional photographers and filmmakers who need aerial footage should begin the permit process well in advance (at least one month) through their trekking agency, which can facilitate the application.
Drone Enforcement
Nepal has increased drone enforcement in recent years. Confiscation of unpermitted drones at airport security and at national park checkpoints has become more common. Flying an unpermitted drone in a national park is a risk to your equipment, your budget (fines), and potentially your freedom (detention is possible for violations near sensitive areas). Do not fly without proper permits.
Best Months for Specific Photography Goals
| Photography Goal | Best Month(s) | Reason |
|---|---|---|
| Mountain panoramas | October, November | Clearest air, snow-covered peaks |
| Rhododendron blooms | March, April | Peak bloom at 2,500-4,000m |
| Cultural festivals | October (Dashain/Tihar/Mani Rimdu) | Multiple major festivals |
| Star trails / astrophotography | December, January | Driest air, longest nights |
| Wildlife | December, January, February | Animals at lower altitudes |
| Rice terrace harvest | October | Golden terraces at lower altitudes |
| Dramatic clouds / weather | September (late), March | Transitional weather creates drama |
| Snow-covered landscapes | December, January | Fresh snow at lower altitudes |
| Wildflowers | March, April, May | Progressive blooming with altitude |
| Desert landscapes (Mustang) | June-September | Monsoon rain shadow = clear days in Mustang |
Recommended Camera Kits by Trek Type
Lightweight Kit (Priority: Weight Savings)
Best for: Long treks (Annapurna Circuit, Three Passes), trekkers who also want to enjoy the walk without heavy gear.
- Mirrorless camera body with weather sealing
- 24-105mm or 24-120mm versatile zoom (one lens does almost everything)
- Polarizing filter
- 3 batteries, 2 SD cards (128GB each)
- Lens cloth and LensPen
- Lightweight camera bag or clip system for accessibility
- Total weight: approximately 1.5-2 kg
Enthusiast Kit (Balanced Quality and Weight)
Best for: Photography-focused treks where image quality is a high priority but you still carry your own gear.
- Mirrorless or DSLR body with weather sealing
- Wide-angle zoom (16-35mm)
- Standard zoom (24-70mm)
- Telephoto zoom (70-200mm)
- Polarizing filter, graduated ND filter
- Compact tripod or Gorillapod
- 4 batteries, 3 SD cards, portable SSD for backup
- Camera rain cover
- Padded camera insert for daypack
- Total weight: approximately 4-5 kg
Professional Kit (Maximum Quality)
Best for: Professional or dedicated amateur photographers, ideally with porter support for carrying gear.
- Full-frame mirrorless body (primary)
- Second body (backup / alternative focal length)
- Ultra-wide (12-24mm)
- Standard zoom (24-70mm f/2.8)
- Telephoto (70-200mm f/2.8 or 100-400mm)
- Fast prime (50mm f/1.4 or 85mm f/1.8) for low light and portraits
- Full filter set (polarizer, graduated ND set, ND filters)
- Carbon fiber travel tripod
- 6 or more batteries, 4 or more SD cards, portable SSD
- Dedicated camera backpack
- Rain covers, silica gel packets, cleaning kit
- Total weight: approximately 8-12 kg
The Ethical Photography Framework
Photographing People
- Always ask permission before taking someone's portrait
- Use your guide as a cultural bridge and translator
- Engage with the person before and after the photograph
- Offer to show them the image on your screen
- If someone declines, respect their decision immediately and gracefully
- Never photograph monks during deep meditation or private rituals without permission
- Be especially careful with children (see warning above)
Photographing Sacred Sites
- Follow all posted photography rules at monasteries and temples
- Never use flash in monastery interiors (it damages paintings and is disrespectful)
- Do not climb on religious structures for better angles
- Be mindful of the spiritual significance of what you are photographing
Environmental Responsibility
- Stay on established trails for your photographs (do not trample vegetation for a better angle)
- Do not move stones, prayer flags, or other objects for compositions
- Dispose of any photography-related waste (packaging, broken filters) properly
For the comprehensive ethics guide: photography etiquette in Nepal.
Frequently Asked Questions
What is the single best photography trek in Nepal?
For overall photographic potential, the Three Passes Trek in the Everest region is unmatched. It combines the highest number of world-class viewpoints, landscape diversity, and high-altitude drama in a single itinerary. However, it requires 18-21 days and good fitness. For a shorter option with exceptional results, Gokyo Lakes (12-14 days) or ABC (7-12 days) are excellent alternatives.
Can I get great photos with just a smartphone?
Modern smartphone cameras are remarkably capable and produce excellent results in good light. The wide-angle capabilities of current flagship phones are well-suited to Nepal's panoramic landscapes. Limitations appear in low light (dawn, dusk, interiors), when reaching for distant subjects (no optical telephoto), and in extreme dynamic range situations. For most trekkers, a quality smartphone supplemented by basic photography knowledge produces excellent memories.
How much does a camera slow you down on the trail?
This depends entirely on your shooting discipline. A camera on a strap or clip system adds negligible time - you stop, shoot, and walk. A dedicated photography stop (setting up a tripod, changing lenses, waiting for light) can add 15-30 minutes. On a 6-hour trekking day, building in 60-90 minutes of dedicated photography time is reasonable without disrupting your schedule.
Should I bring a tripod?
For casual photography, no. Tripods add weight and bulk. For sunrise/sunset shots, astrophotography, long exposures of waterfalls, and any low-light work, a tripod dramatically improves results. A lightweight travel tripod (1-1.5 kg) or a Gorillapod is a reasonable compromise. If astrophotography at ABC or Gokyo is a priority, bring a tripod.
What about weather-sealing on cameras?
Weather sealing provides peace of mind against dust and occasional rain but is not essential for most Nepal treks in the main trekking seasons (October-November, March-May), which are predominantly dry. If you trek during transitional periods (early October, late March) when rain is possible, weather sealing is more valuable. Regardless, carry a simple rain cover or plastic bag for unexpected weather.
How do I keep my camera accessible while trekking?
The most practical solutions are: (1) a camera clip system (like Peak Design Capture) that attaches the camera to your pack strap, (2) a cross-body strap with the camera on your chest, or (3) a hip belt holster. The key is immediate access without removing your pack. Cameras buried in backpacks miss shots. The best camera in the world is useless if it takes 5 minutes to access.
Is it worth hiring a local photography guide?
For serious photographers, hiring a guide who understands both the terrain and photographic needs can be transformative. Some agencies offer specific photography-focused treks with guides trained to identify viewpoints, manage timing for optimal light, and facilitate cultural photography interactions. This service costs more but significantly improves the photographic outcome.
What memory card format should I use?
Use high-speed SD cards (UHS-II or faster) for rapid buffer clearing. Choose cards from reputable brands (SanDisk Extreme Pro, Sony Tough, Lexar Professional). Carry multiple smaller cards (128GB each) rather than one large card - if a card fails, you lose only a portion of your images.
How do I photograph the Himalayan sunrise without overexposing the sky?
Graduated neutral density (GND) filters are the traditional solution, darkening the bright sky while leaving the darker foreground properly exposed. Modern alternative: shoot in RAW format and use exposure bracketing (two or three shots at different exposures), then blend in post-processing. Most current cameras have sufficient dynamic range that a single well-exposed RAW file can recover significant highlight and shadow detail.
Can I photograph inside monasteries?
Rules vary by monastery. Some welcome photography (without flash), others prohibit it entirely, and many allow photography in outer areas but not in inner sanctums. Always ask your guide to inquire before shooting. Even where photography is permitted, be mindful that these are active places of worship, not museums. Brief, quiet photography that does not disrupt worship is the standard.
What is the best lens for mountain photography in Nepal?
A versatile zoom covering 24-105mm (or equivalent) handles the vast majority of mountain photography situations. For dedicated landscape work, a wide-angle (16-35mm) captures the full scale of panoramas and amphitheaters. A telephoto (70-200mm) isolates individual peaks and compresses layers. If you can only bring one lens, the 24-105mm range is the most versatile.
How do I protect my camera from dust on the trail?
Keep a UV or clear protective filter on all lenses at all times. Minimize lens changes (use a zoom rather than swapping primes). When changing lenses, face the camera body downward so dust falls out rather than in. Carry a blower brush for removing dust from the sensor. In extremely dusty conditions (Kali Gandaki gorge, Mustang desert), keep the camera in a sealed bag when not actively shooting.
Final Thoughts
Nepal offers photography opportunities that are, quite simply, among the best on Earth. The combination of the world's highest and most dramatic mountains, ancient living cultures, extraordinary light quality, and diverse landscapes creates a destination that rewards every level of photographic effort.
The key decisions for a photography trek are timing (October and November are unequivocally the best months), route selection (match the trek to your photographic priorities), and gear balance (carry enough to capture what you see, but not so much that carrying it becomes a burden that diminishes your enjoyment).
Whatever camera you bring, from smartphone to professional kit, Nepal will fill it with images that you will treasure. The Himalayas are generous subjects.
For comprehensive preparation, explore our trekking photography guide, photography gear recommendations, and photography etiquette guide.
Planning your photography trek? Start with our how to choose a trekking agency guide and consider a photography-focused itinerary for maximum shooting opportunities.