


Common Beginner Trekking Mistakes in Nepal
The most common beginner trekking mistakes in Nepal are ascending too fast, picking a trek above your fitness level, skipping acclimatization days, ignoring altitude sickness symptoms, and carrying the wrong gear. Most are fully preventable: train 8-12 weeks ahead, choose a trek that matches your level, buy altitude-covered insurance, and trek "bistari, bistari" (slowly).
Underestimating altitude effects
70% of trek failures are avoidable
6-8 weeks (minimum recommended)
8-12% of trekkers file claims
25-50% experience symptoms above 3,500m
40% of first-timers have boot problems
60% of trekkers drink too little water
95% who use guides recommend them
Every year, thousands of first-time trekkers arrive in Nepal with dreams of conquering Himalayan trails. Most succeed—but not without encountering problems that could have been avoided. After interviewing hundreds of guides, analyzing trekker feedback, and documenting common patterns, we've compiled this comprehensive guide to the 15 mistakes that derail first-time Nepal treks.
The good news: nearly all of these errors are preventable with proper knowledge and planning. Whether you're headed to Poon Hill, Annapurna Base Camp, or Everest Base Camp, understanding what NOT to do is just as important as knowing what to do.
This isn't about scaring you—it's about preparing you. Because the difference between a life-changing adventure and a miserable ordeal often comes down to decisions made weeks or months before you set foot on the trail.
Why Mistakes Happen—And Why They Matter
First-time trekkers make mistakes for predictable reasons:
Information overload: The internet offers endless trekking advice, much of it contradictory, outdated, or written by people who've never actually trekked in Nepal.
Overconfidence: "I run marathons, so I'll be fine" or "I've hiked in the Alps" doesn't account for the unique challenges of multi-day high-altitude trekking.
Underconfidence: Fear of appearing weak leads to hiding symptoms, pushing too hard, or not asking questions when confused.
Budget pressure: Trying to save money in the wrong places—cutting guide days, buying cheap gear, choosing express itineraries—creates bigger problems later.
Excitement overriding caution: The thrill of planning a Himalayan adventure makes it easy to minimize risks and focus only on the positive aspects.
The Real Cost of Mistakes
Trekking mistakes in Nepal range from minor inconveniences (blisters, mild discomfort) to serious consequences (helicopter rescue costs $1,800-$5,000 depending on location (EBC to Lukla $1,800-$2,500, EBC to Kathmandu $4,500-$5,000) permanent injury, or worse). Understanding common errors isn't pessimistic—it's practical preparation that increases both your safety and enjoyment.
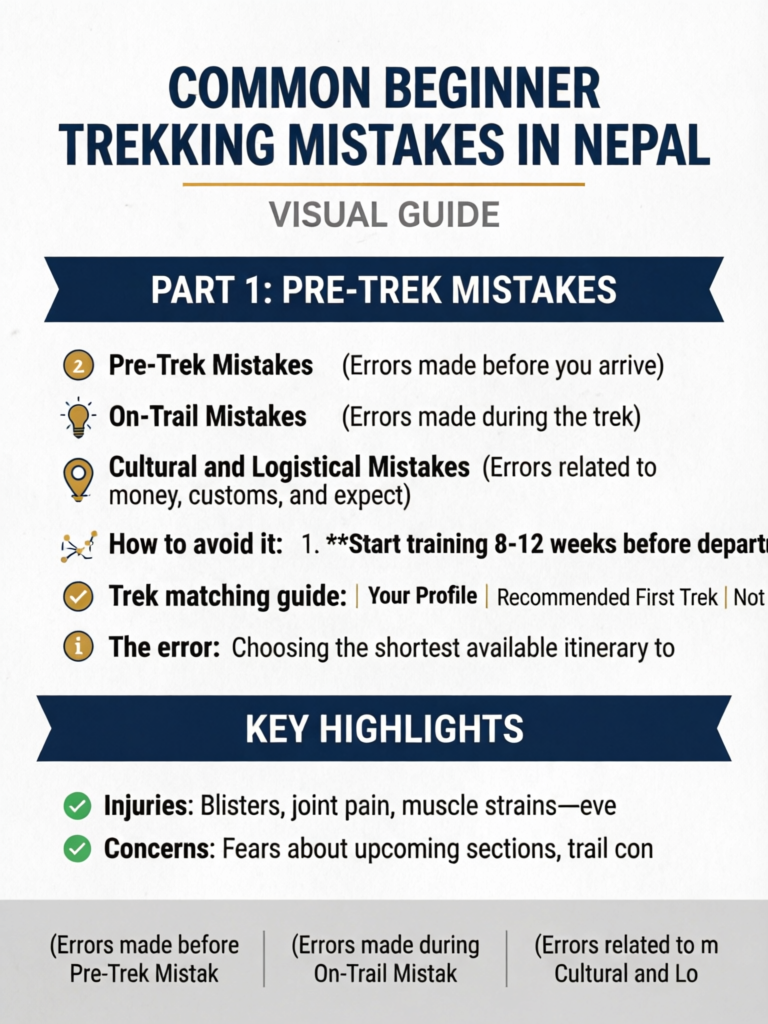
The mistakes we'll cover fall into three categories:
- Pre-Trek Mistakes (Errors made before you arrive)
- On-Trail Mistakes (Errors made during the trek)
- Cultural and Logistical Mistakes (Errors related to money, customs, and expectations)
Let's start with the errors that happen before your boots ever touch Nepali soil.
Part 1: Pre-Trek Mistakes
These are the mistakes made during planning and preparation—often weeks or months before departure. They're also the most preventable because you have time to correct course.
Mistake #1: Not Training Properly (or At All)
The error: Assuming your general fitness will carry you through, or that you can "wing it" based on regular gym workouts or weekend walks.
Why it happens: "Beginner-friendly" sounds easy. Marathon runners assume their cardio transfers directly. Desk workers figure they'll just go slow.
The reality: Multi-day trekking at altitude is a specific physical challenge that requires specific preparation. Your body needs to adapt to:
- Walking 5-7 hours daily for consecutive days
- Carrying weight (daypack) over uneven terrain
- Ascending and descending thousands of stone steps
- Functioning with reduced oxygen
- Recovering overnight in basic conditions
What goes wrong:
- Day 3-4 brings muscle exhaustion because legs aren't conditioned for repeated stress
- Knees give out on descents because you never trained for downhill impact
- Cardiovascular system struggles because gym cardio doesn't replicate hiking at altitude
- Mental resilience breaks because you've never experienced sustained multi-day physical effort
Pro Tip
The single best predictor of trek enjoyment isn't natural fitness—it's specific trek training. Someone who trained deliberately for 8 weeks outperforms a "naturally fit" person who didn't train, almost every time. Stair climbing, hiking with a weighted pack, and back-to-back training days are more valuable than marathon running or gym workouts.
How to avoid it:
- Start training 8-12 weeks before departure—minimum 6 weeks for easy treks, 12+ weeks for challenging ones
- Include stair-specific training—find stadium stairs, office building stairwells, or StairMaster; climb 20-40 minutes with a weighted pack
- Do back-to-back training days—hike Saturday AND Sunday to simulate cumulative fatigue
- Practice with your actual gear—wear your boots (50+ km before departure), carry your actual daypack weight
- Build progressively—increase duration and elevation gain week over week, not all at once
Sample minimum training (for moderate treks like Langtang or ABC):
| Week | Weekday Cardio | Weekend Hiking | Stair Training |
|---|---|---|---|
| 1-2 | 4x 30-40 min | 2-3 hour hike | 15-20 min |
| 3-4 | 4x 40-50 min | 3-4 hour hike with pack | 20-25 min |
| 5-6 | 4x 45-60 min | 4-5 hour hike with pack | 25-30 min |
| 7-8 | 4x 45-60 min | Back-to-back days: 5 hrs + 3 hrs | 30 min |
Mistake #2: Choosing the Wrong Trek for Your Fitness Level
The error: Selecting a trek based on bucket-list appeal, Instagram photos, or friend recommendations rather than honest assessment of your current abilities.
Why it happens: Everest Base Camp sounds more impressive than Poon Hill. "If others can do it, so can I." Fear of missing out on the "best" trek.
The reality: There's no single "best" trek—there's only the best trek for your current fitness, experience, available time, and goals. Choosing wrong means suffering through an experience you should have enjoyed, or worse, failing to complete it.
What goes wrong:
- Overreaching beginners attempt EBC (5,364m) when Poon Hill (3,210m) would have been perfect
- Underprepared trekkers book Annapurna Circuit (5,416m pass) and struggle above 4,000m
- People with 7 days try to compress 14-day treks, setting themselves up for altitude sickness
Honest Self-Assessment Questions
Before choosing your trek, answer honestly:
- Can you walk 15-20 km on hilly terrain without exhaustion?
- Have you ever hiked for 5+ hours in a single day?
- Have you ever been above 3,000m altitude? Above 4,000m?
- Can you handle 8-14 days of basic accommodation and repetitive food?
- How will you react if you feel unwell far from medical care?
Your answers should guide your trek selection—not your aspirations.
How to avoid it:
- Be brutally honest about your current fitness—not where you hope to be, but where you are now
- Match altitude to experience—first trek ever? Stay below 4,000m. Never been to altitude? Don't start at 5,000m+
- Factor in available time—if you only have 7 days, don't attempt treks that need 12-14 days minimum
- Consider a progression—Poon Hill this year, ABC next year, EBC the year after
- Consult with experienced trekkers or guides who will give honest feedback, not just sell you a package
Trek matching guide:
| Your Profile | Recommended First Trek | Not Recommended |
|---|---|---|
| No hiking experience | Poon Hill, Ghorepani-Ghandruk | ABC, EBC, Annapurna Circuit |
| Regular day hiker | Langtang Valley, Mardi Himal | EBC, Three Passes, Manaslu |
| Experienced hiker, no altitude experience | ABC, Pikey Peak | EBC, Annapurna Circuit |
| Experienced hiker, altitude experience | EBC, Annapurna Circuit | Three Passes (unless very fit) |
Mistake #3: Booking Too Short an Itinerary
The error: Choosing the shortest available itinerary to "save time" or "save money," often the "express" or "budget" version that cuts acclimatization days.
Why it happens: Limited vacation time. Belief that faster is better. Underestimating how long proper acclimatization takes.
The reality: Rushing itineraries dramatically increases altitude sickness risk, reduces enjoyment, and paradoxically increases failure rates. The time you "save" by booking a 10-day EBC trek instead of a 14-day one might be spent in a Kathmandu hospital—or evacuated by helicopter.
What goes wrong:
- Altitude sickness forces turnaround or evacuation (most common failure cause)
- Exhaustion accumulates without rest days, making every subsequent day harder
- No buffer for weather delays means missing flights home
- You're too tired to enjoy the scenery you came to see
The mathematics of acclimatization:
Your body needs time to produce additional red blood cells and adapt to reduced oxygen. This process cannot be rushed. The "golden rules" of altitude:
- Above 3,000m: Sleeping altitude should increase by no more than 300-500m per day
- Every 1,000m gained: Include an acclimatization day (sleeping at same altitude)
- "Climb high, sleep low": Day hikes to higher elevations improve adaptation
Express itineraries violate these rules, and your body doesn't care about your flight schedule.
Pro Tip
Add 2-3 buffer days to any itinerary you're considering. This provides acclimatization flexibility, weather contingency, and recovery time if you're slower than expected. These "extra" days often become the most enjoyable—leisurely pacing, exploring villages, actually resting.
How to avoid it:
- Choose standard or extended itineraries—never express versions for your first trek
- Include all recommended acclimatization days—these aren't optional
- Build in 1-2 buffer days—for weather, illness, or slower-than-planned progress
- Plan flights with flexibility—don't book international departure the day after scheduled trek end
Recommended vs. minimum days:
| Trek | Minimum Days | Recommended Days | Why Extra Days Matter |
|---|---|---|---|
| Poon Hill | 3 | 4-5 | Weather buffer, relaxed pace |
| Langtang Valley | 6 | 8-10 | Acclimatization at Kyanjin Gompa |
| Annapurna Base Camp | 8 | 10-12 | Rest days, side trips |
| Everest Base Camp | 11 | 14-16 | Critical acclimatization at Namche and Dingboche |
Mistake: Ignoring Season and Weather When Booking
The error: Booking a trek in the wrong season—or ignoring the daily weather forecast on the trail—because the dates happened to fit your work calendar.
Why it happens: Cheap monsoon flights look tempting. Mountain weather seems like background detail. Beginners assume "the Himalayas" are good year-round.
The reality: Season determines whether you see mountains or clouds, whether passes are open, and how cold the nights get. Mountain weather can also turn from sunny to stormy within hours, and temperature drops roughly 6.5°C per 1,000m gained.
What goes wrong:
- Monsoon (June-August) brings heavy rain, leeches, landslides, and clouded-out views
- Winter (December-February) closes high passes like Thorong La and freezes tea-house water lines
- Booking peak passes without checking forecasts leads to dangerous whiteout crossings
- No buffer day means a single snowstorm ends the trek
Best seasons for first treks:
| Season | Months | Conditions | Best For |
|---|---|---|---|
| Autumn | Late Sep–Nov | Stable, clear, peak views | First-timers (most popular) |
| Spring | Mar–May | Warm, rhododendron bloom | First-timers, photography |
| Winter | Dec–Feb | Cold, clear days, some passes closed | Low-altitude treks (Poon Hill) |
| Monsoon | Jun–Aug | Rain, leeches, poor views | Rain-shadow only (Mustang, Dolpo) |
Pro Tip
Pre-monsoon (March-May) and post-monsoon (October-November) give the most stable conditions for a first trek. Check a mountain-specific forecast the night before any high pass and start walking early—mornings are clearest and calmest. For a month-by-month breakdown, see our best time to trek Nepal guide.
Mistake #4: Skipping Travel Insurance (or Getting the Wrong Kind)
The error: Not purchasing travel insurance at all, or buying a cheap policy that doesn't cover trekking, high altitude, or helicopter evacuation.
Why it happens: "It won't happen to me." Cost-cutting. Confusion about what's needed. Assuming credit card coverage is sufficient.
The reality: Nepal trekking requires specific insurance coverage that standard travel policies don't provide. Without proper coverage, you're gambling with potentially life-altering financial consequences.
What goes wrong:
- helicopter rescue costs $1,800-$5,000 depending on location (EBC to Lukla $1,800-$2,500, EBC to Kathmandu $4,500-$5,000) out of pocket without coverage
- Medical treatment in Kathmandu is expensive without international medical coverage
- Trip cancellation due to weather, strikes, or illness means losing thousands in non-refundable bookings
- Standard travel insurance excludes "adventure activities" or has altitude limits below your trek
Real cost examples:
| Incident | Approximate Cost Without Insurance |
|---|---|
| Helicopter evacuation from above 4,000m | $4,000-$8,000 |
| Helicopter evacuation from remote area | $7,000-$12,000 |
| Hospital stay in Kathmandu (3-5 days) | $1,500-$4,000 |
| Emergency flight home (medical repatriation) | $15,000-$50,000 |
| Trip cancellation (flight + trek package) | $2,000-$5,000 |
Insurance Non-Negotiables
Your Nepal trekking insurance MUST include:
- Helicopter evacuation coverage (minimum $100,000)
- High-altitude coverage to your trek's maximum altitude (verify the policy states your specific altitude, e.g., "coverage to 6,000m")
- Trekking/hiking as covered activity (not excluded as "adventure sport")
- Medical treatment abroad (minimum $100,000)
- 24/7 emergency assistance with Nepal-specific protocols
Read the policy details—don't assume coverage exists.
How to avoid it:
- Purchase dedicated adventure travel insurance—not standard travel insurance
- Verify altitude limits explicitly—policy should state coverage to at least your trek's max altitude + 500m buffer
- Confirm helicopter evacuation is included—some policies exclude it or have low limits
- Check for exclusions—pre-existing conditions, altitude sickness, "extreme" activities
- Carry policy documents and emergency numbers—printed and digital copies
Recommended insurance providers (as of 2026):
- World Nomads (popular with trekkers, good altitude coverage)
- Global Rescue (premium evacuation coverage)
- Travelex (verify altitude limits)
- Allianz Global Assistance (verify trekking coverage)
- IMG Global (comprehensive adventure coverage)
Typical cost: $50-$150 for 2-week coverage with proper trekking inclusions—a tiny fraction of potential costs without it.
Mistake #5: Overpacking or Underpacking
The error: Bringing too much "just in case" gear, or too little assuming you can buy items on the trail.
Why it happens: Fear of being unprepared leads to overpacking. Budget consciousness or "traveling light" philosophy leads to underpacking. Inexperience with what's actually needed.
The reality: Every extra kilogram you carry makes trekking harder—and you'll carry it for hours daily, for days on end. But missing essential items can't be easily fixed on remote trails where options are limited and expensive.
What goes wrong with overpacking:
- Extra weight exhausts you faster, especially on uphill sections
- Organizing and finding items in an overstuffed pack wastes time
- Porter costs increase (they charge by weight)
- You won't use half of what you brought
What goes wrong with underpacking:
- Trail shops have limited selection and high prices
- Missing essential items (proper layers, waterproofing) can't be solved remotely
- Borrowing gear from others is unreliable
- Comfort items that would have helped are unavailable
The weight reality:
- Your main backpack (carried by porter): Should not exceed 15kg
- Your daypack (carried by you): Should be 5-8kg maximum
- Every kilogram matters at altitude when you're already oxygen-deprived
Pro Tip
The "lay it out, then remove 30%" rule works. Lay out everything you plan to bring, then force yourself to remove nearly a third. You'll still have enough, and your body will thank you. Pack for the climate and conditions, not for hypothetical emergencies that rarely happen.
How to avoid it:
- Use a proven packing list—don't reinvent the wheel; follow lists from experienced trekkers
- Question every item—"Will I use this at least 3 times?" If not, leave it
- Wear layers, not multiple outfits—you don't need variety, you need versatility
- Bring critical items from home, rent bulky items in Nepal—boots and clothing from home; sleeping bag and down jacket can be rented
- Weigh your pack before departure—if daypack is over 8kg, remove things
Essentials vs. common excess:
| Essential (Bring) | Common Excess (Leave) |
|---|---|
| 3 base layers | 5+ t-shirts |
| 1 down jacket | Multiple jackets |
| Rain shell | Full rain suit |
| 2-3 pairs trekking socks | 7+ pairs socks |
| Basic first aid | Complete pharmacy |
| 1 book/e-reader | Multiple books |
| Small toiletry kit | Full-size bottles |
| Headlamp + backup batteries | Multiple flashlights |
See our complete packing list for detailed guidance →
Mistake #6: Not Breaking In Boots
The error: Buying new trekking boots shortly before departure and wearing them for the first time on the trail.
Why it happens: Last-minute gear purchases. Assuming modern boots don't need breaking in. Underestimating how much you'll walk.
The reality: New boots cause blisters. Blisters cause agony. Agony ruins treks. This is one of the most predictable and preventable problems first-timers face—and one of the most common.
What goes wrong:
- Blisters develop day 1-2, worsen daily with no recovery time
- Hot spots become open wounds requiring constant management
- Pain changes your gait, causing knee and hip problems
- Severe cases require evacuation (yes, people have been helicoptered out due to blisters)
How blisters form:
Friction between boot and skin, combined with moisture (sweat) and pressure (walking), creates fluid-filled pockets. On multi-day treks, there's no recovery time—you walk on damaged feet daily, making things worse.
The 50km Rule
Your trekking boots should have at least 50km on them before you start your Nepal trek—ideally 100km+. This means walking in them for training hikes, daily walks, even casual errands. The leather/fabric needs to mold to your foot shape, and you need to identify any problem areas before you're on a remote mountain trail.
How to avoid it:
- Buy boots 3-4 months before your trek—not weeks before
- Wear them for all training hikes—this is their purpose
- Wear them casually too—to the grocery store, around the neighborhood
- Identify and address hot spots early—use moleskin, adjust lacing, or return boots if they don't fit properly
- Bring blister supplies anyway—even broken-in boots can cause problems at altitude where feet may swell
Boot break-in progression:
| Time Before Trek | Activity |
|---|---|
| 3-4 months | Purchase boots, wear around house |
| 2-3 months | Short walks (30-60 min), identify issues |
| 1-2 months | Training hikes (2-4 hours), full sock system |
| 2-4 weeks | Long training hikes (4-6 hours), back-to-back days |
| 1 week | Final check—if any problems persist, consider alternatives |
Part 2: On-Trail Mistakes
These mistakes happen during the trek itself. They're often consequences of poor preparation—but even well-prepared trekkers fall into these traps.
Mistake #7: Walking Too Fast
The error: Starting each day at a pace that feels comfortable at lower elevations but is unsustainable at altitude, or trying to keep up with faster trekkers.
Why it happens: Excitement and energy in the morning. Competitive instinct. Wanting to "get it done." Not understanding how altitude affects pace.
The reality: At altitude, there's a direct relationship between exertion level and altitude sickness risk. Walking too fast means breathing harder, which means less efficient oxygen absorption, which triggers altitude symptoms faster.
What goes wrong:
- Breathlessness and exhaustion hit hard by midday
- Altitude sickness symptoms appear or worsen
- Energy depleted with no reserves for afternoon hiking
- Next-day fatigue compounds because you never recovered
The Nepali trekking mantra: "Bistari, bistari"—slowly, slowly. This isn't just politeness; it's survival wisdom developed over generations of mountain travel.
Pro Tip
Your ideal trekking pace at altitude: slow enough to hold a conversation without gasping for breath. If you can't talk in complete sentences, you're going too fast. This feels unnaturally slow to most beginners—embrace it. You'll arrive feeling better and reduce altitude sickness risk significantly.
How to avoid it:
- Start slower than feels natural—especially above 3,000m
- Use the "conversation test"—if you can't chat comfortably, slow down
- Ignore other trekkers' pace—everyone's body is different; this isn't a race
- Take regular breaks—every 45-60 minutes, even when feeling good
- Let your guide set the pace—experienced guides know the right speed for altitude
Pace adjustment by altitude:
| Altitude | Pace Adjustment | Why |
|---|---|---|
| Below 3,000m | Normal comfortable pace | Oxygen adequate |
| 3,000-3,500m | 10-15% slower | Noticeable oxygen reduction |
| 3,500-4,000m | 20-30% slower | Significant adaptation needed |
| 4,000-4,500m | 30-40% slower | Every step requires effort |
| Above 4,500m | 40-50% slower | Survival pace, not hiking pace |
Mistake: Not Telling Anyone Your Plan or Carrying Offline Navigation
The error: Heading onto the trail without leaving an itinerary with anyone, and relying on phone signal for navigation that disappears between villages.
Why it happens: Trekkers assume their guide handles everything, or that popular trails are impossible to lose. Signal in Kathmandu makes them forget how patchy coverage gets at altitude.
The reality: Most Nepal trails are well-marked, but side trails, snow cover, and fog cause people to take wrong turns every season. If something goes wrong and nobody knows your route, rescue is slower.
How to avoid it:
- Leave a trip plan—share your day-by-day itinerary, expected return date (with buffer), and your agency's contact with family or friends
- Download offline maps—Maps.me or Gaia GPS work without signal; see our best offline maps for Nepal trekking
- Register with your embassy if it offers traveller registration
- Carry a power bank—dead phones can't navigate or call for help
- Stay within sight of your guide in fog, snow, or at confusing junctions
Two Minutes That Could Save You
Before you fly to Lukla or drive to your trailhead, send one message: your route, your tea-house stops, your guide's phone number, and the date you'll be back. It costs nothing and it's the single fastest thing that helps rescuers if you go missing.
Mistake #8: Ignoring Altitude Sickness Symptoms
The error: Dismissing early altitude sickness symptoms as "just tiredness," hiding symptoms from guides to avoid being told to descend, or continuing to ascend despite warning signs.
Why it happens: Not wanting to appear weak. Fear of ruining the trip. Not recognizing symptoms. Determination overriding caution.
The reality: Altitude sickness (Acute Mountain Sickness/AMS) affects 25-50% of trekkers above 3,500m, regardless of fitness level. Early symptoms are manageable—but ignoring them can lead to life-threatening conditions (HACE and HAPE) within hours.
What goes wrong:
- Mild headache becomes severe; nausea becomes vomiting
- Coordination problems develop, making trail navigation dangerous
- Severe cases progress to fluid in brain (HACE) or lungs (HAPE)
- What required only a rest day now requires helicopter evacuation
- In extreme cases: permanent injury or death
Altitude sickness symptoms to recognize:
Mild (take seriously):
- Headache (most common early sign)
- Mild nausea or loss of appetite
- Dizziness or lightheadedness
- Fatigue beyond normal tiredness
- Difficulty sleeping
Moderate (stop ascending, consider descent):
- Severe headache not relieved by medication
- Persistent vomiting
- Increasing fatigue and weakness
- Shortness of breath at rest
- Decreased coordination
Severe (descend immediately, even at night):
- Confusion or altered mental state
- Unable to walk in a straight line (ataxia)
- Severe breathing difficulty
- Coughing up pink/frothy sputum
- Gray or blue skin color
The Golden Rule of Altitude
Never ascend to a higher sleeping elevation with unresolved altitude sickness symptoms. If symptoms don't improve with rest and hydration at current altitude, descend. Descent is the only reliable treatment for serious AMS—and it works remarkably well, usually within hours.
How to avoid it:
- Learn symptoms before your trek—know what to watch for
- Be honest with yourself and your guide—hiding symptoms can kill you
- Use the Lake Louise Score—self-assessment tool for AMS (available as apps)
- Take rest days when symptomatic—one day at same altitude often resolves mild symptoms
- Carry and know how to use Diamox—prophylactic use reduces AMS risk (consult doctor before trek)
- Descend immediately for severe symptoms—don't wait until morning
Mistake #9: Not Drinking Enough Water
The error: Drinking too little water due to cold temperatures (not feeling thirsty), avoiding liquids to reduce cold nighttime bathroom trips, or not recognizing increased hydration needs at altitude.
Why it happens: Cold suppresses thirst sensation. Bathrooms are freezing at night. Water costs money on the trail. Not understanding altitude dehydration.
The reality: Altitude dramatically increases water loss through faster breathing, lower humidity, and increased urination. Dehydration worsens altitude sickness, reduces energy, impairs thinking, and can cause serious medical problems.
What goes wrong:
- Dehydration symptoms mimic and compound altitude sickness
- Energy crashes without adequate fluid
- Headaches worsen (often caused by dehydration, not just altitude)
- Digestion problems increase
- Immune system weakens, making you susceptible to illness
Your hydration needs at altitude:
| Altitude | Minimum Daily Water | Why |
|---|---|---|
| Below 3,000m | 2-3 liters | Normal hiking needs |
| 3,000-4,000m | 3-4 liters | Increased respiratory loss |
| Above 4,000m | 4-5 liters | Significant fluid loss |
Pro Tip
Check your urine color—it's the best hydration indicator. Clear to light yellow means adequate hydration. Dark yellow or amber means you're dehydrated and need to drink more. Aim for "light lemonade" color throughout the day.
How to avoid it:
- Drink proactively, not just when thirsty—thirst is a late indicator of dehydration
- Start each day with 500ml before breakfast—replace overnight losses
- Carry 1.5-2 liters in your daypack—sip continuously while walking
- Drink with meals—additional fluid opportunity
- Accept the bathroom trips—better than altitude sickness
- Monitor urine color—adjust intake based on output
Hydration sources and costs:
| Source | Cost | Notes |
|---|---|---|
| Bottled water (lower altitudes) | $1-2/liter | Environmental impact, gets expensive |
| Bottled water (high altitudes) | $3-5/liter | Very expensive, limited availability |
| Safe water stations (ACAP) | $0.50/liter | Best option where available |
| Water purification tablets | $0.10/liter | Taste affected, but effective |
| UV purification (SteriPen) | $0.02/liter | Fast, no taste impact |
| Boiled water from tea houses | $1-2/liter | Available everywhere |
Mistake #10: Skipping Meals at Altitude
The error: Not eating enough because altitude suppresses appetite, or skipping meals to save money or time.
Why it happens: Altitude genuinely reduces appetite (it's a physiological response). Food at altitude is expensive. Time pressure to keep moving. Nausea makes eating unappealing.
The reality: Your body burns 3,000-5,000 calories daily while trekking at altitude—far more than you're likely eating. Inadequate nutrition depletes energy reserves, weakens immune response, and slows altitude adaptation.
What goes wrong:
- Energy crashes without sufficient fuel
- Muscle breakdown as body consumes itself for energy
- Weakened immune system leading to illness
- Slower recovery between days
- Irritability and poor decision-making (your brain needs glucose)
The appetite problem:
Above 3,500m, most trekkers experience reduced appetite. Food becomes less appealing precisely when you need it most. This is normal—but you must eat anyway.
Force Yourself to Eat
Eating at altitude often requires deliberate effort. You may not feel hungry, and food may not taste as good. Treat eating as a task to complete, like walking. Order food you can stomach (often carbohydrate-rich, bland options like rice, noodles, porridge). Eat small amounts frequently rather than trying to force large meals.
How to avoid it:
- Eat breakfast even when not hungry—you need fuel for the day's walking
- Carry trail snacks—nuts, chocolate, dried fruit, energy bars; eat hourly
- Don't skip lunch—mid-day rest and fueling is critical
- Order what you'll actually eat—choose familiar foods over exotic options at altitude
- Prioritize carbohydrates—your body's preferred fuel at altitude (rice, bread, pasta, porridge)
- Eat dinner fully—evening meal rebuilds for tomorrow
Best foods at altitude:
| Food Type | Why It Works | Examples |
|---|---|---|
| Complex carbs | Sustained energy | Dal bhat, rice, potatoes, bread |
| Simple carbs | Quick energy | Honey, jam, biscuits |
| Soups | Hydration + nutrition | Noodle soup, vegetable soup |
| Porridge | Easy to digest, filling | Oatmeal with honey, Tibetan porridge |
| Eggs | Protein, familiar taste | Fried eggs, omelettes |
What to avoid at altitude:
- Fatty/greasy foods (harder to digest)
- Large portions (overwhelms reduced appetite)
- Unfamiliar foods (risk of digestive issues)
- Excessive meat (refrigeration questionable at altitude)
Mistake #11: Not Communicating with Your Guide
The error: Not telling your guide about symptoms, concerns, preferences, or problems—either from embarrassment, language barriers, or independence.
Why it happens: Not wanting to appear weak. Cultural communication differences. Believing guides only care about logistics. Independence instinct.
The reality: Your guide is your primary safety resource. They're trained to recognize altitude sickness, know the terrain, and can make decisions that keep you safe. They can't help you if they don't know what you're experiencing.
What goes wrong:
- Symptoms go unaddressed until they become serious
- Guide can't adjust pace or itinerary to your needs
- Misunderstandings about expectations and plans
- Lost opportunities for local knowledge and cultural insights
- Emergency situations with a mandatory licensed guide awareness
What guides need to know from you:
- Physical state: Headaches, nausea, breathing difficulty, energy levels
- Injuries: Blisters, joint pain, muscle strains—even minor ones
- Concerns: Fears about upcoming sections, trail conditions, altitude
- Preferences: Pace adjustments, rest needs, food preferences
- Changes: Anything different from yesterday—especially symptoms
Pro Tip
Establish a daily check-in routine with your guide. Each morning and evening, briefly share how you're feeling physically and mentally. Good guides ask, but don't wait to be asked. Proactive communication prevents problems and builds trust that enhances your entire experience.
How to avoid it:
- Establish communication expectations early—let your guide know you'll share honestly and want their feedback
- Share symptoms immediately—don't wait to see if they improve
- Ask questions—about the trail, culture, conditions; guides have valuable knowledge
- Discuss pace openly—if too fast or too slow, say so
- Provide positive feedback too—guides appreciate knowing what's working well
Mistake #12: Pushing Through Pain or Injury
The error: Continuing to trek despite significant pain, treating injuries as inconveniences to ignore rather than problems to address.
Why it happens: "I didn't come all this way to quit." Fear of ruining the trip. Belief that pain is normal. Not understanding when pain indicates injury versus discomfort.
The reality: Pain is your body's warning system. Minor issues addressed early stay minor. Issues ignored become serious—and in remote mountains, serious problems have serious consequences.
What goes wrong:
- Minor knee discomfort becomes cartilage damage requiring months of recovery
- Blisters become infected wounds
- Strained muscles become torn muscles
- Ankle tweaks become fractures
- What could have been managed with a rest day now requires evacuation
Distinguishing discomfort from danger:
| Type | Examples | Response |
|---|---|---|
| Normal discomfort | Muscle soreness, general fatigue, mild breathlessness during exertion | Continue with attention, adequate rest |
| Warning signs | Joint pain, sharp pains, persistent specific-location pain, unusual swelling | Rest day, assess, consider descent |
| Stop signals | Unable to bear weight, severe joint pain, fever, inability to catch breath at rest | Do not continue, seek help |
The Sunk Cost Trap
"I've come too far to stop now" is dangerous thinking. The money you've spent and distance you've traveled are "sunk costs"—they're gone regardless of what you do next. Making decisions based on sunk costs rather than current reality leads to poor choices. Turning back when necessary isn't failure—it's wisdom that allows you to return and try again when healthy.
How to avoid it:
- Distinguish discomfort from injury—muscle soreness is normal; sharp joint pain is not
- Address issues early—treat blisters immediately, rest sore joints before they worsen
- Take rest days when needed—one day off can prevent week-long recovery
- Listen to guide advice about injury—they've seen many injuries and know what's serious
- Accept that turning back may be necessary—it's always better than permanent injury
Part 3: Cultural and Logistical Mistakes
These mistakes relate to money, customs, expectations, and logistics—practical matters that can significantly impact your experience.
Mistake #13: Not Respecting Local Customs
The error: Behaving in culturally inappropriate ways—from dress code violations to religious site disrespect to general cultural ignorance.
Why it happens: Unfamiliarity with Nepali culture. Assumptions that tourist areas are "different." Excitement overriding awareness. Genuine ignorance.
The reality: Nepal's trekking regions are home to communities with deep religious and cultural traditions. The trails pass through their villages, not tourist attractions built for visitors. Respectful behavior ensures positive interactions and preserves the cultural environment that makes Nepal special.
What goes wrong:
- Offense to local people whose home you're visiting
- Closed doors and unfriendly interactions
- Damage to sacred sites from inappropriate behavior
- Contributing to cultural degradation
- Missing deeper cultural experiences because locals don't engage
Key cultural guidelines:
Religious sites:
- Walk clockwise around Buddhist stupas, chortens, and mani walls (prayer stone walls)
- Remove shoes before entering temples and monasteries
- Never touch religious objects without permission
- Don't take photos inside temples unless explicitly allowed
- Don't point feet toward religious images or monks
Personal interactions:
- Use right hand for giving and receiving (left hand is considered unclean)
- Ask permission before photographing people, especially monks and elders
- Use "Namaste" as greeting (hands together, slight bow)
- Avoid public displays of affection
- Don't touch people's heads (considered sacred)
Dress code:
- Cover shoulders and knees, especially in villages
- Remove shoes when entering homes
- Dress modestly—you're in conservative mountain communities, not a beach resort
Pro Tip
When in doubt, observe and follow your guide's lead. Guides navigate cultural situations naturally and can provide context you'd otherwise miss. A simple "Is this okay?" before photographing or entering spaces prevents most missteps.
How to avoid it:
- Learn basic customs before arrival—simple research prevents most errors
- Observe before acting—watch what locals and experienced trekkers do
- Ask your guide—they'll happily explain cultural context
- Err on the side of conservative—in dress, behavior, and assumptions
- Apologize if you make mistakes—sincere apology is almost always accepted
Mistake #14: Not Carrying Enough Cash
The error: Underestimating cash needs, assuming ATMs are available, or relying on credit cards that aren't accepted.
Why it happens: Modern travel habits (cards everywhere). Not knowing there are no ATMs on most trails. Underestimating actual expenses.
The reality: Once you leave Kathmandu or Pokhara, cash is king. There are virtually no ATMs on trekking routes (rare exceptions: Namche Bazaar, sometimes Ghandruk—and these are unreliable). Credit cards are not accepted at tea houses. If you run out of cash, you have a serious problem.
What goes wrong:
- Unable to pay for accommodation, food, or emergency expenses
- Forced to borrow from guides or other trekkers (embarrassing and dependent)
- May need to cut trek short to find cash
- Emergency services expect cash payment upfront
Cash planning:
| Expense Category | Estimated Daily Cost | 14-Day Trek Total |
|---|---|---|
| Tea house room | $3-15 | $42-210 |
| Meals (3x daily) | $15-30 | $210-420 |
| Hot showers | $3-5 (every 2-3 days) | $20-35 |
| WiFi | $3-5 | $42-70 |
| Bottled water/drinks | $3-8 | $42-112 |
| Charging | $2-3 | $28-42 |
| Snacks | $3-5 | $42-70 |
| Emergency/tips/extras | - | $200-300 |
| Total cash needed | $626-1,259 |
Cash Buffer Rule
Calculate your expected expenses, then add 30-50% buffer. Unexpected costs arise: extra days due to weather, health issues requiring more rest, expensive items at altitude, porter tips, souvenirs. Running short is stressful; having extra is merely inconvenient (you can spend it after the trek).
How to avoid it:
- Withdraw all trek cash in Kathmandu or Pokhara—multiple ATMs available with reasonable limits
- Bring Nepali Rupees only—USD or other currencies aren't accepted at tea houses
- Calculate expenses conservatively—assume higher costs, longer days
- Carry cash safely—split between multiple locations (daypack, main pack, money belt)
- Keep small bills—large notes (NPR 1,000) are hard to break in villages
Cash safety:
- Don't carry all cash in one place
- Use a hidden money belt for emergency reserve
- Keep daily cash accessible in zippered pocket
- Never flash large amounts of cash publicly
Mistake #15: Expecting Hotel-Quality Amenities
The error: Arriving with expectations shaped by hotels, hostels, or even camping experiences that don't apply to high-altitude tea houses.
Why it happens: Travel marketing shows the best moments. Prior travel experience creates expectations. "Teahouse" sounds cozy. Photos show smiling trekkers, not discomfort.
The reality: Tea houses are basic mountain lodges providing shelter, beds, and food—not comfort accommodations. Understanding and accepting this reality before departure prevents daily disappointment.
What tea houses actually provide:
Rooms:
- Two beds (thin foam mattresses on wood platforms)
- Blankets (heavily used, rarely washed)
- Possibly a pillow
- Unheated space (room temperature equals outside temperature)
- Thin walls (you hear everything)
- No privacy (shared bathrooms, communal spaces)
Bathrooms:
- Shared facilities (typically 2-4 toilets for 10-20 rooms)
- Squat toilets (most common above 3,000m)
- Bucket-flush system (no tank toilets)
- No toilet paper provided (bring your own)
- Cold—often outdoor or semi-outdoor construction
- At altitude: water may freeze overnight
Showers:
- Not available at all tea houses
- When available: solar or gas heated, costs $3-8
- "Hot" is relative—often lukewarm
- Pressure is weak, temperature fluctuates
- Bathroom itself is freezing
- Many trekkers shower every 3-5 days, not daily
Electricity:
- Available for lighting and charging
- Often only during certain hours (evening typically)
- Charging devices: $2-5, or free in dining room
- Outages common—carry headlamp always
What goes wrong when expectations are wrong:
- Daily frustration at conditions that are normal
- Energy wasted on complaints instead of adaptation
- Missing the experience while wishing it were different
- Conflicts with tea house staff over unchangeable realities
- Leaving with negative memories instead of appreciation
Pro Tip
Reframe your expectations before departure. You're not checking into accommodation—you're seeking shelter on a mountain journey. Every tea house represents incredible effort: materials carried by porter or mule, water sourced from springs, food transported from valleys below. Appreciation for what is provided replaces frustration about what isn't.
How to avoid it:
- Research tea house conditions honestly—read realistic accounts, not marketing
- Bring comfort items—sleeping bag, earplugs, eye mask, wet wipes, toilet paper
- Lower expectations before arrival—then reality often exceeds them
- Focus on what matters—warmth, safety, food, rest; not comfort
- Practice gratitude—tea house families work incredibly hard to host you
Bonus Mistake: Going with a mandatory licensed guide
The error: Attempting to trek without a licensed guide, either to save money or for a perceived "authentic" independent experience.
Why it happens: Budget concerns. Desire for independence. Belief that trails are easy to follow. Not knowing it's now legally required.
The reality: Since April 2023, Nepal requires all foreign trekkers in national parks and conservation areas to hire a licensed guide. Beyond the legal requirement, guides provide safety, navigation, cultural access, and practical support that significantly enhance (and often save) first-time treks.
What goes wrong with a mandatory licensed guide:
- Legal issues: Fines, deportation, permit denial at checkpoints
- Safety risks: No one monitoring for altitude sickness, no emergency response coordination
- Navigation problems: Trail junctions, weather decisions, alternate routes
- Missed experiences: Cultural context, local knowledge, village access
- Logistical challenges: Tea house booking, meal ordering, communication
Guide Requirement Details (2023+)
The Nepal government requires all foreign trekkers in national parks and conservation areas to be accompanied by a licensed guide or porter-guide. This covers all major trekking regions: Everest, Annapurna, Langtang, Manaslu, etc. Solo independent trekking is no longer legal. Guides must be registered with the Nepal Tourism Board and carry valid licenses.
Why guides matter beyond legality:
- Altitude sickness recognition: Trained to spot symptoms you might miss or dismiss
- Emergency coordination: Know evacuation procedures, communicate with rescue services
- Cultural bridge: Translate not just language but customs, enhancing every interaction
- Pace setting: Know appropriate speed for altitude, adjusting to your condition
- Tea house logistics: Book ahead during busy seasons, know which lodges are best
- Problem solving: Handle weather delays, trail closures, unexpected situations
How to avoid this mistake:
- Budget for a guide from the start—$25-40/day is minimal compared to trip cost
- Choose licensed guides—verify NTB registration
- Communicate expectations clearly—pace preferences, interests, communication style
- Value the relationship—guides become the human connection that defines your experience
Don't book the cheapest package blindly: The lowest quote is often cheapest for a reason—untrained guides, underpaid porters, skipped acclimatization days, and no emergency plan. Where helicopter rescue may be your only option, poor coordination means dangerous delays. A reputable agency costs slightly more but provides licensed guides, insured porters, flexible itineraries, and 24/7 support. Verify before you pay—see trekking agency red flags and scams and how to choose a trekking agency. Always book with a verified local agency or guide.
How to Recover from Mistakes
Even with preparation, mistakes happen. What separates successful trekkers from unsuccessful ones is often not avoiding all errors—it's recovering from them effectively.
Recovery Strategies by Mistake Type
Physical mistakes (overexertion, injury, altitude sickness):
- Stop and assess honestly—denial worsens problems
- Communicate with your guide immediately—they can help
- Take rest days when needed—one day off often prevents week-long problems
- Descend if symptoms require it—altitude sickness only improves by losing elevation
- Adjust expectations—modified success (shorter trek, slower pace) beats failure
Logistical mistakes (cash shortage, gear problems):
- Talk to your guide—they often have solutions or connections
- Borrow from other trekkers—the trekking community is generally helpful
- Adapt and improvise—creative solutions exist for most problems
- Accept added costs—emergency purchases are expensive but sometimes necessary
Cultural mistakes:
- Apologize sincerely—Nepalis are forgiving of honest mistakes
- Learn from the error—ask your guide what went wrong and why
- Don't repeat it—attention prevents recurrence
- Model better behavior going forward—set example for other trekkers
The Mental Recovery Framework
When things go wrong, your response matters more than the problem itself:
- Acknowledge reality—"This is a problem" (not denial)
- Assess options—"What can I actually do about it?"
- Choose a response—best available option, not perfect option
- Execute without rumination—act on the decision, stop dwelling
- Adjust expectations—what success looks like may have changed, and that's okay
The 90-Second Rule
When something goes wrong, give yourself 90 seconds to feel frustrated, disappointed, or upset. Then shift focus to solutions. Dwelling on problems doesn't fix them—it just makes you miserable while the problem also persists. Brief emotional processing followed by practical response is the most effective pattern.
Frequently Asked Questions
Pre-Trek FAQs
Q: How early should I start preparing for my first Nepal trek?
A: Minimum 8 weeks for easy treks (Poon Hill), 12 weeks for moderate treks (ABC, Langtang), and 16+ weeks for challenging treks (EBC, Annapurna Circuit). This includes physical training, gear acquisition, and logistics planning. Starting earlier is always better—you can't rush fitness.
Q: What's the single most important thing I can do to prepare?
A: Stair training with a weighted pack. This specifically prepares your legs for the stone steps you'll encounter (thousands of them) and simulates the carrying load at altitude. Gym cardio doesn't replicate this; only hiking and stairs do.
Q: How do I know if I'm fit enough?
A: If you can complete a 5-6 hour hike with 500-700m elevation gain while carrying an 8kg pack and feel tired but not destroyed, you're ready for moderate treks. If this sounds impossible, you need more training time.
Q: Is it safe to buy trekking gear in Nepal instead of bringing it?
A: For bulky rental items (sleeping bag, down jacket), buying or renting in Nepal works well and saves luggage space. For fit-critical items (boots, base layers), buy at home where you can properly test and break them in. Kathmandu's Thamel district has extensive gear shops, but quality varies widely.
On-Trek FAQs
Q: What if I get altitude sickness?
A: Mild symptoms (headache, fatigue, mild nausea) usually resolve with rest, hydration, and not ascending further. If symptoms don't improve within 24 hours at the same altitude, descend 300-500m. Severe symptoms (confusion, severe vomiting, inability to walk straight) require immediate descent—even at night. Your guide is trained to help manage this.
Q: How often should I expect to shower?
A: Realistically, every 3-5 days on most treks. Hot showers aren't available at all tea houses, especially above 4,000m. Wet wipes, basin washes, and accepting some dirt are part of the experience. Everyone smells after a few days—nobody cares.
Q: What if I need to use the bathroom at night?
A: You'll likely need to go 1-3 times per night at altitude (increased urination is normal). Options: brave the cold walk to the toilet (recommended—it's part of the experience), or use a pee bottle in your room (wide-mouth Nalgene works; empty in the morning). Many experienced trekkers use pee bottles to avoid freezing bathroom trips.
Q: What if I can't keep up with other trekkers?
A: Go your own pace—this isn't a race. Your guide will accommodate your speed, or you can hire a porter-guide to walk with you while faster group members go ahead. Meeting at the destination is standard practice. The "slow" trekker who finishes healthy beats the "fast" one who gets injured or sick.
Q: What if I need to turn back before reaching the destination?
A: This happens more often than social media suggests. Approximately 5-15% of trekkers on challenging routes don't reach the final destination due to altitude sickness, injury, or other factors. This isn't failure—it's appropriate response to real conditions. You can return another time when circumstances are better.
Logistics FAQs
Q: How much cash should I bring?
A: Calculate your expected expenses (accommodation $5-15/night, meals $15-30/day, extras $10-20/day), multiply by days, then add 30-50% buffer. For a 14-day trek, $800-1,200 in Nepali Rupees is reasonable. Withdraw all cash in Kathmandu or Pokhara before starting.
Q: Is tipping expected? How much?
A: Yes, tipping guides and porters is standard and represents significant income for them. Standard rates: guides $10-15 per day of service, porters $8-12 per day. Give tips at trek end in cash with thanks. Exceptional service warrants higher tips.
Q: What if I have dietary restrictions?
A: Vegetarian food is easily accommodated—Nepal has strong vegetarian tradition. Vegan is possible but requires more communication. Specific allergies (nuts, gluten) are harder—discuss with your guide before starting and communicate clearly at each tea house. Bringing some of your own food as backup helps.
Q: Can I get cell phone service on the trek?
A: Mobile coverage exists in most villages on popular routes (Ncell has best coverage). Data is slow but functional for messaging. WiFi is available at most tea houses for $3-5/day, also slow. At high altitudes, coverage becomes spotty. Don't count on reliable connectivity—treat it as a bonus when available.
Q: When should a beginner go trekking in Nepal?
A: Autumn (late September to November) and spring (March to May) are the best seasons for a first trek—stable weather, clear mountain views, and comfortable temperatures. Avoid the monsoon (June-August) unless you're trekking rain-shadow regions like Mustang or Dolpo, and skip high passes in deep winter. See our best time to trek Nepal guide for a month-by-month breakdown.
Q: What's a realistic budget for a beginner trek in Nepal?
A: A guided teahouse trek typically runs $700-$1,500 for a 7-14 day route, covering guide, permits, accommodation, and meals, plus flights. Budget Poon Hill treks can come in under $500; Everest Base Camp runs higher because of Lukla flights. Add 30-50% cash buffer for extras. See our Nepal trekking costs guide for full figures.
Q: Do I need permits for trekking in Nepal?
A: Yes. Most treks require a conservation area or national park permit plus the TIMS card (arranged through a registered agency). For example, Annapurna treks need the ACAP permit and TIMS. See Nepal trekking permits explained and the TIMS card guide.
Related Resources
Pre-Trek Preparation:
- Best Beginner Treks in Nepal — Finding the right trek for your level
- What to Expect on Your First Nepal Trek — Complete reality check
- Nepal Trekking Packing List — Comprehensive gear guide
- Nepal Trekking Permits Explained — Understanding permit requirements
Trek-Specific Guides:
- Poon Hill Trek Complete Guide — Perfect first trek option
- Annapurna Base Camp Trek Guide — Iconic moderate trek
- Langtang Valley Trek Guide — Great alternative to crowded routes
- Is EBC Too Hard for Beginners? — Honest assessment
Safety and Health:
- Altitude Sickness Signs and Turnaround Rules — Critical safety knowledge
- Best Time to Trek Nepal — Seasonal planning
Training and Budget:
- 16-Week Beginner Trekking Training Plan — Build trek-specific fitness
- Nepal Trekking Costs Complete Guide — Realistic budgets
- How to Choose a Trekking Agency — Avoid cheap-package traps
Final Thoughts: Mistakes Are Part of the Journey
Here's what experienced trekkers know: everyone makes mistakes on their first trek. The perfect first trek doesn't exist—only treks where mistakes were manageable versus treks where they weren't.
The difference lies in preparation and response:
Preparation means learning from others' mistakes so you can avoid the preventable ones. Training properly, choosing the right trek, bringing appropriate gear, getting real insurance—these decisions, made weeks before departure, determine most outcomes.
Response means handling problems when they arise—because they will arise. Weather changes. Symptoms develop. Plans shift. The trekkers who thrive aren't the ones who encounter no problems; they're the ones who respond effectively when problems appear.
The 15 mistakes in this guide represent patterns—errors made by thousands of first-timers before you. Each one taught lessons that you can now learn without paying the same price. That's the real value of preparation: benefiting from collective experience rather than discovering everything through personal suffering.
Your first Nepal trek will challenge you. You'll be tired, uncomfortable, and occasionally wondering why you signed up for this. But you'll also experience moments of profound beauty, unexpected connection, and genuine achievement. The Himalayas have been transforming travelers for generations—not by being easy, but by demanding enough that the reward feels earned.
Avoid the preventable mistakes. Prepare thoroughly. Stay flexible when plans change. Communicate openly with your guide. And remember that the goal isn't a perfect trek—it's a trek you complete safely, learn from, and want to repeat.
The trails are waiting. Go prepared, and you'll join the thousands who return from Nepal not just with photos and memories, but with the understanding of why these mountains keep calling people back.
This guide is maintained by the Nepal Trekking Team with input from licensed guides, trekking agencies, the Himalayan Rescue Association, and feedback from hundreds of first-time trekkers. Last updated June 2026. For corrections, updates, or questions, contact our editorial team.