


The 12-day Everest Base Camp itinerary is the compressed version of the classic trek, shaving two days off the standard 14-day route while still reaching the same iconic destinations: Everest Base Camp (5,364m) and Kala Patthar (5,545m). It is achievable, but it comes with trade-offs that every trekker needs to understand before committing.
This guide breaks down the full 12-day itinerary day by day, explains exactly what you sacrifice compared to the 14 and 16-day versions, identifies who should and should not attempt this compressed schedule, and provides the altitude management strategies that make the difference between success and failure on a shorter timeline.
The bottom line: The 12-day EBC itinerary works for fit, altitude-experienced trekkers who implement proper acclimatization strategies. It does not work for everyone, and attempting it without the right background significantly increases your risk of altitude sickness and trek failure.
Quick Facts: 12-Day EBC Trek
12 days (14 with buffer days)
10 days on trail
1 (Namche Bazaar) + 1 (Dingboche)
5,545m (Kala Patthar)
130km round trip
Challenging
March-May, September-November
$35-55 per day on trail
75-80% with good preparation
Sagarmatha Entry ($30) + TIMS ($20)
Who Should Attempt the 12-Day EBC Trek
The shorter itinerary is not simply a faster version of the same trek. It fundamentally changes the acclimatization equation, and not everyone's physiology can handle the compressed timeline. Here is an honest assessment.
Green Light: Good Candidates
- Previous high-altitude experience above 4,500m with no history of significant altitude sickness
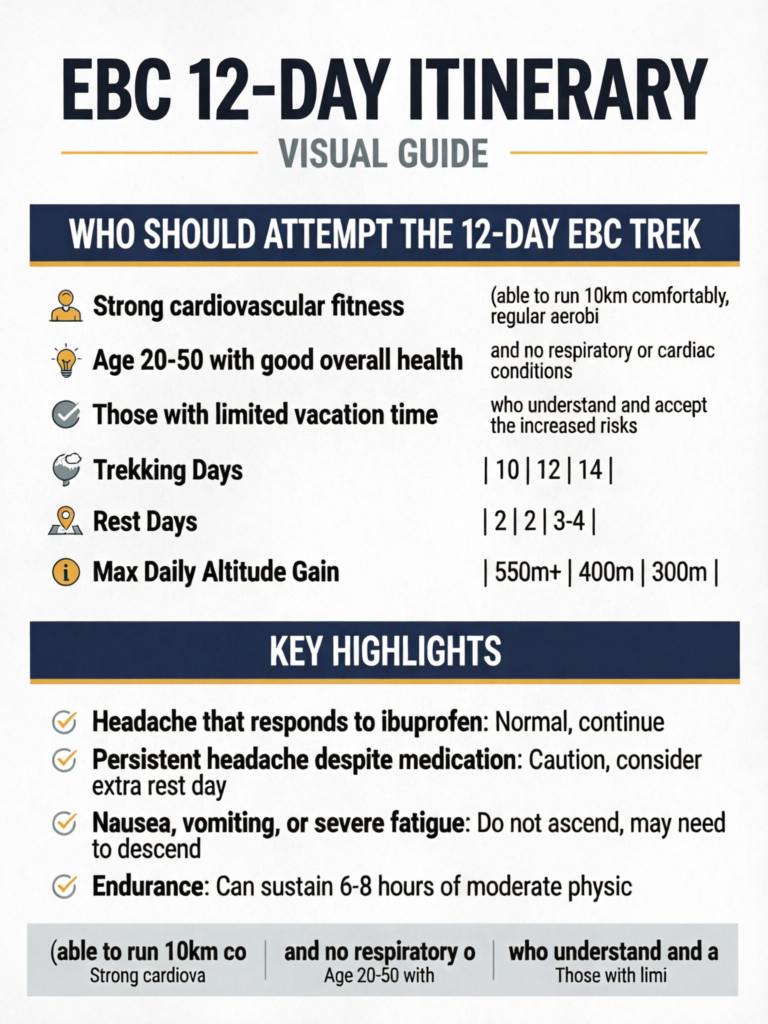
- Strong cardiovascular fitness (able to run 10km comfortably, regular aerobic exercise)
- Age 20-50 with good overall health and no respiratory or cardiac conditions
- Trekkers who have completed other Himalayan treks at similar altitudes (Annapurna Circuit, Langtang, etc.)
- Those with limited vacation time who understand and accept the increased risks
- Trekkers willing to use Diamox prophylactically as an additional safety measure
Red Light: Who Should NOT Attempt 12 Days
Do Not Attempt the 12-Day Itinerary If
- You have never been above 3,500m before. Your body's altitude response is unknown, and you need the extra days to observe how you react.
- You have a history of AMS, HACE, or HAPE on previous treks. Your body has demonstrated altitude sensitivity.
- You are over 55 without a strong recent fitness base. Recovery and acclimatization slow with age.
- You have respiratory conditions (asthma, COPD) or cardiovascular issues.
- You are a smoker or recently quit (within 6 months).
- You are not willing to turn back if symptoms develop. The 12-day schedule leaves almost no buffer for recovery days.
Pro Tip
If you are unsure about your altitude tolerance, book the 14-day itinerary instead. You can always descend faster if you feel strong, effectively creating a 12-day trek from a 14-day booking. The reverse, stretching a 12-day booking into 14 days, is much harder to arrange mid-trek during peak season when lodges fill up.
12-Day vs 14-Day vs 16-Day: Comparison Table
Understanding the differences between itinerary lengths helps you make an informed decision. The days you cut are not random; they come from specific acclimatization and rest periods.
| Feature | 12-Day | 14-Day (Standard) | 16-Day (Leisure) |
|---|---|---|---|
| Trekking Days | 10 | 12 | 14 |
| Rest Days | 2 | 2 | 3-4 |
| Max Daily Altitude Gain | 550m+ | 400m | 300m |
| EBC + Kala Patthar | Same day (combined) | Separate days | Separate days |
| Pheriche Stop | Skipped on ascent | Full day | Full day + rest |
| Success Rate | 75-80% | 85-90% | 90-95% |
| AMS Incidence | 35-45% mild symptoms | 20-30% mild symptoms | 15-20% mild symptoms |
| Descent Speed | Fast (long days) | Moderate | Relaxed |
| Lukla Buffer | None built in | 1 day | 1-2 days |
| Best For | Experienced, fit trekkers | Most trekkers | Cautious, older trekkers |
| Approx Cost | $1,800-2,800 | $2,000-3,200 | $2,200-3,500 |
What Exactly Gets Cut in the 12-Day Version
The 12-day itinerary removes time from three key areas:
-
No separate Pheriche stop on ascent. The 14-day route often includes a night at Pheriche (4,371m) between Tengboche and Dingboche. The 12-day version combines Tengboche to Dingboche into a single day, which is a significant altitude gain of approximately 550m.
-
Combined Gorak Shep and EBC day. Instead of arriving at Gorak Shep one day and visiting EBC the next morning, you arrive at Gorak Shep and trek to EBC on the same afternoon. This makes Day 8 one of the longest and most exhausting days of the trek.
-
Faster descent. The 14-day version typically descends from Pheriche to Namche over two days. The 12-day version pushes from Pheriche all the way to Namche in a single long descent day of approximately 930m elevation loss and 20+ km of trail.
The Complete 12-Day EBC Itinerary: Day by Day
Day 1: Fly Kathmandu to Lukla (2,840m), Trek to Phakding (2,610m)
Distance: 8km | Duration: 3-4 hours | Elevation Change: -230m
The trek begins with the famous 35-minute flight from Kathmandu to Tenzing-Hillary Airport at Lukla, one of the most dramatic airport approaches in the world. The runway is short, perched on a mountainside, and flights operate only in clear morning weather.
From Lukla, the trail descends gently through pine forests and small Sherpa settlements to Phakding, following the Dudh Kosi river. This is an easy introductory day designed to let you find your trekking rhythm.
What to expect: Lukla is bustling with trekkers, porters, and yak trains. The trail to Phakding is wide and well-maintained. You will cross several suspension bridges and pass through the villages of Cheplung and Tok Tok.
Tea houses: Multiple options in Phakding, ranging from basic ($3-5/room) to mid-range ($8-15/room). The Namaste Lodge and Khumbu Resort are popular choices.
Lukla Flight Reality Check
Lukla flights are delayed or cancelled due to weather approximately 30-40% of days during peak season. For a 12-day itinerary with zero built-in buffer, this is a serious concern. Always add 1-2 buffer days in Kathmandu before your international departure flight. Helicopter transfers ($400-600 one way) are an expensive but reliable backup.
For detailed information on Lukla flights, see our Kathmandu to Lukla flights guide.
Day 2: Phakding to Namche Bazaar (3,440m)
Distance: 11km | Duration: 5-7 hours | Elevation Change: +830m
This is the first genuinely demanding day and one of the biggest single-day altitude gains on the entire trek. The trail follows the Dudh Kosi valley, crossing it multiple times on suspension bridges, before the final steep 600m climb to Namche Bazaar.
The big climb: After the village of Jorsale and the Sagarmatha National Park entrance checkpoint, you begin the relentless switchback ascent to Namche. This climb takes 2-3 hours and is where many trekkers get their first taste of altitude exertion. On a clear day, you will catch your first glimpse of Everest from a viewpoint along the way.
Namche Bazaar is the commercial hub of the Khumbu, a horseshoe-shaped town built into a hillside bowl. It has ATMs, bakeries, gear shops, coffee houses, and even a cinema. This is your last opportunity for creature comforts before heading higher.
Tea houses: Namche has the best accommodation below Everest. Rooms range from $5-20/night. Camp de Base, Khumbu Lodge, and Namche Hotel are well-reviewed options.
Pro Tip
Drink at least 3-4 liters of water on the climb to Namche. The steep ascent, combined with the altitude gain, dehydrates you faster than you expect. Start hydrating aggressively from Day 1. Your urine should be clear or light yellow at all times.
Day 3: REST DAY in Namche Bazaar - Acclimatization
Acclimatization Hike: Everest View Hotel (3,880m) | Duration: 3-4 hours round trip | Elevation Gain/Loss: +440m / -440m
This rest day is non-negotiable on any EBC itinerary, including the 12-day version. Your body needs 36-48 hours at 3,440m to begin producing additional red blood cells and adjusting to reduced oxygen. Skipping this day would be medically reckless.
The acclimatization hike follows the "climb high, sleep low" principle. Trek uphill to the Everest View Hotel at 3,880m, where you get a panoramic view of Everest, Lhotse, Ama Dablam, and Nuptse. Spend an hour at altitude, then descend back to Namche to sleep.
Other options for the day:
- Visit the Sherpa Culture Museum in Namche
- Hike to Khumjung village (3,790m) and visit the Hillary School
- Explore Namche's shops for any last-minute gear needs
- Rest completely if feeling any altitude effects (headache, mild nausea)
Warning signs to watch for: Persistent headache not relieved by ibuprofen, nausea, dizziness, loss of appetite. If these symptoms are moderate or worsening, do NOT continue upward the next day. See our acclimatization guide for detailed symptom assessment.
Day 4: Namche Bazaar to Tengboche (3,860m)
Distance: 10km | Duration: 5-6 hours | Elevation Change: +420m (with intermediate descent)
The trail from Namche contours along the hillside with spectacular views of Ama Dablam, Everest, and Lhotse before descending to the Dudh Kosi river at Phunki Tenga (3,250m). From there, a steep 600m climb through rhododendron forest brings you to Tengboche Monastery, the spiritual heart of the Khumbu.
Tengboche Monastery is the largest monastery in the Khumbu region and hosts the annual Mani Rimdu festival (usually November). The monastery sits on a ridge with one of the most photographed mountain panoramas in Nepal, including Ama Dablam, Everest, Nuptse, and Lhotse.
Timing tip: Arrive by early afternoon to attend the 3:00 PM prayer ceremony at the monastery. The chanting monks against the backdrop of Himalayan peaks is an unforgettable experience.
Tea houses: Tengboche has limited but quality options. The Tashi Delek Lodge and Gompa Lodge are closest to the monastery. Rooms $8-15/night.
Day 5: Tengboche to Dingboche (4,410m) - The Combined Day
Distance: 12km | Duration: 6-7 hours | Elevation Change: +550m (with intermediate descent)
This Is Where the 12-Day Itinerary Gets Serious
On the standard 14-day route, this stretch is typically split into two days with a stop in Pangboche or Pheriche. The 12-day version combines them into one long day with a net altitude gain of 550m, pushing you from 3,860m to 4,410m. This is the day where the compressed schedule most increases your altitude risk.
The trail descends from Tengboche through forest to Debuche, then traverses through Pangboche village (home to the oldest monastery in the Khumbu) before climbing steadily up the Imja Khola valley to Dingboche.
The landscape transforms dramatically on this day. You leave the tree line behind as you climb above 4,000m. The terrain becomes alpine, with sparse scrub vegetation giving way to rocky terrain. Ama Dablam dominates the skyline to the south, while Island Peak and the Lhotse wall loom ahead.
Key strategy: Start early (6:30 AM), maintain a slow and steady pace, and drink constantly. Take a substantial lunch break in Pangboche or Shomare to break the day into manageable halves. Do not push through if you develop a headache; ibuprofen and rest may be needed.
Tea houses in Dingboche: Several good options. Hotel Dingboche, Snow Lion Lodge, and Peaceful Lodge are popular. Rooms $5-10/night. Dingboche is slightly less crowded than Pheriche, which sits in a parallel valley.
Day 6: REST DAY in Dingboche - Acclimatization
Acclimatization Hike: Nagarjun Hill (5,100m) | Duration: 4-5 hours round trip | Elevation Gain/Loss: +690m / -690m
The second and final rest day of the 12-day itinerary. This acclimatization day is even more critical than the one at Namche because you are now above 4,400m, where the effects of altitude become dramatically more pronounced.
The Nagarjun Hill hike climbs the ridge above Dingboche to approximately 5,100m, giving you a preview of what 5,000m+ altitude feels like. The panoramic views include Makalu (8,485m), Island Peak (6,189m), Ama Dablam, and the full Lhotse wall. This is a strenuous acclimatization hike, and you should turn back if you develop any concerning symptoms.
Why this rest day matters even more on the 12-day route: Because you combined Tengboche to Dingboche in a single day (Day 5), your body has had less gradual adjustment than the 14-day schedule provides. This rest day partially compensates for that compressed ascent.
Pro Tip
Consider starting Diamox (Acetazolamide, 125mg twice daily) from Day 4 or 5 onward as a prophylactic measure on the 12-day itinerary. Diamox does not mask altitude sickness symptoms; it accelerates acclimatization by increasing your breathing rate and urine output. Consult your doctor before the trek and do a test dose at home to check for side effects (tingling fingers, increased urination, carbonated drinks tasting flat). See our detailed Diamox guide.
Altitude monitoring: At Dingboche, you should actively assess your condition. Use this checklist:
- Headache that responds to ibuprofen: Normal, continue
- Persistent headache despite medication: Caution, consider extra rest day
- Nausea, vomiting, or severe fatigue: Do not ascend, may need to descend
- Confusion, ataxia (loss of coordination), or breathlessness at rest: Descend immediately
Day 7: Dingboche to Lobuche (4,940m)
Distance: 8km | Duration: 4-5 hours | Elevation Change: +530m
The trail climbs steadily from Dingboche, passing through the small settlement of Dughla (4,620m) before reaching the Dughla Pass memorial area, a sobering collection of stone cairns honoring climbers and Sherpas who died on Everest and surrounding peaks.
The climb above Dughla to the memorial area and then to Lobuche is relentless. You are now well above 4,500m, and every step feels heavier. The air contains roughly 55% of the oxygen available at sea level. Take rest stops every 30-45 minutes and keep your pace deliberately slow.
Lobuche is a small, windswept settlement consisting almost entirely of tea houses. It is exposed and cold, with temperatures dropping well below freezing at night. Sleep quality typically deteriorates at this altitude due to periodic breathing (Cheyne-Stokes respiration), which is a normal altitude response.
Tea houses: Limited choice. Eco Lodge and Mountain Lodge are the main options. Expect basic rooms ($8-12), shared facilities, and limited charging (usually $2-5 per device).
Day 8: Lobuche to Gorak Shep (5,164m), Trek to EBC (5,364m)
Distance: 12km total | Duration: 7-9 hours total | Elevation Change: +224m to Gorak Shep, +200m to EBC
The Longest and Most Demanding Day
This is the crux day of the 12-day itinerary. On the 14-day route, the Gorak Shep arrival and EBC visit are split across two separate days. Here, you combine them into one marathon effort at extreme altitude. You need excellent weather, strong energy, and disciplined pacing to pull this off.
Morning: Lobuche to Gorak Shep (3-4 hours)
Start early (6:00 AM) to maximize your afternoon window. The trail crosses the lateral moraine of the Khumbu Glacier, undulating over rocky terrain with occasional views of Pumori and Nuptse. The final approach to Gorak Shep crosses a flat, sandy lake bed at 5,164m.
Drop your main pack at the tea house, eat a substantial lunch (you will need the calories), and prepare for the afternoon push.
Afternoon: Gorak Shep to EBC and back (4-5 hours)
The trail to Everest Base Camp follows the Khumbu Glacier moraine, weaving through rocky terrain for approximately 5km. The path is not particularly steep but the altitude makes every step an effort. At 5,364m, the oxygen level is roughly half that at sea level.
At Everest Base Camp: During climbing season (April-May), you will see the colorful tents of expedition teams spread across the glacier. Outside climbing season, the site is relatively barren but still awe-inspiring with the Khumbu Icefall visible above. The iconic "Everest Base Camp" sign provides the mandatory photo opportunity.
Return to Gorak Shep before dark (aim to leave EBC by 3:00 PM at the latest). The trail is less obvious in fading light, and temperatures plummet after sunset.
Tea houses at Gorak Shep: The most basic accommodation on the route. Buddha Lodge and Snowland are the main options. Rooms are tiny, cold, and expensive ($15-20). Food is expensive and limited. Water freezes in bottles overnight.
Day 9: Early Morning Kala Patthar (5,545m), Descend to Pheriche (4,371m)
Distance: 17km | Duration: 8-10 hours total | Elevation Change: +479m (Kala Patthar), then -1,272m to Pheriche
Pre-dawn: Kala Patthar (2-3 hours up, 1.5 hours down)
Wake at 4:00 AM and begin the steep climb to Kala Patthar in darkness, using your headlamp. The trail gains 479m over approximately 2km. It is brutally steep and at the highest altitude of the entire trek. At 5,545m, you will be breathing very hard and moving very slowly.
The reward: Kala Patthar offers the best panoramic view of Everest available without mountaineering equipment. At sunrise, you see Everest's full south face illuminated in golden light, with Nuptse, Lhotse, Changtse, and dozens of other peaks creating a 360-degree Himalayan amphitheater. This is the moment that makes the entire trek worthwhile.
Morning: Descend to Gorak Shep and continue to Lobuche, then Pheriche
After returning to Gorak Shep (8:00-9:00 AM), pack up and begin the long descent. You will retrace your steps through Lobuche and continue down past Dughla to Pheriche (4,371m). This is a descent of nearly 800m from Gorak Shep, covering approximately 14km.
The rapid descent provides enormous altitude relief. Most trekkers report feeling dramatically better as they drop below 4,500m.
Tea houses in Pheriche: Himalayan Rescue Association has a medical clinic here (worth stopping if you have any concerns). Mountain Resort and Himalayan Lodge are good options.
Day 10: Pheriche to Namche Bazaar (3,440m) - Long Descent Day
Distance: 20km | Duration: 7-9 hours | Elevation Change: -930m
The Marathon Descent
This is the longest single day by distance in the 12-day itinerary. You will cover approximately 20km, descending nearly 1,000m through Pangboche, past Tengboche Monastery, down to Phunki Tenga, and up the final hill to Namche. It is a long day, but the decreasing altitude makes breathing progressively easier.
The descent retraces your ascent route in reverse, which has the advantage of familiarity. The trail is well-maintained and mostly downhill, though the final section into Namche includes an annoying uphill climb from the river crossing.
Knee management: Long descents are harder on joints than ascents. Use trekking poles aggressively, keep your steps short, and take breaks every 90 minutes. Consider wearing a knee brace if you have any joint concerns.
Arriving in Namche feels like returning to civilization after the barren highlands. Hot showers, bakeries, and Wi-Fi await.
Day 11: Namche Bazaar to Lukla (2,860m)
Distance: 19km | Duration: 6-8 hours | Elevation Change: -580m (with intermediate climbs)
Another long day, retracing the Day 2 route in reverse. The steep descent from Namche to the Dudh Kosi river is hard on the knees, followed by relatively flat terrain along the river valley to Lukla.
Celebration in Lukla: Most trekking groups have a celebration dinner at one of Lukla's restaurants on this final trail night. The sense of accomplishment is immense. Toast your success, but get to bed early because morning flights leave at dawn.
Day 12: Fly Lukla to Kathmandu
Flight Duration: 35 minutes | Departure: Early morning (6:00-9:00 AM typically)
The return flight to Kathmandu provides spectacular mountain views (sit on the left side of the aircraft). Upon arrival, your trekking permit will be checked, and you will return to the chaos and color of Kathmandu.
Lukla Flight Buffer: Critical for 12-Day Trekkers
The 12-day itinerary has zero built-in buffer for Lukla flight cancellations. Weather delays strand trekkers in Lukla for 1-3 days roughly 30-40% of the time during peak season. You must add 1-2 buffer days in Kathmandu between your Lukla return flight and your international departure flight. Failure to plan for this is the single most common mistake on shortened EBC itineraries. Alternative options if grounded: helicopter transfer ($400-600) or trekking to Salleri/Phaplu for a more reliable road connection.
Altitude Profile: 12-Day vs 14-Day Comparison
Understanding the altitude profiles side by side reveals exactly where the 12-day route pushes harder.
12-Day Altitude Profile
| Day | Start | End | Altitude Gain | Risk Level |
|---|---|---|---|---|
| 1 | Lukla 2,840m | Phakding 2,610m | -230m | Low |
| 2 | Phakding 2,610m | Namche 3,440m | +830m | Moderate |
| 3 | REST Namche | Hike to 3,880m | Acclimatization | Low |
| 4 | Namche 3,440m | Tengboche 3,860m | +420m | Low |
| 5 | Tengboche 3,860m | Dingboche 4,410m | +550m | High |
| 6 | REST Dingboche | Hike to 5,100m | Acclimatization | Moderate |
| 7 | Dingboche 4,410m | Lobuche 4,940m | +530m | High |
| 8 | Lobuche 4,940m | Gorak Shep 5,164m + EBC 5,364m | +424m | Very High |
| 9 | Gorak Shep 5,164m | Kala Patthar 5,545m, then Pheriche 4,371m | +479m then -1,272m | Very High |
| 10 | Pheriche 4,371m | Namche 3,440m | -931m | Low |
| 11 | Namche 3,440m | Lukla 2,860m | -580m | Low |
| 12 | Lukla flight | Kathmandu | N/A | Low |
Critical days: Days 5, 7, 8, and 9 are the highest-risk days. Day 5 involves the largest altitude gain during the ascent phase, Day 8 is the longest high-altitude day, and Day 9 reaches the trek's maximum elevation.
Where the 14-Day Route Is Gentler
The 14-day version splits Day 5 into two days (Tengboche to Pangboche/Pheriche, then to Dingboche), and separates Day 8 into two parts (arrive Gorak Shep one day, EBC the next). This means the body has an extra 24 hours of adjustment at two critical altitude thresholds.
Acclimatization Risks and Mitigation Strategies
The 12-day itinerary has a measurably higher incidence of Acute Mountain Sickness (AMS) compared to the 14-day version. Here is how to mitigate that risk.
Understanding the Risk
- Mild AMS (headache, fatigue, mild nausea): Expected in 35-45% of 12-day trekkers vs 20-30% on 14-day
- Moderate AMS (persistent headache, vomiting, significant fatigue): 10-15% vs 5-8%
- Severe AMS/HACE/HAPE (life-threatening): Rare (below 2%) but slightly higher risk than 14-day
Diamox Prophylaxis: Recommended for 12-Day Trekkers
For the 12-day itinerary specifically, prophylactic use of Diamox (Acetazolamide) is recommended by most trek medical advisors. The standard prophylactic dose is 125mg twice daily, starting 24 hours before reaching 3,000m (essentially from Day 1 or 2).
What Diamox does:
- Increases respiratory drive, improving oxygen intake
- Promotes bicarbonate excretion through urine, accelerating acclimatization
- Does NOT mask symptoms of serious altitude illness
Side effects: Tingling in fingers and toes, increased urination, flat taste of carbonated beverages. These are expected and not harmful. Always do a test dose at home before the trek.
For complete information, see our Diamox and altitude sickness guide.
Additional Mitigation Strategies
- Hydration: Drink 4-5 liters per day above 3,500m. Clear urine is the goal.
- Pacing: Walk slower than you think necessary. If you can hold a conversation, your pace is about right.
- Nutrition: Eat carbohydrate-rich foods even when appetite diminishes at altitude. Your body burns 3,000-5,000 calories daily on the trek.
- Sleep position: Sleep with your head slightly elevated using extra pillows or your daypack.
- Avoid alcohol and sleeping pills: Both suppress breathing and worsen altitude effects.
- Daily assessment: Monitor yourself honestly each morning using the Lake Louise AMS scoring system.
Bail-Out Points: Know Your Exit Strategy
If altitude sickness strikes, the 12-day route has several built-in bail-out options.
| Location | Altitude | Options |
|---|---|---|
| Namche Bazaar (3,440m) | After Day 2-3 | Descend to Lukla (1 day), helicopter evacuation available |
| Dingboche (4,410m) | After Day 5-6 | Descend to Namche (1 day), continue descent or rest |
| Pheriche (4,371m) | After Day 7 | HRA clinic on-site, helicopter evacuation available |
| Gorak Shep (5,164m) | Day 8-9 | Descend to Pheriche (3-4 hours), helicopter evacuation available |
Pro Tip
The Himalayan Rescue Association (HRA) clinic in Pheriche offers daily altitude sickness talks at 3:00 PM during peak season. On the 12-day route, you pass through Pheriche on Day 10 during descent. If you are concerned about altitude before ascending higher, consider scheduling an extra rest day in Dingboche and walking to Pheriche for a medical assessment.
What You Sacrifice vs the 14-Day Route
Let us be direct about what the shorter schedule costs you beyond just days.
Physical Experience
- More exhausting days. Days 5, 8, 9, and 10 are long and draining. On the 14-day route, these are split into more manageable segments.
- Less recovery time. There is no buffer for a bad night's sleep, mild illness, or a particularly cold day.
- Knee stress. The combined descent days (9 and 10) are brutal on joints.
Cultural Experience
- Rushed village visits. You spend less time in Sherpa communities, missing interactions that many trekkers rate as highlights.
- Skipped Tengboche morning. On the 14-day route, spending a morning at Tengboche Monastery is a highlight. On the 12-day, you push through quickly.
- Less time in Namche. Only one full day instead of the leisurely exploration the 14-day allows.
Safety Margin
- No weather buffer. If a storm blocks the trail for a day, you have no schedule flexibility.
- No illness buffer. A stomach bug or bad cold (both common on the trek) can derail your entire itinerary.
- Compressed acclimatization. Your body has less margin for error in its altitude adjustment.
What You Do NOT Sacrifice
- The destinations are identical. You still reach EBC (5,364m) and Kala Patthar (5,545m).
- The views are the same. Every mountain panorama on the 14-day route is visible on the 12-day.
- The permits and entry fees are identical. There is no cost saving on permits.
Lukla Flight Buffer Days: Non-Negotiable Planning
This deserves its own section because it is the single most frequently ignored piece of advice for 12-day trekkers.
The statistics are clear: Lukla flights are cancelled or delayed on 30-40% of mornings during peak trekking season (October-November, March-April). Cloud, wind, and poor visibility at Lukla's mountain-perched runway are the primary causes.
What Happens When Flights Are Cancelled
- You stay in Lukla until the next available flight
- During peak season, a backlog of hundreds of trekkers builds quickly
- Priority goes to those who have waited longest, but airline reliability varies
- 1-day delays are common, 2-3 day delays happen regularly, 4+ day delays are rare but occur
Your Buffer Options
- Add 2 buffer days in Kathmandu after the trek (strongly recommended). Book your international flight for Day 14 at the earliest, even though the trek is "12 days."
- Budget for helicopter evacuation from Lukla ($400-600 per person). This is the fastest way out when fixed-wing flights are cancelled. Charter helicopters can often fly in conditions that cancel fixed-wing.
- Know the overland option. If truly stranded, you can trek from Lukla to Salleri (2 days) and then take a jeep to Kathmandu (10-12 hours). This is a last resort but has saved many international connections.
For detailed information, see our Kathmandu to Lukla flights guide.
Cost Difference: 12-Day vs 14-Day
The 12-day trek is slightly cheaper overall, but the per-day cost is similar.
| Cost Category | 12-Day | 14-Day |
|---|---|---|
| Permits | $50 (same) | $50 (same) |
| Flights (KTM-Lukla return) | $350-400 (same) | $350-400 (same) |
| Accommodation (trail) | $60-120 | $80-160 |
| Food (trail) | $250-350 | $300-420 |
| Guide | $240-360 | $280-420 |
| Porter | $180-240 | $210-280 |
| Kathmandu hotels | $50-100 | $80-150 |
| Tips | $80-120 | $100-150 |
| Miscellaneous | $100-150 | $120-180 |
| Total (guided) | $1,800-2,800 | $2,000-3,200 |
| Savings | ~$200-400 | Standard |
The cost savings are modest. You save approximately 2 days of on-trail expenses (accommodation, food, guide/porter fees), which works out to $200-400. This is not a significant saving given the total trip cost.
For a detailed cost breakdown, see our EBC trek cost breakdown.
Training for the 12-Day Itinerary
Because the 12-day route demands more from your body with less recovery time, your pre-trek fitness should be above average.
Minimum Fitness Benchmarks
- Cardiovascular: Able to hike 15-20km with 1,000m elevation gain in a day without extreme fatigue
- Endurance: Can sustain 6-8 hours of moderate physical activity
- Leg strength: Comfortable with long downhill sections (critical for Days 9-11)
- Altitude experience: Previous comfortable time above 4,000m (strongly recommended)
Recommended Training Timeline (12 Weeks)
Weeks 1-4: Build base fitness. Hike 3-4 times per week, 60-90 minutes. Include stair climbing or incline treadmill work.
Weeks 5-8: Increase intensity. Weekend hikes of 15-20km with loaded pack (8-10kg). Include consecutive hiking days to simulate back-to-back trekking.
Weeks 9-12: Peak training. Back-to-back 6-8 hour hikes on weekends. Include elevation gain (1,000m+ per hike). Practice with your actual trekking gear and boots.
Combining EBC with Other Treks
If you have completed the 12-day EBC trek and want more, here are logical extensions:
- Gokyo Lakes: Add 4-5 days for a side trip to the stunning turquoise lakes and Gokyo Ri viewpoint
- Cho La Pass: A technical high pass connecting EBC to Gokyo (adds 2-3 days)
- Island Peak: A trekking peak (6,189m) accessible from Chukhung near EBC (adds 3-4 days)
- Three Passes Trek: The ultimate Khumbu circuit covering all three high passes (18-20 days total)
Frequently Asked Questions
Is the 12-day EBC trek safe?
Yes, for the right person. If you meet the fitness and experience criteria outlined above, use Diamox prophylactically, follow proper acclimatization protocols, and are willing to bail out if symptoms develop, the 12-day itinerary has a strong safety record. The key is honest self-assessment and willingness to prioritize health over schedule.
Can I do EBC in fewer than 12 days?
Some extremely fit, altitude-adapted trekkers complete EBC in 8-10 days, and trail runners have done it in 3-4 days. These are exceptional cases. For the vast majority of trekkers, 12 days is the reasonable minimum. Going shorter than 12 days without prior Himalayan experience is medically inadvisable and significantly increases your risk of serious altitude illness.
Do I still need two acclimatization days on the 12-day route?
Absolutely. Both the Namche rest day and the Dingboche rest day are retained in the 12-day itinerary. These are the minimum safe acclimatization stops. Cutting either one would push AMS risk to unacceptable levels.
Should I take Diamox on the 12-day trek?
It is recommended for most 12-day trekkers, particularly those without extensive altitude experience. Consult your doctor before the trek, do a test dose at home, and begin taking it from Day 1 or 2. The standard prophylactic dose is 125mg twice daily. See our Diamox guide for details.
How does weather affect the 12-day schedule?
Weather is the 12-day itinerary's biggest vulnerability. The standard 14-day route has 1-2 built-in buffer days; the 12-day has none. A single day of trail closure due to snow above Lobuche can force you to miss EBC or Kala Patthar entirely. This is why the 12-day route works best during stable weather windows in October, early November, late March, and April.
Can I extend to 14 days if I feel unwell?
In theory, yes. In practice, it depends on lodge availability (during peak season, many lodges are fully booked) and your guide/porter arrangements if applicable. It is always easier to descend faster than planned than to extend. If you think you might need extra days, book the 14-day itinerary from the start.
Is the 12-day itinerary cheaper?
Marginally. You save approximately $200-400 compared to the 14-day version, mostly on 2 fewer nights of accommodation and food. Permits, flights, and guide/porter daily rates remain the same per day. The cost savings are not a compelling reason to choose 12 days over 14.
What happens if my Lukla flight is cancelled on Day 12?
You wait in Lukla until the next available flight. This is why adding 1-2 buffer days in Kathmandu before your international departure is essential. If urgently needed, charter helicopters ($400-600) can often fly when fixed-wing flights cannot. As a last resort, you can trek to Salleri (2 days) and take road transport back.
Do I need a guide for the 12-day EBC trek?
A guide is not legally required for the standard EBC route but is strongly recommended for the 12-day version. The compressed schedule means less margin for navigation errors, and a guide who knows the altitude warning signs is particularly valuable when you are pushing the acclimatization envelope.
Can beginners do the 12-day EBC trek?
We do not recommend it. If this is your first high-altitude trek, the 14-day or 16-day itinerary gives your body the time it needs to reveal how it responds to altitude. The 12-day version assumes you already know your body's altitude response, which is impossible without prior experience above 4,000m.
When is the best time for the 12-day EBC trek?
October to mid-November offers the most stable weather with the least likelihood of trail-disrupting storms. Late March to April is the second-best window. Avoid December-February (extreme cold) and June-August (monsoon). The 12-day itinerary is even more weather-dependent than the 14-day, so timing matters more.
How do I manage the combined Gorak Shep + EBC day?
Start early from Lobuche (6:00 AM or earlier), arrive at Gorak Shep by 9:00-10:00 AM, have a substantial lunch, rest for 30-60 minutes, then depart for EBC no later than 11:00 AM. Aim to be at EBC by 1:00-2:00 PM and begin the return by 2:30-3:00 PM to reach Gorak Shep before dark. Carry snacks, 2+ liters of water, and your headlamp as backup.
Final Verdict: Should You Do the 12-Day EBC Trek?
The 12-day Everest Base Camp itinerary is a legitimate route option for the right trekker. It reaches the same destinations, offers the same mountain views, and creates the same life-changing memories as the standard 14-day version. What it demands in return is better fitness, altitude experience, disciplined pacing, and acceptance of increased risk.
Choose the 12-day if: You have altitude experience, strong fitness, limited time, and are comfortable with the trade-offs.
Choose the 14-day if: You have any doubt about your altitude tolerance, want maximum safety margin, or prefer a more relaxed pace.
Choose the 16-day if: You are new to high altitude, over 55, altitude-sensitive, or simply want to savor every moment of this once-in-a-lifetime experience.
Whatever you choose, the Everest Base Camp trek remains one of the most iconic adventures on Earth. The mountain will be there regardless of whether you take 12 days or 16 to reach it.
Planning your EBC trek? Explore our complete Everest Base Camp route guide for trail details, or compare top EBC trekking agencies to find the right operator for your schedule.