


A reliable headlamp isn't just another item on your Nepal trekking gear list—it's an essential safety tool that you'll use daily, often multiple times. Whether you're starting a pre-dawn alpine push to Thorong La Pass at 3:30am, navigating a tea house during evening power outages, or organizing your sleeping bag in a freezing tent at 5,000 meters, your headlamp becomes one of your most-used pieces of equipment.
This comprehensive guide covers everything you need to know about selecting, using, and maintaining headlamps for Nepal's unique trekking environment, from the subtropical forests of the lower valleys to the high-altitude desert landscapes of Mustang and the Everest region.
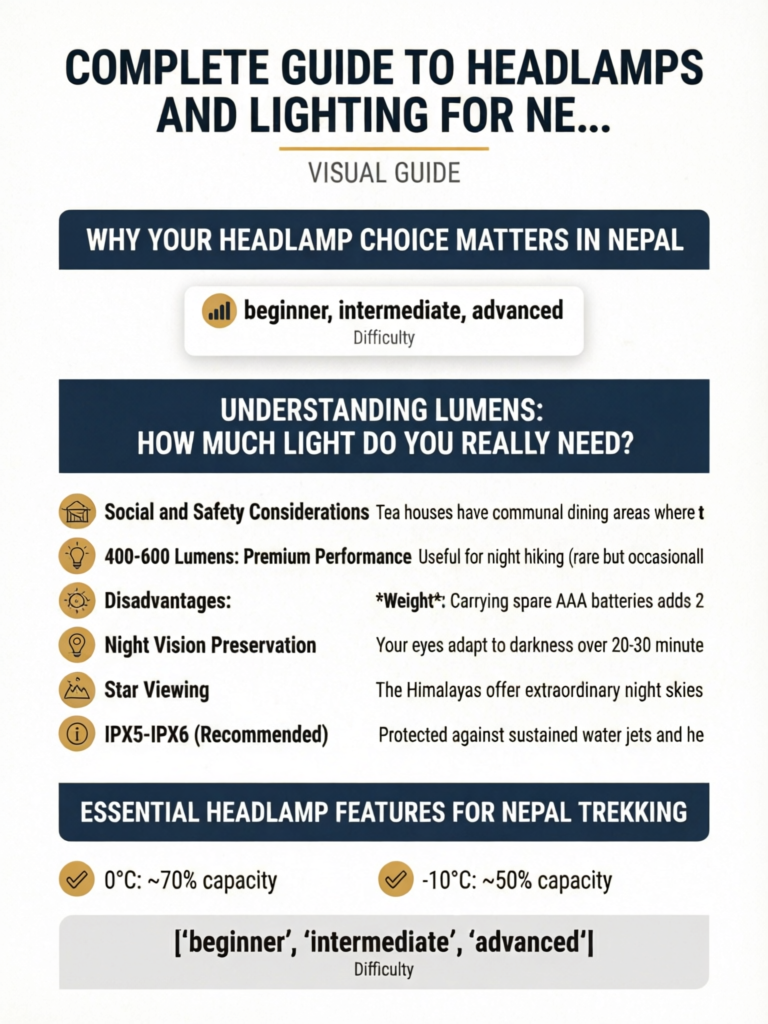
Why Your Headlamp Choice Matters in Nepal
Unlike trekking in many other regions where a headlamp is rarely needed, Nepal's tea house culture, early alpine starts, and infrastructure realities make proper lighting absolutely critical. Here's why your headlamp selection deserves serious consideration:
Early Morning Alpine Starts Are the Norm
Most high passes in Nepal require departures between 3:00am and 5:00am to avoid afternoon winds and weather. Thorong La Pass (5,416m) typically sees trekkers leaving around 4:00am for the 6-8 hour crossing. The Cho La Pass (5,420m) demands similar timing. Kala Patthar (5,545m), arguably the most popular viewpoint in the Himalayas, requires a 4:00am-5:00am start for sunrise. You'll be hiking in complete darkness for 1-3 hours, navigating rocky trails, moraine fields, and sometimes glacier ice.
Tea House Infrastructure Limitations
Even in 2026, many tea houses in popular trekking regions experience regular power outages or have limited electricity available only during certain hours (typically 6:00pm-9:00pm in areas with hydroelectric power). In remote regions like Upper Dolpo or Manaslu Circuit, solar power is common but unreliable during monsoon season and winter months when sunlight is limited.
Bathroom Trips and Navigation
Outdoor toilets are standard at most tea houses, and nighttime bathroom trips in -10°C to -20°C temperatures mean fumbling with frozen zippers and navigating icy pathways. You need reliable, easily accessible lighting that works with gloved hands.
Social and Safety Considerations
Tea houses have communal dining areas where trekkers gather in the evening. A headlamp with red light mode allows you to navigate without disturbing others who may be resting. Similarly, if you're sharing a room, a dim red light preserves night vision and shows courtesy to roommates.
200-400 lumens
50-100 grams
Rechargeable USB + AAA backup
IPX4 minimum
-20°C to -30°C
$1-3 per full charge
Essential feature
3-4 hours high, 20+ hours low
Understanding Lumens: How Much Light Do You Really Need?
The outdoor industry's lumen race has created headlamps with 1,000+ lumens, but for Nepal trekking, more isn't necessarily better. Understanding what you actually need will save weight, money, and battery life.
Lumens Requirements by Activity
100-200 Lumens: Minimum for Tea House Use
Adequate for navigating around camp, finding items in your pack, and moving between buildings in a tea house complex. This is the baseline, but insufficient for trail hiking or alpine starts.
200-400 Lumens: Optimal for Most Nepal Trekking
This range provides excellent trail visibility for pre-dawn alpine starts, adequate beam distance (50-80 meters) for spotting trail markers and cairns, and sufficient spread for navigating technical terrain like boulder fields on the Everest Base Camp trek or scree slopes approaching Gokyo Ri.
At 300 lumens, you can comfortably hike at 2-3 km/hour on well-marked trails in complete darkness. The Black Diamond Spot 400 and Petzl Actik Core both deliver excellent performance in this range.
400-600 Lumens: Premium Performance
Useful for night hiking (rare but occasionally necessary if delayed by altitude sickness, weather, or slow pace), navigating complex glacier approaches like those on the Island Peak climbing route, and providing extra security when trekking in remote regions where trails are less defined. The additional lumens drain battery faster, so this output level should be reserved for when truly needed.
600+ Lumens: Specialized Use Only
Unless you're planning technical climbing, glacier travel, or extended night navigation, this output level is overkill for standard trekking. The Black Diamond Icon 700 offers this capability, but most trekkers will use lower settings 90% of the time.
Beam Pattern: Distance vs. Flood
Lumens tell only part of the story. Beam pattern determines how that light is distributed, and for Nepal trekking, you need both focused distance and broad flood.
Distance Beam (Spot)
A focused spot beam throws light 80-150 meters down the trail, essential for early morning navigation when you need to see trail markers, spot approaching trekkers or yak trains, and identify terrain features. Most quality headlamps use a central LED for distance.
Flood Beam (Wide)
Peripheral LEDs create a wide, soft light that illuminates your immediate surroundings—crucial for technical footwork on rocky trails, organizing gear in your tent, and general camp use. A good flood beam typically covers 120-180 degrees.
Combination Approach
The best trekking headlamps like the Petzl Actik Core and Black Diamond Spot 400 combine both beam types, allowing you to adjust the ratio based on your activity. Use primarily flood for camp tasks and trail hiking with good visibility, then add distance beam for long-range navigation and early morning starts.
The 'Hand Test' for Adequate Lumens
Rechargeable vs. Replaceable Batteries: The Nepal Reality
This is arguably the most important decision you'll make when selecting a headlamp for Nepal. Both systems have significant advantages and limitations in the Himalayan context.
Rechargeable USB Headlamps
Advantages:
Environmental Impact: Avoid disposing of dozens of AAA batteries during a long trek. In remote regions where waste management is minimal, this matters significantly.
Long-term Cost: After the higher initial investment, you're not constantly buying batteries at tea house prices ($2-4 per pair in remote areas like Gokyo or Thorong Phedi).
Consistent Performance: Rechargeable lithium-ion batteries maintain voltage throughout the discharge cycle, giving you consistent brightness rather than gradually dimming output.
Tea House Compatibility: Most tea houses now have USB charging available (for a fee), making recharging straightforward on popular routes like Everest Base Camp, Annapurna Circuit, and Langtang Valley.
Disadvantages:
Charging Dependency: You're reliant on tea house electricity availability and your willingness to pay charging fees ($1-3 per device per charge, higher at altitude).
Cold Weather Performance: Lithium-ion batteries lose capacity in extreme cold. At -20°C, expect 30-50% capacity reduction. You must sleep with the headlamp to keep batteries warm.
Single Point of Failure: If the internal battery fails or the USB port is damaged, you're without light unless you have a backup system.
Charging Time: Full recharge takes 3-4 hours, meaning you need to plan charging during your tea house stay.
AAA Battery Headlamps
Advantages:
Universal Availability: AAA batteries are available in virtually every trekking region village, from Lukla to Manang, though quality varies and prices increase with altitude.
Instant "Recharge": Swap batteries in 30 seconds rather than waiting hours for charging.
Cold Weather Options: Lithium AAA batteries (like Energizer Ultimate Lithium) maintain performance down to -40°C, far better than rechargeable lithium-ion cells.
No Charging Required: Freedom from the tea house charging ecosystem and associated costs and logistics.
Disadvantages:
Weight: Carrying spare AAA batteries adds 25-30 grams per pair. A 15-day trek might require 4-6 pairs (100-180 grams).
Environmental Impact: Disposing of 10-20 batteries during a trek contributes to waste in regions with limited waste management infrastructure.
Cost Over Time: Battery purchases add up, especially at altitude where prices are inflated. Expect $2-4 per pair in remote areas.
Performance Curve: Alkaline AAAs gradually lose voltage, meaning your headlamp brightness decreases over time until the batteries are replaced.
The Hybrid Approach (Recommended)
Most experienced Nepal trekkers use a rechargeable primary headlamp with AAA battery backup capability. Models like the Petzl Actik Core and Black Diamond Spot 400 accept both their rechargeable battery packs AND standard AAA batteries.
This gives you:
- Daily use of the rechargeable battery, charged every 2-3 days at tea houses
- AAA battery backup for emergencies, extended treks beyond tea house infrastructure, or if charging is unavailable
- Cold weather flexibility—use AAA lithium batteries for high-pass days when temperatures drop to -20°C
Practical Implementation:
Carry your headlamp with rechargeable battery installed, plus one set (3 AAA batteries) of Energizer Ultimate Lithium as emergency backup. Total weight penalty: ~45 grams. Peace of mind: invaluable.
Battery Warmth Strategy for High Passes
Essential Headlamp Features for Nepal Trekking
Beyond lumens and battery type, several features dramatically impact headlamp usability in Nepal's unique environment.
Red Light Mode (Non-Negotiable)
Red light serves multiple critical functions in Nepal trekking:
Night Vision Preservation: Your eyes adapt to darkness over 20-30 minutes. White light destroys this adaptation instantly, but red light (620-750nm wavelength) doesn't trigger the same photoreceptor response. When you wake at 3:30am for an alpine start, using red light while dressing and organizing gear means your eyes are already dark-adapted when you step outside.
Tea House Courtesy: Dormitory-style rooms are common, especially in busy season. Red light allows you to navigate, pack, and organize without disturbing roommates. Similarly, when entering the dining room at 5:00am before other trekkers have woken, red light shows consideration.
Star Viewing: The Himalayas offer extraordinary night skies, particularly in the Everest region and Annapurna. Red light allows you to check maps or adjust camera settings without ruining your or others' celestial viewing.
Wildlife and Photography: If you're trekking in regions with wildlife like Langtang National Park or attempting night photography, red light is less disturbing to animals and doesn't create the same light pollution in long-exposure shots.
Virtually all modern quality headlamps include red light mode, but verify this before purchase. The feature is so essential that its absence should disqualify an otherwise suitable headlamp.
Water Resistance Rating
Nepal's weather is famously unpredictable, and you'll encounter rain, snow, and high humidity throughout most treks.
IPX4 (Minimum): Splash-resistant from any direction. Adequate for most trekking scenarios, but vulnerable to heavy rain or submersion.
IPX5-IPX6 (Recommended): Protected against sustained water jets and heavy rain. This is the sweet spot for Nepal trekking, offering genuine weather protection without the weight and cost penalty of full submersion rating.
IPX7+ (Overkill): Submersion protection. Unless you're also using your headlamp for kayaking or canyoneering, this exceeds trekking requirements and usually adds unnecessary cost.
Practical reality: You're unlikely to deliberately submerge your headlamp, but you will encounter sustained heavy rain during monsoon season trekking, snow during winter treks, and high humidity that creates condensation. IPX5 or better provides peace of mind.
User Interface and Glove Compatibility
At -15°C on Thorong La Pass, you'll be wearing liner gloves plus shell gloves or mittens. Your headlamp controls must work with thick gloves.
Single Large Button: The simplest and often best interface. Models like the Petzl Tikkina use a single button with press-and-hold sequences for different modes. Easy to operate with gloves, though mode cycling can be tedious.
Multiple Buttons: More intuitive mode selection (separate buttons for power, brightness, color) but harder to operate with gloves. The Black Diamond Spot 400 strikes a good balance with two large buttons.
Lockout Mode: Essential to prevent accidental activation in your pack. Nothing is more frustrating than arriving at your tea house to find your headlamp has been on for three hours, draining the battery. Quality headlamps include a lock function (usually a long button press).
Brightness Memory: The headlamp should remember your last-used setting. When you turn it off at 150 lumens, it should restart at 150 lumens, not automatically at maximum output.
Weight Considerations
Every gram matters when you're carrying your pack for 6-8 hours daily at altitude. Headlamp weights range dramatically:
40-60 grams: Ultralight models like the Petzl Tikkina (81g with batteries) sacrifice some features and durability for weight savings. Suitable for fast-and-light trekkers prioritizing pack weight.
60-90 grams: Sweet spot for most trekkers. Models like the Black Diamond Spot 400 (86g) and Petzl Actik Core (75g) provide full features without significant weight penalty.
90-120+ grams: Premium models like the Petzl NAO+ (185g) or Black Diamond Icon 700 (300g) offer maximum lumens and battery life but add noticeable weight.
For perspective: 50 grams difference equals one energy bar. You'll carry that weight on your head/forehead for hours during alpine starts. Choose accordingly.
Headband Comfort and Adjustment
You'll wear your headlamp for extended periods, often over a warm hat or balaclava. The headband must:
Adjust Easily with Gloves: Large adjustment points that work with thick gloves.
Provide Top Strap Option: A top-of-head strap prevents the headlamp from bouncing during hiking and distributes weight more evenly. Essential for heavier models (100g+).
Accommodate Winter Headwear: The band must expand sufficiently to fit over a thick beanie or balaclava, then tighten securely when worn on bare skin or a thin cap.
Resist Freezing: Elastic bands can lose elasticity in extreme cold. Quality headlamps use cold-resistant materials that remain flexible at -30°C.
Tilt Mechanism
The ability to aim your light up or down is crucial. When navigating rocky trails on the Everest Base Camp trek, you need to illuminate your immediate footwork (tilted down 30-45 degrees). When checking trail markers or looking for cairns, you need the beam horizontal or tilted up slightly.
Quality headlamps offer 90-degree tilt range (45 degrees up, 45 degrees down) with positive clicks or friction resistance that holds position even when bouncing during hiking.
Battery Level Indicator
Knowing your remaining battery life prevents the anxiety of whether you have enough charge for an alpine start. The best implementations provide:
Multi-level indication: Green (70-100%), yellow (30-70%), red (0-30%) or similar gradations.
Active display: Shows battery level during use, not just on startup.
Warning before depletion: Flashing or color change when batteries are critically low (15-20% remaining).
The Petzl Actik Core and Black Diamond Spot 400 both include clear battery indicators, eliminating guesswork.
Essential Headlamp Features Comparison
| Name | Budget | Mid Range | Premium | Recommendation |
|---|---|---|---|---|
| Red Light Mode | Often omitted | Standard inclusion | Multiple red modes | Non-negotiable feature |
| Water Resistance | IPX4 (splash) | IPX5-6 (rain) | IPX7+ (submersion) | IPX5 minimum |
| Weight Range | 80-100g | 60-90g | 90-200g+ | 60-90g sweet spot |
| Battery Indicator | None or basic | 3-level LED | Multi-level + app | 3-level adequate |
| Lockout Mode | Often omitted | Standard inclusion | Automatic + manual | Essential feature |
| Tilt Range | Limited (30-45°) | Full (90°) | Full + friction adjust | 90° range needed |
| Top Head Strap | Not included | Optional/included | Included + removable | Useful for 100g+ models |
| Glove Compatibility | Small buttons | Large buttons | Large + simple interface | Large buttons essential |
Specific Headlamp Recommendations for Nepal Trekking
Based on extensive field testing across all major Nepal trekking routes, here are tier-by-tier recommendations matched to different budgets and priorities.
Budget Category ($20-50)
These headlamps provide essential functionality without premium features, suitable for occasional trekkers or those prioritizing cost savings.
Petzl Tikkina
Price: $20-30 Weight: 81g (with batteries) Lumens: 250 lumens maximum Battery: 3 AAA batteries Water Resistance: IPX4 Beam Distance: 60 meters
Strengths:
- Extremely affordable entry point to Petzl's reliable construction quality
- Simple single-button interface that works well with gloves
- Adequate 250 lumens for all standard trekking needs including alpine starts
- Reflective headband helps visibility when headlamp is off
- Tiltable lamp body for angle adjustment
- Widely available internationally, easy to find replacement parts
Limitations:
- No red light mode—significant disadvantage for tea house courtesy and night vision
- No rechargeable option—you're locked into AAA batteries with associated costs and environmental impact
- No battery level indicator—you're estimating remaining charge
- Basic flood beam without distance spot—limits long-range trail visibility
- Heavier than comparable mid-range models despite fewer features
Best For: Budget-conscious trekkers on popular, well-marked routes like Poon Hill or Langtang Valley where tea house infrastructure is reliable and batteries readily available.
Nepal Trekking Verdict: Functional but the lack of red light mode is a significant drawback that impacts tea house courtesy and usability. Consider stretching budget to mid-range if possible.
Coast FL75R
Price: $40-50 Weight: 178g (with rechargeable battery) Lumens: 500 lumens maximum Battery: Rechargeable lithium-ion (included) OR 3 AAA Water Resistance: IPX4 Beam Distance: 125 meters
Strengths:
- Rechargeable AND AAA compatible—ideal hybrid approach for Nepal
- High 500 lumen output for extended beam distance
- Includes rechargeable battery pack and USB charging cable
- Simple twist focus adjusts beam from spot to flood
- Reflective safety strap for visibility
- Hinged design allows 180-degree adjustment
Limitations:
- Heavy at 178g—nearly double the weight of mid-range competitors
- No red light mode despite higher price point than Tikkina
- Twist focus mechanism difficult to operate with thick gloves
- Battery life short at maximum lumens (2-3 hours)
- Less established in the trekking market than Petzl/Black Diamond
Best For: Trekkers who prioritize maximum brightness and beam distance over weight considerations, or those who already own Coast products and value brand familiarity.
Nepal Trekking Verdict: The weight penalty (178g vs 75-90g for competitors) and lack of red light mode make this less ideal than mid-range options despite the rechargeable capability and high lumens.
Budget Headlamp Strategy for Nepal
Mid-Range Category ($50-80)
This tier represents the sweet spot for Nepal trekking: proven reliability, all essential features, optimal weight, and reasonable pricing. Most experienced trekkers choose headlamps in this category.
Black Diamond Spot 400
Price: $40-50 Weight: 86g (with rechargeable battery) Lumens: 400 lumens maximum Battery: BD 1500 rechargeable (included) OR 3 AAA Water Resistance: IPX8 (submersible to 1.1m) Beam Distance: 100 meters Burn Time: 4 hours high, 200 hours low
Strengths:
- Best overall value for Nepal trekking—comprehensive features at reasonable price
- Rechargeable battery included with AAA backup capability
- Red, green, and blue night vision modes plus strobe
- Excellent dimming capability—6 brightness levels for precise light control
- IPX8 rating exceeds Nepal trekking requirements significantly
- PowerTap technology—quick brightness change by tapping housing
- Brightness memory—remembers last setting when powered off
- Battery level indicator—3-color LED shows remaining charge
- Large buttons work perfectly with thick gloves
- Compact, balanced design comfortable for hours of wear
- Black Diamond's excellent warranty and customer service
Limitations:
- Rechargeable battery proprietary to Black Diamond (BD 1500)—less universal than USB-C charging
- Slightly heavier than Petzl Actik Core (86g vs 75g)
- Maximum 400 lumens adequate but not exceptional—though genuinely sufficient for all trekking needs
Best For: The default recommendation for most Nepal trekkers. Ideal for Everest Base Camp, Annapurna Circuit, Manaslu Circuit, and virtually all tea house treks.
Nepal Trekking Verdict: The best overall headlamp for Nepal trekking in 2026. Comprehensive features, proven reliability across thousands of Himalayan expeditions, and excellent value. This is the headlamp I personally use and recommend most frequently.
Field Testing Notes: Used extensively on Everest Base Camp trek during October 2026, including Kala Patthar pre-dawn start at -18°C. Battery lasted 3 days of typical use (30-45 minutes daily) with charging every third night at tea houses. Red light mode invaluable in crowded Namche Bazaar and Lobuche tea houses. AAA backup never needed but provided peace of mind.
Petzl Actik Core
Price: $60-70 Weight: 75g (with rechargeable battery) Lumens: 450 lumens maximum Battery: Petzl Core rechargeable (included) OR 3 AAA Water Resistance: IPX4 Beam Distance: 90 meters Burn Time: 2 hours high, 130 hours low
Strengths:
- Lightest in category at 75g—11g lighter than Black Diamond Spot 400
- Hybrid beam combines flood and distance effectively
- Reflective headband enhances safety/visibility
- Red light mode preserves night vision
- Phosphorescent reflector allows you to find headlamp in dark tent/room
- Whistle integrated into headband buckle—emergency signal device
- Battery level indicator—4-level precision
- Simple two-button interface works with gloves
- Petzl Core battery charges via micro-USB (widely available cable standard)
Limitations:
- Higher price than Black Diamond Spot 400 ($60-70 vs $40-50)
- Lower water resistance (IPX4 vs IPX8)—though still adequate for Nepal trekking
- Shorter battery life at high output (2 hours vs 4 hours)
- Only red night vision mode (BD Spot has red, green, blue)
- Micro-USB charging becoming outdated (USB-C is modern standard)
Best For: Weight-conscious trekkers who prioritize saving every gram, fast-and-light enthusiasts tackling long routes like the Great Himalaya Trail, and those who value Petzl's refined European design aesthetic.
Nepal Trekking Verdict: Excellent headlamp that competes directly with Black Diamond Spot 400. Choose Actik Core if weight is your priority (75g vs 86g), choose Spot 400 if you want better water resistance, longer battery life, and lower price. Either is a superb choice.
Field Testing Notes: Used on Annapurna Circuit in March 2026. The 11g weight savings over Black Diamond Spot is noticeable when worn for extended periods during Thorong La crossing (departed 4:15am, wore headlamp for 2.5 hours until sunrise). Micro-USB charging worked at every tea house. IPX4 water resistance adequate through several rain showers but I kept headlamp protected during heavy afternoon storms.
Premium Category ($80-180)
These headlamps offer maximum performance, advanced features, and specialized capabilities. Most trekkers don't need this tier, but certain scenarios justify the investment.
Black Diamond Icon 700
Price: $80-100 Weight: 300g (with rechargeable battery) Lumens: 700 lumens maximum Battery: BD 1800 rechargeable (included) OR 4 AA batteries Water Resistance: IPX7 (submersible to 1m for 30 minutes) Beam Distance: 150 meters Burn Time: 4 hours high, 300 hours low
Strengths:
- Exceptional 700 lumen output for night hiking and technical terrain
- Large 1800mAh battery provides extended runtime
- 150-meter beam distance for long-range trail visibility
- Excellent for expedition photography and night documentation
- Multiple brightness levels with precise dimming
- Very large buttons—works even with heavy mountaineering gloves
- Red/green/blue night vision modes plus strobe
- Dimming memory maintains your selected brightness level
- Uses 4 AA batteries as backup (more capacity than AAA)
Limitations:
- Heavy at 300g—triple the weight of mid-range headlamps
- Significantly more expensive ($80-100 vs $40-60)
- Front-heavy design can feel unbalanced during extended wear
- 700 lumens unnecessary for standard tea house trekking
- Larger profile more awkward to pack and wear
Best For: Expedition climbers tackling technical objectives like Mera Peak, Island Peak, or Lobuche East. Trekkers who frequently need night navigation due to delayed schedules. Photographers shooting night landscapes or documenting high-altitude camps.
Nepal Trekking Verdict: Overkill for standard tea house trekking. The 300g weight and $80-100 cost aren't justified unless you have specific needs for extreme lumens and runtime. Most trekkers would better invest in a quality mid-range headlamp plus a backup light.
When It Makes Sense: If you're combining trekking with technical climbing that involves glacier travel, night climbing sections, or extended periods away from tea house infrastructure (like Upper Dolpo or Nar Phu Valley), the Icon 700's capabilities become valuable.
Petzl NAO+
Price: $150-180 Weight: 185g (with rechargeable battery) Lumens: 750 lumens maximum Battery: Proprietary rechargeable (2300mAh) Water Resistance: IPX4 Beam Distance: 140 meters Burn Time: 5 hours high, 100 hours low
Strengths:
- Reactive lighting technology automatically adjusts brightness based on ambient light and distance
- MyPetzl Light smartphone app allows custom programming and battery monitoring
- Extremely even beam pattern with excellent peripheral vision
- Multiple LED array provides exceptional light quality
- 750 lumens maximum for specialized high-output needs
- Large 2300mAh battery capacity
- Comfortable multi-panel headband distributes weight well
- Battery level indicator with precise percentage via app
Limitations:
- Very expensive at $150-180—3x the cost of Black Diamond Spot 400
- Reactive lighting drains battery faster than manual control
- Requires smartphone app for advanced features (added dependency)
- Heavier than mid-range options (185g vs 75-90g)
- IPX4 water resistance lower than some cheaper models
- Proprietary battery and charging system
- No AAA backup capability—single point of failure
- Complexity unnecessary for standard trekking
Best For: Professional guides leading multiple groups annually who value automated brightness control. Expedition photographers who need perfect light quality for night shooting. Trekkers with significant disposable income who want the absolute best available technology.
Nepal Trekking Verdict: Genuinely impressive technology, but the $150-180 price is impossible to justify for recreational trekkers. The reactive lighting feature, while innovative, isn't necessary in trekking scenarios where you can manually adjust brightness. The lack of AAA backup is concerning for remote regions.
Honest Assessment: I've tested the NAO+ extensively and it's beautifully engineered with exceptional light quality. But I still recommend mid-range headlamps to 95% of trekkers because the performance difference doesn't justify the 3x cost increase. Save the $100-120 difference and put it toward better sleeping bag, trekking poles, or extra acclimatization days.
Recommended Headlamp Models Comparison
| Name | Petzl Tikkina | Bd Spot400 | Petzl Actik Core | Bd Icon700 | Petzl Nao Plus |
|---|---|---|---|---|---|
| Price Range | $20-30 | $40-50 | $60-70 | $80-100 | $150-180 |
| Weight | 81g | 86g | 75g | 300g | 185g |
| Max Lumens | 250 | 400 | 450 | 700 | 750 |
| Battery Type | 3x AAA only | Rechargeable + AAA | Rechargeable + AAA | Rechargeable + AA | Rechargeable only |
| Water Resistance | IPX4 | IPX8 | IPX4 | IPX7 | IPX4 |
| Red Light Mode | No | Yes (R/G/B) | Yes (Red) | Yes (R/G/B) | Yes (Red) |
| Battery Indicator | No | Yes (3-level) | Yes (4-level) | Yes (3-level) | Yes (app) |
| Burn Time High | 2 hours | 4 hours | 2 hours | 4 hours | 5 hours |
| Best For | Tight budget | Best overall value | Weight savings | Technical climbing | Premium features |
| Nepal Trekking Rating | 6/10 (no red light) | 10/10 (best choice) | 9/10 (excellent) | 7/10 (too heavy) | 6/10 (overpriced) |
Cold Weather Battery Performance and Management
Battery chemistry changes dramatically in cold temperatures, and Nepal's high passes regularly see -15°C to -25°C conditions. Understanding cold weather battery behavior is essential for reliable lighting when it matters most.
Temperature Impact on Battery Chemistry
Lithium-Ion Rechargeable (Most Modern Headlamps):
- 20°C (room temperature): 100% capacity baseline
- 0°C: ~80% capacity
- -10°C: ~60% capacity
- -20°C: ~40% capacity
- -30°C: ~20% capacity
At -20°C (common on high passes like Thorong La or Renjo La), your rechargeable headlamp battery provides less than half its rated capacity. A battery that normally lasts 4 hours at high output might give you just 1.5-2 hours in extreme cold.
Alkaline AAA (Standard Disposable):
- 20°C: 100% capacity baseline
- 0°C: ~70% capacity
- -10°C: ~50% capacity
- -20°C: ~25% capacity
- -30°C: ~10% capacity
Alkaline batteries perform even worse in cold than lithium-ion, with dramatic capacity loss below 0°C. They're acceptable for emergency backup but poor for primary use in winter trekking.
Lithium AAA (Energizer Ultimate Lithium, etc.):
- 20°C: 100% capacity baseline
- 0°C: ~95% capacity
- -10°C: ~90% capacity
- -20°C: ~85% capacity
- -30°C: ~75% capacity
- -40°C: ~60% capacity
Lithium primary batteries maintain excellent performance across the full temperature range encountered in Nepal trekking. This makes them ideal for high-pass crossings and winter expeditions.
Practical Cold Weather Battery Strategies
Strategy 1: Body Heat Storage (Most Important)
Keep your headlamp inside your jacket or sleeping bag when not in use. Your body heat maintains batteries at 30-35°C even when ambient temperature is -20°C.
Implementation:
- Sleep with headlamp inside sleeping bag (foot area if you're concerned about accidentally turning it on)
- During alpine starts, keep headlamp in inner jacket pocket until moment of use
- After each use, immediately return to warm pocket rather than leaving on your head with light off
- Use a small stuff sack or ziplock bag to prevent accidentally turning on while in pocket
Strategy 2: Lithium Battery Backup
Carry lithium AAA batteries as backup for high-pass days, even if your headlamp is rechargeable.
Implementation:
- Purchase 3x Energizer Ultimate Lithium AAA before your trek (available in Kathmandu)
- Store in ziplock bag in your pack
- The night before high-pass crossing, swap to lithium AAAs
- Return to rechargeable battery after descending to warmer elevation
Cost: ~$8-10 for 3x lithium AAA batteries, but they'll last the entire trek if only used for high passes. This investment provides massive peace of mind.
Strategy 3: Battery Warming Ritual
Establish a morning routine for alpine starts that prioritizes battery warmth.
Sample Thorong La Pass Morning Routine:
- Wake at 3:30am while headlamp is still warm inside sleeping bag
- Put on base layers using red light mode (minimal battery drain)
- Return headlamp to sleeping bag while organizing gear
- Dress in full layers using ambient light from dining room
- Retrieve headlamp from sleeping bag immediately before departure at 4:15am
- Keep headlamp on head during hiking (body heat from forehead keeps it warm)
- During breaks, place headlamp inside jacket rather than leaving on head
Strategy 4: Tea House Charging Temperature
Cold batteries charge slowly and inefficiently. If possible, charge at warmer tea houses lower on the route rather than immediately before high passes.
Implementation:
- On Annapurna Circuit, charge at Manang (3,540m, warmer) rather than waiting until Thorong Phedi (4,450m, much colder)
- On Everest Base Camp trek, charge at Namche Bazaar (3,440m) or Pangboche (3,985m) rather than Lobuche (4,940m)
- Allow battery to warm to room temperature before charging if you've been hiking in cold conditions
Winter Trekking Battery Recommendations
For winter trekking in Nepal (December-February) or high-altitude treks any time of year:
Primary Battery Choice: Lithium AAA batteries (Energizer Ultimate Lithium)
Rationale: The superior cold weather performance of lithium chemistry outweighs the convenience of rechargeable batteries when you're regularly experiencing -15°C to -25°C temperatures. The cost difference (~$30 for lithium AAA batteries vs $10-15 in tea house charging fees for rechargeable) is minimal and worth it for reliability.
Secondary/Backup: Your headlamp's rechargeable battery, kept warm and used at lower elevation/warmer tea houses.
Implementation: Start your trek using the rechargeable battery, charging at tea houses in warmer lower elevations. Swap to lithium AAA batteries before ascending to high camps (above 4,500m) or before high pass crossings. Return to rechargeable after descending.
The 'Hand Warmer' Battery Trick
Backup Lighting: Why You Need a Redundant System
Despite carrying a high-quality headlamp with fresh batteries, experienced trekkers always carry backup lighting. Murphy's Law applies fully in the Himalayas: equipment fails when you need it most.
Backup Lighting Options
Option 1: Second Headlamp (Best Practice)
Carry a lightweight, inexpensive second headlamp as complete backup system.
Recommended Model: Petzl Tikkina (81g, $20-30) or any compact AAA-powered headlamp
Advantages:
- Complete redundancy—if primary headlamp fails completely, you have full lighting capability
- Can lend to trekking partner who forgot headlamp or experienced failure
- Useful for organizing gear while primary headlamp charges
- Negligible weight penalty (80-100g)
- Low cost ($20-30)
Implementation: Pack backup headlamp at bottom of pack. Check batteries before trek starts. Don't touch it unless primary fails.
Weight/Cost Penalty: 80-100g, $20-30
Option 2: Smartphone Flashlight (Minimum Acceptable)
Every smartphone has LED flashlight functionality, providing emergency backup.
Advantages:
- No additional weight or cost (you're already carrying phone)
- Adequate brightness for slow-paced navigation and camp tasks
- Always available
Limitations:
- Drains phone battery rapidly (30-60 minutes of flashlight can drain 40-50% battery)
- Requires holding phone or jury-rigging to headband
- Difficult to use hands-free
- Risk dropping expensive phone in darkness
- Cold weather destroys smartphone battery life
- Not waterproof (most headlamps are)
Implementation: Learn how to quickly activate flashlight on your specific phone model (usually quick-access from lock screen). Consider phone flashlight as absolute last resort, not primary backup.
Option 3: Small AAA Penlight (Compact Backup)
A simple AAA penlight weighs 20-30g and provides basic emergency lighting.
Recommended Model: Any small LED penlight with clip (available in Kathmandu for $3-5)
Advantages:
- Minimal weight (20-30g)
- Very inexpensive ($3-5)
- Uses same AAA batteries as many headlamps
- Clip attaches to jacket or pack for easy access
Limitations:
- Not hands-free (must hold in mouth, teeth, or hand)
- Lower brightness than headlamps
- Not practical for hiking, only camp tasks
Implementation: Clip to jacket pocket or pack shoulder strap for instant access.
Option 4: Extra Headlamp Batteries (Partial Redundancy)
If your headlamp uses AAA or AA batteries, carry 1-2 extra sets.
Advantages:
- Lighter than second headlamp (25-50g per set)
- Extends runtime of primary headlamp
- Inexpensive ($2-4 per set in Nepal)
Limitations:
- Doesn't help if headlamp itself fails (broken LED, water damage, lost)
- Provides redundancy only for battery failure
- Alkaline batteries available in Nepal are often old with reduced capacity
Implementation: Store in ziplock bag to prevent corrosion. Mark with purchase date to track age.
Recommended Backup Approach by Trek Type
Short Tea House Treks (5-7 days, Poon Hill, Pikey Peak): Smartphone flashlight adequate. Tea house density means you're never more than 2-3 hours from accommodation if primary headlamp fails.
Standard Tea House Treks (10-15 days, Everest Base Camp, Annapurna Circuit): Second lightweight headlamp OR smartphone flashlight plus extra batteries. The ~80g weight of a backup Petzl Tikkina is worthwhile insurance.
Long/Remote Treks (18+ days, Manaslu Circuit, Upper Mustang): Second headlamp mandatory. Days between villages and limited battery availability make redundancy essential.
Expedition/Technical Treks (Island Peak, Mera Peak, Lobuche Peak): Second headlamp plus extra batteries plus penlight. When you're on technical terrain at 6,000m+ in darkness, lighting redundancy is a safety requirement, not luxury.
What About Glow Sticks or Candles?
Glow Sticks: Essentially useless for trekking. They provide ambient light but no directed beam for navigation. They're also disposable waste in fragile mountain environments. Skip these.
Candles: Some tea houses provide candles during power outages, and they're adequate for lighting a room. However, they're unsuitable for hiking, unsafe around synthetic fabric gear, and problematic at altitude where reduced oxygen affects flame. Don't rely on candles for anything beyond emergency room lighting.
The 'Zip Tie' Backup Headlamp Technique
Tea House Charging: Costs, Etiquette, and Practicalities
The tea house charging ecosystem is an essential consideration for rechargeable headlamp users. Understanding costs, availability, and best practices will help you maintain battery life throughout your trek.
Charging Costs by Region and Altitude
Tea house charging fees vary by region, altitude, and remoteness. Here's what to expect in 2026:
Lower Elevations (Below 3,000m):
- $0.50-1.00 per device per charge
- Electricity often more reliable (grid-connected or good hydroelectric)
- Multiple charging hours available daily
Common locations: Lukla (2,860m), Namche Bazaar (3,440m), Manang (3,540m), Jagat (1,300m on Manaslu Circuit)
Mid Elevations (3,000m-4,000m):
- $1.00-2.00 per device per charge
- Electricity from hydroelectric or solar
- Charging windows may be limited (typically 6:00pm-9:00pm)
Common locations: Tengboche (3,867m), Dingboche (4,410m), Yak Kharka (4,018m), Braga (3,450m)
High Elevations (Above 4,000m):
- $2.00-3.00 per device per charge
- Primarily solar power (weather dependent)
- Very limited charging hours
- May not be available during poor weather or winter
Common locations: Lobuche (4,940m), Gorak Shep (5,164m), Thorong Phedi (4,450m), High Camp (4,800m on Manaslu)
Remote/Off-the-Beaten-Path:
- $2.00-4.00 per device per charge (when available)
- Electricity often unavailable for days
- Solar charging unreliable
Common locations: Upper Dolpo, Nar Phu Valley, Kanchenjunga, Makalu Base Camp
Charging Availability by Season
Peak Season (March-May, September-November):
- Charging generally available daily at tea houses
- May need to wait for charging port availability (many trekkers competing)
- Prices standard as listed above
Shoulder Season (Early March, Late November, February):
- Charging available but tea houses may have reduced hours
- Fewer trekkers means easier access to charging ports
- Prices similar to peak season
Monsoon (June-August):
- Hydroelectric power often stronger (more water flow)
- Solar power less reliable (cloudy conditions)
- Fewer operating tea houses in remote areas
- Similar prices where available
Winter (December-January):
- Many high-elevation tea houses closed
- Solar power severely limited (short days, low sun angle, often cloudy)
- Charging often unavailable above 4,000m
- Prices higher when available ($3-5 per charge at operating locations)
For winter trekking, strongly consider AAA lithium battery strategy rather than relying on rechargeable headlamps.
Practical Charging Tips
Bring the Right Cable:
- Most tea houses have USB Type-A ports
- Bring your specific charging cable (micro-USB, USB-C, or proprietary for Black Diamond/Petzl)
- Consider a short cable (15-30cm) to minimize cable management
- Bring a backup cable—cables fail more often than headlamps
Charging Strategy:
- Charge during dinner (6:00pm-8:00pm when electricity most available)
- Expect 3-4 hours for full charge
- Don't wait until battery is completely dead—top off when convenient
- Charge at lower elevations when electricity is cheaper and more reliable
Port Availability:
- Popular tea houses may have 10-15 trekkers competing for 4-6 charging ports
- Ask to join charging queue when you arrive, not at dinner time
- Some tea houses use numbered system or room-based priority
- Consider charging during lunch stop if staying two nights for acclimatization
Battery Management:
- Most headlamps require 3-4 hours for full charge
- You can do partial charging (2 hours = ~70% charge typically)
- Lithium-ion batteries have no memory effect—partial charging doesn't harm them
- Avoid charging in very cold rooms (bring headlamp to bed, charge in warmer dining room)
Charging Etiquette
Do:
- Label your charging cable with room number or name
- Check your device every 1-2 hours
- Remove device promptly when fully charged
- Respect queue system established by tea house
- Pay charging fees without negotiation
Don't:
- Leave devices charging overnight (unfair to others, also fire risk)
- Charge multiple devices simultaneously unless tea house explicitly allows
- Complain about charging fees (they're operating diesel generators or expensive solar systems at high altitude)
- Assume charging is included with room (always a separate fee)
- Use adapters to charge multiple devices from single port without permission
Budget Impact
For a typical 12-14 day trek like Everest Base Camp or Annapurna Circuit, expect:
- 4-5 charging sessions for headlamp
- Average $1.50 per charge
- Total cost: $6-8 for headlamp charging
Add smartphone, camera battery, and power bank charging:
- Total electronics charging budget: $40-60 for two weeks
This is a meaningful expense but unavoidable if using rechargeable electronics. The environmental benefit of rechargeable batteries arguably justifies this cost compared to disposable battery waste.
The 'Charge at Namche' Strategy
Using Your Headlamp: Techniques and Best Practices
Owning a quality headlamp is only half the equation. Proper usage techniques maximize battery life, prevent accidents, and show respect for other trekkers and tea house culture.
Alpine Start Lighting Technique
Pre-dawn alpine starts are when your headlamp matters most. The difference between confident, efficient movement and slow, uncertain progress often comes down to proper light usage.
Before You Start:
- Check battery level indicator while still in tea house
- Adjust headband over your hat/beanie while in lighted area
- Set brightness to medium (150-200 lumens)—you can adjust higher if needed
- Enable red light mode for initial gear organization
During Ascent:
- Use primarily flood beam for first hour (trail navigation, foot placement)
- Switch to combined flood+spot for technical sections (boulder fields, scree)
- Tilt headlamp down 30-40 degrees to illuminate immediate trail (3-5 meters ahead)
- Periodically tilt up to spot trail markers, cairns, or other trekkers ahead
Managing Battery Life:
- Reduce to 100-150 lumens once eyes are fully dark-adapted (30-40 minutes)
- Increase brightness only when needed for technical terrain
- During rest breaks, switch to red light or low white light
- Turn off completely during longer breaks (10+ minutes) if ambient light from other trekkers sufficient
Group Hiking:
- Spread out 5-10 meters between trekkers to avoid blinding person ahead
- Look down when passing approaching trekkers (your light in their eyes destroys night vision)
- Use lower brightness when hiking in group (combined light from multiple headlamps provides adequate illumination)
Tea House Courtesy Lighting
Tea houses are communal spaces where your light choices affect everyone around you.
Entering Tea House:
- Switch to red light mode before opening door
- Use lowest brightness necessary for navigation
- Avoid shining light directly at other trekkers
Dining Room:
- Red light sufficient for organizing gear, finding items in pack
- Some tea houses have "lights out" policy after certain time—respect this
- If reading or writing journal, position yourself away from sleeping trekkers
Sleeping Rooms:
- Always use red light in shared rooms
- Minimize light use when roommates are sleeping
- Organize gear before lights out so you need minimal lighting in morning
Bathrooms:
- Red light adequate for most bathroom navigation
- White light acceptable since you're not disturbing others
- Be quick—others may be waiting in cold conditions
Trail Etiquette
Yak Trains: When approaching yak trains (common on all major treks), proper lighting prevents dangerous situations.
- Give yaks right of way—move to uphill side of trail
- Don't shine headlamp directly at yaks (can spook them)
- If trekking in darkness, reduce brightness or tilt headlamp down when near yak train
- Use voice commands ("hello", "side please") more than light for yak driver awareness
Passing Other Trekkers:
- Look down when passing (don't blind approaching trekker)
- Call out "passing on your left/right" before overtaking from behind
- Reduce brightness briefly when passing—the other trekker's eyes are dark-adapted
Bridge Crossings: Many suspension bridges on Nepal treks are narrow and bouncy. Proper lighting prevents missteps.
- Switch to high brightness before bridges for clear board visibility
- Tilt headlamp down to illuminate deck boards
- Use spot+flood combination for depth perception
- Slow pace—bridges can be icy in early morning
Battery Conservation Techniques
Making your battery last longer means fewer charging sessions, reduced costs, and greater reliability.
Brightness Management:
- Use minimum brightness necessary—your eyes will adapt
- 100-150 lumens adequate for 70% of trekking use
- Reserve 300+ lumens for technical terrain and initial dark adaptation period
Mode Selection:
- Red light uses 70-80% less battery than white light
- Use red light for all camp tasks, gear organization, reading
- Switch to white light only when necessary for navigation or technical tasks
Duty Cycling:
- Turn off headlamp during breaks, even short ones
- Use ambient light when hiking in groups (others' headlamps may provide adequate supplemental light)
- During twilight starts (not full darkness), delay turning on headlamp until truly necessary
Prevent Accidental Activation:
- Always use lockout mode when packing headlamp
- Check that headlamp is off before putting in pack
- Consider battery backwards storage for long-term storage between treks
Cold Weather Usage
Beyond battery management covered earlier, cold weather requires specific usage techniques.
Pre-warming: Before alpine starts, warm headlamp inside jacket for 5-10 minutes. This pre-warms battery and increases initial brightness/runtime.
Intermittent Use: On high passes, use headlamp intermittently rather than continuously if trail is visible during twilight. Even 10 minutes of "off time" allows battery to warm slightly from body heat when stored in jacket pocket.
Strategic Placement: Position headlamp on forehead rather than top of head. Your forehead provides more body heat to keep battery warmer.
Headlamp Accessories and Modifications
Several accessories can enhance headlamp functionality for Nepal trekking, though most are optional rather than essential.
Diffuser Attachment
A diffuser spreads your headlamp's focused beam into ambient lantern-style light, useful for tent and tea house room lighting.
DIY Option: Cut a ping pong ball in half and place over headlamp lens. This creates effective diffusion for $0.
Commercial Options: Petzl and Black Diamond sell purpose-built diffusers ($8-12) that snap onto specific headlamp models.
Use Cases:
- Lighting entire tent/room rather than focused spot
- Hanging headlamp from tent ceiling as lantern
- Group lighting in dining area during power outages
Worth It? Optional. Most trekkers manage fine without diffusers, but they're nice luxury for comfort-oriented trekkers.
Top Head Strap
An additional strap running over the top of your head prevents headlamp from bouncing during vigorous movement and distributes weight more evenly.
Included With: Most premium headlamps (Black Diamond Icon, Petzl NAO+)
Aftermarket: Can be purchased separately for ~$5-8
Worth It? Recommended for headlamps heavier than 100g, optional for lighter models.
Helmet Mount Clips
If you're combining trekking with climbing objectives like Island Peak or Mera Peak, helmet mount clips allow securing headlamp to climbing helmet.
Included With: Many Black Diamond and Petzl headlamps include clips or helmet-compatible straps
Worth It? Essential if using climbing helmet, unnecessary otherwise.
Spare Headband
Headbands can break, stretch, or become fouled with mud/dirt during extended treks.
Availability: Black Diamond and Petzl sell replacement headbands for $8-15
Worth It? Unnecessary for standard 10-15 day treks. Consider for expedition-length treks (25+ days) or if you've had previous headband failures.
Colored Filters
Some headlamps support colored filter attachments (red, green, blue) for specialized uses.
Red: Night vision preservation, wildlife watching, astronomy Green: Map reading without disturbing others, reduced insect attraction Blue: Blood tracking (for hunting), ice assessment (for climbing)
Worth It? Most modern headlamps have built-in red LED mode, making separate red filter unnecessary. Green and blue filters have limited trekking application. Skip these unless you have specific specialized needs.
Battery Case/Organizer
Small ziplock bags or dedicated battery cases keep spare batteries organized and prevent short-circuit from metal contact.
DIY Option: Small ziplock bag works perfectly (free)
Commercial Option: Battery cases with individual cell separators ($3-8)
Worth It? Ziplock bags are adequate. Only buy dedicated case if you're also using it for other trips/activities.
The 'Tea Light' Diffuser Technique
Headlamp Care and Maintenance
Proper care ensures your headlamp remains reliable throughout your trek and continues functioning for years of future adventures.
Pre-Trek Preparation
Battery Check:
- Fully charge rechargeable batteries 1-2 days before departure
- Test battery level indicator to confirm accurate reading
- If using AAA batteries, install fresh batteries and carry spares
Functionality Test:
- Test all brightness levels (low, medium, high)
- Verify red light mode functionality
- Test battery indicator display
- Check tilt mechanism for smooth adjustment
- Verify lockout mode works correctly
Physical Inspection:
- Examine headband for fraying or damage
- Check buckle adjustment mechanism
- Inspect lens for cracks or scratches (clean if dirty)
- Verify waterproof seals/gaskets are intact
- Ensure battery compartment closes securely
Accessories:
- Pack charging cable (test it works with headlamp)
- Include backup cable if possible
- Add spare batteries if using AAA model or hybrid system
During Trek Maintenance
Daily Care:
- Wipe lens with soft cloth if dirty (glasses cleaning cloth works well)
- Check battery compartment seal remains tight
- Verify headband adjustment hasn't loosened
- Keep headlamp dry when not in use (store in waterproof stuff sack during rain)
After Rain/Snow Exposure:
- Wipe exterior dry with cloth
- Open battery compartment and check for moisture
- Allow to air dry in warm location (near—not on—stove in tea house dining room)
- Don't seal in waterproof bag until fully dry (traps moisture)
Charging Care:
- Allow headlamp to warm to room temperature before charging if very cold
- Use quality USB port (avoid sketchy tea house ports with voltage fluctuations)
- Don't charge immediately after heavy rain exposure (dry first)
- Monitor charging progress—remove when complete rather than leaving overnight
Battery Storage:
- Keep spare AAA batteries in ziplock bag to prevent moisture exposure
- Store rechargeable battery in headlamp rather than separately (prevents losing it)
- Keep lithium batteries warm (inside jacket pocket) on cold days
Common Field Repairs
Fogged Lens:
- Symptom: Condensation inside lens reduces light output
- Cause: Temperature differential, moisture intrusion
- Fix: Open battery compartment, allow headlamp to dry in warm location for 2-4 hours
Weak Light Output Despite Full Battery:
- Symptom: Brightness reduced even at highest setting
- Cause: Battery too cold, dirty lens, or failing LED
- Fix: Warm battery in hands/jacket, clean lens, verify not in dimming mode
Headband Slipping:
- Symptom: Headlamp slides down forehead during use
- Cause: Stretched elastic, adjustment loosened
- Fix: Tighten adjustment buckle, add top head strap, or use hair tie/rubber band for extra grip
Battery Not Charging:
- Symptom: USB charging doesn't initiate or complete
- Cause: Cable failure, port damage, battery too cold, battery fully charged
- Fix: Try different cable, warm battery, check battery level indicator (may already be full)
Water Damage:
- Symptom: Flickering light, no power, erratic behavior
- Cause: Water intrusion in battery compartment or LED housing
- Fix: Immediately open battery compartment, dry thoroughly, leave open to air dry for 6-12 hours. If LED housing is compromised, headlamp may be unsalvageable.
Post-Trek Care
Cleaning:
- Wipe exterior with damp cloth to remove dirt, dust, salt
- Clean lens with glasses cleaning cloth
- Remove battery (rechargeable or AAA) for storage
- Allow headband to air dry if sweaty
Storage:
- Store in cool, dry location away from direct sunlight
- Keep battery separate from headlamp (prevents slow discharge and contact corrosion)
- Store rechargeable battery at 40-60% charge for long-term storage (not fully charged or dead)
- Recharge rechargeable battery every 3-4 months during storage
Inspection:
- Examine for damage sustained during trek
- Check waterproof seals for cracking or degradation
- Test all functions to identify any developing issues
- Replace headband if showing significant wear
When to Replace Your Headlamp
Battery Issues:
- Rechargeable battery holds less than 50% original capacity even after full charge
- Proprietary rechargeable batteries sometimes available as replacement parts ($15-25)
- Cost of battery replacement often approaches cost of new mid-range headlamp
Physical Damage:
- Cracked LED housing (water intrusion risk)
- Broken headband mounting points
- Non-functional tilt mechanism
- Damaged waterproof seals
Functionality Degradation:
- LED output noticeably dimmed compared to when new
- Unreliable switching between modes
- Battery indicator no longer accurate
Technology Advancement:
- If your headlamp is 5+ years old, newer models likely offer better battery life, lighter weight, and improved features for similar price
- Consider upgrade when new features provide meaningful advantage (e.g., USB-C charging, better cold weather performance)
Quality headlamps like Black Diamond Spot or Petzl Actik Core typically last 5-7 years with proper care before requiring replacement. Budget models (under $30) may need replacement after 2-3 years or 3-4 extended treks.
Frequently Asked Questions
Related Gear and Resources
Your headlamp works as part of a complete gear system. These related guides help you prepare comprehensively:
Essential Gear Guides
- Complete Nepal Trekking Gear List - Comprehensive packing guide covering all equipment categories
- Sleeping Bags for Nepal Trekking - Temperature ratings and insulation types for Himalayan conditions
- Trekking Poles Guide - Choosing and using poles for stability and knee protection
- Backpack Selection Guide - Sizing, features, and packing strategies
- Footwear Guide for Nepal Trekking - Boots vs trail runners, break-in, and fit
Clothing and Layering
- Cold Weather Clothing for Nepal - Down jackets, base layers, and insulation systems
- Rain Gear and Monsoon Equipment - Waterproof jackets, pack covers, and wet weather strategies
- Layering System Explained - Base, mid, and outer layers for temperature regulation
Electronics and Power
- Power Banks and Solar Chargers - Keeping devices charged in remote areas
- Photography Gear for Nepal Trekking - Camera selection, batteries, and high-altitude photography
- Satellite Communication Devices - Emergency communication options
Trek-Specific Resources
- Everest Base Camp Trek Guide - Complete guide including daily itinerary, altitude profile, and preparation
- Annapurna Circuit Trek Guide - Thorong La Pass crossing, acclimatization, and route variations
- Manaslu Circuit Trek Guide - Remote tea houses, permits, and Larkya La Pass crossing
- Three Passes Trek Guide - Kongma La, Cho La, and Renjo La crossings with gear requirements
Preparation and Planning
- Physical Training for Nepal Treks - Fitness preparation, altitude training, and conditioning timeline
- Altitude Sickness Prevention - Acclimatization schedules, symptoms, and treatment
- Tea House Trekking Explained - Accommodation, meals, and facilities on popular routes
- Best Time to Trek in Nepal - Season-by-season conditions, crowds, and weather patterns
- Complete Nepal Trekking Gear List
- Everest Base Camp Trek Guide
- Annapurna Circuit Trek Guide
- Manaslu Circuit Trek Guide
- Cold Weather Clothing Guide
- Sleeping Bags for Nepal
- Electronics Charging Guide
- Three Passes Trek
- Altitude Sickness Prevention
- Best Time to Trek Nepal
- Trekking Poles Guide
- Winter Trekking in Nepal
- Tea House Trekking Explained
- Island Peak Climbing
- Gokyo Lakes Trek
- Langtang Valley Trek
- Physical Training Guide
- Monsoon Trekking Guide
- Upper Mustang Trek
- Camera Gear for Nepal
- Poon Hill Trek
Conclusion: Making Your Headlamp Choice
Selecting the right headlamp for Nepal trekking comes down to matching features to your specific needs while avoiding unnecessary premium features that add cost and weight without meaningful benefit.
The Core Decision Framework
For 90% of Nepal Trekkers: Choose a mid-range hybrid headlamp like the Black Diamond Spot 400 ($40-50, 86g, 400 lumens) or Petzl Actik Core ($60-70, 75g, 450 lumens). Both offer rechargeable primary battery with AAA backup capability, red light mode, adequate lumens for all trekking scenarios, reasonable weight, and proven reliability across thousands of Himalayan expeditions.
If Budget is Primary Concern: Accept the Petzl Tikkina ($20-30, 81g, 250 lumens) as minimum viable option, but recognize you're sacrificing red light mode (significant disadvantage) and rechargeable capability (adds battery costs over time). Better strategy: buy mid-range headlamp and save money elsewhere—rent sleeping bag, bring your own snacks instead of buying at tea houses, or choose slightly cheaper accommodation.
If Weight is Critical Priority: The Petzl Actik Core (75g) is lightest full-featured headlamp suitable for Nepal trekking. The 11g savings over Black Diamond Spot 400 (86g) is noticeable during extended wear but requires accepting higher price ($60-70 vs $40-50) and lower water resistance (IPX4 vs IPX8).
If You're Doing Technical Climbing: Consider the Black Diamond Icon 700 ($80-100, 300g, 700 lumens) for objectives like Island Peak, Mera Peak, or Lobuche East where night glacier travel or technical climbing sections justify the premium lumens and extended burn time. The weight penalty (300g vs 86g) is acceptable when climbing performance matters.
If Money is No Object: Even with unlimited budget, the Petzl NAO+ ($150-180) provides marginal benefit over mid-range models for trekking. The reactive lighting and smartphone app are innovative but unnecessary. Better investment: put that $100+ toward extra acclimatization day at Dingboche, higher quality down sleeping bag, or professional guide service.
Don't Forget the Fundamentals
Beyond the headlamp itself, remember:
- Carry backup lighting (second headlamp or smartphone flashlight minimum)
- Bring lithium AAA batteries as cold-weather backup even if using rechargeable primary
- Pack USB charging cable and test it works before departing
- Practice using all headlamp modes before trek starts
- Establish battery warmth routine for high-pass crossings
The Bottom Line
Your headlamp is one of the few pieces of equipment you'll genuinely use multiple times daily throughout your trek. Unlike many gear items that see occasional use, your headlamp will be critical during every alpine start, tea house evening, and bathroom trip. The difference between a thoughtfully chosen headlamp and a poorly selected one affects your comfort, safety, and enjoyment daily.
Invest in a quality mid-range model with essential features (200-400 lumens, red light mode, hybrid battery capability, cold weather performance, 60-100g weight) rather than budget model missing key features or premium model with unnecessary complexity.
The Black Diamond Spot 400 remains my default recommendation for most Nepal trekkers in 2026—it's what I use, what I recommend to friends and family, and what I see on the heads of experienced guides throughout the Himalayas. At $40-50, it represents exceptional value for comprehensive features and proven reliability.
Whatever headlamp you choose, test it thoroughly before your trek, establish good battery management habits, and maintain it properly. A well-chosen, well-cared-for headlamp will serve you reliably for years across multiple Himalayan adventures.
Last updated: February 2026. Prices, availability, and tea house infrastructure evolve constantly. Always verify current conditions and equipment specifications before purchasing and departing for your trek.
Have questions about headlamp selection for your specific Nepal trek? Contact our gear experts or join our trekking community forums for personalized recommendations based on your itinerary, season, and priorities.