


The Layering System for Trekking: Complete Nepal Guide
A layering system is a set of thin, purpose-built clothing layers worn together so you can add or remove warmth as conditions change. For trekking in Nepal it uses three or four layers: a moisture-wicking base layer, an insulating mid layer (fleece and a down jacket), and a waterproof, windproof outer shell. You adjust the combination to match altitude, weather, and how hard you are working, staying warm and dry without carrying excess weight.
Nepal's Himalayas present one of the most demanding clothing challenges on Earth. On a single trekking day, you might wake at -10°C in a frost-covered teahouse at 4,200m, climb through warm sunshine that pushes 15°C by midday, then face biting wind and sleet on an exposed ridge by afternoon. Temperature swings of 30 degrees Celsius within a few hours are not unusual. That morning in Dingboche when you scrape ice off the inside of your window? By noon you will be hiking in a t-shirt, sweating on the climb toward Lobuche. Then the clouds roll in, the wind picks up, and suddenly you are reaching for every layer you own.
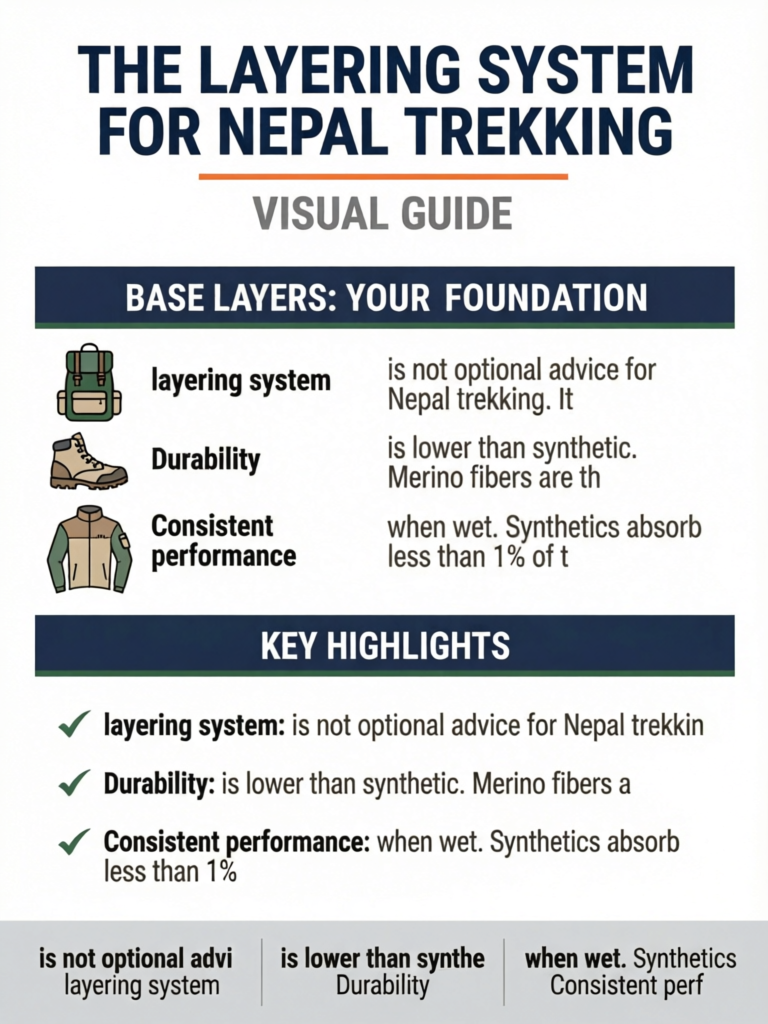
This is why the layering system is not optional advice for Nepal trekking. It is a survival strategy. The ability to add and remove thin, purpose-built layers lets you regulate body temperature across radical environmental shifts without carrying excessive weight. Get it right, and you trek in comfort from subtropical forest to high-altitude glacier. Get it wrong, and you risk hypothermia, heat exhaustion, or at minimum, a miserable experience that overshadows everything else.
This guide breaks down every component of the layering system with specific recommendations for Nepal's unique conditions, covering altitude zones from Poon Hill at 3,210m to Everest Base Camp at 5,364m and beyond.
-20°C to 30°C depending on altitude and season
3-4 layers for high-altitude treks (base, mid, insulation, shell)
$20-80 (merino wool) or $15-40 (synthetic)
Under 3-4 kg for complete system
No cotton, ever — synthetics or merino only
Every 30-60 minutes during active trekking
$150-250 total for adequate layering
$600-1,000+ for top-tier fabrics and construction
Why the Layering System Works
The layering system is built on three principles of thermodynamics that apply directly to trekking in variable mountain environments.
Trapped air insulates. Your clothing does not generate warmth. Your body does. Clothing works by trapping pockets of warm air close to your skin. Multiple thin layers create more air pockets than a single thick garment, giving you better insulation per gram of weight. This is why two thin fleeces outperform one thick sweater, and why lofty down jackets (which trap enormous amounts of air in tiny clusters) provide extraordinary warmth for their weight.
Moisture destroys insulation. When you hike uphill at altitude, your body generates significant heat and perspiration. If that sweat saturates your clothing, you lose insulating air pockets, and evaporative cooling kicks in. On a windy ridge at 4,500m, wet clothing can drop your skin temperature dangerously fast. The layering system combats this by using moisture-wicking base layers to pull sweat away from your skin, breathable mid layers that allow vapor to escape, and outer shells that block wind and rain while still letting moisture vapor pass through.
Wind steals heat. Moving air strips warmth from your body through convective cooling. A 20 km/h wind at 0°C makes the air feel like -7°C. At exposed passes like Thorong La (5,416m) on the Annapurna Circuit, sustained winds of 40-60 km/h are common. Your outer shell's primary job is to block this wind.
Why Cotton Kills
This phrase has been used in outdoor education for decades because it is literally true. Cotton absorbs up to 27 times its weight in water. Once wet from sweat or rain, cotton loses virtually all insulating value, dries extremely slowly (10-20 times slower than synthetics), and conducts heat away from your body at an alarming rate. Every year, trekkers in Nepal suffer from hypothermia partly because they wore cotton t-shirts or cotton underwear. In the mountains, cotton is not just uncomfortable. It is dangerous.
Why Nepal's Terrain Demands Adaptability
Unlike a day hike in consistent weather, Nepal treks involve dramatic altitude changes, multiple climate zones, and rapidly shifting conditions. On the Annapurna Circuit, you trek through subtropical forest at 800m, temperate oak and rhododendron at 2,500m, alpine scrub at 3,800m, and barren high desert above 4,500m, all within a single week. Each zone demands different layering configurations. A rigid clothing system fails here. The layering approach gives you the modularity to handle everything Nepal throws at you.
3-Layer vs 4-Layer System: Which Do You Need?
The classic 3-layer system is base layer + mid layer + outer shell. The 4-layer system simply splits the middle into two distinct insulation pieces: a breathable layer for active hiking and a warmer layer for stops. Both describe the same principle; the question is how many insulation layers you carry.
- 3-layer system (base + mid + shell): Best for short, lower-altitude treks like Poon Hill and the warm stretches of any route, or for autumn trekkers who run warm. One fleece does double duty.
- 4-layer system (base + fleece + down + shell): The standard for high-altitude Nepal trekking above 4,000m. You hike in the fleece for breathability, then add the down jacket the moment you stop. This is the configuration we recommend for Everest Base Camp, Annapurna Circuit, and Manaslu.
For nearly every multi-day Nepal trek that climbs above 3,500m, plan around the 4-layer system. The extra insulation piece weighs little, packs small, and is the difference between comfortable and dangerously cold at high camps.
Base Layers: Your Foundation
The base layer sits directly against your skin and serves one critical function: moisture management. It wicks perspiration away from your body to keep your skin dry. A dry base layer maintains insulation efficiency and prevents the dangerous cooling that occurs when sweat saturates fabric. You will wear your base layer every day, all day. It is the single most important layer to get right.
Merino Wool Base Layers
Merino wool has become the gold standard for Himalayan trekking base layers, and for good reason. Unlike traditional wool, merino comes from sheep that produce ultra-fine fibers (15-24 microns in diameter), making the fabric soft, non-itchy, and comfortable against bare skin.
Advantages of merino:
- Odor resistance is merino's defining advantage for multi-day treks. The natural lanolin and fiber structure resist bacterial growth, meaning you can wear a merino top for 5-7 days of hard trekking without it becoming offensive. On a 14-day trek where laundry opportunities are limited, this matters enormously.
- Temperature regulation across a wide range. Merino's natural crimp creates air pockets that insulate when cold and allow airflow when warm. It performs well from 5°C to 25°C without feeling too hot or too cold.
- Moisture handling is nuanced. Merino absorbs up to 35% of its weight in moisture while still feeling dry against the skin. The hydrophilic core absorbs sweat while the exterior remains relatively dry.
- Comfort is superior to any synthetic. Merino feels soft, natural, and pleasant even after days of continuous wear.
Disadvantages of merino:
- Cost is significant. Quality merino tops run $50-80 from brands like Icebreaker, Smartwool, or Minus33. Budget merino from Decathlon or Amazon basics costs $20-35 but may pill faster and have shorter lifespan.
- Drying time is slower than synthetics. A soaked merino top takes 4-6 hours to air dry versus 1-2 hours for polyester. At high altitude where humidity is low, this gap narrows, but in the wet forests of Langtang Valley it matters.
- Durability is lower than synthetic. Merino fibers are thinner and more delicate. Expect pilling after 50-100 wears, and holes developing in high-friction areas. Merino-synthetic blends (80/20 or 70/30) improve durability substantially.
Synthetic Base Layers
Polyester and nylon-based base layers offer compelling advantages for budget-conscious trekkers and those trekking in wet conditions.
Advantages of synthetics:
- Fast drying is their strongest suit. A synthetic top wrung out after washing dries in 1-2 hours, even in humid conditions. For monsoon trekking or lower-altitude trails where you sweat heavily, this matters.
- Affordability makes them accessible. Quality synthetic base layers cost $15-40. Budget options from Decathlon (Quechua brand) or Uniqlo Heattech start at $10-15.
- Durability is excellent. Synthetics resist pilling, tearing, and abrasion far better than merino. A $25 synthetic top may last 200+ wears.
- Consistent performance when wet. Synthetics absorb less than 1% of their weight in water, maintaining insulation even when soaked.
Disadvantages of synthetics:
- Odor is the dealbreaker for many trekkers. Polyester harbors bacteria aggressively. After 2-3 days of hard trekking, synthetic base layers can become genuinely unpleasant. Antimicrobial treatments (Polygiene, silver ion) help initially but wash out over time.
- Less comfortable against skin, particularly cheaper options. Some trekkers find polyester clingy and clammy when wet.
- Temperature regulation is less nuanced than merino. Synthetics tend to feel cold when you stop moving and hot when you are working hard.
Pro Tip
The smartest strategy for most Nepal trekkers: bring one merino and one synthetic base layer top. Wear the merino on consecutive trekking days when odor matters, and use the synthetic as your backup and wash-day rotation. This gives you the best of both worlds without doubling cost or weight. For a deeper comparison, see our merino wool vs synthetic guide.
Base Layer Weight Categories
Base layers come in three weight categories, and choosing correctly for your trek altitude makes a significant difference.
Lightweight (130-170 gsm): Best for lower altitudes (1,000-3,000m) and active hiking in moderate temperatures. Thin enough to layer without bulk, wicks aggressively, and works well as a standalone top in warm conditions. Ideal for Poon Hill treks and the lower sections of longer routes.
Midweight (180-220 gsm): The workhorse weight for most Nepal trekking between 3,000-4,500m. Provides meaningful warmth while still wicking effectively. This is the most versatile choice for treks like the Annapurna Circuit or Langtang Valley where you spend most of your time in this altitude band.
Heavyweight (230-280 gsm): Reserved for sustained cold at 4,500m and above, winter trekking, or as a sleep layer. These are essentially thin thermal underwear. Critical for Everest Base Camp treks, especially during autumn and winter. Too warm for active hiking below 3,500m unless temperatures are well below freezing.
Brand Recommendations by Budget
Budget tier ($10-25): Decathlon Quechua Trek 500 merino ($25), Uniqlo Heattech Extra Warm ($15-20), Amazon Meriwool basics ($20-30).
Mid-range ($30-55): Smartwool Merino 250 ($55), Icebreaker 200 Oasis ($50-60), Patagonia Capilene Midweight ($49).
Premium ($60-90): Icebreaker 260 Tech ($70-80), Smartwool Intraknit ($75-85), Arc'teryx Satoro AR ($80-90).
How Many to Pack
For a standard 12-16 day trek: 2 base layer tops (one merino, one synthetic, or two of your preferred fabric) and 1-2 base layer bottoms (one midweight for trekking days, one heavyweight for sleeping or extreme cold). Add underwear: 3-4 pairs of synthetic boxer briefs or sports underwear. Total base layer weight should be under 600-800 grams.
Mid Layers: Insulation That Adapts
Mid layers sit between your base layer and outer shell, providing the bulk of your insulation. The key to effective mid-layer strategy is understanding that you will use different mid layers for different situations: one for active hiking when you need breathability, and another for stationary periods when maximum warmth matters.
Fleece
Fleece remains the single most versatile mid layer for Nepal trekking. Its combination of breathability, warmth, quick-drying ability, and affordability makes it indispensable.
How fleece works: Polyester fleece traps air in a lofted fiber structure. The "weight" rating (100, 200, 300) roughly corresponds to grams per square meter and warmth. A 200-weight fleece (like the Patagonia Better Sweater or North Face TKA 200) hits the sweet spot for Nepal trekking: warm enough for most conditions when combined with a base layer and shell, breathable enough for sustained uphill hiking.
Advantages:
- Breathability is fleece's defining strength. Unlike down or synthetic insulation, fleece allows moisture vapor to pass through freely. You can hike hard in a fleece without overheating as quickly as you would in a puffy jacket.
- Drying speed is exceptional. A soaked fleece wrung out and hung up dries in 2-3 hours, even at altitude. This makes fleece the go-to mid layer for wet conditions.
- Affordability is excellent. Quality fleece jackets cost $30-60 mid-range, with budget options from Decathlon starting at $15-20.
- Durability is outstanding. A good fleece lasts years of heavy use with minimal degradation.
Disadvantages:
- Wind permeability is fleece's primary weakness. Without a shell over it, wind cuts straight through fleece, drastically reducing warmth. On exposed ridges, fleece alone is inadequate.
- Bulk and weight are greater than down or synthetic insulation for equivalent warmth. A 200-weight fleece weighs 350-450g and does not compress well in a pack.
Recommended fleece options: Patagonia R1 Air (best breathability, $129), Patagonia Better Sweater (classic warmth, $99-139), The North Face TKA 200 ($50-70), Decathlon Quechua MH520 ($25-35).
Down Insulation
Down jackets provide the best warmth-to-weight ratio of any insulation. For Nepal trekking, a lightweight down jacket is typically your warmest mid layer and the piece you reach for at camp, during breaks, and on cold mornings.
How down works: Goose or duck down feathers trap enormous amounts of air in tiny clusters. Fill power (measured in cubic inches per ounce) indicates quality: 550 fill is adequate, 650-700 is good, 800+ is premium. Higher fill power means more warmth for less weight. A 700-fill jacket weighing 350g provides warmth equivalent to a 600g fleece.
Advantages:
- Warmth-to-weight ratio is unmatched. A quality down jacket provides extraordinary insulation while weighing as little as 250-400g.
- Packability is superb. Down compresses into a tiny stuff sack, taking up minimal pack space. A full down jacket can compress to the size of a water bottle.
- Longevity is excellent when properly cared for. Quality down maintains its loft and warmth for 10+ years.
Disadvantages:
- Moisture vulnerability is down's critical weakness. Wet down clumps together, loses its loft, and provides almost zero insulation. In rain or heavy condensation, down becomes useless. Hydrophobic down treatments (like Nikwax or DownTek) help but do not eliminate this problem.
- Cost is higher than alternatives. Quality down jackets range from $100-300+ from major brands.
- Ethical concerns lead some trekkers to avoid down, though responsible sourcing (RDS certified) has improved industry practices.
For comprehensive down jacket recommendations, see our down jacket guide.
Synthetic Insulation
Synthetic insulated jackets use polyester fibers (PrimaLoft, Climashield, Coreloft) to mimic down's air-trapping structure. They occupy a middle ground between fleece and down.
Advantages:
- Wet-weather performance is synthetic insulation's key advantage. Unlike down, synthetic fibers maintain 70-80% of their insulating value when wet. For monsoon trekking or prolonged rain, synthetic insulation is more reliable than down.
- Affordability compared to equivalent-warmth down. Quality synthetic jackets cost $80-180, roughly 30-50% less than down alternatives.
- Easy care with machine-washable, quick-drying construction. No special treatment required.
Disadvantages:
- Heavier and bulkier than down for equivalent warmth. A synthetic jacket providing the same warmth as a 350g down jacket will weigh 500-650g and pack larger.
- Shorter lifespan of insulation. Synthetic fibers gradually lose loft over time, typically degrading noticeably after 3-5 years of regular use.
When to Use Which Mid Layer
Understanding when to reach for each mid layer is as important as owning them.
Fleece for active hiking: When you are moving uphill at a sustained pace and generating body heat, fleece's breathability prevents overheating and sweat accumulation. Wear your fleece as your primary hiking mid layer from 2,500m to 4,500m.
Down for stationary periods: At camp, during long tea breaks, in cold teahouse dining rooms, and on cold mornings before the sun hits, your down jacket provides maximum warmth without bulk. Put it on the moment you stop moving. Take it off when you start hiking.
Synthetic for wet conditions: During monsoon treks, extended rain, or snow crossings where getting wet is unavoidable, a synthetic insulated jacket maintains warmth when down would fail. Also a smart choice for trekkers who run cold and want an active insulation layer that handles sweat.
The Stop-Start Temperature Trap
The most dangerous moment for heat loss is when you stop for a break after hard uphill hiking. Your base layer is damp with sweat, the wind hits, and your core temperature can drop rapidly. Always put on your insulating mid layer within 2-3 minutes of stopping, even if you feel warm initially. By the time you feel cold, you have already lost significant body heat that takes far more energy to recover.
Outer Layers: Your Weather Shield
Your outer layer is the barrier between you and the elements: wind, rain, snow, and sleet. In Nepal, weather can shift from clear sunshine to driving rain or snow within 30 minutes, particularly during spring and monsoon seasons. Your outer layer stays in your pack most of the time, but when you need it, nothing else will do.
Hardshell Jackets
A waterproof, breathable hardshell jacket is the single most important outer layer for Nepal trekking. This is not a place to compromise.
Waterproof-breathable membranes explained:
- Gore-Tex remains the industry standard. Gore-Tex Active is lightest and most breathable (best for trekking). Gore-Tex Pro is most durable (overkill for trekking). Gore-Tex Paclite is a good lightweight compromise.
- eVent/DVstorm offers slightly better breathability than standard Gore-Tex at a lower price point. Used by brands like Rab and Black Diamond.
- Proprietary membranes from Patagonia (H2No), The North Face (Futurelight), Arc'teryx (Hadron), and others. Performance varies but top-tier proprietary membranes rival Gore-Tex.
Key features to prioritize:
- Pit zips (underarm ventilation) are non-negotiable for trekking. Without them, you will overheat during uphill hiking in rain and end up wetter from sweat than from the rain itself.
- Hood that fits over a beanie or helmet, with one-hand adjustment. A well-designed hood transforms a jacket from good to essential.
- Sealed seams throughout, not just in critical areas. Partially sealed seams will leak on a sustained Himalayan downpour.
- Two-way front zip for ventilation from the bottom.
- Weight under 400g for trekking use. Heavier jackets add weight you carry every day but use occasionally.
Waterproofing ratings explained: Measured in millimeters of water column (mm). 10,000mm (10K) handles light rain. 20,000mm (20K) handles sustained heavy rain. 28,000mm+ handles the worst monsoon downpours. For Nepal autumn trekking, 15K-20K is sufficient. For spring or monsoon, aim for 20K+.
Breathability ratings: Measured in grams of moisture vapor per square meter per 24 hours (g/m2/24hrs). 10,000 g/m2/24hrs is adequate for moderate activity. 15,000-20,000 is good for sustained hiking. 25,000+ is excellent. At altitude, where exertion levels are high and the air is dry, breathability becomes increasingly important.
Recommended hardshells:
- Budget ($60-120): Decathlon Quechua MH500 ($70), Columbia Watertight II ($90), Marmot PreCip Eco ($100).
- Mid-range ($150-250): Outdoor Research Foray II ($200), Rab Downpour Eco ($180), Patagonia Torrentshell 3L ($149).
- Premium ($300-500): Arc'teryx Beta LT ($400), Rab Muztag GTX ($350), Mountain Hardwear Exposure/2 GTX ($325).
Softshell Jackets
Softshell jackets prioritize breathability and stretch over waterproofing. They block wind effectively and resist light rain, but they are not waterproof.
When softshells excel in Nepal: On clear autumn trekking days between 3,000-4,500m, a softshell jacket provides excellent wind protection with far greater breathability and comfort than a hardshell. If the forecast is dry and you are hiking actively, a softshell over a base layer is more comfortable than any other combination.
When to skip the softshell: If you are packing light, a softshell is a luxury, not a necessity. A windbreaker or your hardshell with pit zips open covers most situations. Softshells add 300-400g to your pack for a role that other layers can fill.
Rain Gear Alternatives
Not every trail section demands a full hardshell. On lower trails below 3,000m, where rain is warm and the terrain is forgiving, lighter alternatives work.
Trekking umbrella: Surprisingly effective on lower-altitude forest trails. Keeps rain off without any breathability sacrifice. Many experienced Nepal trekkers carry a compact umbrella for the subtropical sections of the Annapurna Circuit below Manang. Weight: 200-350g. Limitations: useless in wind, impractical above treeline.
Poncho: Covers both you and your pack. Popular among budget trekkers. Works for warm rain at lower altitudes. Not recommended above 3,500m where wind makes ponchos dangerous (they catch wind like a sail) and temperatures require more technical protection.
Hardshell Pants
Waterproof pants are the most debated outer layer item on a Nepal packing list.
When you need them: Winter trekking above 3,500m, monsoon-season treks with sustained rain, passes where you trek through snow, and any conditions where your legs will be wet and cold for extended periods.
When you can skip them: Autumn treks on popular routes like Everest Base Camp or Annapurna Circuit in October-November, when rainfall is minimal and quick-dry trekking pants handle occasional moisture. Many autumn trekkers leave hardshell pants at home and carry lightweight rain chaps or gaiters instead.
If you bring them: Look for full side-zips so you can put them on over boots. Weight should be under 300g. The Outdoor Research Foray pants and Marmot PreCip Eco Full Zip are both solid options at $80-120.
Pro Tip
Most Nepal trekkers overestimate how often they will use hardshell pants and underestimate how often they will use a down jacket. If you are trekking in autumn (the most popular season), hardshell pants stay in the pack 90% of the time. Your down jacket comes out every single evening. Prioritize spending on the down jacket.
Extremities: Hands, Head, Neck, and Feet
Your layering system does not stop at your torso. Hands, head, neck, and feet lose heat fast, and once your fingers or toes go numb at altitude they are very hard to rewarm. Treat extremities as part of the system, not an afterthought.
Hands (two layers): A thin liner glove (merino or synthetic, $5-15) worn inside an insulated or shell glove gives you the same modularity as your jacket. Keep the liners on for tasks like adjusting straps, and add the outer glove for cold mornings and exposed passes such as Thorong La or Cho La. See our trekking gloves guide for cold-rating advice.
Head: A warm beanie that covers your ears is essential above 3,500m and for every cold morning. Add a sun hat or cap for midday UV, which is intense at altitude. Many trekkers carry both; both are cheap in Thamel. More detail in our hats guide.
Neck and face: A buff or neck gaiter is one of the most useful, lightest items you can carry. It seals the gap at your collar, protects against wind and sun, doubles as a dust filter on dry trails, and pulls up over your face on freezing summit pushes like Kala Patthar.
Feet: Socks are a layer too. Merino trekking socks (thin for lower altitudes, midweight for cold) are durable and odor-resistant. Avoid cotton socks entirely. Keep feet dry, address hot spots before they become blisters, and rinse the salt out daily where you can.
Pro Tip
Apply the same "small but mighty" rule the pros use: put gloves and a hat on before you feel cold, not after. By the time your hands are numb, you have already lost the window to warm them efficiently. A thin liner glove and lightweight beanie weigh almost nothing and belong in your daypack on every trek above 3,000m.
Layer Combinations by Altitude Zone
The following table shows recommended layering for active hiking during the peak autumn season (October-November). Add layers for rest stops, evenings, and colder seasons.
| Altitude Zone | Base Layer | Mid Layer(s) | Outer Layer | Notes |
|---|---|---|---|---|
| 1,000-2,500m | Lightweight synthetic or merino | Light fleece in pack | Shell in pack | Often hiking in base layer only; warm and humid in forests |
| 2,500-3,500m | Midweight merino or synthetic | 200-weight fleece (worn mornings, packed midday) | Shell accessible in pack | Layer on/off frequently; cool mornings, warm afternoons |
| 3,500-4,500m | Midweight merino | 200-weight fleece + down jacket accessible | Shell accessible | Fleece for hiking, add down at every break and in evenings |
| 4,500-5,500m+ | Heavyweight merino | Fleece + down jacket (both often worn) | Shell over everything in wind/precip | All layers in use most of the day; double mid layers on cold mornings |
Lower body layering by altitude:
| Altitude Zone | Lower Body Layers |
|---|---|
| 1,000-2,500m | Trekking pants or zip-off shorts |
| 2,500-3,500m | Trekking pants; base layer bottoms for cold mornings |
| 3,500-4,500m | Base layer bottoms under trekking pants on cold days |
| 4,500-5,500m+ | Heavyweight base layer bottoms + trekking pants; hardshell pants for wind/snow |
The Altitude Layering Rule of Thumb
For every 1,000m of elevation gain, expect temperatures to drop approximately 6.5°C. This means a comfortable 20°C day at 1,500m in Lukla becomes a biting -6°C at Gorak Shep (5,164m) at the same time of day, before accounting for wind chill. Plan your layers accordingly.
Seasonal Layering Adjustments
Nepal's trekking seasons present dramatically different layering demands. The same route can require entirely different clothing strategies depending on the month.
| Season | Daytime Highs (3,500m) | Nighttime Lows (4,500m) | Key Layering Focus | Rain Risk |
|---|---|---|---|---|
| Spring (Mar-May) | 10-20°C | -5 to -15°C | Versatile layers for warm days, cold nights; rain gear essential | Moderate-High |
| Autumn (Sep-Nov) | 8-18°C | -8 to -18°C | Classic 3-layer system; lightest overall packing | Low |
| Winter (Dec-Feb) | 0-10°C | -15 to -25°C | Maximum insulation; heavyweight everything; double mid layers | Very Low |
| Monsoon (Jun-Aug) | 12-22°C | 0 to -8°C | Rain protection primary focus; lighter insulation; quick-dry everything | Very High |
Spring (March-May)
Spring is the second most popular trekking season, offering rhododendron blooms and longer days. Layering challenge: extreme temperature variation within a single day. Mornings start cold, midday can be genuinely warm, and afternoon thunderstorms bring rapid cooling and rain. Pack versatile mid layers and ensure your hardshell is accessible at all times. A lightweight synthetic insulated jacket works well as a spring mid layer because it handles both cold mornings and unexpected rain.
Autumn (September-November)
The peak trekking season offers the most stable weather and the lightest packing. The classic 3-layer system works perfectly: midweight base, fleece for hiking, down for evenings, and a hardshell that stays in the pack most days. Early autumn (September-early October) is warmer; late autumn (November) approaches winter temperatures above 4,000m and demands heavier layering. For detailed seasonal guidance, see our best trekking seasons guide.
Winter (December-February)
Winter trekking above 3,500m is serious business. Temperatures at Everest Base Camp altitudes drop to -20°C to -25°C overnight, with wind chill pushing effective temperatures below -30°C. Layering strategy shifts to maximum insulation: heavyweight merino base layers, fleece plus down (or two insulation layers), and a hardshell worn nearly continuously above 4,000m. Consider adding a heavyweight down parka (700+ fill, rated to -20°C) for winter rather than the lightweight down jacket sufficient for autumn. Hardshell pants become essential, not optional.
Monsoon (June-August)
Monsoon trekking demands a rain-first layering philosophy. Lighter insulation is acceptable because temperatures are warmer, but waterproofing must be bulletproof. A 20K+ rated hardshell, waterproof pants, and a waterproof pack cover are all essential. Use synthetic insulation (not down) as your mid layer because everything will get damp. Quick-drying base layers become even more critical. Consider rain-shadow regions like Upper Mustang or Dolpo where monsoon conditions are less intense.
Winter Trekking Is Not Autumn Trekking With More Layers
Winter conditions above 4,000m in Nepal are genuine mountain winter. Trails may be icy, passes may be snowbound, and some teahouses close entirely. Simply adding more layers to an autumn packing list does not prepare you for winter. You need heavier-duty gear across every layer, plus accessories like insulated gloves, balaclavas, gaiters, and potentially microspikes. If you have not trekked in winter mountain conditions before, consider starting with a lower-altitude route or hiring an experienced winter trekking guide.
Budget vs Premium: Is Expensive Gear Worth It?
Gear companies want you to believe that a $500 jacket is essential for Nepal trekking. Experienced trekkers know that smart spending matters more than total spending. Here is where your money makes the biggest difference and where you can safely cut costs.
Budget Kit (~$150-250 Total)
A functional layering system for Nepal does not require a large investment. Here is a budget-tier setup that will get you to Everest Base Camp in autumn:
- Base layers (2 tops, 1 bottom): Decathlon merino tops ($25 each) + synthetic bottom ($15). Total: $65.
- Mid layer (fleece): Decathlon MH520 fleece ($25-30).
- Mid layer (insulation): Buy a down jacket in Thamel, Kathmandu for $40-70. Quality varies, but $50-60 buys a serviceable 600-fill jacket that will handle an autumn EBC trek.
- Outer shell: Decathlon MH500 rain jacket ($70) or a Columbia Watertight II ($80-90).
Total: $200-255. This setup is adequate for autumn and spring treks to 5,500m. The weakest link will be the Thamel down jacket (lower fill power, heavier, less durable than premium options), but it works.
What to prioritize when budget is tight: Spend the most on your base layers and rain jacket. A good base layer worn every day adds more comfort than an expensive down jacket worn a few hours daily. A reliable rain jacket can prevent a dangerous situation that a leaking budget shell cannot.
Mid-Range Kit (~$300-500 Total)
This is the sweet spot for most trekkers, combining performance with reasonable cost.
- Base layers: Smartwool 250 top ($55) + Icebreaker 200 top ($50) + midweight bottom ($40). Total: $145.
- Mid layer (fleece): Patagonia Better Sweater or R1 ($99-129).
- Mid layer (insulation): Mountain Hardwear Ghost Whisperer 2 ($250) or Rab Microlight Alpine ($200). These provide dramatically better warmth-to-weight than budget alternatives.
- Outer shell: Outdoor Research Foray ($200) or Patagonia Torrentshell 3L ($149).
Total: $395-525. Significant upgrade in warmth, packability, breathability, and longevity. This kit will last through multiple treks and perform well in all seasons except the coldest winter conditions.
Premium Kit (~$600-1,000+ Total)
Premium gear is justified for frequent trekkers, winter treks, expeditions above 6,000m, or those who prioritize every gram of weight savings.
- Base layers: Icebreaker 260 Tech ($70-80 each) + heavyweight bottom ($60). Total: $200-220.
- Mid layer (fleece): Patagonia R1 Air ($129) or Arc'teryx Delta LT ($129).
- Mid layer (insulation): Arc'teryx Cerium LT ($350-380) or Rab Neutrino Pro ($350). Exceptional warmth, minimal weight (280-350g), premium construction.
- Outer shell: Arc'teryx Beta LT ($400) or Rab Muztag GTX ($350).
Total: $710-930. The diminishing returns are real. A premium kit is perhaps 15-20% better performing than a mid-range kit at 2-3x the cost. But for serious trekkers who use their gear 30+ days per year, the durability, comfort, and weight savings justify the investment over time.
What to Buy in Kathmandu
Thamel district in Kathmandu is stacked with trekking gear shops selling both brand-name items and high-quality copies at a fraction of Western prices. Items worth buying in Kathmandu include: down jackets ($40-80), fleece jackets ($15-30), base layers ($10-20), trekking pants ($15-30), gloves ($5-15), hats ($5-10), and buffs/neck gaiters ($3-8).
Items to bring from home: your rain jacket (fit and waterproofing quality matter too much to risk), trekking boots (fit is critical and cannot be rushed), and any base layers where fabric quality is important to you (Thamel "merino" is sometimes blended or mislabeled).
For a detailed breakdown of what to buy versus bring, see our rent vs buy guide.
Pro Tip
If you are buying a down jacket in Kathmandu, test it properly. Compress it in your fist and release it; quality down springs back to full loft within seconds. Cheap fill recovers slowly and feels clumpy. Check the baffles (stitched sections) for even down distribution, and blow air through the fabric to test wind resistance. A $60 jacket that passes these tests will serve you well. A $40 jacket that fails them is a waste of money at any altitude.
Common Layering Mistakes to Avoid
After thousands of trekkers on Nepal's trails, the same mistakes appear again and again. Avoid these and you will be more comfortable than most people on the mountain.
1. Wearing Cotton
This cannot be repeated enough. Cotton t-shirts, cotton underwear, cotton socks, and cotton hoodies have no place on a Nepal trek above the lowlands. Cotton absorbs sweat, stays wet for hours, and conducts heat away from your body. Replace every cotton item with synthetic or merino alternatives. Check the tags on your clothing before packing. If it says "100% cotton" or "cotton blend," leave it behind.
2. Over-Layering During Active Hiking
A common mistake among anxious trekkers: putting on too many layers at the start of a cold morning and then overheating within 30 minutes of hiking uphill. Overheating causes excessive sweating, which saturates your base layer and leads to chilling when you stop. Start slightly cold. You should feel a bit chilly when you begin hiking. Within 10-15 minutes, your body heat will bring you to a comfortable temperature. If you are warm when you start walking, you are wearing too much.
3. Under-Layering During Breaks
The inverse mistake: stopping for a rest break after hard hiking and not adding layers because you feel warm. Your body temperature drops rapidly when you stop generating exercise heat, especially if your base layer is damp. Add your insulating mid layer within 2-3 minutes of stopping, regardless of how warm you feel initially. This is especially critical above 4,000m where air temperatures are low and wind is common.
4. Ignoring Leg Insulation
Most trekkers obsess over upper body layers and forget their legs. Above 4,000m, trekking pants alone are insufficient in cold conditions. Base layer bottoms (midweight or heavyweight) under your trekking pants add significant warmth with minimal bulk. Your legs have less fat and muscle insulation than your torso, and cold legs lead to overall body chill. Pack at least one pair of base layer bottoms for any trek reaching 4,000m+.
5. Not Adjusting Layers Frequently Enough
The layering system only works if you actually use it. Many trekkers put on their layers in the morning and leave them unchanged for hours, even as conditions shift. Effective layering means stopping every 30-60 minutes to assess: Am I sweating? Add ventilation or remove a layer. Am I chilling? Add a layer. Is it starting to rain? Get the shell out before you are wet, not after. The 60 seconds spent adjusting layers saves hours of discomfort.
6. Packing Layers Too Deep in Your Pack
If your rain jacket is buried at the bottom of your daypack under your lunch, water bottles, and camera, you will hesitate to dig it out when light rain starts. By the time you commit to getting it, you are soaked. Keep your shell jacket and down jacket in the top compartment or outside pocket of your daypack, accessible in under 30 seconds. Use a stuff sack for each so they stay organized and easy to grab.
Putting It All Together: A Real-World Example
Here is what a complete layering system looks like for a 14-day autumn Everest Base Camp trek, including exactly what you carry and wear each day.
What goes in the porter duffel (carried by your porter):
- 1 extra base layer top
- 1 heavyweight base layer bottom (for sleeping)
- Clean base layer for Kathmandu return
What goes in your daypack (carried by you, accessible):
- Down jacket (top pocket, stuffed small)
- Hardshell jacket (top pocket or strapped outside)
- Buff/neck gaiter
What you wear while hiking (adjusting throughout the day):
- Base layer top (midweight merino)
- Base layer bottom (on cold days above 4,000m)
- Fleece jacket (mornings and evenings, packed midday when warm)
- Trekking pants
- Hiking socks
- Sun hat or warm beanie (depending on conditions)
This entire clothing system weighs approximately 2.8-3.5 kg total, well within the target of 3-4 kg. It covers temperatures from -15°C (early mornings at Gorak Shep with all layers on) to 20°C (sunny afternoons at Namche Bazaar in base layer only).
For your complete equipment list beyond clothing layers, see our complete gear list and packing list.
Frequently Asked Questions
Do I Need a Layering System for Nepal Trekking?
Absolutely. Nepal's Himalayan trails produce temperature swings of 30 degrees Celsius within a single day. On routes like the Annapurna Circuit or Everest Base Camp, you may start a morning at -10 degrees Celsius, hike in sunshine at 15 degrees by midday, then face wind and sleet on an exposed ridge by afternoon. A single heavy jacket cannot adapt to these conditions. The layering system -- moisture-wicking base layer, insulating mid-layer, windproof outer shell, and a down jacket for stops -- lets you regulate temperature by adding or removing thin layers throughout the day. This approach works for every Nepal trek from Poon Hill to the Three Passes.
What Layers Do I Need for Everest Base Camp?
For the EBC trek, you need the full four-layer system: a merino or synthetic base layer top and bottom, a fleece or lightweight insulated mid-layer, a down jacket for insulation at stops and evenings, and a waterproof shell jacket for rain and wind. Below Namche (3,440m), you will mostly trek in a base layer. Above Dingboche (4,410m), you will use all four layers daily. Pair this with proper trekking pants, boots, and the rest of your packing list. See our rent vs buy guide for which layers to purchase in Kathmandu.