


You've decided you want to trek in Nepal. Maybe you've seen stunning photos of the Himalayas on social media, heard stories from friends who've walked to Everest Base Camp, or simply felt the pull of adventure calling you toward something bigger than your daily routine.
But where do you actually start?
The gap between "I want to trek in Nepal" and "I'm boarding the flight to Kathmandu" can feel overwhelming. Permits, altitude, guides, gear, training, bookings—the logistics alone can make the whole thing seem impossibly complicated.
Here's the truth: thousands of first-time trekkers successfully complete Nepal treks every year. They're not superhuman athletes or wealthy adventurers. They're regular people—office workers, teachers, retirees, parents—who followed a clear process to turn their Himalayan dream into reality.
This guide provides that process. We'll walk you through exactly how to start trekking in Nepal, step by step, from initial assessment to the moment you begin walking into the mountains. No fluff, no hype—just the practical roadmap you need to go from dreamer to trekker.
3-6 months ideal
$1,500-$4,000 total
8-12 weeks recommended
Yes (since April 2023)
On arrival for most nationalities
Oct-Nov, Mar-Apr
4-14 days options
90-98% on beginner treks
Step 1: Assess Your Readiness
Before diving into logistics, honestly evaluate whether you're ready for this undertaking. Trekking in Nepal isn't a casual vacation—it's a physical, mental, and sometimes emotional challenge. That said, it's far more achievable than most people assume.
Fitness Self-Assessment
You don't need to be an athlete, but you need a baseline fitness level. Ask yourself:
Can you currently:
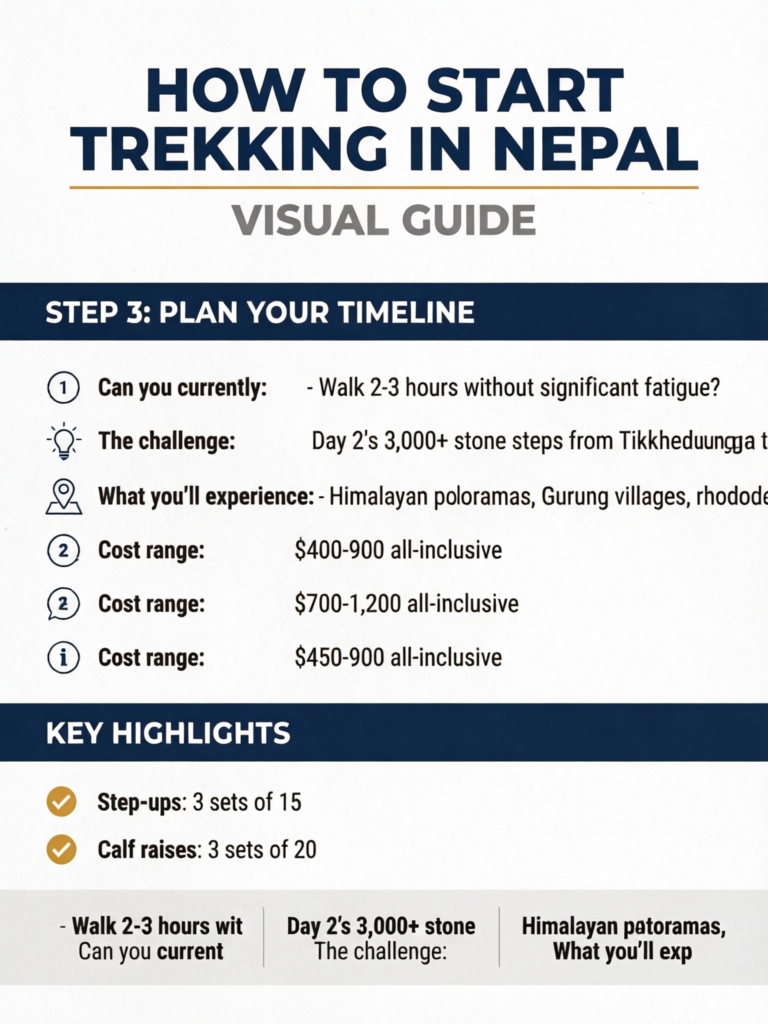
- Walk 2-3 hours without significant fatigue?
- Climb several flights of stairs without stopping?
- Carry a 5-7kg backpack for an extended period?
- Exercise 3-4 times per week consistently?
If you answered "yes" to most of these, you have a foundation to build on. If not, you'll need extra preparation time—which is completely fine. Many successful trekkers started from sedentary lifestyles and built up over 4-6 months.
Physical considerations:
- Joint issues (knees, hips, ankles) need medical assessment
- Heart conditions require doctor clearance
- Respiratory conditions may be affected at altitude
- Previous altitude experience is helpful but not required
Fitness Reality Check
Even "easy" Nepal treks involve 4-6 hours of daily walking on uneven terrain, often with significant elevation gain. The stone staircases on popular routes can exceed 3,000 steps in a single day. If stairs currently leave you breathless, you need 3-4 months of dedicated training before considering a trek.
Time Availability
Be realistic about how much time you can actually commit:
| Time Available | Suitable Treks | Notes |
|---|---|---|
| 5-7 days | Poon Hill, Ghorepani-Ghandruk | Shortest options, achievable in one week vacation |
| 8-10 days | Mardi Himal, Helambu, Short Langtang | Good balance of experience and time |
| 11-14 days | Langtang Valley, Annapurna Base Camp | Classic moderate treks |
| 15-20 days | Everest Base Camp, Manaslu Circuit | Major treks, require longer vacation |
Remember to add 2-3 days for Kathmandu pre- and post-trek, plus international travel time. A "10-day trek" realistically requires 14-16 days away from home.
Budget Reality Check
Nepal trekking is more affordable than many expect, but costs add up. Here's what first-timers typically spend:
Total trip budget (excluding international flights):
- Budget approach: $1,200-1,800
- Standard approach: $1,800-2,500
- Comfortable approach: $2,500-3,500
Major cost categories:
- Trek package/guide fees: $400-1,500
- Permits: $30-100
- Gear (buy/rent): $100-400
- Pre/post-trek accommodation: $100-300
- Travel insurance: $50-150
- Meals outside trek: $100-200
- Transportation within Nepal: $50-150
- Tips and miscellaneous: $100-200
Budget-Saving Insight
The biggest variable is trek duration. A 5-day Poon Hill trek costs roughly half of a 12-day Annapurna Base Camp trek. If budget is tight, choose shorter treks—you'll still have an incredible experience and can return for longer adventures later.
Health Considerations
Consult a doctor if you have:
- Heart or cardiovascular conditions
- Respiratory issues (asthma, COPD)
- High blood pressure
- Diabetes
- Recent surgeries
- Pregnancy (not recommended)
- Severe anxiety or panic disorders
Vaccinations and medications:
- No vaccinations legally required for Nepal
- Recommended: Hepatitis A, Typhoid, updated Tetanus
- Consider: Hepatitis B, Rabies (for extended stays)
- Malaria medication not needed for trekking regions
- Altitude medication (Diamox) often recommended—discuss with doctor
Pre-existing conditions aren't automatic disqualifiers. Many trekkers with managed conditions (controlled asthma, well-managed diabetes, etc.) successfully complete Nepal treks. The key is proper medical consultation, appropriate trek selection, and honest communication with your guide.
Step 2: Choose Your First Trek
This is arguably the most important decision you'll make. The right trek matches your fitness, time, and goals; the wrong one leads to struggle, disappointment, or worse.
Matching Trek to Fitness Level
If you're building from basic fitness:
- Poon Hill Trek (3-5 days) — Maximum altitude 3,210m
- Ghorepani-Ghandruk Loop (4-6 days) — Maximum altitude 3,210m
- Helambu Trek (5-7 days) — Maximum altitude 3,650m
If you have moderate fitness and hiking experience:
- Mardi Himal Trek (5-7 days) — Maximum altitude 4,500m
- Langtang Valley Trek (7-10 days) — Maximum altitude 4,773m
- Annapurna Base Camp (10-14 days) — Maximum altitude 4,130m
Avoid these for your first trek:
- Everest Base Camp (high altitude, demanding)
- Annapurna Circuit with Thorong La (high pass)
- Manaslu Circuit (restricted, demanding)
- Any trek with "pass" in the name (usually involves 5,000m+ altitude)
Duration Considerations
Longer isn't necessarily better for first-timers. Advantages of shorter treks:
- Less physical demand overall
- Lower altitude sickness risk
- Easier to commit mentally
- Test your gear and preferences
- Requires less vacation time
- Lower total cost
If this is truly your first multi-day trek, seriously consider Poon Hill (4-5 days). It delivers spectacular Himalayan views, authentic teahouse experience, and cultural immersion—all without excessive altitude risk or physical demands. After completing it, you'll know exactly what longer treks involve and whether you want more.
Season Selection
| Season | Weather | Temps | Crowds | Recommendation |
|---|---|---|---|---|
| - | - | - | - | - |
| - | - | - | - | - |
| - | - | - | - | - |
| - | - | - | - | - |
| - | - | - | - | - |
For first-timers, October-November or March-April are strongly recommended. These seasons offer the best weather, clearest views, and full teahouse operations. The crowds are worth accepting for reliability.
Recommended First Treks in Detail
Best overall first trek: Poon Hill (4-5 days)
The Poon Hill trek is Nepal's most popular short trek for excellent reasons. At just 3,210m maximum altitude, it presents virtually no altitude sickness risk. The iconic sunrise viewpoint delivers panoramic views of Dhaulagiri (8,167m), Annapurna I (8,091m), and Machapuchare's fishtail peak.
- Why it works for beginners: Manageable duration, low altitude, excellent infrastructure, clear success path
- The challenge: Day 2's 3,000+ stone steps from Tikhedhunga to Ghorepani
- What you'll experience: Himalayan panoramas, Gurung villages, rhododendron forests, teahouse culture
- Cost range: $400-900 all-inclusive
Best moderate first trek: Langtang Valley (7-10 days)
Closer to Kathmandu than Everest or Annapurna routes, Langtang offers spectacular mountain scenery, rich Tamang culture, and the "Valley of Glaciers" atmosphere without extreme difficulty.
- Why it works for beginners: Gradual ascent profile, excellent acclimatization opportunities, diverse scenery
- The challenge: Higher altitude (4,773m optional viewpoint), longer daily walks
- What you'll experience: Dramatic valley scenery, Buddhist monasteries, yak cheese, mountain panoramas
- Cost range: $700-1,200 all-inclusive
Best off-beaten-path first trek: Mardi Himal (5-7 days)
The Annapurna region's hidden gem offers intimate, wilderness experience with spectacular close-up views of Machapuchare and Annapurna South.
- Why it works for beginners: Fewer crowds, achievable in less than a week, spectacular views
- The challenge: 4,500m altitude requires proper acclimatization, basic teahouses at high elevations
- What you'll experience: Ridgeline walking, intimate mountain views, genuine wilderness feeling
- Cost range: $450-900 all-inclusive
Our Recommendation for True First-Timers
If you've never trekked before—never walked multiple days in mountains with a backpack—start with Poon Hill. It's not about "settling" for less; it's about smart progression. Poon Hill delivers world-class experiences while building confidence and understanding. Many experienced trekkers name it among their favorites.
Step 3: Plan Your Timeline
With your trek chosen, work backward from your ideal departure date to create a realistic preparation timeline.
How Far in Advance to Book
6-8 months before: Ideal for October peak season or if joining group departures 3-4 months before: Standard booking window for most treks 1-2 months before: Still possible outside peak season, reduced options Last minute (2-4 weeks): Possible but limited agency/guide choices
Booking earlier provides:
- Best guide availability (experienced guides book up)
- More agency options and comparison time
- Locked-in pricing (costs can increase near peak season)
- Time to arrange travel insurance, vaccinations, etc.
The Preparation Timeline
Ideal 6-Month Timeline:
| Months Before | Focus Areas |
|---|---|
| 6 months | Choose trek, research agencies, begin base fitness |
| 5 months | Book trek package, arrange travel insurance |
| 4 months | Begin structured training program |
| 3 months | Purchase/gather essential gear, break in boots |
| 2 months | Intensify training, practice with full gear, finalize logistics |
| 1 month | Peak training, book flights, confirm all arrangements |
| 2 weeks | Taper training, final gear check, pack |
| 1 week | Rest, mental preparation, final packing |
Minimum 3-Month Timeline:
| Months Before | Focus Areas |
|---|---|
| 3 months | Choose trek, book package, begin training |
| 2 months | Acquire gear, intensify training |
| 1 month | Book flights, continue training with gear |
| 2 weeks | Final preparations, taper |
Visa and Travel Arrangements
Nepal visa: Available on arrival for most nationalities at Kathmandu airport. Costs: $30 (15 days), $50 (30 days), $125 (90 days). Pay in exact USD cash. No advance visa application needed for most countries.
Flights to Nepal: Book 2-4 months ahead for best prices. Most international arrivals route through Delhi, Doha, Bangkok, or Dubai. Direct flights from major Asian hubs; connections required from Americas and Europe.
Travel insurance: Purchase 1-2 months before departure. Must explicitly cover:
- Trekking to your maximum altitude
- Helicopter evacuation
- Trip cancellation/interruption
- Medical expenses
Insurance Non-Negotiable
Do not trek in Nepal without comprehensive travel insurance covering helicopter evacuation. Evacuations cost $3,000-10,000+ and teahouse medical facilities are extremely limited. Without insurance, you could face life-threatening delays or devastating financial burden. Verify your policy covers trekking to your specific altitude before departure.
Step 4: Book Your Trek
Since April 2023, Nepal requires all foreign trekkers in national parks and conservation areas to hire a licensed guide. Solo independent trekking is no longer permitted.
Agency vs. Independent Booking
Agency package (recommended for first-timers):
A trekking agency handles all logistics—guide, permits, accommodation bookings, transportation, meals, and emergency coordination.
What's typically included:
- Licensed, English-speaking guide
- All trekking permits (TIMS, conservation area permits)
- Teahouse accommodation during trek
- All meals during trek (3x daily)
- Transportation to/from trailhead
- Guide's food and accommodation
- Porter (in standard/premium packages)
- Emergency coordination
What's NOT included:
- International flights
- Nepal visa fees
- Pre/post-trek accommodation
- Travel insurance
- Personal gear
- Hot showers on trail ($2-5 each)
- WiFi charges ($2-5 per day)
- Drinks beyond basic tea
- Tips for guide/porter
Independent booking with guide:
You arrange your own guide (still required) and handle logistics yourself. Slightly cheaper but more complex.
For first-timers, agency packages reduce stress and uncertainty significantly. The price difference is modest ($100-200), and the peace of mind is substantial.
What to Look for in Agencies
Verify these credentials:
- Registration with Nepal Tourism Board (NTB)
- Member of Trekking Agencies' Association of Nepal (TAAN)
- Positive recent reviews (TripAdvisor, Google, Trustpilot)
- Clear, detailed itineraries
- Transparent pricing with inclusions/exclusions listed
- Responsive communication
Good signs:
- Willing to customize itineraries
- Provides guide profiles and experience
- Offers pre-departure briefing
- Has local office in Kathmandu
- Carries emergency protocols
- Pays fair wages to guides/porters
Questions to ask agencies:
- How many years of experience does my guide have?
- What's the maximum group size?
- What happens if weather forces itinerary changes?
- What emergency procedures do you have?
- How do you handle altitude sickness situations?
- Is guide/porter insurance included?
- Can I speak with previous clients?
What Should Be Included
For a standard package, expect:
Always included:
- Licensed guide throughout trek
- All required permits
- Teahouse accommodation
- Three meals daily during trek
- Transportation to trailhead
Usually included in standard packages:
- Porter (one per two trekkers)
- Welcome/farewell dinners in Kathmandu
- Airport transfers
Premium additions:
- Private room upgrades
- Higher staff-to-trekker ratio
- Better quality teahouses
- Additional buffer days
Red Flags to Avoid
Immediate red flags:
- No NTB registration or TAAN membership
- Prices significantly below market rate (likely cutting safety corners)
- Vague answers about guide credentials
- No written contract or unclear terms
- Pressure to book immediately
- Poor or no reviews
- Unlicensed guides offering "cheaper" options
- Refusing to provide guide insurance documentation
Concerning patterns:
- All reviews seem fake or overly positive
- No local office (only online presence)
- Unclear cancellation policies
- Hidden fees appearing after booking
- Communication that stops after payment
Booking Tip
Contact 3-4 agencies with the same inquiry. Compare responses, pricing transparency, and communication quality. The way an agency handles pre-booking communication often predicts how they'll handle your trek.
Step 5: Prepare Physically
Proper physical preparation transforms your trek from a survival test into an enjoyable achievement. Here's a proven 8-12 week training plan.
8-12 Week Training Overview
Weeks 1-4: Building Foundation
Goal: Establish cardio base and begin leg strength work
Cardio (4x per week):
- Walk or hike 30-45 minutes at moderate pace
- Include hills or inclined treadmill (5-10% grade)
- Heart rate should allow conversation with effort
- Progress to 45-60 minutes by week 4
Strength (2x per week):
- Squats: 3 sets of 15 reps
- Lunges: 3 sets of 12 each leg
- Step-ups: 3 sets of 15
- Calf raises: 3 sets of 20
- Planks: 3 sets of 45 seconds
Weeks 5-8: Building Endurance
Goal: Increase duration, add pack weight, stair specificity
Cardio (4-5x per week):
- One long session: 2-3 hours with hills
- Three moderate sessions: 45-60 minutes
- Add 5-8kg daypack to one session weekly
- Include dedicated stair climbing (20-30 minutes)
Strength (2x per week):
- Increase reps by 20% on all exercises
- Add single-leg exercises (single-leg deadlifts, pistol progressions)
- Increase plank hold to 60-90 seconds
Weeks 9-12: Trek Simulation
Goal: Back-to-back training days, full gear practice
Weekend long sessions (both days):
- Saturday: 3-4 hour hike with full daypack (8-10kg)
- Sunday: 2-3 hour hike with same pack
- Include maximum available elevation gain
- Test all gear during these hikes
Weekday maintenance (3-4x):
- 45-60 minute sessions
- At least one stair session weekly
- Maintain strength work
Final 1-2 weeks: Taper
- Reduce volume by 40-50%
- Maintain intensity but cut duration
- Focus on rest and avoiding injury
- No new exercises
Key Exercises for Trekking
Stairs are crucial. Nepal's trails feature thousands of stone steps. Find a stadium, tall building, or stair machine and climb continuously for 20-30 minutes. This specifically prepares muscles for what you'll encounter.
Essential exercises:
- Squats — Fundamental leg strength
- Step-ups — Mimics trail stepping
- Lunges — Balance and leg endurance
- Calf raises — Critical for steep ascents
- Planks — Core stability for pack carrying
- Hip flexor stretches — Prevent tightness from hiking
Practice Hikes
Before departure, complete at least:
- Two 3-4 hour hikes with full daypack
- One back-to-back weekend (hiking both days)
- Multiple sessions with your actual boots
Practice hikes reveal:
- Boot fit issues (blisters, hot spots)
- Pack adjustment needs
- Layering requirements
- Your actual pace and endurance
Already Active?
If you're already running, cycling, or doing regular gym work, your cardiovascular base is likely sufficient. Focus your preparation on: (1) stair-specific training, (2) hiking with weight, and (3) sustained moderate effort over multi-hour sessions. Your challenge will be adjusting to slower paces at altitude.
Step 6: Gather Your Gear
You don't need to spend thousands on equipment. Focus on essentials, rent bulky items, and avoid over-packing.
Essential Items
Footwear (critical—don't compromise):
- Hiking boots (broken in with 50+ km before departure)
- Wool hiking socks (3-4 pairs)
- Camp shoes/sandals (lightweight)
Clothing layers:
- Base layers (moisture-wicking, 2 tops, 1 bottom)
- Mid-layer fleece or lightweight down
- Insulated jacket (down or synthetic)
- Rain jacket (waterproof, breathable)
- Rain pants or ponchos
- Trekking pants (2 pairs, quick-dry)
- Sun hat and warm hat
- Gloves (liner and insulated pair)
Pack and carrying:
- Daypack (25-35 liters)
- Dry bags or pack liner
- Duffel bag for porter (if applicable)
Sleep and comfort:
- Sleeping bag (rent in Nepal, -10C rated)
- Sleeping bag liner (bring from home)
Accessories:
- Headlamp with spare batteries
- Trekking poles (rent or buy)
- Sunglasses (UV protection essential)
- Water bottles (2x 1L) or hydration bladder
- Water purification (tablets or SteriPen)
Personal:
- First aid kit (basic)
- Medications (personal + altitude sickness)
- Sunscreen SPF 50+
- Lip balm with SPF
- Toiletries (minimal)
- Quick-dry towel (small)
What to Buy vs. Rent in Nepal
Buy at home (fit-critical or quality-critical):
- Hiking boots
- Base layers
- Technical clothing
- Headlamp
- Water purification
- Personal first aid
- Sunscreen
Rent in Nepal (bulky or one-time use):
- Sleeping bag: NPR 150-300/day ($1-2)
- Down jacket: NPR 100-200/day ($0.75-1.50)
- Trekking poles: NPR 50-100/day ($0.40-0.75)
- Duffel bag: NPR 50-100/day
- Crampons (if needed): NPR 200-300/day
Buy in Nepal (good value, good quality):
- Wool socks
- Fleece layers
- Gloves and hats
- Trekking pants
- Thermal underwear
Renting in Nepal saves significant money and pack space. A 2-week rental package costs $50-80—far less than purchasing equivalent items.
Packing Strategy
Total pack weight targets:
- Daypack: 6-8 kg maximum
- Porter duffel: 12-15 kg maximum (shared between two trekkers)
Daypack should contain:
- Water and snacks
- Rain jacket
- Extra warm layer
- Camera
- Sunscreen and lip balm
- Small first aid items
- Cash and documents
- Headlamp
Porter duffel contains:
- Sleeping bag
- Spare clothing
- Toiletries
- Extra layers
- Non-daily-use items
Packing principles:
- Lay out everything, then remove 30%
- Every item must serve multiple purposes or be essential
- Avoid "just in case" items except for safety gear
- Cotton has no place in your pack
- Pack in waterproof bags/compression sacks
Gear Testing
Do at least one full training hike in your complete trekking outfit—boots, pack, layers, everything. Discover problems at home where you can fix them, not at 3,500m where options are limited.
Step 7: Handle Logistics
The final pieces: getting to Nepal, getting your visa, navigating arrival, and managing money and communication.
Flights to Nepal
International routing options:
- From Europe: Via Delhi, Doha, Abu Dhabi, Dubai, or Istanbul
- From Americas: Via Delhi, Doha, Dubai, Bangkok, or multiple stops
- From Australia/NZ: Via Bangkok, Singapore, Kuala Lumpur, or Delhi
- From Asia: Direct flights from many hubs (Delhi, Bangkok, Hong Kong, Singapore)
Booking tips:
- Compare prices on Google Flights, Skyscanner, Kayak
- Book 2-4 months ahead for best prices
- Consider open-jaw (arrive Kathmandu, depart different city if combining trips)
- Budget $700-1,500 depending on origin
Arrival timing:
- Plan to arrive in Kathmandu 2-3 days before trek start
- Afternoon arrivals allow same-day rest and adjustment
- Evening arrivals are fine but allow extra rest day
Visa on Arrival
Nepal offers visa on arrival for most nationalities at Tribhuvan International Airport (KTM).
Process:
- Fill out form at electronic kiosks in arrival hall
- Queue at payment counter with passport and cash
- Pay exact fee in USD: $30 (15 days), $50 (30 days), $125 (90 days)
- Receive receipt and queue at visa counter
- Officer stamps visa in passport
- Proceed to immigration
What to have ready:
- Passport (6+ months validity)
- Exact USD cash for visa fee
- Passport photos (2, though not always required)
- Kathmandu hotel name/address
Processing time: 30 minutes to 2 hours depending on crowd
Kathmandu Arrival
Airport to Thamel transportation:
- Pre-paid taxi (recommended): NPR 1,200-1,500 ($9-11)
- Negotiated taxi: NPR 1,000-1,200 ($7-9)
- Hotel pickup: Free if arranged (mid-range+ hotels)
- Ride-sharing apps (Pathao): NPR 600-900 ($4.50-7)
At the airport, also:
- Get SIM card (Ncell or Nepal Telecom): NPR 1,000-1,500 ($7-11) for tourist package
- Exchange small amount of USD for immediate expenses (better rates in Thamel)
- Confirm hotel booking and address
First day in Kathmandu:
- Check into hotel
- Rest and hydrate
- Light exploration of Thamel
- Early dinner
- Early sleep (adjust to time zone)
Second day:
- Meet with trekking agency
- Complete permit paperwork (if not handled by agency)
- Final gear purchases or rentals
- Review itinerary with guide
- Organize pack
Money and Communication
Money strategy:
- Exchange majority of cash in Thamel (better rates than airport)
- Use ATMs in Kathmandu: Nabil Bank, Himalayan Bank, Standard Chartered
- Carry all trek cash from Kathmandu (no ATMs on most trails)
- Budget NPR 1,500-2,500 per day on trail ($11-18) for extras
Daily trail expenses beyond package:
- Hot shower: $2-5
- WiFi: $2-5
- Phone charging: $2-3
- Bottled drinks: $1-4
- Snacks: $2-5
Communication:
- Nepali SIM provides coverage in main villages
- WiFi available at teahouses (slow, unreliable)
- Download offline maps before trek
- Inform family of approximate itinerary
- WhatsApp messages work on minimal data
Cash Safety
Divide your cash between daypack, main bag, and money belt. Keep daily spending amount accessible; larger reserve hidden securely. Nepal is generally safe, but smart practices prevent problems.
Step 8: Final Preparations
The week before departure separates prepared trekkers from stressed ones. Here's how to approach it.
Week Before Departure Checklist
Documents and copies:
- Passport (original and 2 photocopies)
- Travel insurance policy (printed and digital)
- Flight confirmations
- Trek booking confirmation
- Emergency contact list
- Passport photos (4-6 for permits)
- Credit/debit cards
- Driver's license (as backup ID)
Gear final check:
- All items present and functional
- Batteries fully charged
- Headlamp tested
- Boots broken in
- Pack fits properly
- Rain gear accessible
- First aid kit complete
Health:
- Prescriptions filled (plus extras)
- Altitude medication if using (Diamox)
- Doctor clearance if applicable
- Dental checkup (altitude intensifies issues)
Financial:
- USD cash for visa ($30/50/125 exact)
- USD cash to exchange ($300-500)
- Notify banks of Nepal travel
- Verify credit card works internationally
Communication:
- Unlock phone for international SIM
- Download offline maps (Maps.me, Google Maps offline)
- Download entertainment for flights
- Share itinerary with family/friends
Day Before Trek Checklist
With your trekking agency:
- Final itinerary review
- Meet guide (if possible)
- Verify all permits ready
- Confirm pickup time and location
- Exchange emergency contact information
- Clarify any remaining questions
Personal preparation:
- Pack bags completely
- Weigh daypack (under 8kg)
- Arrange porter duffel
- Store excess luggage at hotel
- Early dinner (familiar foods)
- Lay out morning clothes
- Charge all devices
- Set alarm with buffer time
Mental Preparation
Physical readiness gets most attention, but mental preparation matters equally.
Expect challenges:
- You will have hard days
- Weather may not cooperate
- Your body will be tired
- Teahouse conditions are basic
- You might experience mild altitude effects
Adopt the right mindset:
- "Bistari, bistari" (slowly, slowly)—Nepal's universal trekking mantra
- Progress over perfection
- Each step forward is an achievement
- Flexibility and patience are virtues
- The journey matters as much as the destination
Managing anxiety:
- Some pre-trek nervousness is normal and healthy
- Review your preparation—you've done the work
- Trust your guide's experience
- Focus on controllables (effort, attitude) not uncontrollables (weather, others)
- Remember thousands of people complete this every year
The Night Before
Don't stay up late organizing. Everything that can be done should be done by 7 PM. Have a calm dinner, review your itinerary one more time, and get 8+ hours of sleep. You'll be grateful for the rest when 5 AM comes.
What Happens Next: Your First Day on Trail
You've done the preparation. Your pack is ready. Your guide meets you at the hotel. Here's what the first day typically looks like:
Morning of Departure
5:00-6:00 AM: Wake up, final pack check, breakfast 6:30-7:00 AM: Guide arrives at hotel 7:00-8:00 AM: Transportation to trailhead (varies by trek: bus, jeep, or flight)
The drive/flight to the trailhead is itself an experience. Roads wind through valleys, past terraced hillsides, through villages. Take it in—the adventure has begun.
First Steps
When you step onto the trail for the first time, the reality hits: you're actually doing this.
What to expect:
- Initial excitement mixed with nervousness
- Adjustment to walking pace (slower than you think)
- Getting used to trekking poles if you use them
- Finding your pack's comfortable position
- Trail hospitality—"Namaste" greetings from locals
Your guide will:
- Set an appropriate pace
- Point out landmarks and explain culture
- Stop at strategic rest points
- Order lunch at a teahouse
- Monitor your condition
Day 1 is typically gentle. Itineraries intentionally start with moderate distances to let you adjust. You'll walk 4-5 hours with breaks, ending at a teahouse village where you'll eat, rest, and sleep.
Your First Teahouse Evening
Teahouses are mountain lodges—simple but comfortable. Expect:
- Twin room with basic beds (foam mattresses, blankets)
- Common dining room with wood stove or heater
- Simple but filling meals (dal bhat, noodles, soup)
- Basic toilet facilities (usually squat style, sometimes Western)
- Hot drinks on demand
- Fellow trekkers sharing stories
Evening routine:
- Arrive at teahouse (typically 2-4 PM)
- Check into room, unpack essentials
- Tea and snacks in common room
- Explore village if time/energy permits
- Dinner at 6-7 PM
- Socialize with other trekkers
- Early sleep (8-9 PM)
The Pattern Continues
Each subsequent day follows similar rhythm: early morning, walking through stunning landscapes, lunch break, more walking, afternoon arrival, teahouse evening. The scenery changes, altitude increases, villages become more remote, mountains grow closer.
You've prepared for this. Trust the process. Take it step by step.
Frequently Asked Questions
Planning Questions
Q: How far in advance should I start preparing for a Nepal trek?
A: Ideally 4-6 months. This allows time for proper fitness training (8-12 weeks), gear acquisition and testing, booking arrangements, and logistics coordination. Minimum viable preparation is 2-3 months if you're already reasonably fit.
Q: Is Nepal trekking safe for solo travelers?
A: Yes, Nepal is generally safe for solo travelers, including solo women. Since 2023, all trekkers must have guides, so you won't be truly "solo" on the trail. Popular routes have many other trekkers, and Nepali people are famously hospitable. Standard travel precautions apply.
Q: Can I trek in Nepal if I've never done a multi-day hike before?
A: Absolutely. Choose an appropriate beginner trek (Poon Hill, Helambu, or Ghorepani-Ghandruk), train properly, and hire a good guide. Many successful Nepal trekkers were complete beginners. The key is matching your first trek to your actual fitness and experience level.
Q: What if I need to cancel my trek?
A: Cancellation policies vary by agency—read terms carefully before booking. Typical policies: 30+ days before = significant refund, 15-30 days = partial refund, under 15 days = minimal or no refund. Travel insurance with "cancel for any reason" coverage provides additional protection.
Fitness and Health Questions
Q: I'm overweight. Can I still trek in Nepal?
A: Yes, with appropriate preparation and trek selection. Choose easier treks (Poon Hill, Helambu), allow extra training time, consider hiring a porter to carry your bag, and plan longer itineraries for slower pacing. Extra weight makes ascents harder and increases knee strain on descents—trekking poles help significantly.
Q: How will I know if I'm getting altitude sickness?
A: Common symptoms include headache, nausea, fatigue, dizziness, and sleep disruption. These typically appear 6-24 hours after reaching higher elevations. Tell your guide immediately if you experience symptoms. Mild symptoms are normal at altitude; severe symptoms (confusion, loss of coordination, severe vomiting) require immediate descent.
Q: What medications should I bring?
A: Personal prescriptions (with extras), pain relievers, anti-diarrheal, rehydration salts, altitude medication if prescribed (Diamox), antihistamines, throat lozenges, blister treatments. Your guide will have basic first aid; you need personal medications.
Logistics Questions
Q: Do I need to tip my guide and porter?
A: Yes, tipping is expected and represents significant income for staff. Standard guidelines: Guide $10-15 per day of service, Porter $8-12 per day. For a 10-day trek, budget $100-150 for tips total. Present at trek's end with sincere thanks.
Q: How much cash should I carry on the trek?
A: For extras beyond your package (hot showers, WiFi, drinks, snacks), budget NPR 1,500-2,500 per day ($11-18). For a 10-day trek, carry NPR 20,000-30,000 ($150-220) plus emergency reserve. There are no ATMs on most trails.
Q: What's the food like?
A: Teahouse food is simple but filling. Dal bhat (rice, lentils, vegetables, pickle) is the staple—unlimited refills make it excellent value. Also available: momos (dumplings), noodle soups, fried rice, eggs, pancakes, porridge. Vegetarian options are plentiful. Stick to cooked foods for safety.
Q: Can I charge my electronics?
A: Yes, most teahouses offer charging for $2-3 per device. Bring a power bank (10,000+ mAh), universal adapter, and USB cables. Don't rely on consistent charging availability at higher elevations.
Trek-Specific Questions
Q: Which trek has the best views for beginners?
A: Poon Hill delivers spectacular panoramic sunrise views of Dhaulagiri and Annapurna in just 4-5 days. For longer treks, Annapurna Base Camp's mountain amphitheater is among the world's most dramatic sights. Mardi Himal offers intimate close-up views of Machapuchare.
Q: Can I extend or shorten my trek once I'm there?
A: Within reason, yes. Discuss with your guide—they can often adjust itineraries. Shortening due to illness or difficulty is always possible (safety first). Extending requires checking permit validity and teahouse availability. Built-in buffer days in your itinerary provide flexibility.
Q: What if the weather is bad?
A: Weather can force itinerary changes. Your guide will assess conditions and make safety decisions. Options include waiting for improvement, taking alternate routes, or aborting if necessary. This is why buffer days and travel insurance matter. Trust your guide's judgment—they know local conditions.
Related Resources
Beginner Trek Guides:
- Best Nepal Treks for Beginners — Compare all first-timer options
- Poon Hill Trek Guide — Complete guide to the classic first trek
- Langtang Valley Trek Guide — Moderate first trek deep dive
- Mardi Himal Trek Guide — Off-beaten path adventure
Essential Preparation:
- Kathmandu Arrival Guide for Trekkers — Airport to trail
- Nepal Trekking Permits Explained — All permit information
- Nepal Trekking Packing List — Complete gear guide
- Altitude Sickness Signs and Turnaround Rules — Critical safety info
Seasonal Planning:
- Best Time to Trek in Nepal — Month-by-month breakdown
Interactive Tools:
- Trek Finder Quiz — Get personalized recommendations
- Compare Nepal Treks — Side-by-side comparison
Your Journey Starts Here
You now have the complete roadmap from "I want to trek" to "I'm ready to go."
Let's recap the 8 steps:
- Assess your readiness — Fitness, time, budget, health
- Choose your first trek — Match difficulty to your reality
- Plan your timeline — Work backward from departure
- Book your trek — Find reputable agency, understand what's included
- Prepare physically — 8-12 weeks of targeted training
- Gather your gear — Essentials only, rent in Nepal
- Handle logistics — Flights, visa, money, communication
- Final preparations — Checklists, mental readiness
The gap between dreaming and doing is smaller than it appears. Thousands of people just like you—regular people with jobs, families, and limited experience—complete Nepal treks every year. They're not exceptional; they're prepared.
The Himalayas have been calling adventurers for generations. The mountains are patient—they'll wait for you. But you don't have to wait. You have everything you need to start.
Choose your trek. Book your adventure. Begin your training. In a few months, you could be watching sunrise over 8,000-meter peaks, walking through ancient villages, and discovering what you're capable of.
Your first Himalayan trek awaits. The only question left is: when will you start?
This guide is maintained by the Nepal Trekking Team with input from licensed guides, trekking agencies, and hundreds of first-time trekkers. Last updated February 2026. For questions or clarifications, contact our editorial team.