

Ask any guide in Namche Bazaar what injury causes the most problems on the Everest trail, and most will say the same thing: knees. Not altitude sickness. Not blisters. Knees.
This is not surprising when you understand Nepal's trail architecture. The most famous trekking routes in the country — the Everest, Annapurna, and Langtang corridors — are built primarily from stone steps. Not gentle gravel paths or forested dirt tracks, but thousands of hand-laid stone slabs, often steep, irregular, slick when wet, and relentless in their demand on the knee joint.
The descent from Namche Bazaar to the Dudh Kosi bridge is the classic example: 800 metres of elevation loss over stone steps in 3–4 hours. Your quadriceps must eccentrically contract on every single step to absorb your weight. Multiply that by tens of thousands of steps over 14 days and you understand why knee pain is endemic on Nepal treks.
This guide gives you what you need to protect your knees before your trek, on the trail, and in the event that something goes wrong.
Understanding Why Nepal Descents Destroy Knees
The Biomechanics of Stone Steps
On flat terrain, your knee bends and extends under minimal load. On a downhill step, physics changes dramatically. As you lower your body weight onto the forward foot, your quadriceps must produce a braking force equal to multiples of your body weight.
Studies of stair descent biomechanics show knee joint loads of 3–5 times body weight during each step. On a 75-kg trekker, that is 225–375 kg of force through the knee joint with every step down. Over 8 hours of descending, the cumulative load is extraordinary.
The main structures under stress:
Patellofemoral joint: The kneecap (patella) tracks in a groove on the femur. Repetitive loading under fatigue causes the patella to track improperly, producing the anterior (front) knee pain called patellofemoral syndrome — colloquially "trekker's knee" or "runner's knee." This is the most common knee complaint on Nepal's trails.
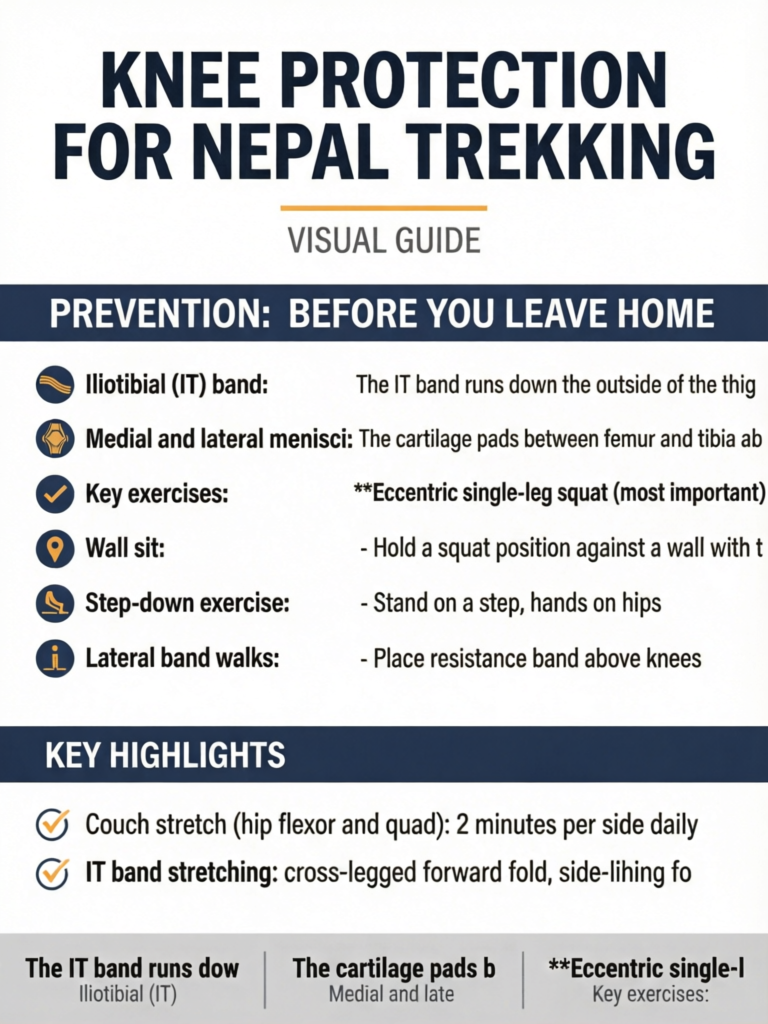
Iliotibial (IT) band: The IT band runs down the outside of the thigh and attaches near the knee. Repetitive bending causes friction on the lateral femoral condyle, producing sharp pain on the outside of the knee. IT band syndrome is common and debilitating if untreated.
Medial and lateral menisci: The cartilage pads between femur and tibia absorb shock and enable smooth joint movement. Fatigue and awkward foot placements on uneven stone steps can compress and twist these structures beyond their tolerance.
Patellar tendon: The tendon connecting the kneecap to the shinbone. Sustained eccentric loading produces patellar tendinopathy — pain below the kneecap, typically worst at the start of movement and after prolonged rest.
The Nepal-Specific Factor
Nepal's trails concentrate descent load in ways that differ from mountain trails in other countries:
Stone is unforgiving. Dirt and packed gravel absorb some impact. Stone absorbs none. Each step transfers full impact directly through your foot into your knee.
Step height is irregular. Stone steps carved by hand vary enormously — from ankle-height to thigh-height within a few metres. Your knee absorbs sudden unexpected loads as you misestimate step height, particularly when tired.
Wet stone is treacherous. Monsoon-season trekking and rainy days produce slick stone surfaces. Slipping on a step forces the knee into abrupt and uncontrolled positions that can strain ligaments.
Elevation change is concentrated. Nepal treks don't gently undulate — they climb steeply and descend steeply. The 1,400-metre descent from Thorong La to Muktinath on the Annapurna Circuit happens in 3 hours. The 1,700-metre descent from Ghorepani to Birethanti is 5–6 hours of continuous downhill.
Prevention: Before You Leave Home
Strengthening Programme (Start 8–12 Weeks Before)
Building quadriceps and posterior chain strength before your trek is the single most effective knee protection strategy. The muscles must be conditioned to sustain eccentric loads before you ask them to do it for hours per day.
Key exercises:
Eccentric single-leg squat (most important):
- Stand on one foot at the edge of a step
- Slowly lower your body weight until your knee bends to 90°
- Use the other foot to return to start position
- Repeat 3 sets of 12 each leg, 3x per week
- Progress to deeper knee bend as strength develops
Wall sit:
- Hold a squat position against a wall with thighs parallel to floor
- Start with 30 seconds, progress to 90 seconds
- Builds isometric quad strength directly relevant to stair descent
Step-down exercise:
- Stand on a step, hands on hips
- Slowly lower one foot toward the ground (do not touch)
- Return to standing
- 3 sets of 15 per leg, focusing on control not speed
Lateral band walks:
- Place resistance band above knees
- Step sideways maintaining tension
- 3 sets of 20 steps each direction
- Strengthens glutes — essential for knee tracking
Hip bridge:
- Lie on back, knees bent
- Drive hips toward ceiling, hold 3 seconds
- 3 sets of 15
- Builds glutes and hamstrings that support knee in descent
Flexibility Work
Tight hip flexors and quadriceps increase patellofemoral compression. Add:
- Couch stretch (hip flexor and quad): 2 minutes per side daily
- Calf stretching: critical for Achilles health, which affects knee biomechanics
- IT band stretching: cross-legged forward fold, side-lying foam roller
On the Trail: Equipment
Trekking Poles: Non-Negotiable on Nepal Descents
If you use trekking poles on the ascent and then stow them for the descent because "the poles aren't needed going down" — you are making the most common and most damaging mistake in Nepal trekking.
Trekking poles on descents:
Reduce knee load by 20–30%: Studies consistently show that properly used trekking poles reduce the eccentric knee load during stair descent by this margin. Over an 8-hour descent day, this is thousands of kilonewton-seconds of reduced knee stress.
Improve balance: The four-point stance created by two trekking poles dramatically reduces the risk of awkward step placements. The poles give you a warning system — you feel the surface through the pole before committing full weight.
Reduce fatigue accumulation: By sharing the descent load across your upper body and core, poles extend the period before quads fatigue — and fatigue is when most injuries occur.
Proper pole technique for descents:
- Lengthen poles 5–10 cm compared to your ascent length
- Plant both poles ahead of you before stepping down
- Brace through both poles as you lower your body weight
- Do not use poles after the step — plant them on the next step down first
- Keep elbows slightly bent — pole length should create a slight forward lean
Knee Braces
For trekkers with existing knee conditions or previous injuries, a knee brace can extend functional trekking capacity significantly.
Patellofemoral/runner's knee sleeve: A simple neoprene sleeve with a patellar cutout. Provides proprioceptive feedback, keeps the knee warm, and may improve patellar tracking. Lightweight and inexpensive. Recommended for anyone with a history of anterior knee pain.
IT band strap: A strap worn just below the kneecap or around the IT band insertion. Can dramatically reduce IT band pain by altering the tension angle of the band.
Hinged brace: For ligament instability or previous ACL/MCL injuries. Heavier and more restrictive but provides genuine mechanical support. Essential if your orthopaedist has recommended bracing for your joint.
What to avoid: Bulky, rigid braces that restrict range of motion are counterproductive on technical terrain. You need full knee flexion to navigate high steps safely.
Footwear Considerations
Boots with good ankle support and a stiff midsole transmit less torsional force to the knee on uneven surfaces. Worn-out boots with compressed midsoles increase impact transmission. Replace boots if the midsole shows visible compression patterns.
Avoid foam-only trail runners for Nepal's stone trails — their flexibility may be comfortable on soft surfaces but increases knee loading on hard stone stairs.
On the Trail: Technique
The Step-Down Technique
Most knee pain is caused not by the magnitude of descent but by technique failures. The correct technique:
-
Lead with your heel on descents. Placing the heel first rather than the midfoot or toe allows the ankle to absorb impact before the knee is loaded.
-
Keep a slight forward lean. The classic mistake is leaning back in fear of slipping — this places the load entirely on the knee rather than distributing it through hip and core.
-
Never straighten the knee fully on landing. The "locked knee" landing is the primary mechanism of stair descent injury. Keep a slight bend throughout.
-
Look ahead, not at your feet. Plan 2–3 steps ahead to identify step heights and adjust your pace before committing to the step.
-
Use a shorter step on very steep sections. If the steps are very high, take them one at a time — both feet on each step before proceeding.
Managing Fatigue
Knee injuries cluster in the final 2 hours of long descent days — when fatigue erodes technique. Strategies:
- Eat a carbohydrate snack mid-descent to maintain muscle glycogen
- Take regular 5-minute breaks, especially on long descents of more than 3 hours
- Slow your pace as fatigue accumulates rather than pushing to finish faster
- If you notice technique degrading (locking knees, heavy impacts), stop immediately for 10 minutes
Treatment: When Pain Appears
Immediate Response to Knee Pain
If knee pain develops on the trail:
Stop and assess before pushing on. A 10-minute rest that allows you to identify the nature of the pain is more valuable than pushing through to the next teahouse.
RICE protocol: Rest the knee (no further walking), Ice if available (cold streams work), Compression with a knee wrap if you have one, Elevate if resting.
Anti-inflammatory medications: Ibuprofen (400–600mg with food) reduces inflammation and pain. Do not use as a masking agent to continue trekking at the same pace — use it as a tool to reduce inflammation while genuinely resting.
Common Conditions and Trail Management
Patellofemoral syndrome (front knee pain): Rest, taping the knee, compression sleeve, avoid bent-knee positions for extended periods. Often manageable with poles and modified pace.
IT band syndrome (outside knee pain): Rest is the primary treatment. Foam rolling the lateral quad and glute if available. The condition typically resolves with 24–48 hours of rest. Return to trekking on flat terrain first.
Significant acute pain (possible ligament injury): Do not continue. Splint the knee, arrange evacuation, contact your travel insurance's emergency line. A suspected ligament tear requires medical assessment.
Medical Resources on Nepal's Trails
The Himalayan Rescue Association operates posts in Pheriche (Khumbu region) and Manang (Annapurna Circuit). Both have physicians who see significant numbers of knee injuries.
For evacuation from remote sections, helicopter services operate throughout the Khumbu and Annapurna regions. Confirm your travel insurance has helicopter evacuation coverage before your trek.