


Island Peak Training Requirements
The core Island Peak training requirements are 16 weeks of structured preparation: a strong aerobic base (VO2 max 45+ ml/kg/min), the ability to ascend roughly 1,000 vertical feet (300m) per hour carrying a 20-25 lb (9-11kg) pack, leg strength for back-to-back hiking days, and technical practice with crampons, ice axe, and a jumar on fixed ropes. Most climbers need 4-6 months to build this fitness.
Island Peak Training Requirements at a Glance
- Timeline: 16 weeks if you already exercise 2-3x/week; add 4-6 weeks from a sedentary baseline (4-6 months total is typical).
- Aerobic standard: sustain ~1,000 vertical feet (300m) per hour uphill with a 20-25 lb pack; VO2 max 45+ ml/kg/min by departure.
- Strength: squats at 1.25x bodyweight, weighted step-ups with a 20kg pack, 5+ pull-ups, and core endurance.
- Stamina: complete back-to-back loaded hiking days (the summit follows 8 days of approach trekking).
- Technical skills: crampons, ice axe self-arrest, ladder/fixed-rope crossing, and jumar ascent on a 45-50 degree headwall.
- Altitude: prior exposure above 4,000-5,000m strongly recommended; the route reaches 5,600m at High Camp before a 6,189m summit.
Island Peak (Imja Tse, 6,189m) is the most popular trekking peak in Nepal, but it is also the most technically demanding among the introductory mountaineering objectives. The 45-50 degree headwall, the exposed summit ridge, the jumar ascent on fixed ropes at altitude -- these are not challenges you can improvise your way through. They require physical and technical preparation that begins months before you board the plane to Kathmandu.
This 16-week training program is built around four progressive phases: base fitness, strength building, altitude simulation and technical preparation, and peak readiness. Each phase builds on the last. The program is designed for someone with a reasonable activity baseline -- meaning you are exercising 2-3 times per week -- who has a summit date committed on the calendar. If you are starting from a more sedentary baseline, add 4-6 weeks to the front of this program.
Island Peak's summit day is 10-14 hours long, starting at 1-2 AM from High Camp at 5,600 meters, ascending 589 vertical meters to the summit, and then descending over 1,400 meters back to Chukhung. The approach trek adds 8 consecutive days of hiking before you set foot on the mountain. This is not a program for half-measures.
16 weeks (4 phases)
6-12 hours/week (builds progressively)
6,189m (20,305 ft)
10-14 hours from High Camp
VO2 max 45+ ml/kg/min
Squats 1.25x bodyweight, step-ups 20kg pack
Crampons, jumar, fixed rope, self-arrest
4 specific assessments
Strongly recommended above 4,000m
Builds on EBC training plan
Why Island Peak Demands More Than Everest Base Camp Training
Most trekkers who set their sights on Island Peak have already completed or are planning the Everest Base Camp trek. The EBC experience is excellent preparation -- but it is not sufficient on its own. Here is what Island Peak demands that EBC does not:
Technical climbing skills: The headwall requires jumar technique on fixed ropes, front-pointing crampons on steep ice and snow, and the upper body strength to haul yourself up 200-300 meters of 45-50 degree terrain. These movements are fundamentally different from walking.
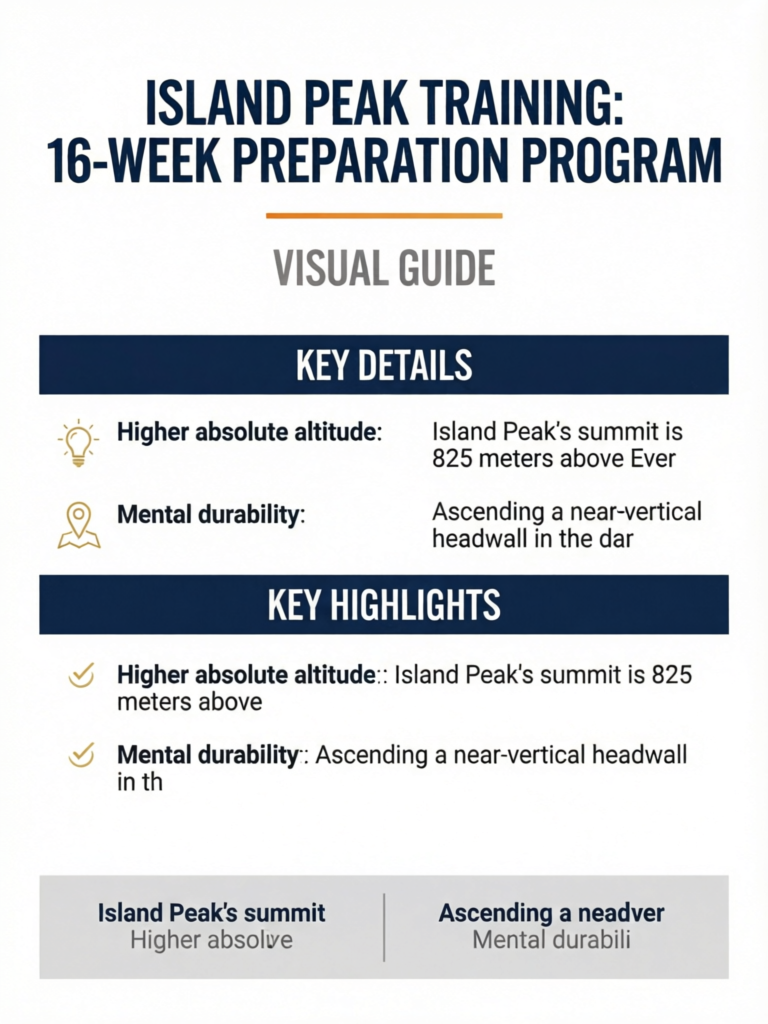
Higher absolute altitude: Island Peak's summit is 825 meters above Everest Base Camp. At 6,189m, your body is operating at roughly 47% of sea-level oxygen availability. The final push demands cardiovascular output your body simply cannot maintain without specific training.
Back-to-back day stamina: You will trek 8 days to reach the mountain. Then you will push to High Camp. Then summit day begins at 1 AM. You need reserves that accumulate day after day.
Mental durability: Ascending a near-vertical headwall in the dark at altitude, with 100 meters of air below you and a jumar in your hand, is a categorically different psychological experience from walking a trail. Mental preparation is not optional.
How This Program Relates to EBC Training
If you have followed our EBC 12-week training plan, this 16-week program extends those gains into mountaineering-specific territory. Weeks 1-4 of this plan overlap with the final phase of EBC training. You can begin this Island Peak program immediately after completing an EBC trek preparation cycle, making it ideal for those doing EBC then Island Peak in the same expedition.
Fitness Benchmarks: How Fit Do You Need to Be?
Before committing to a summit date, measure yourself against the benchmarks that decide success on summit day. These are the same sport-specific standards used by international mountaineering operators.
| Requirement | Pass Standard | Why It Matters |
|---|---|---|
| Uphill pace under load | Ascend ~1,000 vertical feet (300m) per hour carrying a 20-25 lb (9-11kg) pack | This is the single best predictor of high-altitude trekking and climbing performance |
| Sustained elevation gain | Gain 3,000 ft (900m) in roughly 3 hours with a 20 lb pack | Mirrors the daily output of the approach trek and the High Camp push |
| Aerobic capacity | VO2 max 45+ ml/kg/min | At 6,189m, effective VO2 max drops to roughly 22-25 ml/kg/min |
| Leg strength | Squats at 1.25x bodyweight, 20kg step-ups, 5+ pull-ups | Drives crampon placements and jumar moves on the headwall |
| Back-to-back stamina | Repeat a 4-5 hr loaded hike at 80%+ pace the next morning | The summit follows 8 consecutive approach days |
| Training frequency | 4-6 sessions per week for at least 4-6 months | Pure cardio alone does not prepare you; marathon runners regularly fail to summit |
The 1,000-Feet-Per-Hour Rule
The most useful field test you can run is timing your uphill ascent rate with a loaded pack. If you can climb 1,000 vertical feet (300 metres) per hour while carrying 20-25 lbs and still hold a conversation, you have the aerobic engine Island Peak demands. Build to this gradually: start with a 10 lb pack on a hike gaining about 1,000 ft, then add 2-3 lbs each outing (never more than 10% pack weight per week) until 20-25 lbs feels sustainable. This benchmark matters far more than how fast you run on flat ground.
Mountaineering Experience and Skills Required
Island Peak is classed as a trekking peak, but reputable operators do not treat it casually -- you need genuine mountaineering competency to be safe and successful. The summit day involves roped glacier travel, ladder and fixed-rope crossings over crevasses, and a jumar ascent of the 45-50 degree headwall.
Minimum recommended experience:
- Prior multi-day trekking at altitude (ideally above 4,000-5,000m) so you know your acclimatization profile
- Basic competency with crampons, ice axe, and harness -- gained before arrival, not improvised on the mountain
- Comfort with exposure and heights on steep terrain
Skills you must be able to perform on summit day:
- Walk confidently in crampons on snow and ice (French technique and front-pointing)
- Cross aluminium ladders and fixed ropes over crevasses while clipped in
- Ascend a fixed line using a jumar/ascender and descend on a rappel or lower
- Self-arrest with an ice axe if you slip
Most expeditions include a dedicated training day at Base Camp or in Chukhung to rehearse ladder crossings, fixed-rope clipping, and jumar work with the guides. That on-site session sharpens skills -- it does not replace the technical practice you should complete at home during Phase 3. For the full route and summit-day sequence, see our Island Peak climbing guide, and weigh the technical demands against Mera Peak in our Island Peak vs Mera Peak comparison.
Phase 1: Base Fitness (Weeks 1-4)
The first four weeks establish the aerobic foundation that every subsequent phase builds on. If this phase feels easy, push the intensity slightly. If it feels overwhelming, you need to extend your preparation timeline.
Cardio Framework
Goal: Develop consistent Zone 2 aerobic base (60-70% of maximum heart rate) and introduce sustained effort duration.
Frequency: 4-5 cardio sessions per week
| Session Type | Duration | Frequency | Heart Rate Zone |
|---|---|---|---|
| Long steady hike or walk | 90-120 min | 2x/week | Zone 2 (60-70% max HR) |
| Moderate cardio (cycling, elliptical) | 45-60 min | 2x/week | Zone 2-3 |
| Interval session (hills, stairs) | 30-40 min | 1x/week | Zone 4 (80-90% max HR) |
Target weekly cardio volume: 5-7 hours by end of Phase 1.
Best activities for Island Peak specificity:
- Stair climbing with a loaded pack (10kg) -- directly mimics the headwall effort
- Hiking on hilly terrain, aiming for 400-600m elevation gain per session
- Cycling on hilly routes or stationary bike with resistance
- Swimming (builds lung capacity and whole-body cardiovascular efficiency)
Strength Foundation
Frequency: 2x per week, full-body sessions
Key exercises:
| Exercise | Sets x Reps | Notes |
|---|---|---|
| Goblet squat | 3 x 15 | Focus on depth and knee tracking |
| Bodyweight step-ups (45cm box) | 3 x 12 each leg | Controlled tempo, full hip extension |
| Romanian deadlift | 3 x 12 | Hamstrings and posterior chain |
| Push-ups | 3 x max | Essential for self-arrest and rope work |
| Plank | 3 x 45 seconds | Core stability |
| Single-leg balance | 3 x 30 seconds each | Ankle and knee stability |
| Calf raises | 3 x 20 | Crampon work relies heavily on calves |
Phase 1 strength target: Complete all sets with controlled form before adding weight.
Track Your Heart Rate from Day One
Purchase or borrow a heart rate monitor before starting Phase 1. Understanding your actual Zone 2 heart rate (calculated as approximately 180 minus your age for most adults) allows you to train in the correct zone. Most beginners instinctively go too hard on easy days and too easy on hard days. Zone 2 training should feel conversational -- you should be able to speak in full sentences while maintaining the effort.
Phase 1 Weekly Schedule
| Day | Session |
|---|---|
| Monday | Strength training (45-60 min) |
| Tuesday | Zone 2 cardio, 60-90 min |
| Wednesday | Rest or gentle walk |
| Thursday | Strength training (45-60 min) |
| Friday | Interval session (30-40 min hills or stairs) |
| Saturday | Long hike or walk (90-120 min, flat terrain) |
| Sunday | Rest |
Phase 2: Strength Building (Weeks 5-8)
Phase 2 introduces loaded hiking, increases strength training frequency, and shifts cardio toward hill-specific work. The focus is building the leg power to handle back-to-back uphill days under pack weight.
Loaded Hiking Progression
This is the cornerstone of Phase 2. Begin carrying a pack on your longer cardio sessions.
| Week | Pack Weight | Hike Duration | Elevation Gain Target |
|---|---|---|---|
| 5 | 8kg | 2-3 hours | 400-600m |
| 6 | 10kg | 2.5-3.5 hours | 500-700m |
| 7 | 12kg | 3-4 hours | 600-800m |
| 8 | 12-15kg | 3.5-4.5 hours | 700-900m |
What to load in the pack: Water bottles filled with water, rice bags, or a weighted vest. The goal is consistent weight, not specific items.
Strength Progression
Frequency: 3x per week, alternating upper-body focus and lower-body focus sessions
Lower body (2x/week):
| Exercise | Sets x Reps | Week 5-6 | Week 7-8 |
|---|---|---|---|
| Back squat | 4 x 8 | 30-40% bodyweight | 40-50% bodyweight |
| Weighted step-ups (45-50cm box) | 4 x 10 each leg | 10kg pack | 15kg pack |
| Walking lunges | 3 x 15 each leg | Bodyweight | 8-10kg dumbbells |
| Single-leg deadlift | 3 x 10 each leg | Bodyweight | Light dumbbells |
| Wall sit | 3 x 60-90 seconds | Bodyweight | 10kg plate on thighs |
| Loaded calf raises | 4 x 20 | 20kg bar | 30kg bar |
Upper body and core (1x/week):
- Pull-ups or lat pulldowns: 4 x 6-8
- Bent-over rows: 3 x 10-12
- Overhead press: 3 x 10
- Loaded carry (farmer's walk): 4 x 30m with heavy dumbbells
- Hanging knee raises: 3 x 15
Phase 2 strength target: Squats at 0.75x bodyweight, step-ups with 15kg pack, 5+ pull-ups unassisted.
Don't Skip Leg Day Recovery
The loaded hiking in Phase 2 combined with increased strength training volume creates significant leg fatigue. Schedule at least one full rest day between your heaviest loaded hike and your hardest strength session. Overtraining the legs in Phase 2 increases injury risk and undermines Phase 3 performance. Mild muscle soreness is normal; sharp joint pain or inability to descend stairs without pain is a warning sign.
Back-to-Back Training Days
A critical Island Peak-specific element: introduce back-to-back training days to simulate consecutive trekking days.
- Weekend block (Weeks 6-8): Saturday long loaded hike (3-4 hours, 10-15kg) immediately followed by Sunday moderate hike (2-3 hours, 10kg). This is the most important training stimulus for multi-day expedition fitness.
Phase 3: Altitude Simulation and Technical Preparation (Weeks 9-12)
Phase 3 addresses two elements that cannot be fully replicated at sea level but can be meaningfully trained: altitude response and technical mountaineering skills.
Cardiovascular Intensity Progression
Goal: Develop capacity at higher intensities to simulate the cardiovascular demand of the headwall at altitude.
| Session Type | Duration | Frequency | Notes |
|---|---|---|---|
| Long loaded hike | 4-6 hours, 15-20kg | 1x/week | Target 800-1,200m gain |
| Stair climbing intervals | 45-60 min | 2x/week | Weighted pack (10-15kg), all stairs |
| Zone 3-4 sustained effort | 60-75 min | 1x/week | Cycling or running hills |
| Back-to-back weekend hiking | 2 full days | Weekly | Long Saturday, moderate Sunday |
VO2 max targets: By the end of Phase 3, your estimated VO2 max should be 42-45 ml/kg/min or above. You can estimate this from a Cooper Test (12-minute run): distance in meters minus 504.9, divided by 44.73. Many fitness watches also estimate VO2 max automatically.
Crampon and Rope Practice Sessions
Technical skills require practice before you arrive in Nepal. Three targeted sessions in Phase 3 will build fundamental competency:
Session 1: Crampon Familiarization (Week 9) Rent or purchase crampons before this session. Find a snow slope, frozen lake, or indoor ice rink and practice:
- Putting crampons on and removing them with gloves
- Flat-foot (French technique) walking on low-angle snow
- Front-pointing on steeper sections (10-20 degrees)
- Walking with trekking poles, then without
- Duration: 2-3 hours
Session 2: Ice Axe and Self-Arrest (Week 10) Find a snow slope safe for practice or enroll in a day course with a mountain guide:
- Correct ice axe grip (self-arrest grip vs. dagger position)
- Simulated falls from sitting, rolling, and head-first positions
- Arresting speed before gaining dangerous momentum
- Plunge-step descending on moderate snow
- Duration: 2-3 hours with instruction preferred
Session 3: Rope and Jumar Work (Week 11-12) Enroll in a half-day or full-day mountaineering basics course at a climbing gym or outdoor venue:
- Tying into a rope with figure-eight follow-through
- Clipping into fixed lines with carabiners and slings
- Jumar/ascender technique: loading the device, weighting it, moving it up
- Rappelling or lowering on fixed rope
- Duration: 4-6 hours with a qualified instructor
Take a Mountaineering Basics Course
Many outdoor education providers offer 1-2 day introductory mountaineering courses that cover everything in these three practice sessions in a single efficient program. The American Alpine Club, REI, and local mountain guiding companies offer similar courses in the US. In the UK, Mountain Training Scotland and Plas y Brenin run equivalent programs. Even a single day with a guide dramatically accelerates technical skill development and is money far better spent than premium gear upgrades.
Altitude Simulation Options
You cannot fully acclimatize at sea level, but you can stimulate altitude adaptation:
Hypoxic tents (altitude tents): Reduce oxygen concentration during sleep to simulate sleeping at 2,500-4,000m. Used by elite mountaineers and some dedicated trekkers. Rental costs $150-300/month. Evidence supports modest benefits in red blood cell production and ventilatory response. Not essential but useful if available.
Altitude masks: Simulate increased breathing resistance but do not reduce oxygen. Limited evidence for altitude-specific adaptation. Can improve breathing muscle strength.
High-altitude training trip: If your budget and schedule allow, a preparatory trek to 4,000-5,000m before the Island Peak expedition provides genuine acclimatization data about your personal response to altitude. Everest Base Camp itself, Kilimanjaro (5,895m), or Colorado 14ers (4,267m+) are excellent options.
The Irreplaceable Value of Real Altitude
No simulation substitutes for actual altitude exposure. Your body's response to hypoxia at 6,000m cannot be predicted from sea-level data alone. If you have never been above 4,500m, completing the EBC approach section (which reaches 5,364m at Kala Patthar) before your Island Peak attempt gives you critical information about your personal acclimatization profile.
Mental Preparation in Phase 3
The headwall on Island Peak creates significant psychological pressure. Address this deliberately:
Exposure training: Practice climbing at height. Indoor climbing gyms, outdoor sport climbing routes, or scrambling on exposed ridges build comfort with vertical exposure. You do not need to become a climber -- you need to not freeze.
Pre-dawn training: Conduct at least two training sessions starting at 2-3 AM. The combination of sleep deprivation, cold, and effort at that hour closely mimics the first hours of summit day. This is uncomfortable by design.
Visualization: Spend 10-15 minutes per week visualizing the summit day sequence: the headwall, the jumar moves, the ridge traverse, the summit. Mental rehearsal builds confidence and reduces panic responses on the actual day.
Phase 4: Peak Readiness (Weeks 13-16)
Phase 4 consolidates fitness gains, sharpens technical skills, and prepares your body specifically for the expedition format: high daily output followed by genuine recovery.
Training Volume Management
Phase 4 is not about gaining new fitness -- it is about arriving at the mountain fresh and at peak capacity. Volume begins to taper in the final two weeks.
| Week | Cardio Focus | Strength | Long Day |
|---|---|---|---|
| 13 | 8-10 hrs/week, high intensity maintained | 3x/week | 6+ hour hike, 15-20kg |
| 14 | 8-10 hrs/week, back-to-back peaks | 2x/week maintenance | 5-6 hour hike + 3-4 hour day 2 |
| 15 | 6-7 hrs/week, moderate intensity | 2x/week light | 4-5 hour hike, moderate weight |
| 16 (departure week) | 3-4 hrs/week, easy sessions only | 1x/week very light | No long days -- rest and travel |
Simulation Weekends (Weeks 13-14)
The most demanding training blocks of the program. These simulate the cumulative fatigue of multi-day expedition trekking followed by summit effort:
Simulation Weekend 1 (Week 13):
- Day 1: 5-6 hour hike, 15-20kg pack, 800-1,000m gain
- Day 2: 4-5 hour hike, 15kg pack, 600m gain
- Day 3: 3-4 hour hike, 10kg pack, moderate terrain
Simulation Weekend 2 (Week 14):
- Day 1: 4-5 hour hike, 15kg pack, 700m gain
- Day 2: 3-4 hour hike, 15kg pack, 500m gain
- Day 3: Rest
By completing these simulation blocks, you will understand -- viscerally, not theoretically -- what multi-day accumulated fatigue feels like and how your body responds.
Nutrition During Simulation Days
Practice your expedition nutrition strategy during simulation weekends. Eat what you plan to eat on the trek: trail mix, energy gels, crackers with peanut butter, dried fruit, protein bars. Test your hydration strategy. The expedition is not the place to discover that gel blocks make you nauseous at altitude or that you need to eat every 90 minutes to maintain output.
Final Technical Rehearsal (Week 13-14)
One additional skills session in Phase 4 consolidates technical preparation:
- Review crampon technique with fresh eyes: are you comfortable with both French technique and front-pointing?
- Practice jumar moves on a climbing gym wall with gear on: harness, helmet, gloves
- Walk in mountaineering boots for at least three sessions to ensure break-in is complete
- Review rope management: clipping, unclipping, maintaining tension when roped to a partner
Break In Mountaineering Boots Early
Mountaineering boots (B2 or B3 rated) are stiff and unforgiving. Begin wearing them in training during Phase 2 or 3 -- not just on hiking days but also during strength training. Walk in them on your simulation weekends. Blisters, hot spots, and comfort issues must be resolved before Kathmandu. There is no breaking-in process on the mountain.
Pre-Departure Fitness Tests
Four weeks before departure, complete these four assessments to confirm readiness. If you cannot pass any test, extend your preparation or consult with your expedition operator.
Test 1: Loaded Step-Up Endurance
- Equipment: 45cm box or stair, 20kg pack
- Protocol: Step up with right foot, bring left foot up, step down right, step down left. Continuous for 20 minutes without stopping.
- Pass standard: Complete 20 minutes with controlled breathing (conversational pace maintained for at least 15 of the 20 minutes)
- What it tests: Leg endurance under load at simulated headwall cadence
Test 2: Stair Climbing Capacity
- Equipment: Building stairwell or StairMaster, 15kg pack
- Protocol: Climb continuously for 60 minutes at moderate pace
- Pass standard: Maintain consistent pace throughout without significant slowdown in the final 15 minutes
- What it tests: Sustained uphill cardiovascular output under load
Test 3: Back-to-Back Day Stamina
- Equipment: Outdoor trail, 12-15kg pack
- Protocol: Day 1: 5-hour hike with 700m+ gain. Day 2: 4-hour hike with 500m gain the following morning
- Pass standard: Day 2 hike completed at 80% or above of Day 1 pace without excessive soreness
- What it tests: Recovery capacity and multi-day stamina
Test 4: Cold and Pre-Dawn Tolerance
- Equipment: Whatever outdoor conditions are available
- Protocol: Wake at 2 AM, complete 90 minutes of outdoor activity (hiking, stair climbing) in cold conditions before sunrise
- Pass standard: Maintain physical output despite cold and sleep disruption; mental composure intact
- What it tests: The psychological and physical readiness for summit day's 1-3 AM start
If You Fail the Fitness Tests
Do not proceed with the expedition if you cannot complete these tests three to four weeks before departure. Contact your expedition operator immediately. Most reputable agencies will work with you to reschedule for a later season rather than send an unprepared climber onto the mountain. Summit day on Island Peak is a full mountaineering day and the consequences of physical failure at 5,800-6,000m are serious.
Injury Prevention and Recovery
A 16-week training program carries injury risk if recovery is neglected. The most common training injuries for mountaineering preparation are:
Knee pain (patellar tendonitis): Caused by excessive downhill loading too early. Progress loaded descent slowly. Strengthen VMO (inner quad) with terminal knee extensions. Wear hiking poles on all downhill sessions.
Achilles tendinopathy: Often worsens before it improves. Early warning: stiffness at the base of the calf in the morning. Address immediately with eccentric calf drops (heel off a step) and reduce running volume.
Hip flexor strain: Common in those who sit at desks and suddenly start doing step-ups. Include hip flexor stretches and glute activation exercises (clamshells, bridges) daily.
Lower back fatigue: Caused by carrying heavy packs with poor posture. Strengthen core in all three planes (sagittal, frontal, transverse). Practice pack-carrying with a neutral spine.
Mobility and Flexibility
Spend 10-15 minutes daily on hip mobility, ankle mobility, and thoracic spine rotation. Flexible hips and mobile ankles are essential for crampon technique and for maintaining good posture on steep terrain. The best single daily routine: hip 90/90 stretches, ankle circles in dorsiflexion, and cat-cow thoracic extensions.
Nutrition Strategy for the Training Program
Training at this volume requires deliberate nutrition. Key principles:
Protein: Target 1.6-2.0g per kg bodyweight per day during strength-heavy phases. Spread intake across meals (30-40g per meal is more effective than a single large dose).
Carbohydrates: Your primary fuel for long aerobic sessions. Do not low-carb during heavy training weeks. Aim for 4-6g per kg bodyweight on heavy training days.
Hydration: Dehydration impairs performance at much lower thresholds than most people recognize. Aim for pale yellow urine throughout the day. During sessions longer than 90 minutes, add electrolytes (sodium, potassium, magnesium) to water.
Iron: Altitude stimulates red blood cell production, which requires iron. Get a blood panel at the start of the program -- iron deficiency anemia is the most commonly missed nutritional issue in mountaineering candidates, particularly in women. If low, supplement under medical supervision.
Medications and Altitude Preparation
Diamox (Acetazolamide)
Diamox is the most commonly used medication for altitude acclimatization support. It works by acidifying the blood, which stimulates increased breathing and accelerates acclimatization.
- Typical dose: 125-250mg twice daily, starting 24 hours before significant altitude gain
- Side effects: Tingling in hands and feet (very common), increased urination, mild diuresis
- Contraindications: Sulfa drug allergy, kidney disease
- Recommendation: Do a trial dose at sea level during training Phase 3 to test for allergic reactions or intolerable side effects before relying on it at altitude
For full dosing protocols and how Diamox fits into acclimatization, see our Diamox altitude sickness guide and the altitude sickness prevention and treatment page.
Dexamethasone
A corticosteroid used for treating HACE (High Altitude Cerebral Edema) and severe AMS. Not a prophylactic drug for typical Island Peak preparation. Carried by guides as emergency medication.
Consult a Travel Medicine Physician
Discuss your complete Island Peak itinerary, medications, and personal medical history with a travel medicine physician 6-8 weeks before departure. They can prescribe Diamox, recommend vaccinations, and identify any medical conditions that may affect altitude performance. Altitude medicine is a specialist field -- general practitioners vary widely in their familiarity with these protocols.
Frequently Asked Questions
- Island Peak Climbing Guide: Complete Overview
- EBC 12-Week Training Plan
- Cardiovascular Fitness for Nepal Trekking
- Strength Training for Trekking Nepal
- Island Peak Equipment Guide
- Best Time to Climb Island Peak
- Island Peak vs Mera Peak Comparison
- Mera Peak Climbing Guide
- Peak Climbing Nepal: Comprehensive Guide
- Altitude Sickness Signs and Turnaround Rules
- Travel Insurance for Nepal Trekking
- Everest Base Camp Route Guide