


Gokyo Ri: The Complete Trek and Summit Guide
Gokyo Ri is a 5,357m (17,575 ft) viewpoint peak above the Gokyo Lakes in Nepal's Everest region, reached by a non-technical pre-dawn hike from Gokyo village (4,790m). It delivers a panorama of four 8,000m peaks — Everest, Lhotse, Makalu, and Cho Oyu — that many trekkers rate above Kala Patthar. Reaching it needs only two permits and 5-6 days of acclimatization.
Standing on the summit of Gokyo Ri at 5,357m as the first light touches Everest's south face is an experience that stops experienced trekkers dead in their tracks. This is not just another high-altitude viewpoint. Gokyo Ri delivers what many seasoned Khumbu veterans consider the finest panorama in the entire Everest region — four 8,000m peaks simultaneously visible, the turquoise Gokyo Lakes spread below like scattered jewels, and the Ngozumpa Glacier winding north beneath Cho Oyu's massive bulk.
The summit climb is non-technical, but it is serious. You start in darkness at 4:00 AM from a village already sitting at 4,790m, gain 567m on steep, rocky terrain, and arrive at the summit just as the Himalayan giants begin to glow pink and amber in the rising sun. Wind, cold, and altitude make every step deliberate. But the reward is proportional to the effort.
This guide covers everything you need for a successful Gokyo Ri summit: the route in detail, exact timing for sunrise, what you will see from the top, photography strategies, how to prepare your body, and the critical turnaround rules that keep trekkers safe on this high-altitude climb.
5,357m (17,575 ft)
Gokyo village (4,790m)
567m from village to summit
2-3 hours (pace-dependent)
1.5-2 hours
Strenuous (non-technical)
4:00-4:30 AM for sunrise
October-November and March-May
Everest, Lhotse, Makalu, Cho Oyu (four 8,000m peaks)
None required (microspikes helpful in winter)
Why Gokyo Ri Instead of Kala Patthar?
This is the question every trekker in the Khumbu eventually asks. Kala Patthar (5,545m) is the famous Everest viewpoint on the standard EBC route. Gokyo Ri (5,357m) is the summit above the Gokyo Lakes. Both are non-technical, both deliver Everest views, and both require serious acclimatization. The differences matter.
The Four 8,000m Peak Advantage
From Kala Patthar, you see Everest's summit rising above the Lhotse-Nuptse wall with Pumori immediately overhead. The view is dominated by the close proximity of surrounding peaks. From Gokyo Ri, the vista opens dramatically. You see:
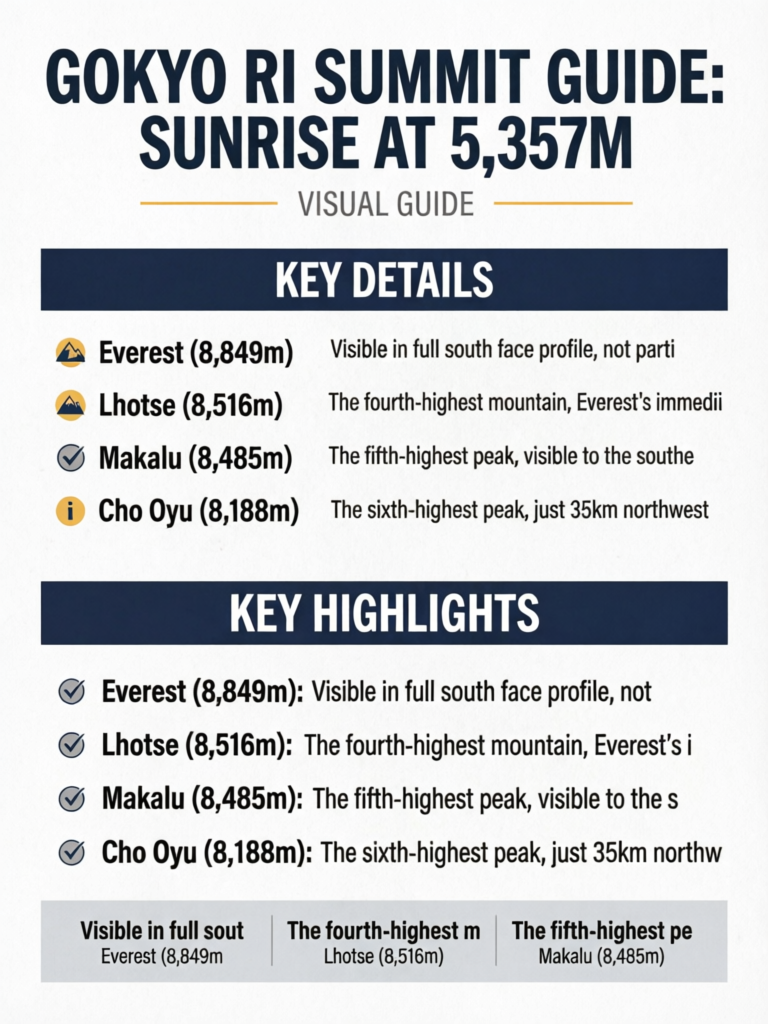
- Everest (8,849m): Visible in full south face profile, not partially obscured
- Lhotse (8,516m): The fourth-highest mountain, Everest's immediate neighbor
- Makalu (8,485m): The fifth-highest peak, visible to the southeast
- Cho Oyu (8,188m): The sixth-highest peak, just 35km northwest
Four of the world's fourteen 8,000m mountains visible from a single non-technical summit. No other accessible viewpoint in Nepal matches this.
Foreground Drama
The lakes change everything. Looking down from Gokyo Ri, you see the first, second, and third Gokyo Lakes spread across the valley floor in vivid turquoise. The Ngozumpa Glacier fills the western part of the valley. This foreground — impossible from Kala Patthar's exposed ridge — transforms photographs from mountain portraits into complete landscape compositions.
Lower Altitude, Same Drama
Gokyo Ri sits 287m lower than Kala Patthar. For trekkers who are altitude-sensitive or working with tighter acclimatization schedules, this difference is meaningful. The panorama is arguably superior despite the lower summit elevation.
Do Both If You Can
The EBC-Gokyo combination trek via Cho La Pass lets you summit both Gokyo Ri and Kala Patthar on a single 18-19 day itinerary. Doing both is the definitive Khumbu experience. The views are complementary rather than redundant — Gokyo Ri shows you the western Khumbu and four 8,000m peaks; Kala Patthar puts you directly in front of the Khumbu Icefall and the EBC approach couloirs.
The Route: Gokyo Village to Summit
Starting Point: Gokyo Village (4,790m)
Gokyo village consists of a cluster of tea houses and lodges on the west bank of the third Gokyo Lake. The Gokyo Ri trail begins from the northern edge of the village, clearly marked by a line of prayer flags and cairns leading up the steep slope to the east.
There are no formally marked sections or checkpoints. The trail is obvious in daylight. In the dark, you follow the trail by headlamp and watch for cairns. Most trekkers who have spent a night at Gokyo will have oriented themselves to the route during an afternoon reconnaissance.
Section 1: Village to First Ridgeline (4,790m to 5,000m)
The trail leaves the village heading northeast and immediately starts climbing steeply. The first 200m of gain is the steepest section of the entire route, requiring short switchbacks on loose rocky terrain. At altitude and in the cold darkness of 4:00 AM, this opening section is a jolt.
Key details:
- Distance: Approximately 1.2 km
- Duration: 45-60 minutes
- Terrain: Loose rock, steep switchbacks, some larger boulder steps
- Navigation: Cairns visible with headlamp, trail is well-worn
Reaching the first ridgeline (approximately 5,000m) gives you a natural rest point. The gradient eases slightly and you begin to see silhouettes of the surrounding peaks against the pre-dawn sky.
Do Not Rush Section One
The urge to push hard in the first 20 minutes — fueled by cold, excitement, and the need to warm up — is a mistake at 4,790m. Move deliberately slowly. If you are breathing hard enough that you cannot form complete sentences, slow down further. Overexertion in the first section leads to early exhaustion, headache, or worse. The summit is not going anywhere. The sunrise will wait. Your body needs ten minutes to find its altitude rhythm.
Section 2: First Ridgeline to Second Ridgeline (5,000m to 5,200m)
After the first ridge, the trail traverses a flatter section before resuming its climb. This middle section is more gradual in gradient but longer in distance. Views begin to open dramatically as you gain the ridge.
Key details:
- Distance: Approximately 1.5 km
- Duration: 40-55 minutes
- Terrain: Rocky trail with occasional loose sections, more stable than Section 1
- Highlights: First light on surrounding peaks, Gokyo Lakes visible below
At 5,200m you can already see Everest, Lhotse, Cho Oyu, and — depending on conditions — Makalu. Many trekkers choose to stop here and watch sunrise rather than pushing to the true summit. The views are already extraordinary.
Evaluate at 5,200m
Assess how you feel at the 5,200m mark. If you have a headache, are feeling nauseated, or are significantly more breathless than you expect, stop here. You can see four 8,000m peaks from this altitude on a clear day. The summit adds 157m of gain and another 20-30 minutes of effort. If your body is struggling, the summit is not worth the risk. If you feel good, continue — the final push is rewarding.
Section 3: Second Ridgeline to Summit (5,200m to 5,357m)
The final section steepens again as you approach the prayer flag-decorated summit ridge. The trail narrows and the wind often picks up significantly at this altitude. The last 50m to the summit involves a short scramble on rocky terrain.
Key details:
- Distance: Approximately 0.8 km
- Duration: 25-35 minutes
- Terrain: Steeper rocky trail, some hands-on-rock scrambling near summit
- Summit marker: Prayer flags and a stone cairn
Total Route Statistics
| Section | Distance | Altitude Gain | Time |
|---|---|---|---|
| Village to first ridge | 1.2 km | 210m | 45-60 min |
| First to second ridge | 1.5 km | 200m | 40-55 min |
| Second ridge to summit | 0.8 km | 157m | 25-35 min |
| Total ascent | 3.5 km | 567m | 2h 30m-3h |
| Total descent | 3.5 km | 567m | 1h 30m-2h |
Timing: The Pre-Dawn Ascent
Why Leave at 4:00-4:30 AM
Sunrise at Gokyo Ri occurs between 6:00 AM (October) and 6:45 AM (March-April). To reach the summit before first light touches the peaks, you need to start the 2.5-3 hour climb no later than 4:30 AM. Most guides recommend 4:00 AM to allow a margin for slow pacing.
The light sequence matters:
- 60 minutes before sunrise: Sky begins to lighten in the east. Everest and surrounding peaks become silhouettes
- 30 minutes before sunrise: Deep blue alpenglow on the highest peaks, often the most dramatic photography moment
- Sunrise: Direct orange light strikes the summit of Everest first, working its way down the face
- 30 minutes after sunrise: Full illumination, best panoramic photography
- 90 minutes after sunrise: Valley clouds often begin building. Start descent
Dress for the Summit Cold
Summit temperatures at 4:00-5:00 AM in October range from -10 to -18 degrees Celsius. Add wind chill and it feels considerably colder. Wear all your layers: thermal base layer, fleece mid-layer, and your warmest down jacket. Wear gloves you would use in a hard winter, not trail gloves. Summit photography requires removing gloves momentarily to operate camera controls — have hand warmers in your pockets. Frostbitten fingers are a real risk if hands are exposed without gloves for more than 2-3 minutes at these temperatures.
Afternoon Alternative
Some trekkers climb Gokyo Ri in the afternoon of their first day at Gokyo (typically arriving by 2:00-3:00 PM from Machhermo). This serves two purposes: acclimatization reconnaissance and sunset views. The afternoon light on the Gokyo Lakes is warm and beautiful, and you learn the route before the pre-dawn summit attempt.
Afternoon cloud cover is more common in the afternoon than morning, reducing the chance of a completely clear panorama. But the acclimatization benefit of reaching 5,357m on your first day at Gokyo and descending to sleep at 4,790m is substantial — the "climb high, sleep low" principle that accelerates acclimatization.
What You See from the Summit
The Four 8,000m Peaks
Standing at the summit of Gokyo Ri on a clear day, the panorama unfolds in an arc across the horizon:
Cho Oyu (8,188m) — the sixth-highest mountain in the world, sits to the northwest in massive, white bulk. At 35 km from Gokyo Ri, it appears deceptively close. The south face is fully visible, a sweep of glaciers and rocky ridgelines. This is the clearest view of Cho Oyu available from any accessible viewpoint.
Everest (8,849m) — visible to the northeast in south face profile. From Gokyo Ri, you see Everest differently than from Kala Patthar. The peak rises in full profile above the Khumbu Valley, with the characteristic summit plume (windblown snow) trailing to the southeast in strong winds. The dark pyramid shape that defines Everest in photographs is exactly what you see.
Lhotse (8,516m) — immediately to the right of Everest, sharing a ridgeline. The fourth-highest mountain is massive, often mistaken by first-timers for Everest itself due to its impressive vertical bulk.
Makalu (8,485m) — the more distant fifth-highest peak to the southeast, distinctively five-sided in profile. Requiring more searching to identify, Makalu appears above and beyond the Imja Valley.
Additional Peaks
Beyond the four 8,000m summits, the panorama includes dozens of recognizable peaks:
- Gyachung Kang (7,952m): Between Cho Oyu and Pumori, a striking peak rarely discussed but hugely impressive
- Pumori (7,161m): The dramatic "daughter peak" northwest of Everest
- Ama Dablam (6,812m): The beautiful peak often called the Matterhorn of the Himalayas, visible to the south
- Thamserku (6,623m) and Kangtenga (6,782m): Dramatic twin peaks to the south
- Ngozumpa Glacier: The longest glacier in the Himalayas, directly below you to the west
- Gokyo Lakes: First, second, and third lakes visible as turquoise mirrors in the valley
Peak Identification Help
Bring a printed mountain identification chart or download one to your phone. The panorama from Gokyo Ri is so expansive that even experienced trekkers struggle to name all the visible peaks. Your guide (if you have one) will know each peak. The Himalayan Trust and several trekking apps also offer augmented reality peak identification. Peak Finder is a reliable app that works offline.
Photography Guide for Gokyo Ri
Optimal Lighting Windows
| Time | Light Quality | Best Subject |
|---|---|---|
| 30 min before sunrise | Blue-purple alpenglow | Silhouette compositions with sky |
| Sunrise moment | Orange-pink on summit | Everest summit crest, Lhotse face |
| 20-40 min post-sunrise | Warm full light | Full panorama, lakes reflection |
| 60+ min post-sunrise | Even but brighter | Wide landscape, group photos |
| Afternoon (sunset visit) | Warm side-lighting | Lakes reflections, Cho Oyu |
Equipment Recommendations
Camera: Any camera system works, but mirrorless and DSLR cameras offer better image quality than smartphones in low light. Battery performance degrades significantly in cold — keep batteries warm in an inner jacket pocket and swap when cold ones lose power.
Lenses:
- Wide angle (16-24mm equivalent): For full panoramas, lakes and peaks together
- Standard zoom (24-70mm equivalent): For versatile coverage throughout the climb
- Telephoto (100-400mm equivalent): For peak close-ups, especially Everest summit detail
Cold weather considerations:
- Silica gel packets in camera bags prevent condensation when moving from cold outside air to warm lodges
- Fingerless gloves allow operation without full glove removal
- Extra batteries (cold kills them fast)
The Lakes Reflection Shot
On completely still mornings — rare but magical — the third Gokyo Lake (Gokyo Tsho) perfectly reflects Cho Oyu in an almost perfect mirror. This is best captured from the lower ridgeline between 5,000-5,100m rather than the summit, where the angle is too steep to see the lake surface. Build in time on the ascent to pause and check for this reflection opportunity as you gain the first ridge.
Composition Tips
The most compelling Gokyo Ri photographs include both the lakes and the peaks in the same frame. This requires a wide-angle lens and careful positioning on the ridge. The lakes appear small from the summit, so the mid-ridge at 5,000-5,100m often provides better lake-and-peak compositions.
For Everest close-ups with the telephoto, look for the summit plume trailing east in the wind. When winds exceed 80 km/h at the summit (common from November to March), the plume is dramatic and visible at great distance. In calm conditions, the plume disappears, giving Everest a cleaner, more symmetrical look.
Acclimatization Requirements
You Must Be Ready for 5,357m
Gokyo Ri requires proper acclimatization. This is not optional. Attempting the summit without adequate preparation is how trekkers develop serious AMS or, in the worst cases, HACE (High Altitude Cerebral Edema).
The recommended acclimatization progression before summiting Gokyo Ri:
Day 1-2 of your trek: Arrive Namche Bazaar (3,440m). Sleep two nights.
Day 3: Acclimatization hike from Namche to Everest View Hotel (3,880m) and return. Sleep at Namche.
Day 4-5: Ascend through Phortse or Dole to Machhermo (4,470m). Sleep at Machhermo.
Day 6: Acclimatization hike above Machhermo to 4,700-4,800m. This is critical — it prepares your body for sleeping at Gokyo the following night.
Day 7: Ascend to Gokyo (4,790m). Afternoon option: climb Gokyo Ri for sunset (the "climb high, sleep low" principle in action). Sleep at Gokyo.
Day 8: Pre-dawn Gokyo Ri summit attempt.
This schedule provides two proper acclimatization days and a progressive altitude gain. Trekkers who try to compress this schedule — particularly by skipping the Machhermo acclimatization day — significantly increase their AMS risk.
AMS Symptoms Mean Turn Around
If you experience any of these symptoms during the Gokyo Ri climb, turn around immediately: persistent, worsening headache that does not respond to paracetamol; nausea or vomiting; loss of coordination (ataxia); confusion or unusual behavior; severe breathlessness at rest. Mild headache and breathlessness are normal at 5,000m+ and are not necessarily reasons to stop. But these escalating symptoms are warning signs that your body is not coping. Descending 500-1,000m resolves most AMS symptoms within hours. See our complete guide to altitude sickness signs and turnaround rules before your trek.
Altitude Medication
Diamox (acetazolamide) is the most commonly used AMS prevention and treatment medication. Standard prophylactic dose is 125mg twice daily, starting 1-2 days before significant altitude gain. Consult your doctor before your trek. Common side effects include increased urination and tingling in the extremities — both manageable and expected.
Dexamethasone is a steroid used for emergency treatment of HACE. It does not prevent AMS and should only be used in genuine emergencies under medical guidance.
Turnaround Protocols
The Cardinal Rule
The mountain will be there tomorrow. Your health will not recover quickly above 5,000m. Establish a turnaround protocol before you start and commit to honoring it regardless of how close the summit seems.
Recommended Turnaround Rules
Time-based: If you have not reached the summit by 7:30 AM, turn around regardless of how close you are. This ensures you descend before valley clouds build, temperatures rise (increasing rockfall risk), and before exhaustion becomes a factor.
Symptom-based: Any escalating AMS symptoms (worsening headache, nausea, coordination issues) require immediate descent regardless of altitude reached.
Weather-based: If wind increases to the point where you cannot stand steadily on exposed ridge sections, descend. Wind is the most underestimated hazard on Gokyo Ri — a strong gust on a narrow ridge at 5,300m can knock unprepared trekkers off their feet.
Personal threshold: Communicate your personal turnaround conditions to your guide before starting. A good guide will enforce these conditions even when you want to push further.
No Shame in Any Altitude
The views improve at every 100m of altitude gain on Gokyo Ri. Turning around at 5,100m, 5,200m, or the second ridge does not mean you failed. It means you made a smart decision. Many trekkers with mild AMS symptoms who pushed to the summit found the descent significantly harder and the recovery slower. The goal is to safely experience the views — not to reach a specific altitude number.
Descent Strategy
Take your time on the descent. More injuries happen coming down than going up, as tired legs and loose terrain combine with reduced concentration. Use trekking poles for stability on the steep upper sections. Slow, deliberate steps on loose rock are safer than trying to descend quickly to reach breakfast. The tea houses will hold your dal bhat.
Best Season for Gokyo Ri
October-November (Prime Window)
October is the most reliable month for a clear Gokyo Ri summit:
- Post-monsoon clarity, typically the clearest skies of the year
- Snowfall at summit level is possible but not certain in November
- Daytime temperatures: -5 to +5 degrees Celsius at summit
- Pre-dawn temperatures: -10 to -18 degrees Celsius at summit
- Wind: Generally moderate (20-40 km/h), gusting higher
Mid-October through early November is the sweet spot — post-monsoon clarity without the harder November cold.
March-May (Spring Season)
Spring offers:
- Longer days (sunrise earlier, better light duration)
- Warmer temperatures at altitude
- Some high-altitude snow coverage on the lower route from March into April
- Slightly more haze than autumn due to dust and moisture in the atmosphere
- Still excellent panoramic views on clear days
Avoid December-February
Winter months bring extreme cold (summit temperatures of -20 to -30 degrees Celsius), high winds, and increased risk. The climb is technically the same but significantly more dangerous and miserable. Gokyo Ri is not closed in winter, but it is not recommended for most trekkers.
Afternoon Cloud Cover
Regardless of season, mountain views in the Khumbu are typically best in the early morning. By midday, convective clouds often build along the valleys, obscuring peaks by early afternoon. The pre-dawn start time for Gokyo Ri is not just about catching sunrise — it ensures you are on the summit during the clear-sky window before clouds develop. Never plan an afternoon Gokyo Ri summit attempt as your primary attempt if you want guaranteed views.
Permits and Cost for the Gokyo Ri Trek
You do not need a climbing permit to summit Gokyo Ri — it is a trekking viewpoint, not an expedition peak. The Gokyo Ri trek requires only two permits, both bought along the way:
| Permit | 2026 Cost | Where to Get It |
|---|---|---|
| Sagarmatha National Park entry | NPR 3,000 (approx. USD 23) | Monjo park gate or Kathmandu (Nepal Tourism Board) |
| Khumbu Pasang Lhamu Rural Municipality card | NPR 2,000 (approx. USD 15) | Lukla or Monjo |
The national TIMS card is not required inside the Khumbu — the local municipality card replaces it. Bring cash in Nepali rupees; card payment is unreliable at the gates. For the full breakdown and how to obtain each one, see our Sagarmatha National Park permit guide and the overview of Nepal trekking permits explained.
A guided Gokyo Lakes trek including Gokyo Ri typically costs USD 1,150-1,500 per person for an 11-13 day itinerary with a verified local agency, covering guide, permits, tea-house accommodation, and meals. Independent trekkers can do it for less, but a licensed guide is now required across most of Nepal's national-park trekking routes. For a line-by-line estimate, see our Gokyo Lakes cost breakdown, and compare operators in our guide to the best trekking agencies for Gokyo Lakes.
Adding Renjo La Pass: The Gokyo Ri Loop
Many trekkers turn the Gokyo Ri trek into a circuit rather than an out-and-back by descending over Renjo La Pass (5,360m) instead of retracing the Dole valley. Renjo La is the westernmost of the Everest region's three high passes, and the climb to the pass delivers one more sweeping Gokyo-and-Everest panorama before you drop into the quieter Thame valley.
- Route: Gokyo (4,790m) over Renjo La (5,360m) to Lumde/Marlung, then down through Thame to Namche Bazaar
- Adds: 1-2 days versus the standard out-and-back
- Difficulty: A genuine pass crossing — steeper, more exposed, and snow-prone in shoulder seasons; not technical but harder than Gokyo Ri itself
- Reward: The least-crowded major trail in the Khumbu and the historic Sherpa villages of the Thame valley
A guide is strongly recommended for the Renjo La variation because route-finding above the pass is harder than on the Gokyo Ri trail. See our dedicated Renjo La Pass guide for the full crossing, and the Cho La Pass guide if you want to link Gokyo with the Everest Base Camp side.
Gokyo Lakes and Milky Way Photography
Gokyo sits beside a system of six main lakes — Gokyo Cho (Dudh Pokhari), Thonak Cho, Gyazumpa Cho, Tanjung Cho, Ngojumba Cho, and Kyajumba — part of a wider chain of high-altitude lakes fed by the Ngozumpa Glacier, the longest glacier in Nepal. The third lake, Gokyo Tsho, is the one your lodge overlooks and the classic Cho Oyu reflection shot.
Because Gokyo is far from any light pollution and the air is dry and clear in autumn and winter, it is one of the finest places in the Himalayas for night photography. On moonless nights from October to February the Milky Way arches directly over the lakes and Cho Oyu. Shoot with a wide-angle lens, a sturdy tripod, and long exposures (15-25 seconds at a wide aperture). Dress for -15 degrees Celsius or colder, since you will be standing still in the dark, and keep spare camera batteries warm in an inner pocket. For more, see our Everest region photography spots and the best photography treks in Nepal.
Comparing Gokyo Ri with Other Khumbu Viewpoints
| Viewpoint | Altitude | Difficulty | Unique Feature |
|---|---|---|---|
| Gokyo Ri | 5,357m | Strenuous | Four 8,000m peaks + lakes foreground |
| Kala Patthar | 5,545m | Strenuous | Closest non-technical Everest summit view |
| Everest View Hotel | 3,880m | Easy-Moderate | Accessible luxury viewpoint |
| Chhukhung Ri | 5,550m | Strenuous | Makalu, Baruntse, Ama Dablam |
| Nagkartshang Hill | 5,083m | Moderate | Dingboche Valley, Island Peak overview |
For the best Everest panorama combining all elements — peaks, glaciers, lakes — Gokyo Ri is unmatched. For the single closest look at Everest's summit, Kala Patthar wins by virtue of raw altitude and proximity. For the easiest Everest view, the Everest View Hotel is unbeatable. See our full Gokyo Lakes trek guide for context on planning your Gokyo visit.
Practical Information
Gear Checklist for Summit Day
- Down jacket (rated -15 degrees Celsius or warmer)
- Warm gloves (insulated winter gloves, not liner gloves)
- Balaclava and warm hat
- Base layer (thermal) and mid-layer (fleece)
- Wind-resistant outer shell
- Warm trekking pants (softshell or insulated)
- Sturdy trekking boots (broken-in, ankle support)
- Microspikes (helpful if ice on upper route, especially in winter)
- Headlamp with fresh batteries (bring backup)
- Hand warmers (2-3 pairs)
- Water bottle (insulated Nalgene or thermos keeps water from freezing)
- High-calorie snacks (chocolate, energy bars, nuts)
- First aid and personal medications
- Camera with spare batteries kept warm in inner pocket
- Trekking poles
What to Eat and Drink Before Summit Day
The day before your summit attempt, focus on hydration and carbohydrate-heavy foods. Dal bhat, the Nepali staple of lentil soup with rice, provides sustained energy and is the optimal pre-summit meal. Avoid heavy fats and alcohol the evening before. Drink 3-4 liters of water or tea throughout the day, and drink one liter of warm water before starting your pre-dawn climb.
On summit day, eat a light breakfast before starting — tea, porridge, or toast. Your appetite will be suppressed at altitude, but you need fuel. Bring snacks for the ascent and plan a proper breakfast immediately upon return.
- Gokyo Lakes Trek Guide
- Gokyo Lakes Route Overview
- Gokyo Lakes vs. EBC Comparison
- Altitude Sickness Signs and Turnaround Rules
- EBC-Gokyo Combination Trek Guide
- Gokyo Lakes 12-Day Itinerary
- Best Trekking Agencies for Gokyo Lakes
- Cho La Pass Guide
- Renjo La Pass Guide
- Sagarmatha National Park Permit
- Gokyo Lakes Cost Breakdown
- Everest Base Camp Packing List
- Gokyo Lakes Best Time to Visit
Ready to Summit Gokyo Ri?
How Difficult Is the Gokyo Ri Sunrise Hike?
Gokyo Ri is non-technical but physically demanding due to altitude. The 567m climb from Gokyo village (4,790m) takes 2-3 hours in pre-dawn darkness at temperatures often below -15C. The biggest challenge is not the terrain but the thin air -- at 5,357m you are breathing roughly 50% of sea-level oxygen. Proper acclimatization with at least two nights above 4,000m before attempting the summit is essential.
Frequently Asked Questions
What time should I start the Gokyo Ri hike for sunrise?
Depart Gokyo village at 4:00-4:30 AM to reach the summit by 6:00-6:30 AM for sunrise. Allow 2-3 hours depending on fitness and acclimatization. Bring a reliable headlamp and warm gloves.
Can I see Everest from Gokyo Ri?
Yes. Gokyo Ri offers views of four 8,000m peaks: Everest (8,849m), Lhotse (8,516m), Makalu (8,485m), and Cho Oyu (8,188m). Many experienced trekkers consider this panorama superior to the view from Kala Patthar.
Do I need a guide for Gokyo Ri?
A guide is strongly recommended but not technically required. The trail is well-marked in daylight but navigating by headlamp in pre-dawn darkness at 5,000m can be disorienting. Your trekking guide will know the route.
How many acclimatization days do I need before Gokyo Ri?
You need at least 5-6 days of gradual ascent before attempting Gokyo Ri. The standard Gokyo Lakes itinerary includes proper acclimatization with rest days at Namche Bazaar and Machhermo.
Is Gokyo Ri harder than Kala Patthar?
Gokyo Ri (5,357m) is 188m lower than Kala Patthar (5,545m), making it slightly less altitude-stressful. However, the terrain is steeper. Most trekkers find them comparable in overall difficulty.